fold seats CHEVROLET SILVERADO 2013 2.G Owners Manual
[x] Cancel search | Manufacturer: CHEVROLET, Model Year: 2013, Model line: SILVERADO, Model: CHEVROLET SILVERADO 2013 2.GPages: 542, PDF Size: 7.91 MB
Page 20 of 542
Black plate (14,1)Chevrolet Silverado Owner Manual - 2013 - crc2 - 8/13/12
1-14 In Brief
United States
Canada and Mexico
See Passenger Sensing System on
page 3ŌĆæ32 for important information.
Mirror Adjustment
Using hood-mounted air deflectors
and add-on convex mirror
attachments could decrease mirror
performance.
Exterior Mirrors
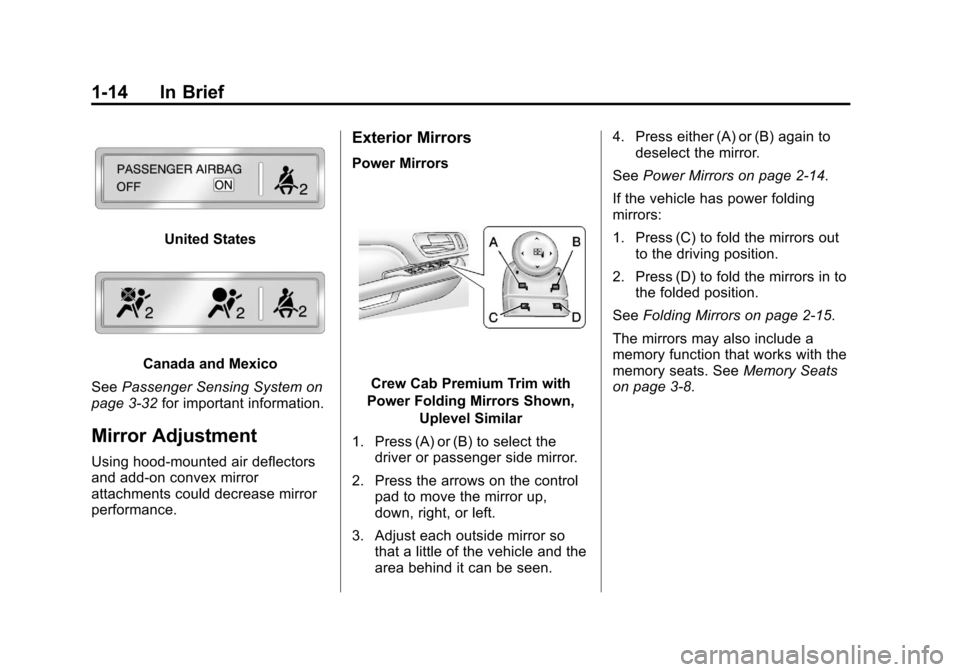
Power Mirrors
Crew Cab Premium Trim with
Power Folding Mirrors Shown, Uplevel Similar
1. Press (A) or (B) to select the driver or passenger side mirror.
2. Press the arrows on the control pad to move the mirror up,
down, right, or left.
3. Adjust each outside mirror so that a little of the vehicle and the
area behind it can be seen. 4. Press either (A) or (B) again to
deselect the mirror.
See Power Mirrors on page 2ŌĆæ14.
If the vehicle has power folding
mirrors:
1. Press (C) to fold the mirrors out to the driving position.
2. Press (D) to fold the mirrors in to the folded position.
See Folding Mirrors on page 2ŌĆæ15.
The mirrors may also include a
memory function that works with the
memory seats. See Memory Seats
on page 3ŌĆæ8.
Page 55 of 542
Black plate (15,1)Chevrolet Silverado Owner Manual - 2013 - crc2 - 8/13/12
Keys, Doors, and Windows 2-15
The mirrors may also include a
memory function that works with the
memory seats. SeeMemory Seats
on page 3ŌĆæ8 for more information.
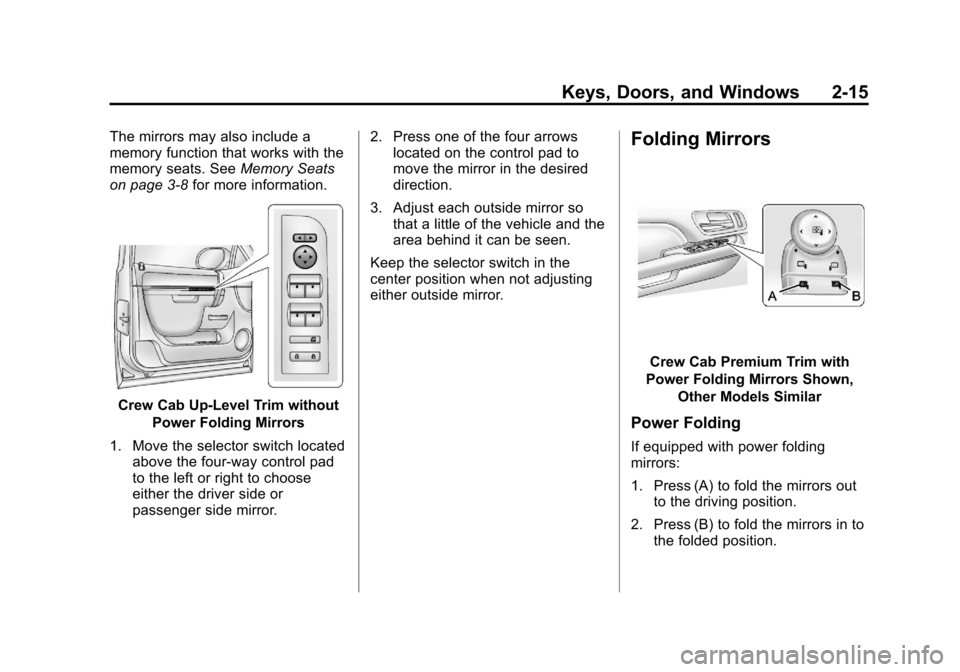
Crew Cab UpŌĆÉLevel Trim without
Power Folding Mirrors
1. Move the selector switch located above the four-way control pad
to the left or right to choose
either the driver side or
passenger side mirror. 2. Press one of the four arrows
located on the control pad to
move the mirror in the desired
direction.
3. Adjust each outside mirror so that a little of the vehicle and the
area behind it can be seen.
Keep the selector switch in the
center position when not adjusting
either outside mirror.
Folding Mirrors
Crew Cab Premium Trim with
Power Folding Mirrors Shown, Other Models Similar
Power Folding
If equipped with power folding
mirrors:
1. Press (A) to fold the mirrors outto the driving position.
2. Press (B) to fold the mirrors in to the folded position.
Page 56 of 542
Black plate (16,1)Chevrolet Silverado Owner Manual - 2013 - crc2 - 8/13/12
2-16 Keys, Doors, and Windows
The mirrors may also include a
memory function that works with the
memory seats. SeeMemory Seats
on page 3ŌĆæ8 for more information.
Resetting the Power Folding
Mirrors
Reset the power folding mirrors if:
.The mirrors are accidentally
obstructed while folding.
.They are accidentally manually
folded/unfolded.
.The mirrors will not stay in the
unfolded position.
.The mirrors vibrate at normal
driving speeds.
Fold and unfold the mirrors one time
using the mirror controls to reset
them to their normal position.
A popping noise may be heard
during the resetting of the power
folding mirrors. This sound is normal
after a manual folding operation.
Manual Folding
If equipped with manual folding
mirrors, push the mirror toward the
vehicle. Push the mirror outward, to
return to its original position.
Manually fold the mirrors inward to
prevent damage when going
through an automatic car wash.
Automatic Dimming
If equipped with an automatic
dimming mirror, the driver outside
mirror automatically dimes for the
glare of the headlamps from behind.
This feature is controlled by the on
and off setting on the inside
rearview mirror.
See Automatic Dimming Rearview
Mirror on page 2ŌĆæ17.
Turn Signal Indicator
The vehicle may also have a turn
signal indicator on the mirror. An
arrow on the mirror flashes in the
direction of the turn or lane change.
Heated Mirrors
For vehicles with heated mirrors:
1(Rear Window Defogger):
Press to heat the mirrors. If the
vehicle has towing mirrors, only the
upper glass of the mirror is heated.
The lower convex part of the towing
mirrors is not heated.
See ŌĆ£Rear Window DefoggerŌĆØ under
Climate Control Systems (with Air
Conditioning) on page 8ŌĆæ1 or
Climate Control Systems (with
Heater Only) on page 8ŌĆæ4 orDual
Automatic Climate Control System
on page 8ŌĆæ5.
Page 65 of 542
Black plate (3,1)Chevrolet Silverado Owner Manual - 2013 - crc2 - 8/13/12
Seats and Restraints 3-3
Rear Seats
The rear seat has adjustable
headrests in the outboard seating
positions.
The height of the headrest can be
adjusted. Pull the headrest up to
raise it. To lower the headrest, push
down on the headrest.
Rear outboard headrests are not
designed to be removed.
Front Seats
Seat Adjustment
{WARNING
You can lose control of the
vehicle if you try to adjust a driver
seat while the vehicle is moving.
Adjust the driver seat only when
the vehicle is not moving.
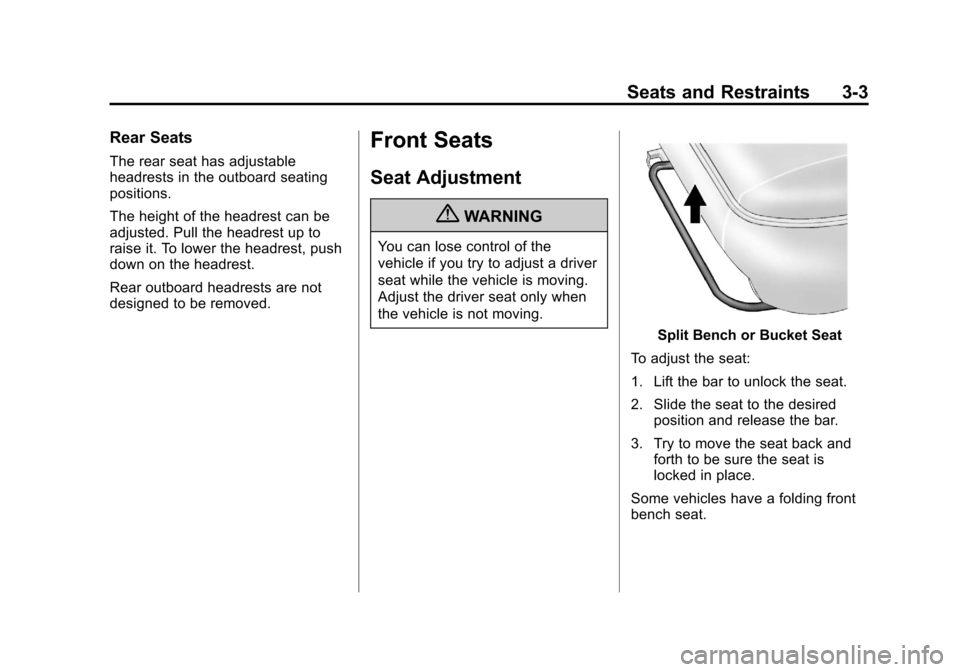
Split Bench or Bucket Seat
To adjust the seat:
1. Lift the bar to unlock the seat.
2. Slide the seat to the desired position and release the bar.
3. Try to move the seat back and forth to be sure the seat is
locked in place.
Some vehicles have a folding front
bench seat.
Page 66 of 542
Black plate (4,1)Chevrolet Silverado Owner Manual - 2013 - crc2 - 8/13/12
3-4 Seats and Restraints
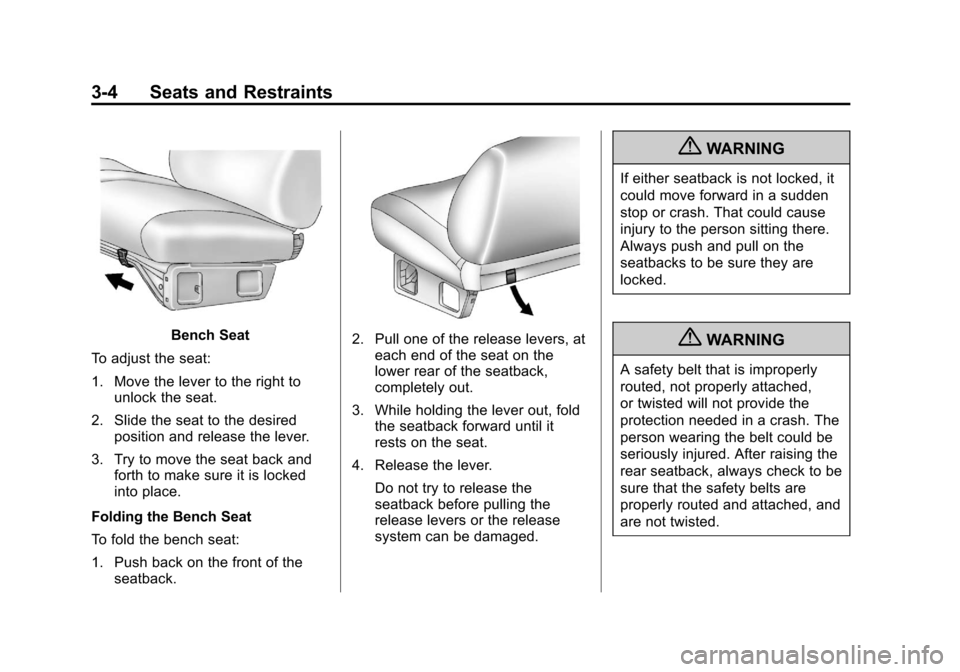
Bench Seat
To adjust the seat:
1. Move the lever to the right to unlock the seat.
2. Slide the seat to the desired position and release the lever.
3. Try to move the seat back and forth to make sure it is locked
into place.
Folding the Bench Seat
To fold the bench seat:
1. Push back on the front of the seatback.2. Pull one of the release levers, at
each end of the seat on the
lower rear of the seatback,
completely out.
3. While holding the lever out, fold the seatback forward until it
rests on the seat.
4. Release the lever. Do not try to release the
seatback before pulling the
release levers or the release
system can be damaged.
{WARNING
If either seatback is not locked, it
could move forward in a sudden
stop or crash. That could cause
injury to the person sitting there.
Always push and pull on the
seatbacks to be sure they are
locked.
{WARNING
A safety belt that is improperly
routed, not properly attached,
or twisted will not provide the
protection needed in a crash. The
person wearing the belt could be
seriously injured. After raising the
rear seatback, always check to be
sure that the safety belts are
properly routed and attached, and
are not twisted.
Page 67 of 542
Black plate (5,1)Chevrolet Silverado Owner Manual - 2013 - crc2 - 8/13/12
Seats and Restraints 3-5
Reverse the steps to raise the
seatback. Push and pull on the
seatback to make sure the seatback
is locked in the upright position
before driving. Make sure the safety
belts are not twisted or caught in the
seatback.
Center Seat
If equipped, the center front
seatback doubles as an armrest and
cupholder/storage area for the driver
and passenger when the center
front seat is not used. Do not use it
as a seating position when the
seatback is folded down.
Power Seat Adjustment
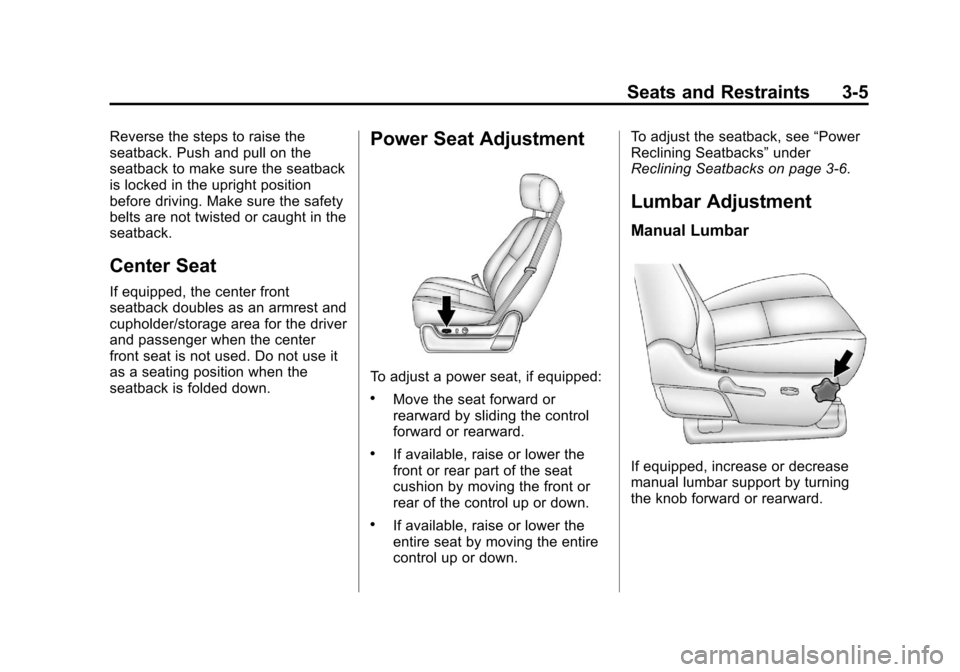
To adjust a power seat, if equipped:
.Move the seat forward or
rearward by sliding the control
forward or rearward.
.If available, raise or lower the
front or rear part of the seat
cushion by moving the front or
rear of the control up or down.
.If available, raise or lower the
entire seat by moving the entire
control up or down.To adjust the seatback, see
ŌĆ£Power
Reclining SeatbacksŌĆØ under
Reclining Seatbacks on page 3ŌĆæ6.
Lumbar Adjustment
Manual Lumbar
If equipped, increase or decrease
manual lumbar support by turning
the knob forward or rearward.
Page 69 of 542
Black plate (7,1)Chevrolet Silverado Owner Manual - 2013 - crc2 - 8/13/12
Seats and Restraints 3-7
Manual Reclining Seatbacks
{WARNING
If either seatback is not locked, it
could move forward in a sudden
stop or crash. That could cause
injury to the person sitting there.
Always push and pull on the
seatbacks to be sure they are
locked.
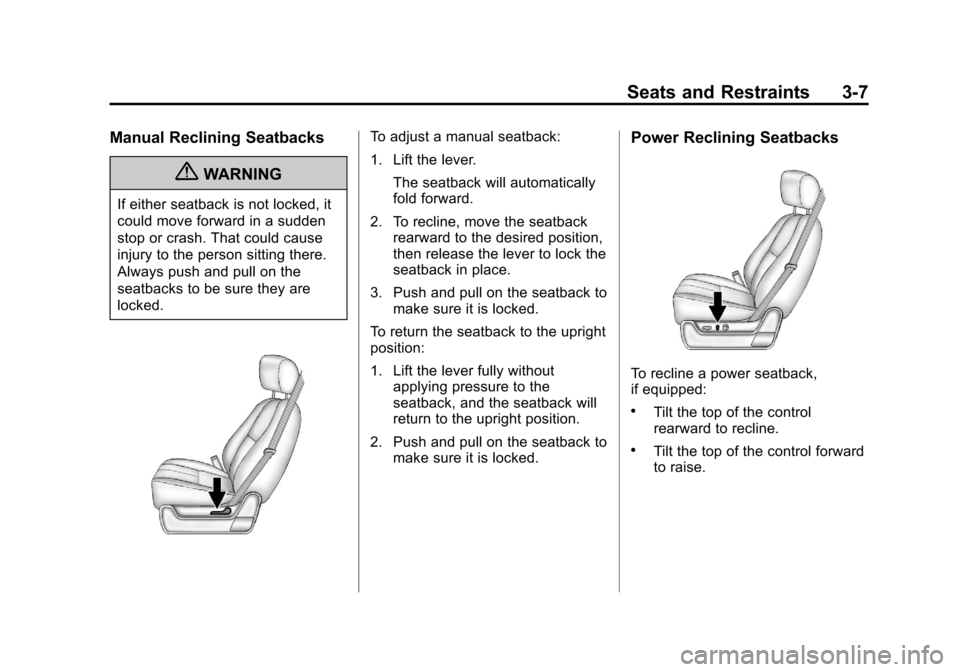
To adjust a manual seatback:
1. Lift the lever.The seatback will automatically
fold forward.
2. To recline, move the seatback rearward to the desired position,
then release the lever to lock the
seatback in place.
3. Push and pull on the seatback to make sure it is locked.
To return the seatback to the upright
position:
1. Lift the lever fully without applying pressure to the
seatback, and the seatback will
return to the upright position.
2. Push and pull on the seatback to make sure it is locked.Power Reclining Seatbacks
To recline a power seatback,
if equipped:
.Tilt the top of the control
rearward to recline.
.Tilt the top of the control forward
to raise.
Page 73 of 542
Black plate (11,1)Chevrolet Silverado Owner Manual - 2013 - crc2 - 8/13/12
Seats and Restraints 3-11
Rear Seats
Rear Seats (Extended
Cab Full Bench)
Folding the Rear Seat
Notice:Folding a rear seat with
the safety belts still fastened may
cause damage to the seat or the
safety belts. Always unbuckle the
safety belts and return them to
their normal stowed position
before folding a rear seat.
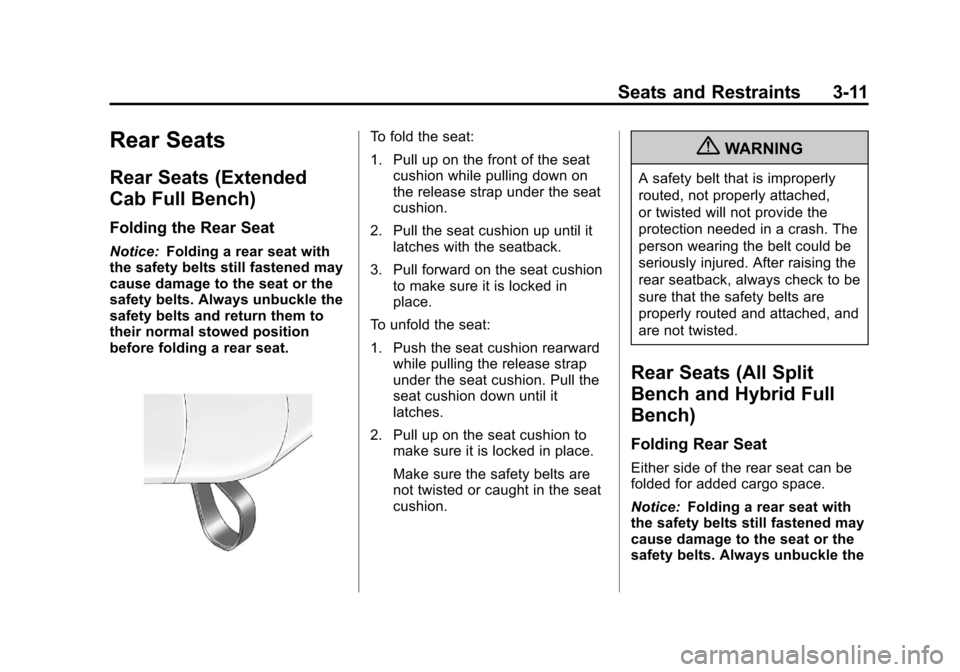
To fold the seat:
1. Pull up on the front of the seat
cushion while pulling down on
the release strap under the seat
cushion.
2. Pull the seat cushion up until it latches with the seatback.
3. Pull forward on the seat cushion to make sure it is locked in
place.
To unfold the seat:
1. Push the seat cushion rearward while pulling the release strap
under the seat cushion. Pull the
seat cushion down until it
latches.
2. Pull up on the seat cushion to make sure it is locked in place.
Make sure the safety belts are
not twisted or caught in the seat
cushion.{WARNING
A safety belt that is improperly
routed, not properly attached,
or twisted will not provide the
protection needed in a crash. The
person wearing the belt could be
seriously injured. After raising the
rear seatback, always check to be
sure that the safety belts are
properly routed and attached, and
are not twisted.
Rear Seats (All Split
Bench and Hybrid Full
Bench)
Folding Rear Seat
Either side of the rear seat can be
folded for added cargo space.
Notice: Folding a rear seat with
the safety belts still fastened may
cause damage to the seat or the
safety belts. Always unbuckle the
Page 74 of 542
Black plate (12,1)Chevrolet Silverado Owner Manual - 2013 - crc2 - 8/13/12
3-12 Seats and Restraints
safety belts and return them to
their normal stowed position
before folding a rear seat.
Make sure that nothing is on
the seat.
To fold the seat, slowly pull the seat
cushion up.
To return the seat to the normal
seating position, slowly pull the seat
cushion down.
Make sure the safety belts are not
twisted or caught in the seat
cushion.
{WARNING
A safety belt that is improperly
routed, not properly attached,
or twisted will not provide the
protection needed in a crash. The
person wearing the belt could be
seriously injured. After raising the
rear seatback, always check to be
sure that the safety belts are
properly routed and attached, and
are not twisted.
Safety Belts
This section of the manual
describes how to use safety belts
properly. It also describes some
things not to do with safety belts.
{WARNING
Do not let anyone ride where a
safety belt cannot be worn
properly. In a crash, if you or your
passenger(s) are not wearing
safety belts, injuries can be much
worse than if you are wearing
safety belts. You can be seriously
injured or killed by hitting things
inside the vehicle harder or by
being ejected from the vehicle. In
addition, anyone who is not
buckled up can strike other
passengers in the vehicle.
It is extremely dangerous to ride
in a cargo area, inside or outside
of a vehicle. In a collision,
passengers riding in these areas(Continued)
WARNING (Continued)
are more likely to be seriously
injured or killed. Do not allow
passengers to ride in any area of
the vehicle that is not equipped
with seats and safety belts.
Always wear a safety belt, and
check that all passenger(s) are
restrained properly too.
This vehicle has indicators as a
reminder to buckle the safety belts.
See Safety Belt Reminders on
page 5ŌĆæ16.
Page 113 of 542
Black plate (51,1)Chevrolet Silverado Owner Manual - 2013 - crc2 - 8/13/12
Seats and Restraints 3-51
Securing a Child Restraint
Designed for the LATCH
System
{WARNING
If a LATCH-type child restraint is
not attached to anchors, the child
restraint will not be able to protect
the child correctly. In a crash, the
child could be seriously injured or
killed. Install a LATCH-type child
restraint properly using the
anchors, or use the vehicle safety
belts to secure the restraint,
following the instructions that
came with the child restraint and
the instructions in this manual.
{WARNING
Do not attach more than one child
restraint to a single anchor,
except for the center top tether(Continued)
WARNING (Continued)
anchors in the crew and extended
cabs. Attaching more than one
child restraint to a single anchor
could cause the anchor or
attachment to come loose or even
break during a crash. A child or
others could be injured. To reduce
the risk of serious or fatal injuries
during a crash, attach only one
child restraint per anchor.
{WARNING
Children can be seriously injured
or strangled if a shoulder belt is
wrapped around their neck and
the safety belt continues to
tighten. Buckle any unused safety
belts behind the child restraint so
children cannot reach them. Pull
the shoulder belt all the way out
(Continued)
WARNING (Continued)
of the retractor to set the lock,
if the vehicle has one, after the
child restraint has been installed.
Notice: Do not let the LATCH
attachments rub against the
vehicleŌĆÖ s safety belts. This may
damage these parts. If necessary,
move buckled safety belts to
avoid rubbing the LATCH
attachments.
Do not fold the empty rear seat
with a safety belt buckled. This
could damage the safety belt or
the seat. Unbuckle and return the
safety belt to its stowed position,
before folding the seat.
If you need to secure more than one
child restraint in the rear seat, see
Where to Put the Restraint on
page 3ŌĆæ45.
This system is designed to make
installation of child restraints easier.
When using lower anchors, do not