check transmission fluid CHEVROLET SILVERADO 2018 Owner's Manual
[x] Cancel search | Manufacturer: CHEVROLET, Model Year: 2018, Model line: SILVERADO, Model: CHEVROLET SILVERADO 2018Pages: 501, PDF Size: 6.69 MB
Page 237 of 501
Chevrolet Silverado Owner Manual (GMNA-Localizing-U.S./Canada/Mexico-
11349200) - 2018 - CRC - 2/27/18
236 Driving and Operating
of driving conditions and avoid
driving through large puddles and
deep-standing or flowing water.
{Warning
Wet brakes can cause crashes.
They might not work as well in a
quick stop and could cause
pulling to one side. You could
lose control of the vehicle.
After driving through a large
puddle of water or a car/vehicle
wash, lightly apply the brake
pedal until the brakes work
normally.
Flowing or rushing water creates
strong forces. Driving through
flowing water could cause the
vehicle to be carried away. If this
happens, you and other vehicle
occupants could drown. Do not
ignore police warnings and be
very cautious about trying to drive
through flowing water.
Hydroplaning
Hydroplaning is dangerous. Water
can build up under the vehicle's
tires so they actually ride on the
water. This can happen if the road is
wet enough and you are going fast
enough. When the vehicle is
hydroplaning, it has little or no
contact with the road.
There is no hard and fast rule about
hydroplaning. The best advice is to
slow down when the road is wet.
Other Rainy Weather Tips
Besides slowing down, other wet
weather driving tips include:
.Allow extra following distance.
. Pass with caution.
. Keep windshield wiping
equipment in good shape.
. Keep the windshield washer fluid
reservoir filled.
. Have good tires with proper
tread depth. See Tires0384.
. Turn off cruise control.
Hill and Mountain Roads
Driving on steep hills or through
mountains is different than driving
on flat or rolling terrain. Tips include:
.Keep the vehicle serviced and in
good shape.
. Check all fluid levels and brakes,
tires, cooling system, and
transmission.
. Shift to a lower gear when going
down steep or long hills.
{Warning
Using the brakes to slow the
vehicle on a long downhill slope
can cause brake overheating, can
reduce brake performance, and
could result in a loss of braking.
Shift the transmission to a lower
gear to let the engine assist the
brakes on a steep downhill slope.
Page 301 of 501
Chevrolet Silverado Owner Manual (GMNA-Localizing-U.S./Canada/Mexico-
11349200) - 2018 - CRC - 2/27/18
300 Driving and Operating
4. Stop and have someone pickup and store the chocks.
Maintenance when Trailer
Towing
The vehicle needs service more
often when pulling a trailer. See
Maintenance Schedule 0443.
Things that are especially important
in trailer operation are automatic
transmission fluid, engine oil, axle
lubricant, belts, cooling system, and
brake system. It is a good idea to
inspect these before and during
the trip.
Check periodically to see that all
hitch nuts and bolts are tight.
Engine Cooling When Trailer
Towing
The cooling system may temporarily
overheat during severe operating
conditions. See Engine Overheating
0 356.
Trailer Towing
If the vehicle has a diesel engine,
see the Duramax diesel
supplement.
Do not tow a trailer during break-in.
See New Vehicle Break-In 0247.
{Warning
The driver can lose control when
pulling a trailer if the correct
equipment is not used or the
vehicle is not driven properly. For
example, if the trailer is too heavy
or the trailer brakes are
inadequate for the load, the
vehicle may not stop as expected.
The driver and passengers could
be seriously injured. The vehicle
may also be damaged; the
resulting repairs would not be
covered by the vehicle warranty.
Pull a trailer only if all the steps in
this section have been followed.
Ask your dealer for advice and
information about towing a trailer
with the vehicle.
Caution
Pulling a trailer improperly can
damage the vehicle and result in
costly repairs not covered by the
vehicle warranty. To pull a trailer
correctly, follow the advice in this
section and see your dealer for
important information about
towing a trailer with the vehicle.
See Vehicle Load Limits 0239 for
more information about the vehicle's
maximum load capacity.
To identify the trailering capacity of
the vehicle, read the information in
“Weight of the Trailer” later in this
section.
Trailering is different than just
driving the vehicle by itself.
Trailering means changes in
handling, acceleration, braking,
durability, and fuel economy.
Successful, safe trailering takes
correct equipment, and it has to be
used properly.
Page 335 of 501
Chevrolet Silverado Owner Manual (GMNA-Localizing-U.S./Canada/Mexico-
11349200) - 2018 - CRC - 2/27/18
334 Vehicle Care
Vehicle Care
General Information
General Information . . . . . . . . . . 335
California Proposition65 Warning . . . . . . . . . . . . . . . . . 336
California Perchlorate Materials Requirements . . . . . 336
Accessories and Modifications . . . . . . . . . . . . . . . . 336
Vehicle Checks
Doing Your OwnService Work . . . . . . . . . . . . . . . 337
Hood . . . . . . . . . . . . . . . . . . . . . . . . . 337
Engine Compartment Overview . . . . . . . . . . . . . . . . . . . . 338
Engine Oil . . . . . . . . . . . . . . . . . . . . 343
Engine Oil Life System . . . . . . . 346
Automatic Transmission Fluid (6-Speed Transmission) . . . . . 347
Automatic Transmission Fluid (8-Speed Transmission) . . . . . 350
Manual Transmission Fluid . . . 350
Hydraulic Clutch . . . . . . . . . . . . . . 351
Engine Air Cleaner/Filter . . . . . . 351
Cooling System . . . . . . . . . . . . . . 352
Engine Overheating . . . . . . . . . . 356 Overheated Engine Protection
Operating Mode . . . . . . . . . . . . . 358
Engine Fan . . . . . . . . . . . . . . . . . . . 358
Power Steering Fluid (1500 Series) . . . . . . . . . . . . . . . . . . . . . . 359
Power Steering Fluid (2500/ 3500 Series) . . . . . . . . . . . . . . . . 359
Washer Fluid . . . . . . . . . . . . . . . . . 359
Brakes . . . . . . . . . . . . . . . . . . . . . . . 360
Brake Fluid . . . . . . . . . . . . . . . . . . . 361
Battery - North America . . . . . . 362
Four-Wheel Drive . . . . . . . . . . . . . 363
Front Axle . . . . . . . . . . . . . . . . . . . . 364
Rear Axle . . . . . . . . . . . . . . . . . . . . 365
Noise Control System . . . . . . . . 366
Starter Switch Check . . . . . . . . . 367
Automatic Transmission Shift Lock Control Function
Check . . . . . . . . . . . . . . . . . . . . . . . 368
Ignition Transmission Lock Check . . . . . . . . . . . . . . . . . . . . . . . 368
Park Brake and P (Park) Mechanism Check . . . . . . . . . . 368
Wiper Blade Replacement . . . . 369
Windshield Replacement . . . . . 369
Gas Strut(s) . . . . . . . . . . . . . . . . . . 370
Headlamp Aiming
Headlamp Aiming . . . . . . . . . . . . 371
Bulb Replacement
Bulb Replacement . . . . . . . . . . . . 371
Halogen Bulbs . . . . . . . . . . . . . . . . 371
High Intensity Discharge (HID) Lighting . . . . . . . . . . . . . . . . . . . . . 371
LED Lighting . . . . . . . . . . . . . . . . . 371
Headlamps, Front Turn Signal,
Sidemarker, and Parking
Lamps . . . . . . . . . . . . . . . . . . . . . . 372
Fog Lamps . . . . . . . . . . . . . . . . . . . 373
Taillamps (Chassis Cab Models) . . . . . . . . . . . . . . . . . . . . . 373
Taillamps, Turn Signal, Stoplamps, and Back-Up
Lamps . . . . . . . . . . . . . . . . . . . . . . 373
Center High-Mounted Stoplamp (CHMSL) and
Cargo Lamp . . . . . . . . . . . . . . . . . 375
Electrical System
High Voltage Devices andWiring . . . . . . . . . . . . . . . . . . . . . . . 375
Electrical System Overload . . . 375
Fuses and Circuit Breakers . . . 376
Engine Compartment Fuse Block . . . . . . . . . . . . . . . . . . . . . . . . 376
Instrument Panel Fuse Block (Right) . . . . . . . . . . . . . . . . . . . . . . 380
Instrument Panel Fuse Block (Left) . . . . . . . . . . . . . . . . . 381
Page 340 of 501

Chevrolet Silverado Owner Manual (GMNA-Localizing-U.S./Canada/Mexico-
11349200) - 2018 - CRC - 2/27/18
Vehicle Care 339
1. Positive (+) Terminal. SeeJump Starting - North America
0421.
2. Battery - North America 0362.
3. Coolant Surge Tank and Pressure Cap. See Cooling
System 0352.
4. Engine Air Cleaner/Filter 0351.
5. Automatic Transmission Dipstick (If Equipped). See
“How to Check Automatic
Transmission Fluid” under
Automatic Transmission Fluid
(6-Speed Transmission) 0347
or Automatic Transmission
Fluid (8-Speed Transmission)
0 350. 6. Remote Negative (–) Location.
See Jump Starting - North
America 0421.
7. Engine Cooling Fans (Out of View). See Cooling System
0 352.
8. Engine Oil Fill Cap. See “When
to Add Engine Oil” under
Engine Oil 0343.
9. Engine Oil Dipstick. See “Checking Engine Oil” under
Engine Oil 0343. 10. Brake Fluid Reservoir. See
Brake Fluid 0361.
11. Windshield Washer Fluid Reservoir. See “Adding Washer
Fluid” under Washer Fluid
0 359.
12. Engine Compartment Fuse
Block 0376.
Page 342 of 501

Chevrolet Silverado Owner Manual (GMNA-Localizing-U.S./Canada/Mexico-
11349200) - 2018 - CRC - 2/27/18
Vehicle Care 341
1. Positive (+) Terminal. SeeJump Starting - North America
0421.
2. Battery - North America 0362.
3. Coolant Surge Tank and Pressure Cap. See Cooling
System 0352.
4. Engine Air Cleaner/Filter 0351.
5. Automatic Transmission Dipstick (If Equipped). See
“How to Check Automatic
Transmission Fluid” under
Automatic Transmission Fluid
(6-Speed Transmission) 0347
or Automatic Transmission
Fluid (8-Speed Transmission)
0 350. 6. Remote Negative (–) Location
(Out of View). See Jump
Starting - North America 0421.
7. Engine Cooling Fans (Out of View). See Cooling System
0 352.
8. Engine Oil Fill Cap. See “When
to Add Engine Oil” under
Engine Oil 0343.
9. Engine Oil Dipstick. See “Checking Engine Oil” under
Engine Oil 0343. 10. Windshield Washer Fluid
Reservoir. See “Adding Washer
Fluid” under Washer Fluid
0 359.
11. Brake Fluid Reservoir. See Brake Fluid 0361.
12. Engine Compartment Fuse
Block 0376.
Page 344 of 501
Chevrolet Silverado Owner Manual (GMNA-Localizing-U.S./Canada/Mexico-
11349200) - 2018 - CRC - 2/27/18
Vehicle Care 343
1. Positive (+) Terminal. SeeJump Starting - North America
0421.
2. Battery - North America 0362.
3. Coolant Surge Tank and Pressure Cap. See Cooling
System 0352.
4. Engine Air Cleaner/Filter 0351.
5. Automatic Transmission Dipstick (If Equipped). See
“How to Check Automatic
Transmission Fluid” under
Automatic Transmission Fluid
(6-Speed Transmission) 0347
or Automatic Transmission
Fluid (8-Speed Transmission)
0 350.
6. Engine Oil Dipstick. See “Checking Engine Oil” under
Engine Oil 0343.
7. Engine Oil Fill Cap. See “When
to Add Engine Oil” under
Engine Oil 0343.
8. Engine Cooling Fan (Out of View). See Cooling System
0 352. 9. Remote Negative (–) Location.
See Jump Starting - North
America 0421.
10. Power Steering Fluid Reservoir. See Power Steering
Fluid (1500 Series) 0359 or
Power Steering Fluid (2500/
3500 Series) 0359.
11. Windshield Washer Fluid Reservoir. See “Adding Washer
Fluid” under Washer Fluid
0 359.
12. Brake Fluid Reservoir. See Brake Fluid 0361.
13. Clutch Fluid Reservoir (If Equipped). See Hydraulic
Clutch 0351.
14. Auxiliary Battery (If Equipped). SeeBattery - North America
0 362.
15. Engine Compartment Fuse
Block 0376.
If the vehicle has a diesel engine
and/or an Allison Transmission, see
the Duramax diesel supplement. For an eAssist vehicle, see the
Silverado/Sierra eAssist
supplement.
Engine Oil
For diesel engine vehicles, see
“Engine Oil”
in the Duramax diesel
supplement.
To ensure proper engine
performance and long life, careful
attention must be paid to engine oil.
Following these simple, but
important steps will help protect
your investment:
. Use engine oil approved to the
proper specification and of the
proper viscosity grade. See
“Selecting the Right Engine Oil”
in this section.
. Check the engine oil level
regularly and maintain the
proper oil level. See “Checking
Engine Oil” and“When to Add
Engine Oil” in this section.
. Change the engine oil at the
appropriate time. See Engine Oil
Life System 0346.
Page 348 of 501
Chevrolet Silverado Owner Manual (GMNA-Localizing-U.S./Canada/Mexico-
11349200) - 2018 - CRC - 2/27/18
Vehicle Care 347
1. Display the OIL LIFEREMAINING on the DIC. If the
vehicle does not have DIC
buttons, the vehicle must be in
P (Park) to access this display.
See Driver Information Center
(DIC) (Base Level) 0155 or
Driver Information Center (DIC)
(Uplevel) 0156.
2. Press and hold
V, or the trip
odometer reset stem if the
vehicle does not have DIC
buttons, for several seconds.
The oil life will change
to 100%.
The oil life system can also be reset
as follows:
1. Display the OIL LIFE REMAINING on the DIC.
See Driver Information Center
(DIC) (Base Level) 0155 or
Driver Information Center (DIC)
(Uplevel) 0156.
2. Fully press the accelerator pedal slowly three times within
five seconds. 3. Display the OIL LIFE
REMAINING on the DIC. If the
display shows 100%, the
system is reset.
If the vehicle has a CHANGE
ENGINE OIL SOON message and it
comes back on when the vehicle is
started and/or the OIL LIFE
REMAINING is near 0%, the engine
oil life system has not been reset.
Repeat the procedure.
Automatic Transmission
Fluid (6-Speed
Transmission)
When to Check and Change
Automatic Transmission Fluid
It is usually not necessary to check
the transmission fluid level. The only
reason for fluid loss is a
transmission leak or overheated
transmission. If a small leak is
suspected, then use the following
checking procedures to check the
fluid level. However, if there is a
large leak, then it may be necessary
to have the vehicle towed to a dealer service department and have
it repaired before driving the vehicle
further.
Caution
Use of the incorrect automatic
transmission fluid may damage
the vehicle, and the damage may
not be covered by the vehicle
warranty. Always use the
automatic transmission fluid listed
in
Recommended Fluids and
Lubricants 0451.
Change the fluid and filter at the
scheduled maintenance intervals
listed in Maintenance Schedule
0 443. Be sure to use the
transmission fluid listed in
Recommended Fluids and
Lubricants 0451.
Page 349 of 501
Chevrolet Silverado Owner Manual (GMNA-Localizing-U.S./Canada/Mexico-
11349200) - 2018 - CRC - 2/27/18
348 Vehicle Care
How to Check Automatic
Transmission FluidCaution
Too much or too little fluid can
damage the transmission. Too
much can mean that some of the
fluid could come out and fall on
hot engine parts or exhaust
system parts, starting a fire. Too
little fluid could cause the
transmission to overheat. Be sure
to get an accurate reading if
checking the transmission fluid.
Before checking the fluid level,
prepare the vehicle: 1. Start the engine and park the vehicle on a level surface.
Keep the engine running.
2. Apply the parking brake and place the shift lever in P (Park).
3. With your foot on the brake pedal, move the shift lever
through each gear range,
pausing for about three seconds in each range.
Then, move the shift lever back
to P (Park).
4. Allow the engine to idle (500– 800 rpm) for at least
one minute. Slowly release the
brake pedal.
5. Keep the engine running and check the transmission fluid
temperature on the Driver
Information Center (DIC).
See Driver Information Center
(DIC) (Base Level) 0155 or
Driver Information Center (DIC)
(Uplevel) 0156.
6. Using the transmission fluid temperature reading, determine
and perform the appropriate
check procedure. If the
transmission fluid temperature
reading is not within the
required temperature ranges,
allow the vehicle to cool,
or operate the vehicle until the
appropriate transmission fluid
temperature is reached. Cold Check Procedure
Use this procedure only as a
reference to determine if the
transmission has enough fluid to be
operated safely until a hot check
procedure can be made. The hot
check procedure is the most
accurate method to check the fluid
level. Perform the hot check
procedure at the first opportunity.
Use this cold check procedure to
check fluid level when the
transmission temperature is
between 27 °C and 32 °C (80 °F and
90 °F).
1. Locate the transmission
dipstick at the rear of the
engine compartment, on the
passenger side of the vehicle.
See Engine Compartment
Overview 0338.
Page 350 of 501
Chevrolet Silverado Owner Manual (GMNA-Localizing-U.S./Canada/Mexico-
11349200) - 2018 - CRC - 2/27/18
Vehicle Care 349
2. Flip the handle up, then pull outthe dipstick and wipe it with a
clean rag or paper towel.
3. Install the dipstick by pushing it back in all the way; wait
three seconds, and then pull it
back out again.
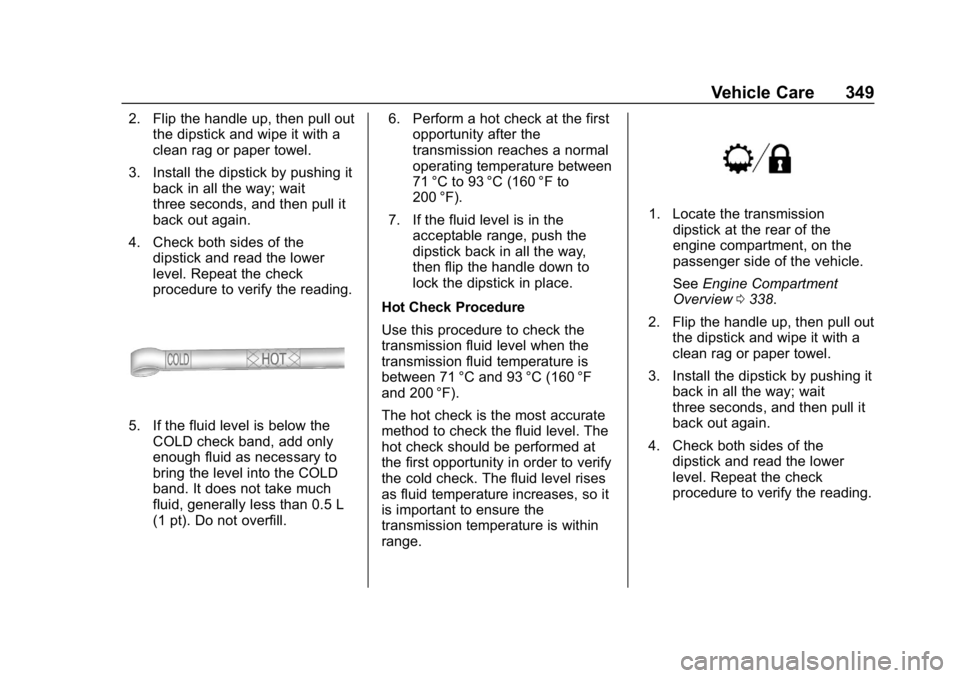
4. Check both sides of the dipstick and read the lower
level. Repeat the check
procedure to verify the reading.
5. If the fluid level is below the
COLD check band, add only
enough fluid as necessary to
bring the level into the COLD
band. It does not take much
fluid, generally less than 0.5 L
(1 pt). Do not overfill. 6. Perform a hot check at the first
opportunity after the
transmission reaches a normal
operating temperature between
71 °C to 93 °C (160 °F to
200 °F).
7. If the fluid level is in the acceptable range, push the
dipstick back in all the way,
then flip the handle down to
lock the dipstick in place.
Hot Check Procedure
Use this procedure to check the
transmission fluid level when the
transmission fluid temperature is
between 71 °C and 93 °C (160 °F
and 200 °F).
The hot check is the most accurate
method to check the fluid level. The
hot check should be performed at
the first opportunity in order to verify
the cold check. The fluid level rises
as fluid temperature increases, so it
is important to ensure the
transmission temperature is within
range.
1. Locate the transmission dipstick at the rear of the
engine compartment, on the
passenger side of the vehicle.
See Engine Compartment
Overview 0338.
2. Flip the handle up, then pull out the dipstick and wipe it with a
clean rag or paper towel.
3. Install the dipstick by pushing it back in all the way; wait
three seconds, and then pull it
back out again.
4. Check both sides of the dipstick and read the lower
level. Repeat the check
procedure to verify the reading.
Page 351 of 501
Chevrolet Silverado Owner Manual (GMNA-Localizing-U.S./Canada/Mexico-
11349200) - 2018 - CRC - 2/27/18
350 Vehicle Care
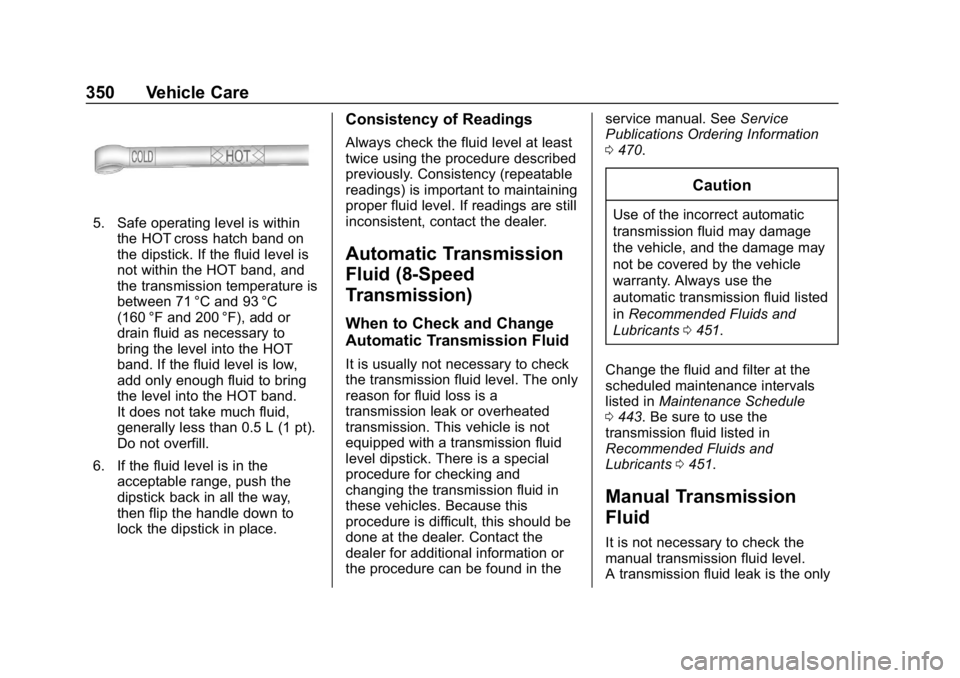
5. Safe operating level is withinthe HOT cross hatch band on
the dipstick. If the fluid level is
not within the HOT band, and
the transmission temperature is
between 71 °C and 93 °C
(160 °F and 200 °F), add or
drain fluid as necessary to
bring the level into the HOT
band. If the fluid level is low,
add only enough fluid to bring
the level into the HOT band.
It does not take much fluid,
generally less than 0.5 L (1 pt).
Do not overfill.
6. If the fluid level is in the acceptable range, push the
dipstick back in all the way,
then flip the handle down to
lock the dipstick in place.
Consistency of Readings
Always check the fluid level at least
twice using the procedure described
previously. Consistency (repeatable
readings) is important to maintaining
proper fluid level. If readings are still
inconsistent, contact the dealer.
Automatic Transmission
Fluid (8-Speed
Transmission)
When to Check and Change
Automatic Transmission Fluid
It is usually not necessary to check
the transmission fluid level. The only
reason for fluid loss is a
transmission leak or overheated
transmission. This vehicle is not
equipped with a transmission fluid
level dipstick. There is a special
procedure for checking and
changing the transmission fluid in
these vehicles. Because this
procedure is difficult, this should be
done at the dealer. Contact the
dealer for additional information or
the procedure can be found in the service manual. See
Service
Publications Ordering Information
0 470.
Caution
Use of the incorrect automatic
transmission fluid may damage
the vehicle, and the damage may
not be covered by the vehicle
warranty. Always use the
automatic transmission fluid listed
in Recommended Fluids and
Lubricants 0451.
Change the fluid and filter at the
scheduled maintenance intervals
listed in Maintenance Schedule
0 443. Be sure to use the
transmission fluid listed in
Recommended Fluids and
Lubricants 0451.
Manual Transmission
Fluid
It is not necessary to check the
manual transmission fluid level.
A transmission fluid leak is the only