clock CHEVROLET SILVERADO 2020 Owner's Manual
[x] Cancel search | Manufacturer: CHEVROLET, Model Year: 2020, Model line: SILVERADO, Model: CHEVROLET SILVERADO 2020Pages: 495, PDF Size: 8.09 MB
Page 21 of 495
Chevrolet Silverado Owner Manual (GMNA-Localizing-U.S./Canada/Mexico-
13337620) - 2020 - CTC - 1/27/20
20 Keys, Doors, and Windows
Programming Transmitters to
the Vehicle
Only RKE transmitters programmed
to the vehicle will work. If a
transmitter is lost or stolen, a
replacement can be purchased and
programmed through your dealer.
The vehicle can be reprogrammed
so that lost or stolen transmitters no
longer work. Each vehicle can have
up to eight transmitters matched
to it.
Programming with Recognized
Transmitters
A new transmitter can be
programmed to the vehicle when
there are two recognized
transmitters.
To program, the vehicle must be off
and all transmitters, both currently
recognized and new, must be
with you.1. Remove the key from a recognized transmitter.
2. Place the two recognized transmitters in the cupholder or
on the passenger seat. 3. Insert the vehicle key into the
key lock cylinder on the driver
door handle. Then turn the key
counterclockwise, to the unlock
position, five times within
10 seconds.
The DIC displays READY FOR
REMOTE#3, 4, 5 ETC.
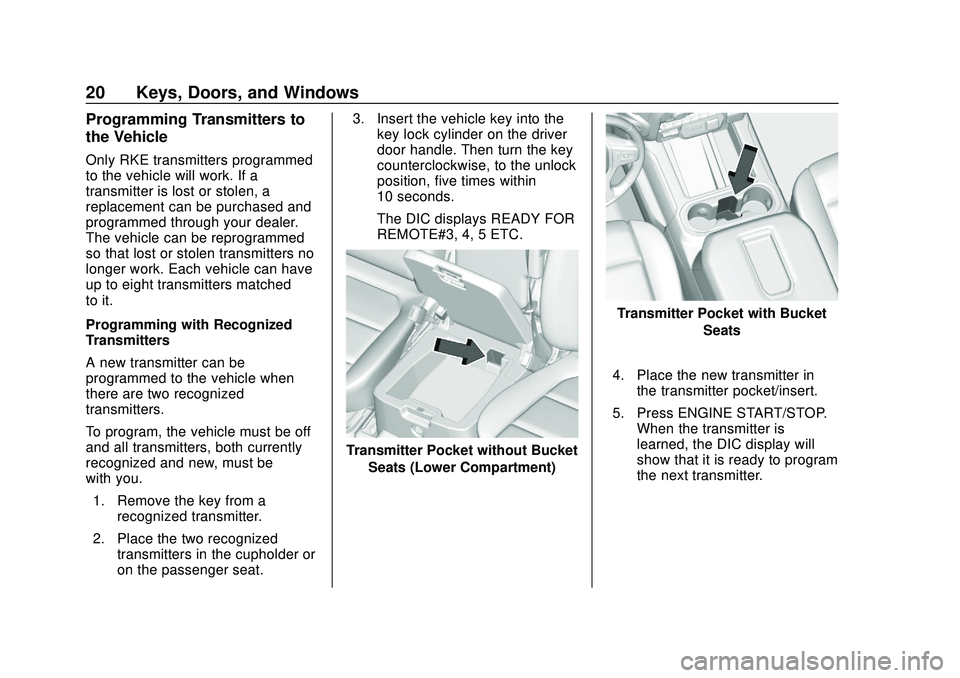
Transmitter Pocket without Bucket
Seats (Lower Compartment)
Transmitter Pocket with Bucket
Seats
4. Place the new transmitter in the transmitter pocket/insert.
5. Press ENGINE START/STOP. When the transmitter is
learned, the DIC display will
show that it is ready to program
the next transmitter.
Page 22 of 495
Chevrolet Silverado Owner Manual (GMNA-Localizing-U.S./Canada/Mexico-
13337620) - 2020 - CTC - 1/27/20
Keys, Doors, and Windows 21
6. Remove the transmitter fromthe transmitter pocket and
press
KorQon the
transmitter.
To program additional
transmitters, repeat Steps 4–6.
When all additional transmitters
are programmed, press and
hold ENGINE START/STOP for
approximately 12 seconds to
exit programming mode.
7. Return the key back into the transmitter.
Programming without Recognized
Transmitters
If two currently recognized
transmitters are not available, follow
this procedure to program up to
eight transmitters. This feature is
not available in Canada. This
procedure will take approximately
30 minutes to complete. The vehicle
must be off and all transmitters to
be programmed must be with you. 1. Remove the vehicle key from the transmitter. 2. Insert the vehicle key into the
key lock cylinder on the driver
door handle; then turn the key
counterclockwise, to the unlock
position, five times within
10 seconds.
The DIC displays REMOTE
LEARN PENDING,
PLEASE WAIT.
3. Wait for 10 minutes until the DIC displays PRESS ENGINE
START BUTTON TO LEARN,
then press ENGINE
START/STOP.
The DIC will again display
REMOTE LEARN PENDING,
PLEASE WAIT.
4. Repeat Step 3 two additional times. After the third time all
previously known transmitters
will no longer work with the
vehicle. Remaining transmitters
can be relearned during the
next steps.
The DIC should now display
READY FOR REMOTE # 1.
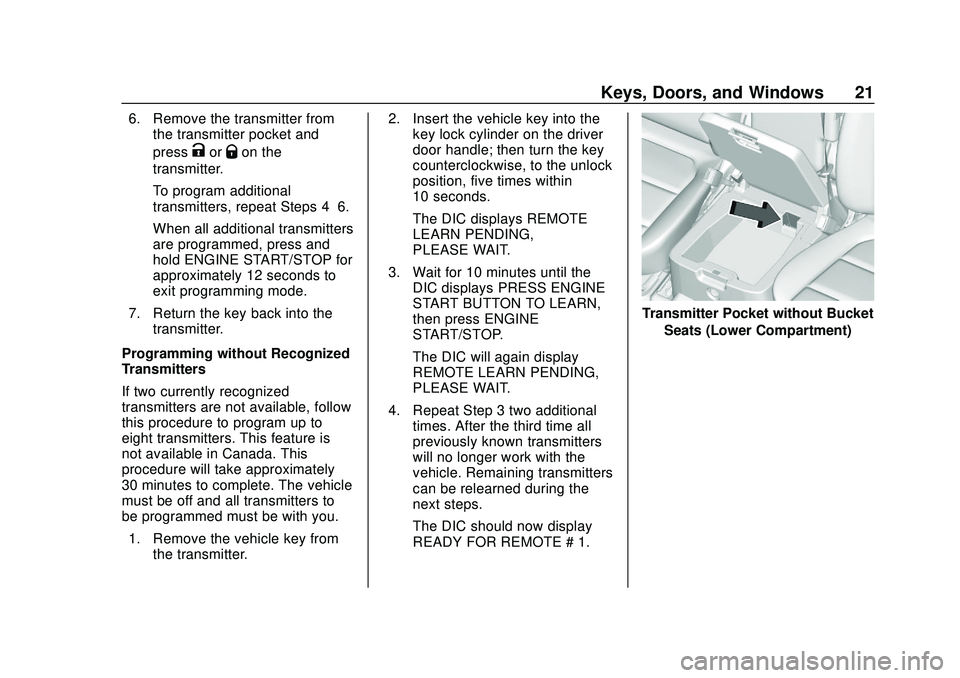
Transmitter Pocket without Bucket
Seats (Lower Compartment)
Page 114 of 495
Chevrolet Silverado Owner Manual (GMNA-Localizing-U.S./Canada/Mexico-
13337620) - 2020 - CTC - 1/27/20
Storage 113
Additional Storage
Features
Cargo Tie-Downs
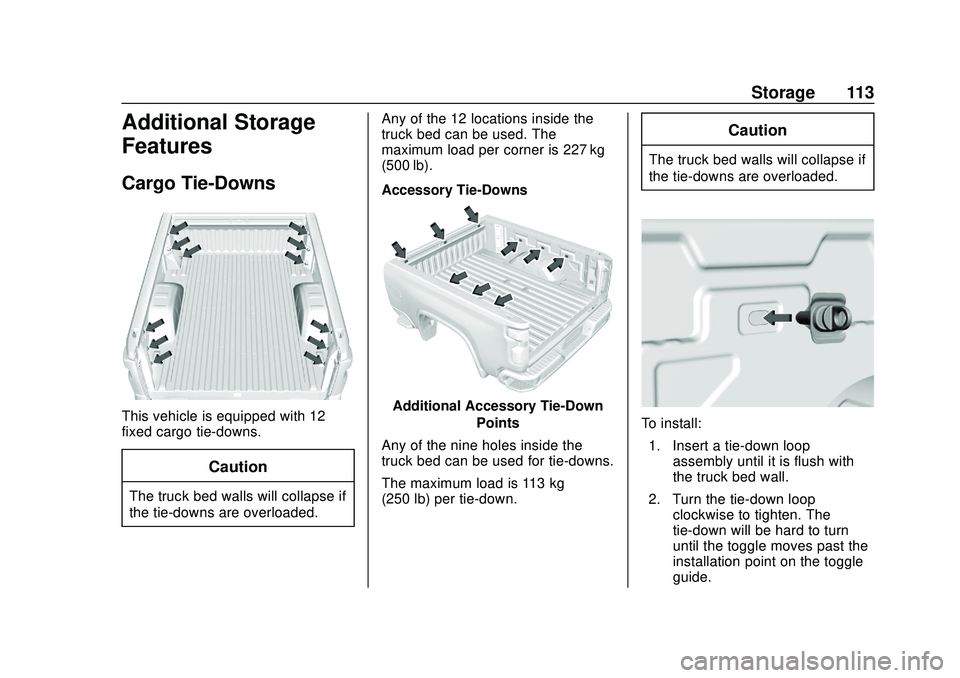
This vehicle is equipped with 12
fixed cargo tie-downs.
Caution
The truck bed walls will collapse if
the tie-downs are overloaded.Any of the 12 locations inside the
truck bed can be used. The
maximum load per corner is 227 kg
(500 lb).
Accessory Tie-Downs
Additional Accessory Tie-Down
Points
Any of the nine holes inside the
truck bed can be used for tie-downs.
The maximum load is 113 kg
(250 lb) per tie-down.
Caution
The truck bed walls will collapse if
the tie-downs are overloaded.
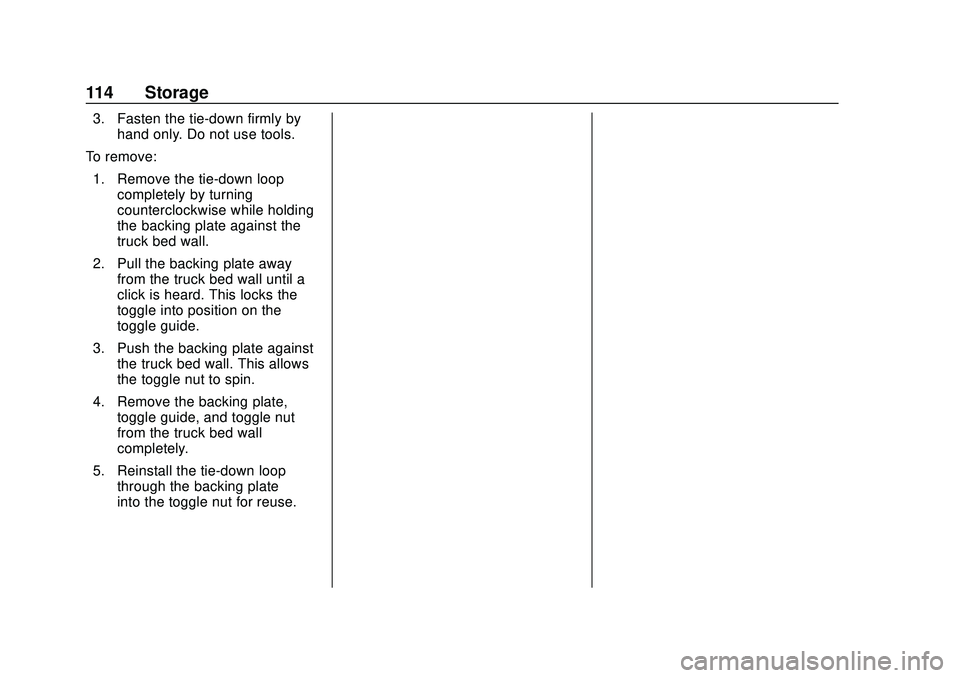
To install: 1. Insert a tie-down loop assembly until it is flush with
the truck bed wall.
2. Turn the tie-down loop clockwise to tighten. The
tie-down will be hard to turn
until the toggle moves past the
installation point on the toggle
guide.
Page 115 of 495
Chevrolet Silverado Owner Manual (GMNA-Localizing-U.S./Canada/Mexico-
13337620) - 2020 - CTC - 1/27/20
114 Storage
3. Fasten the tie-down firmly byhand only. Do not use tools.
To remove: 1. Remove the tie-down loop completely by turning
counterclockwise while holding
the backing plate against the
truck bed wall.
2. Pull the backing plate away from the truck bed wall until a
click is heard. This locks the
toggle into position on the
toggle guide.
3. Push the backing plate against the truck bed wall. This allows
the toggle nut to spin.
4. Remove the backing plate, toggle guide, and toggle nut
from the truck bed wall
completely.
5. Reinstall the tie-down loop through the backing plate
into the toggle nut for reuse.
Page 116 of 495
Chevrolet Silverado Owner Manual (GMNA-Localizing-U.S./Canada/Mexico-
13337620) - 2020 - CTC - 1/27/20
Instruments and Controls 115
Instruments and
Controls
Controls
Steering Wheel Adjustment . . . 116
Steering Wheel Controls . . . . . . 117
Heated Steering Wheel . . . . . . . 117
Horn . . . . . . . . . . . . . . . . . . . . . . . . . . 117
Windshield Wiper/Washer . . . . 117
Compass . . . . . . . . . . . . . . . . . . . . . 118
Clock . . . . . . . . . . . . . . . . . . . . . . . . . 118
Power Outlets . . . . . . . . . . . . . . . . 118
Wireless Charging . . . . . . . . . . . . 121
Warning Lights, Gauges, and
Indicators
Warning Lights, Gauges, andIndicators . . . . . . . . . . . . . . . . . . . 123
Instrument Cluster . . . . . . . . . . . . 124
Speedometer . . . . . . . . . . . . . . . . . 128
Odometer . . . . . . . . . . . . . . . . . . . . . 128
Trip Odometer . . . . . . . . . . . . . . . . 129
Tachometer . . . . . . . . . . . . . . . . . . . 129
Fuel Gauge . . . . . . . . . . . . . . . . . . . 129
Engine Oil Pressure Gauge . . . . . . . . . . . . . . . . . . . . . . 130
Engine Coolant Temperature Gauge . . . . . . . . . . . . . . . . . . . . . . 131 Voltmeter Gauge . . . . . . . . . . . . . 132
Seat Belt Reminders . . . . . . . . . 132
Airbag Readiness Light . . . . . . . 133
Passenger Airbag Status
Indicator . . . . . . . . . . . . . . . . . . . . 133
Charging System Light . . . . . . . 134
Malfunction Indicator Lamp (Check Engine Light) . . . . . . . . 135
Brake System Warning Light . . . . . . . . . . . . . . . . . . . . . . . . 137
Electric Parking Brake Light . . . . . . . . . . . . . . . . . . . . . . . . 137
Service Electric Parking Brake Light . . . . . . . . . . . . . . . . . . . . . . . . 138
Antilock Brake System (ABS) Warning Light . . . . . . . . . . . . . . . 138
Four-Wheel-Drive Light . . . . . . . 138
Tow/Haul Mode Light . . . . . . . . . 139
Hill Descent Control Light . . . . 139
Lane Departure Warning (LDW) Light (2500/3500
Series) . . . . . . . . . . . . . . . . . . . . . . 139
Lane Keep Assist (LKA) Light (1500 Series) . . . . . . . . . . . . . . . 139
Vehicle Ahead Indicator . . . . . . 140
Pedestrian Ahead Indicator . . . 140
Traction Off Light . . . . . . . . . . . . . 140
Traction Control System (TCS)/ Electronic Stability Control
Light . . . . . . . . . . . . . . . . . . . . . . . . 140 Electronic Stability Control
(ESC) Off Light . . . . . . . . . . . . . . 141
Engine Coolant Temperature Warning Light . . . . . . . . . . . . . . . 141
Driver Mode Control Light . . . . 142
Tire Pressure Light . . . . . . . . . . . 142
Engine Oil Pressure Light
(Uplevel Cluster) . . . . . . . . . . . . 143
Low Fuel Warning Light . . . . . . 143
Security Light . . . . . . . . . . . . . . . . . 143
High-Beam On Light . . . . . . . . . . 143
Front Fog Lamp Light . . . . . . . . . 144
Lamps On Reminder . . . . . . . . . 144
Cruise Control Light . . . . . . . . . . 144
Door Ajar Light . . . . . . . . . . . . . . . 144
Information Displays
Driver Information Center (DIC) (Base Level) . . . . . . . . . . . . . . . . 145
Driver Information Center (DIC) (Midlevel and Uplevel) . . . . . . 146
Head-Up Display (HUD) . . . . . . 149
Vehicle Messages
Vehicle Messages . . . . . . . . . . . . 152
Engine Power Messages . . . . . 153
Vehicle Speed Messages . . . . . 153
Vehicle Personalization
Vehicle Personalization . . . . . . . 153
Page 119 of 495

Chevrolet Silverado Owner Manual (GMNA-Localizing-U.S./Canada/Mexico-
13337620) - 2020 - CTC - 1/27/20
118 Instruments and Controls
activated. SeeWasher Fluid0350
for information on filling the
windshield washer fluid reservoir.
Clear snow and ice from the wiper
blades before using them. If frozen
to the windshield, carefully loosen or
thaw them. Damaged blades should
be replaced. See Wiper Blade
Replacement 0360.
Heavy snow or ice can overload the
wiper motor.
{Warning
In freezing weather, do not use
the washer until the windshield is
warmed. Otherwise the washer
fluid can form ice on the
windshield, blocking your vision.
{Warning
Before driving the vehicle, always
clear snow and ice from the hood,
windshield, roof, and rear of the
vehicle, including all lamps and (Continued)
Warning (Continued)
windows. Reduced visibility from
snow and ice buildup could lead
to a crash.
Wipe Parking
If the ignition is turned off while the
wipers are on LO, HI, or
3, they
will immediately stop.
If the windshield wiper control is ON
then moved to OFF before the driver
door is opened or within 10 minutes,
the wipers will restart and move to
the base of the windshield.
If the ignition is turned off while the
wipers are performing wipes due to
windshield washing, the wipers
continue to run until they reach the
base of the windshield.
Compass
The vehicle may have a compass
display on the Driver Information
Center (DIC). The compass receives
its heading and other information
from the Global Positioning System (GPS) antenna, Electronic
Stability Control (ESC), and vehicle
speed information.
The compass system is designed to
operate for a certain number of
miles or degrees of turn before
needing a signal from the GPS
satellites. When the compass
display shows CAL, drive the
vehicle for a short distance in an
open area where it can receive a
GPS signal. The compass system
will automatically determine when a
GPS signal is restored and provide
a heading again.
Clock
The time and date for the clock can
be set using the infotainment
system. See
“Time/Date”in
“System” under“Settings” in the
infotainment manual.
Power Outlets
Accessory power outlets can be
used to plug in electrical equipment,
such as a cell phone or MP3 player.
Page 175 of 495
Chevrolet Silverado Owner Manual (GMNA-Localizing-U.S./Canada/Mexico-
13337620) - 2020 - CTC - 1/27/20
174 Climate Controls
Climate Controls
Climate Control Systems
Climate Control Systems . . . . . 174
Dual Automatic ClimateControl System . . . . . . . . . . . . . 176
Air Vents
Air Vents . . . . . . . . . . . . . . . . . . . . . 179
Maintenance
Passenger Compartment AirFilter . . . . . . . . . . . . . . . . . . . . . . . . 180
Service . . . . . . . . . . . . . . . . . . . . . . . 181
Climate Control Systems
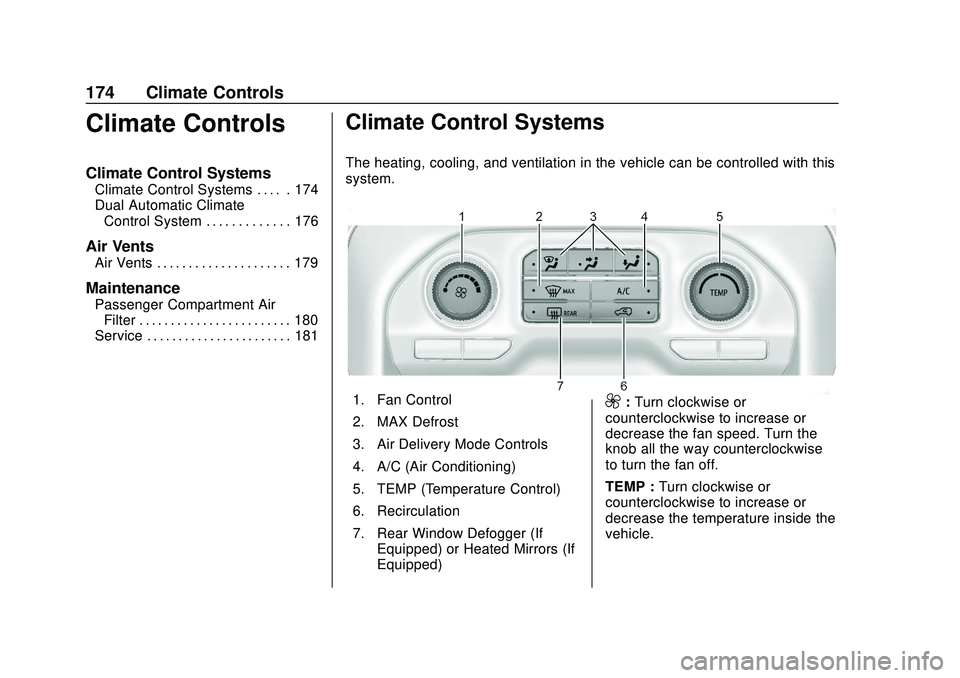
The heating, cooling, and ventilation in the vehicle can be controlled with this
system.
1. Fan Control
2. MAX Defrost
3. Air Delivery Mode Controls
4. A/C (Air Conditioning)
5. TEMP (Temperature Control)
6. Recirculation
7. Rear Window Defogger (If Equipped) or Heated Mirrors (If
Equipped)9:Turn clockwise or
counterclockwise to increase or
decrease the fan speed. Turn the
knob all the way counterclockwise
to turn the fan off.
TEMP : Turn clockwise or
counterclockwise to increase or
decrease the temperature inside the
vehicle.
Page 178 of 495

Chevrolet Silverado Owner Manual (GMNA-Localizing-U.S./Canada/Mexico-
13337620) - 2020 - CTC - 1/27/20
Climate Controls 177
The fan, air delivery mode, air
conditioning, driver and passenger
temperatures, and Sync settings
can be controlled by touching
CLIMATE on the infotainment Home
Page or the climate button in the
climate control display application
tray. A selection can then be made
on the front climate control page
displayed. See the infotainment
manual.
Climate Control Status Display
The climate control status display
appears briefly when the center
stack climate controls are adjusted.Automatic Operation
The system automatically controls
the fan speed, air delivery, air
conditioning, and recirculation in
order to heat or cool the vehicle to
the desired temperature.
When AUTO is lit, all four functions
operate automatically. Each function
can also be manually set and the
selected setting is displayed.
Functions not manually set will
continue to be automatically
controlled, even if the AUTO
indicator is not lit.
For automatic operation:
1. Press AUTO.
2. Set the temperature. Allow the system time to stabilize. Adjust
the temperature as needed for
best comfort.
To improve fuel efficiency and to
cool the vehicle faster, recirculation
may be automatically selected in
warm weather. The recirculation light will not come
on when automatically controlled.
See
@under
“Manual Operation”
for more details.
Manual Operation
9: Turn clockwise or
counterclockwise to increase or
decrease the fan speed. Press the
knob to turn the fan off. When off is
selected, a small amount of air may
still come out of the outlets
depending on vehicle speed. If any
buttons are pressed or knobs are
turned, the climate control system
will turn on and operate at the
current setting.
Press AUTO to return to automatic
operation.
Driver and Passenger
Temperature Control : The
temperature can be adjusted
separately for the driver and
passenger.
Turn the knob clockwise or
counterclockwise to increase or
decrease the driver or passenger
temperature setting. The driver side
Page 282 of 495
Chevrolet Silverado Owner Manual (GMNA-Localizing-U.S./Canada/Mexico-
13337620) - 2020 - CTC - 1/27/20
Driving and Operating 281
Filling the Tank (Chassis
Cab Model)
If the vehicle has a diesel engine,
see the Duramax diesel
supplement.
An arrow on the fuel gauge
indicates which side of the vehicle
the fuel door is on. SeeFuel Gauge
0 129.
{Warning
Fuel vapors and fuel fires burn
violently and can cause injury or
death.
Follow these guidelines to help
avoid injuries to you and others:
. Read and follow all the
instructions on the fuel
pump island.
. Turn off the engine when
refueling.
. Keep sparks, flames, and
smoking materials away
from fuel.
(Continued)
Warning (Continued)
.Do not leave the fuel pump
unattended.
. Avoid using electronic
devices while refueling.
. Do not re-enter the vehicle
while pumping fuel.
. Keep children away from
the fuel pump and never let
children pump fuel.
. Before touching the fill
nozzle, touch a metallic
object to discharge static
electricity from your body.
. Fuel can spray out if the fuel
cap is opened too quickly.
This spray can happen if the
tank is nearly full, and is
more likely in hot weather.
Open the fuel cap slowly
and wait for any hiss noise
to stop, then unscrew the
cap all the way. Turn the fuel cap counterclockwise
to remove. Fully insert and latch the
fill nozzle, begin fueling. If the
vehicle is a dual fuel tank chassis
cab model, and it runs out of fuel,
refuel the front fuel tank first to
ensure a quick restart.
{Warning
Overfilling the fuel tank by more
than three clicks of a standard fill
nozzle may cause:
. Vehicle performance issues,
including engine stalling and
damage to the fuel system.
. Fuel spills.
. Under certain conditions,
fuel fires.
Be careful not to spill fuel. Wait
five seconds after you have finished
pumping before removing the fill
nozzle. Clean fuel from painted
surfaces as soon as possible. See
Exterior Care 0424. Reinstall the
cap by turning it clockwise until it
clicks.
Page 347 of 495
Chevrolet Silverado Owner Manual (GMNA-Localizing-U.S./Canada/Mexico-
13337620) - 2020 - CTC - 1/27/20
346 Vehicle Care
Warning (Continued)
warning. The engine could catch
fire and you or others could be
burned.
{Warning
Steam and scalding liquids from a
hot cooling system are under
pressure. Turning the pressure
cap, even a little, can cause them
to come out at high speed and
you could be burned. Never turn
the cap when the cooling system,
including the pressure cap, is hot.
Wait for the cooling system and
pressure cap to cool.
Caution
Failure to follow the specific
coolant fill procedure could cause
the engine to overheat and could(Continued)
Caution (Continued)
cause system damage. If coolant
is not visible in the surge tank,
contact your dealer.
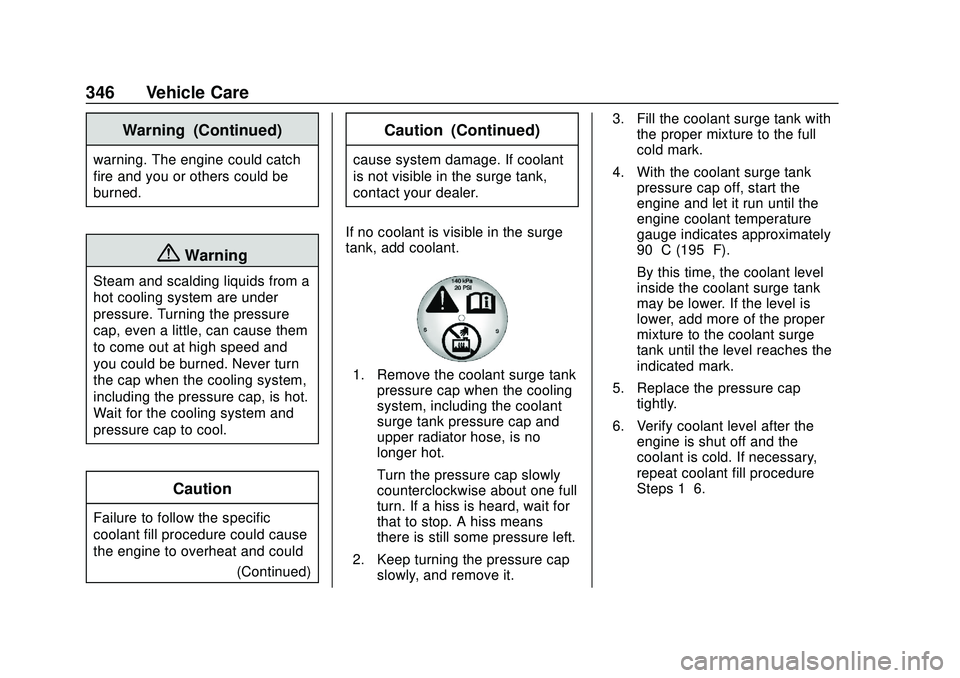
If no coolant is visible in the surge
tank, add coolant.
1. Remove the coolant surge tank pressure cap when the cooling
system, including the coolant
surge tank pressure cap and
upper radiator hose, is no
longer hot.
Turn the pressure cap slowly
counterclockwise about one full
turn. If a hiss is heard, wait for
that to stop. A hiss means
there is still some pressure left.
2. Keep turning the pressure cap slowly, and remove it. 3. Fill the coolant surge tank with
the proper mixture to the full
cold mark.
4. With the coolant surge tank pressure cap off, start the
engine and let it run until the
engine coolant temperature
gauge indicates approximately
90 °C (195 °F).
By this time, the coolant level
inside the coolant surge tank
may be lower. If the level is
lower, add more of the proper
mixture to the coolant surge
tank until the level reaches the
indicated mark.
5. Replace the pressure cap tightly.
6. Verify coolant level after the engine is shut off and the
coolant is cold. If necessary,
repeat coolant fill procedure
Steps 1–6.