ABS CHEVROLET SILVERADO 2024 Owners Manual
[x] Cancel search | Manufacturer: CHEVROLET, Model Year: 2024, Model line: SILVERADO, Model: CHEVROLET SILVERADO 2024Pages: 433, PDF Size: 14.15 MB
Page 5 of 433
Chevrolet Silverado 2500 HD/3500 HD Owner Manual (GMNA-Localizing-U.
S./Canada/Mexico-16908339) - 2024 - CRC - 12/5/22
Introduction 3
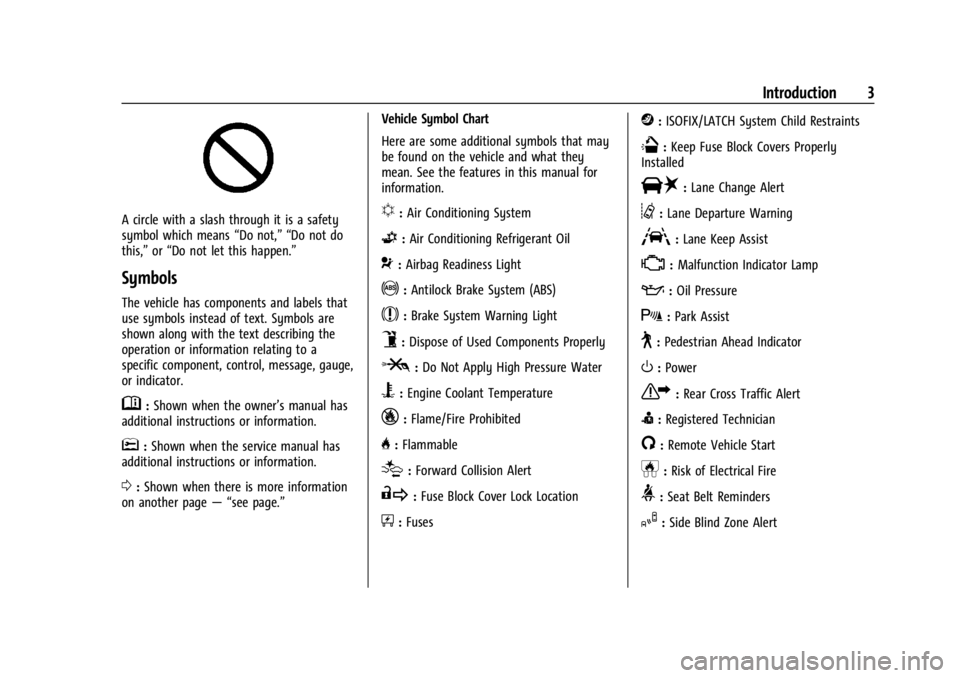
A circle with a slash through it is a safety
symbol which means“Do not,” “Do not do
this,” or“Do not let this happen.”
Symbols
The vehicle has components and labels that
use symbols instead of text. Symbols are
shown along with the text describing the
operation or information relating to a
specific component, control, message, gauge,
or indicator.
M:Shown when the owner’s manual has
additional instructions or information.
*: Shown when the service manual has
additional instructions or information.
0: Shown when there is more information
on another page — “see page.” Vehicle Symbol Chart
Here are some additional symbols that may
be found on the vehicle and what they
mean. See the features in this manual for
information.
u:
Air Conditioning System
G:Air Conditioning Refrigerant Oil
9:Airbag Readiness Light
!:Antilock Brake System (ABS)
$:Brake System Warning Light
9:Dispose of Used Components Properly
P:Do Not Apply High Pressure Water
B:Engine Coolant Temperature
_:Flame/Fire Prohibited
H: Flammable
[:Forward Collision Alert
R:Fuse Block Cover Lock Location
+:Fuses
j:ISOFIX/LATCH System Child Restraints
Q:Keep Fuse Block Covers Properly
Installed
|: Lane Change Alert
@:Lane Departure Warning
A:Lane Keep Assist
*: Malfunction Indicator Lamp
::Oil Pressure
X:Park Assist
~:Pedestrian Ahead Indicator
O:Power
7:Rear Cross Traffic Alert
I:Registered Technician
/:Remote Vehicle Start
h:Risk of Electrical Fire
>:Seat Belt Reminders
I:Side Blind Zone Alert
Page 65 of 433
Chevrolet Silverado 2500 HD/3500 HD Owner Manual (GMNA-Localizing-U.
S./Canada/Mexico-16908339) - 2024 - CRC - 12/5/22
Seats and Restraints 63
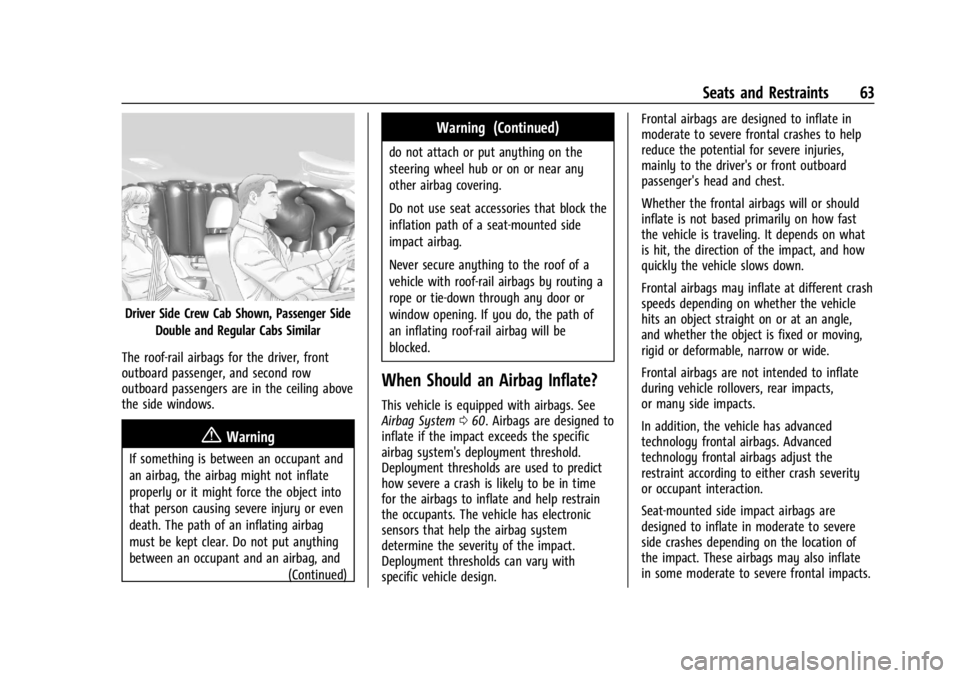
Driver Side Crew Cab Shown, Passenger SideDouble and Regular Cabs Similar
The roof-rail airbags for the driver, front
outboard passenger, and second row
outboard passengers are in the ceiling above
the side windows.
{Warning
If something is between an occupant and
an airbag, the airbag might not inflate
properly or it might force the object into
that person causing severe injury or even
death. The path of an inflating airbag
must be kept clear. Do not put anything
between an occupant and an airbag, and (Continued)
Warning (Continued)
do not attach or put anything on the
steering wheel hub or on or near any
other airbag covering.
Do not use seat accessories that block the
inflation path of a seat-mounted side
impact airbag.
Never secure anything to the roof of a
vehicle with roof-rail airbags by routing a
rope or tie‐down through any door or
window opening. If you do, the path of
an inflating roof-rail airbag will be
blocked.
When Should an Airbag Inflate?
This vehicle is equipped with airbags. See
Airbag System060. Airbags are designed to
inflate if the impact exceeds the specific
airbag system's deployment threshold.
Deployment thresholds are used to predict
how severe a crash is likely to be in time
for the airbags to inflate and help restrain
the occupants. The vehicle has electronic
sensors that help the airbag system
determine the severity of the impact.
Deployment thresholds can vary with
specific vehicle design. Frontal airbags are designed to inflate in
moderate to severe frontal crashes to help
reduce the potential for severe injuries,
mainly to the driver's or front outboard
passenger's head and chest.
Whether the frontal airbags will or should
inflate is not based primarily on how fast
the vehicle is traveling. It depends on what
is hit, the direction of the impact, and how
quickly the vehicle slows down.
Frontal airbags may inflate at different crash
speeds depending on whether the vehicle
hits an object straight on or at an angle,
and whether the object is fixed or moving,
rigid or deformable, narrow or wide.
Frontal airbags are not intended to inflate
during vehicle rollovers, rear impacts,
or many side impacts.
In addition, the vehicle has advanced
technology frontal airbags. Advanced
technology frontal airbags adjust the
restraint according to either crash severity
or occupant interaction.
Seat-mounted side impact airbags are
designed to inflate in moderate to severe
side crashes depending on the location of
the impact. These airbags may also inflate
in some moderate to severe frontal impacts.
Page 101 of 433
Chevrolet Silverado 2500 HD/3500 HD Owner Manual (GMNA-Localizing-U.
S./Canada/Mexico-16908339) - 2024 - CRC - 12/15/22
Instruments and Controls 99
Instruments and Controls
Controls
Steering Wheel Adjustment . . . . . . . . . . . 100
Heated Steering Wheel . . . . . . . . . . . . . . . . 100
Horn . . . . . . . . . . . . . . . . . . . . . . . . . . . . . . . . . . . 101
Windshield Wiper/Washer . . . . . . . . . . . . . 101
Compass . . . . . . . . . . . . . . . . . . . . . . . . . . . . . . . 102
Clock . . . . . . . . . . . . . . . . . . . . . . . . . . . . . . . . . . 102
Power Outlets . . . . . . . . . . . . . . . . . . . . . . . . . 102
Wireless Charging . . . . . . . . . . . . . . . . . . . . . 104
Warning Lights, Gauges, and Indicators
Warning Lights, Gauges, andIndicators . . . . . . . . . . . . . . . . . . . . . . . . . . . . 106
Instrument Cluster (Base Level) . . . . . . . . 107
Instrument Cluster (Uplevel) . . . . . . . . . . . 108
Speedometer . . . . . . . . . . . . . . . . . . . . . . . . . . . 111
Odometer . . . . . . . . . . . . . . . . . . . . . . . . . . . . . . 111
Trip Odometer . . . . . . . . . . . . . . . . . . . . . . . . . 111
Tachometer . . . . . . . . . . . . . . . . . . . . . . . . . . . . 111
Fuel Gauge . . . . . . . . . . . . . . . . . . . . . . . . . . . . . 111
Engine Oil Pressure Gauge . . . . . . . . . . . . . 112
Engine Coolant Temperature Gauge . . . . 113
Transmission Temperature Gauge (Uplevel only) . . . . . . . . . . . . . . . . . . . . . . . . 114
Voltmeter Gauge . . . . . . . . . . . . . . . . . . . . . . 114
Seat Belt Reminders . . . . . . . . . . . . . . . . . . . . 115
Airbag Readiness Light . . . . . . . . . . . . . . . . . 116
Passenger Airbag Status Indicator . . . . . . 116 Charging System Light . . . . . . . . . . . . . . . . . 117
Malfunction Indicator Lamp (Check
Engine Light) . . . . . . . . . . . . . . . . . . . . . . . . . 117
Brake System Warning Light . . . . . . . . . . . 119
Electric Parking Brake Light . . . . . . . . . . . . 119
Service Electric Parking Brake Light . . . . 119
Antilock Brake System (ABS) Warning Light . . . . . . . . . . . . . . . . . . . . . . . . . . . . . . . . . 120
Four-Wheel-Drive Light . . . . . . . . . . . . . . . . 120
Tow/Haul Mode Light . . . . . . . . . . . . . . . . . 120
Hill Descent Control Light . . . . . . . . . . . . . . 121
Lane Departure Warning (LDW) Light . . . . . . . . . . . . . . . . . . . . . . . . . . . . . . . . . 121
Automatic Emergency Braking (AEB) Disabled Light . . . . . . . . . . . . . . . . . . . . . . . . 121
Vehicle Ahead Indicator . . . . . . . . . . . . . . . . 121
Pedestrian Ahead Indicator . . . . . . . . . . . . . 121
Traction Off Light . . . . . . . . . . . . . . . . . . . . . . 122
Traction Control System (TCS)/Electronic Stability Control Light . . . . . . . . . . . . . . . . 122
Electronic Stability Control (ESC) Off Light . . . . . . . . . . . . . . . . . . . . . . . . . . . . . . . . . 122
Engine Coolant Temperature Warning Light . . . . . . . . . . . . . . . . . . . . . . . . . . . . . . . . . 123
Driver Mode Control Light . . . . . . . . . . . . . 123
Tire Pressure Light . . . . . . . . . . . . . . . . . . . . . 123
Engine Oil Pressure Light (Uplevel Cluster) . . . . . . . . . . . . . . . . . . . . . . . . . . . . . . 124
Low Fuel Warning Light . . . . . . . . . . . . . . . 124
Security Light . . . . . . . . . . . . . . . . . . . . . . . . . . 125 High-Beam On Light . . . . . . . . . . . . . . . . . . . 125
Front Fog Lamp Light . . . . . . . . . . . . . . . . . . 125
Lamps On Reminder . . . . . . . . . . . . . . . . . . . 125
Cruise Control Light . . . . . . . . . . . . . . . . . . . 126
Door Ajar Light . . . . . . . . . . . . . . . . . . . . . . . . 126
Information Displays
Driver Information Center (DIC) (Base
Level) . . . . . . . . . . . . . . . . . . . . . . . . . . . . . . . . 126
Driver Information Center (DIC) (Uplevel) . . . . . . . . . . . . . . . . . . . . . . . . . . . . . 128
Head-Up Display (HUD) . . . . . . . . . . . . . . . . 130
Vehicle Messages
Vehicle Messages . . . . . . . . . . . . . . . . . . . . . . 134
Engine Power Messages . . . . . . . . . . . . . . . 134
Vehicle Speed Messages . . . . . . . . . . . . . . . 134
Universal Remote System
Universal Remote System . . . . . . . . . . . . . . 134
Universal Remote System Programming . . . . . . . . . . . . . . . . . . . . . . . . 135
Universal Remote System Operation . . . 136
Page 122 of 433
Chevrolet Silverado 2500 HD/3500 HD Owner Manual (GMNA-Localizing-U.
S./Canada/Mexico-16908339) - 2024 - CRC - 12/15/22
120 Instruments and Controls
This light may come on briefly when the
vehicle is turned on. If it does not come on,
have it fixed so it will be ready to warn if
there is a problem.
If this light stays on or comes on while
driving, there is a problem with the Electric
Parking Brake (EPB). Take the vehicle to a
dealer as soon as possible. In addition to the
parking brake, other safety functions that
utilize the EPB may also be degraded.
A message may also display in the Driver
Information Center (DIC). SeeElectric Parking
Brake 0228.
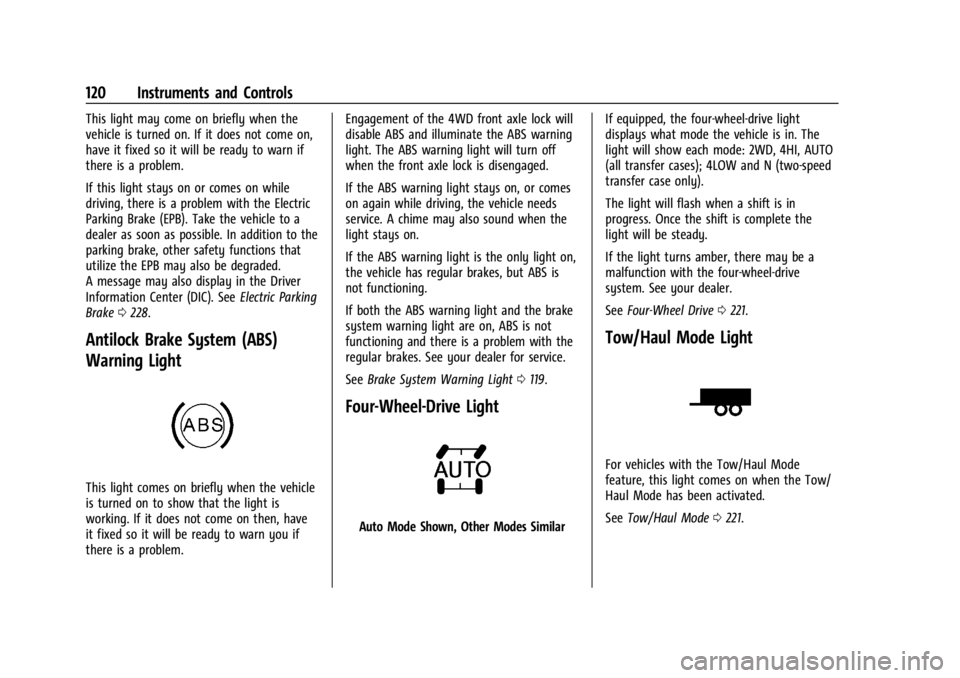
Antilock Brake System (ABS)
Warning Light
This light comes on briefly when the vehicle
is turned on to show that the light is
working. If it does not come on then, have
it fixed so it will be ready to warn you if
there is a problem. Engagement of the 4WD front axle lock will
disable ABS and illuminate the ABS warning
light. The ABS warning light will turn off
when the front axle lock is disengaged.
If the ABS warning light stays on, or comes
on again while driving, the vehicle needs
service. A chime may also sound when the
light stays on.
If the ABS warning light is the only light on,
the vehicle has regular brakes, but ABS is
not functioning.
If both the ABS warning light and the brake
system warning light are on, ABS is not
functioning and there is a problem with the
regular brakes. See your dealer for service.
See
Brake System Warning Light 0119.
Four-Wheel-Drive Light
Auto Mode Shown, Other Modes Similar If equipped, the four-wheel-drive light
displays what mode the vehicle is in. The
light will show each mode: 2WD, 4HI, AUTO
(all transfer cases); 4LOW and N (two-speed
transfer case only).
The light will flash when a shift is in
progress. Once the shift is complete the
light will be steady.
If the light turns amber, there may be a
malfunction with the four-wheel-drive
system. See your dealer.
See
Four-Wheel Drive 0221.
Tow/Haul Mode Light
For vehicles with the Tow/Haul Mode
feature, this light comes on when the Tow/
Haul Mode has been activated.
See Tow/Haul Mode 0221.
Page 194 of 433
Chevrolet Silverado 2500 HD/3500 HD Owner Manual (GMNA-Localizing-U.
S./Canada/Mexico-16908339) - 2024 - CRC - 12/12/22
192 Driving and Operating
Driving and Operating
Driving Information
Driving for Better Fuel Economy . . . . . . . 193
Distracted Driving . . . . . . . . . . . . . . . . . . . . . 193
Defensive Driving . . . . . . . . . . . . . . . . . . . . . . 194
Impaired Driving . . . . . . . . . . . . . . . . . . . . . . 194
Control of a Vehicle . . . . . . . . . . . . . . . . . . . 194
Braking . . . . . . . . . . . . . . . . . . . . . . . . . . . . . . . . 194
Steering . . . . . . . . . . . . . . . . . . . . . . . . . . . . . . . 195
Off-Road Recovery . . . . . . . . . . . . . . . . . . . . . 196
Loss of Control . . . . . . . . . . . . . . . . . . . . . . . . 196
Off-Road Driving . . . . . . . . . . . . . . . . . . . . . . . 197
Driving on Wet Roads . . . . . . . . . . . . . . . . . 201
Hill and Mountain Roads . . . . . . . . . . . . . . 201
Winter Driving . . . . . . . . . . . . . . . . . . . . . . . . 202
If the Vehicle Is Stuck . . . . . . . . . . . . . . . . . 203
Vehicle Load Limits . . . . . . . . . . . . . . . . . . . . 204
Truck-Camper Loading Information . . . . 209
Starting and Operating
New Vehicle Break-In . . . . . . . . . . . . . . . . . . 210
Ignition Positions . . . . . . . . . . . . . . . . . . . . . . 211
Starting the Engine . . . . . . . . . . . . . . . . . . . . 213
Engine Heater . . . . . . . . . . . . . . . . . . . . . . . . . 213
Retained Accessory Power (RAP) . . . . . . . 214
Vehicle Shutdown . . . . . . . . . . . . . . . . . . . . . . 215
Shifting Into Park . . . . . . . . . . . . . . . . . . . . . . 215
Shifting out of Park . . . . . . . . . . . . . . . . . . . 216
Parking over Things That Burn . . . . . . . . . 216Extended Parking . . . . . . . . . . . . . . . . . . . . . . 217
Engine Exhaust
Engine Exhaust . . . . . . . . . . . . . . . . . . . . . . . . 217
Running the Vehicle While Parked . . . . . 217
Automatic Transmission
Automatic Transmission . . . . . . . . . . . . . . . 218
Manual Mode . . . . . . . . . . . . . . . . . . . . . . . . . 220
Tow/Haul Mode . . . . . . . . . . . . . . . . . . . . . . . 221
Drive Systems
Four-Wheel Drive . . . . . . . . . . . . . . . . . . . . . . 221
Brakes
Antilock Brake System (ABS) . . . . . . . . . . . 227
Electric Parking Brake . . . . . . . . . . . . . . . . . . 228
Brake Assist . . . . . . . . . . . . . . . . . . . . . . . . . . . 229
Hill Start Assist (HSA) . . . . . . . . . . . . . . . . . 229
Ride Control Systems
Traction Control/Electronic Stability
Control . . . . . . . . . . . . . . . . . . . . . . . . . . . . . . 230
Hill Descent Control (HDC) . . . . . . . . . . . . . 231
Driver Mode Control . . . . . . . . . . . . . . . . . . . 232
Locking Rear Axle . . . . . . . . . . . . . . . . . . . . . . 233
Cruise Control
Cruise Control . . . . . . . . . . . . . . . . . . . . . . . . . 233
Adaptive Cruise Control (Camera) . . . . . . 235
Advanced Driver Assistance Systems
Advanced Driver Assistance Systems . . . . . . . . . . . . . . . . . . . . . . . . . . . . . 246
Assistance Systems for Parking or Backing . . . . . . . . . . . . . . . . . . . . . . . . . . . . . . 247
Rear Vision Camera (RVC) . . . . . . . . . . . . . 247
Surround Vision System . . . . . . . . . . . . . . . 248
Park Assist . . . . . . . . . . . . . . . . . . . . . . . . . . . . 256
Rear Cross Traffic Alert (RCTA)
System . . . . . . . . . . . . . . . . . . . . . . . . . . . . . . 257
Assistance Systems for Driving . . . . . . . . 257
Forward Collision Alert (FCA) System . . . . . . . . . . . . . . . . . . . . . . . . . . . . . . 257
Automatic Emergency Braking (AEB) . . . . . . . . . . . . . . . . . . . . . . . . 259
Front Pedestrian Braking (FPB) System . . . . . . . . . . . . . . . . . . . . . . . . . . . . . . 260
Lane Change Alert (LCA) . . . . . . . . . . . . . . . 262
Lane Departure Warning (LDW) . . . . . . . 264
Fuel
Top Tier Fuel . . . . . . . . . . . . . . . . . . . . . . . . . . 265
Recommended Fuel . . . . . . . . . . . . . . . . . . . 266
Prohibited Fuels . . . . . . . . . . . . . . . . . . . . . . . 266
Fuels in Foreign Countries . . . . . . . . . . . . . 266
Fuel Additives . . . . . . . . . . . . . . . . . . . . . . . . . 266
E85 or FlexFuel . . . . . . . . . . . . . . . . . . . . . . . . 266
Filling the Tank (Pickup Models) . . . . . . . 267
Filling the Tank (Chassis Cab and Box Delete Models) . . . . . . . . . . . . . . . . . . . . . . 269
Page 198 of 433
Chevrolet Silverado 2500 HD/3500 HD Owner Manual (GMNA-Localizing-U.
S./Canada/Mexico-16908339) - 2024 - CRC - 12/12/22
196 Driving and Operating
Curve Tips
.Take curves at a reasonable speed.
.Reduce speed before entering a curve.
.Maintain a reasonable steady speed
through the curve.
.Wait until the vehicle is out of the curve
before accelerating gently into the
straightaway.
Steering in Emergencies
.There are some situations when steering
around a problem may be more effective
than braking.
.Holding both sides of the steering wheel
allows you to turn 180 degrees without
removing a hand.
.Antilock Brake System (ABS) allows
steering while braking.
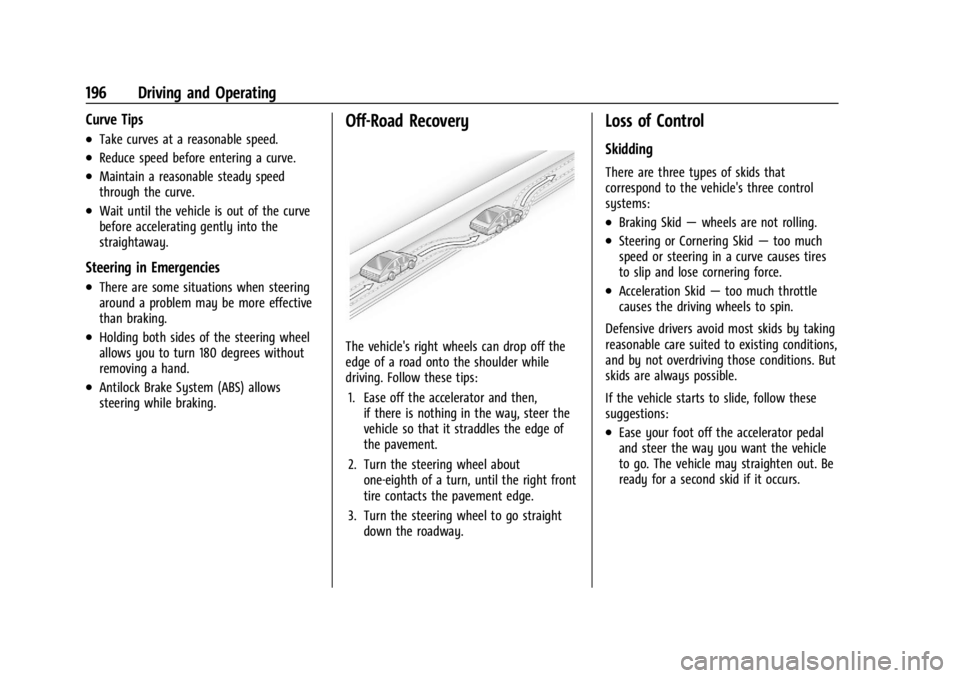
Off-Road Recovery
The vehicle's right wheels can drop off the
edge of a road onto the shoulder while
driving. Follow these tips:1. Ease off the accelerator and then, if there is nothing in the way, steer the
vehicle so that it straddles the edge of
the pavement.
2. Turn the steering wheel about one-eighth of a turn, until the right front
tire contacts the pavement edge.
3. Turn the steering wheel to go straight down the roadway.
Loss of Control
Skidding
There are three types of skids that
correspond to the vehicle's three control
systems:
.Braking Skid —wheels are not rolling.
.Steering or Cornering Skid —too much
speed or steering in a curve causes tires
to slip and lose cornering force.
.Acceleration Skid —too much throttle
causes the driving wheels to spin.
Defensive drivers avoid most skids by taking
reasonable care suited to existing conditions,
and by not overdriving those conditions. But
skids are always possible.
If the vehicle starts to slide, follow these
suggestions:
.Ease your foot off the accelerator pedal
and steer the way you want the vehicle
to go. The vehicle may straighten out. Be
ready for a second skid if it occurs.
Page 204 of 433
Chevrolet Silverado 2500 HD/3500 HD Owner Manual (GMNA-Localizing-U.
S./Canada/Mexico-16908339) - 2024 - CRC - 12/12/22
202 Driving and Operating
{Warning
Coasting downhill in N (Neutral) or with
the ignition off is dangerous. This can
cause overheating of the brakes and loss
of steering assist. Always have the engine
running and the vehicle in gear.
.Drive at speeds that keep the vehicle in
its own lane. Do not swing wide or cross
the center line.
.Be alert on top of hills; something could
be in your lane (e.g., stalled car, crash).
.Pay attention to special road signs (e.g.,
falling rocks area, winding roads, long
grades, passing or no-passing zones) and
take appropriate action.
Winter Driving
Driving on Snow or IceCaution
To avoid damage to the wheels and
brake components, always clear snow and
ice from inside the wheels and
underneath the vehicle before driving. Snow or ice between the tires and the road
creates less traction or grip, so drive
carefully. Wet ice can occur at about 0 °C
(32 °F) when freezing rain begins to fall.
Avoid driving on wet ice or in freezing rain
until roads can be treated.
For Slippery Road Driving:
.Accelerate gently. Accelerating too quickly
causes the wheels to spin and makes the
surface under the tires slick.
.Turn on Traction Control. See
Traction
Control/Electronic Stability Control 0230.
.The Antilock Brake System (ABS) improves
vehicle stability during hard stops, but
the brakes should be applied sooner than
when on dry pavement. See Antilock
Brake System (ABS) 0227.
.Allow greater following distance and
watch for slippery spots. Icy patches can
occur on otherwise clear roads in shaded
areas. The surface of a curve or an
overpass can remain icy when the
surrounding roads are clear. Avoid sudden
steering maneuvers and braking while
on ice.
.Turn off cruise control.
Cold Weather Mode
In very low temperatures, a cold weather
message may display on the Driver
Information Center (DIC). The engine speed,
transmission shift patterns, and cabin fan
speed may operate differently to enable the
vehicle to warm up quicker. You can
manually override the cabin fan speed in
cold weather mode.
Blizzard Conditions
Stop the vehicle in a safe place and signal
for help. Stay with the vehicle unless there
is help nearby. If possible, use Roadside
Assistance. See Roadside Assistance Program
0 402. To get help and keep everyone in
the vehicle safe:
.Turn on the hazard warning flashers.
.Tie a red cloth to an outside mirror.
{Warning
Snow can trap engine exhaust under the
vehicle. This may cause exhaust gases to
get inside. Engine exhaust contains
carbon monoxide (CO), which cannot be
seen or smelled. It can cause
unconsciousness and even death.
(Continued)
Page 229 of 433
Chevrolet Silverado 2500 HD/3500 HD Owner Manual (GMNA-Localizing-U.
S./Canada/Mexico-16908339) - 2024 - CRC - 12/12/22
Driving and Operating 227
flashing until the shift request has
completed. A DIC message displays to
indicate the state of the request.
Once the 4x4 shift has completed, the
DIC message disappears, the
4x4 indicator stops flashing, and the
current setting is indicated.
If vehicle speed is higher when shift
request occurs, a DIC message displays.
Reduce vehicle speed.
If the transmission is not in N (Neutral)
when shift request occurs, DIC messages will
display. The vehicle will allow 20 seconds for
this shift to occur. After this time, a
indicator in the instrument cluster will
indicate that the transfer case is in 4
n.
Caution
Shifting the transmission into gear before
the requested mode indicator light has
stopped flashing could damage the
transfer case.
If the transmission is not shifted into
N (Neutral) or the vehicle has not slowed to
5 km/h (3 mph) within 20 seconds, the
transfer case will remain in its original state.
This will be indicated in the instrument
cluster. With the vehicle moving less than 5 km/h
(3 mph), and the transmission in N (Neutral),
attempt the shift again.
Shifting Into N (Neutral)
To shift into N (Neutral):
1. Start the vehicle.
2. Shift the transmission to N (Neutral).
3. Shift the transfer case to 2
m.
4. Apply the parking brake and/or brake pedal.
5. Press 2
mfive times in 10 seconds until
the N (Neutral) indicator starts flashing in
the instrument cluster. When the shift is
complete, the indicator stops flashing.
If the parking brake and/or brake pedal
is not applied within 20 seconds, the
transfer case will remain in the original
state.
6. If the transmission is not shifted into N (Neutral) or the vehicle has not slowed
to 5 km/h (3 mph) within 20 seconds,
the transfer case will remain in its
original state. This will be indicated in
the instrument cluster. Shifting Out of N (Neutral)
To shift out of N (Neutral):
1. Turn the ignition on with the engine off. See Ignition Positions 0211.
2. Set the parking brake. See Electric
Parking Brake 0228.
3. Shift the transmission to N (Neutral).
4. Shift the transfer case to 2
m. Transfer
case shifts out of N (Neutral) can only be
made into 2
m. When the shift to 2mis
complete, the indicator in the instrument
cluster will stop flashing. If the transfer
case cannot complete a shift, the
indicator will return to the previously
selected setting.
Brakes
Antilock Brake System (ABS)
The Antilock Brake System (ABS) helps
prevent a braking skid and maintain steering
while braking hard.
ABS performs a system check when the
vehicle is first driven. A momentary motor
or clicking noise may be heard while this
test is going on, and the brake pedal may
move slightly. This is normal.
Page 230 of 433
Chevrolet Silverado 2500 HD/3500 HD Owner Manual (GMNA-Localizing-U.
S./Canada/Mexico-16908339) - 2024 - CRC - 12/12/22
228 Driving and Operating
If there is a problem with ABS, this warning
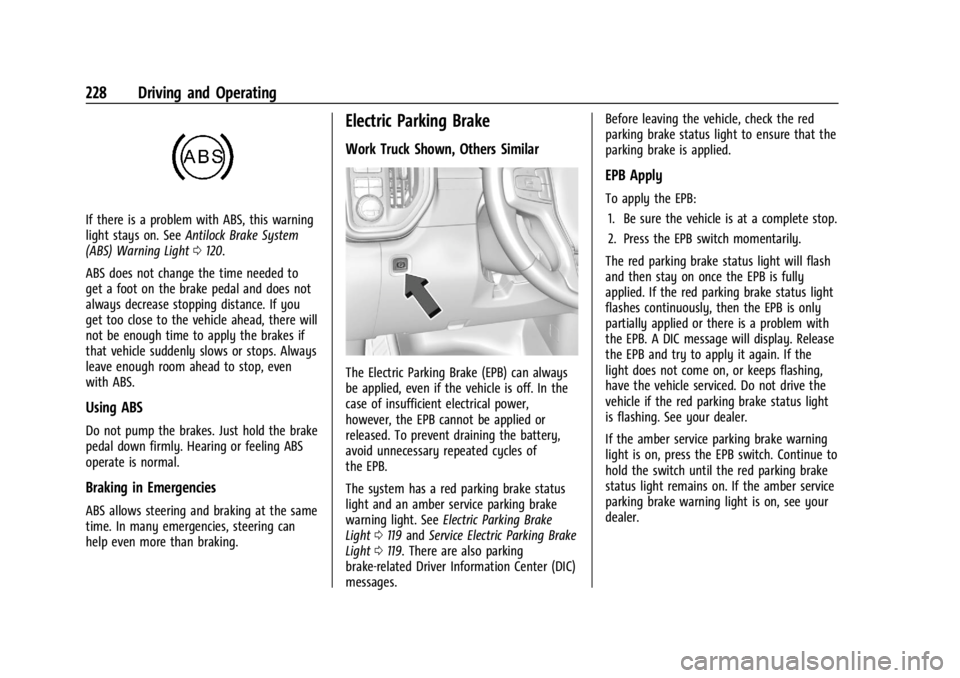
light stays on. SeeAntilock Brake System
(ABS) Warning Light 0120.
ABS does not change the time needed to
get a foot on the brake pedal and does not
always decrease stopping distance. If you
get too close to the vehicle ahead, there will
not be enough time to apply the brakes if
that vehicle suddenly slows or stops. Always
leave enough room ahead to stop, even
with ABS.
Using ABS
Do not pump the brakes. Just hold the brake
pedal down firmly. Hearing or feeling ABS
operate is normal.
Braking in Emergencies
ABS allows steering and braking at the same
time. In many emergencies, steering can
help even more than braking.
Electric Parking Brake
Work Truck Shown, Others Similar
The Electric Parking Brake (EPB) can always
be applied, even if the vehicle is off. In the
case of insufficient electrical power,
however, the EPB cannot be applied or
released. To prevent draining the battery,
avoid unnecessary repeated cycles of
the EPB.
The system has a red parking brake status
light and an amber service parking brake
warning light. See Electric Parking Brake
Light 0119 and Service Electric Parking Brake
Light 0119. There are also parking
brake-related Driver Information Center (DIC)
messages. Before leaving the vehicle, check the red
parking brake status light to ensure that the
parking brake is applied.
EPB Apply
To apply the EPB:
1. Be sure the vehicle is at a complete stop.
2. Press the EPB switch momentarily.
The red parking brake status light will flash
and then stay on once the EPB is fully
applied. If the red parking brake status light
flashes continuously, then the EPB is only
partially applied or there is a problem with
the EPB. A DIC message will display. Release
the EPB and try to apply it again. If the
light does not come on, or keeps flashing,
have the vehicle serviced. Do not drive the
vehicle if the red parking brake status light
is flashing. See your dealer.
If the amber service parking brake warning
light is on, press the EPB switch. Continue to
hold the switch until the red parking brake
status light remains on. If the amber service
parking brake warning light is on, see your
dealer.
Page 231 of 433
Chevrolet Silverado 2500 HD/3500 HD Owner Manual (GMNA-Localizing-U.
S./Canada/Mexico-16908339) - 2024 - CRC - 12/12/22
Driving and Operating 229
If the EPB is applied while the vehicle is
moving, the vehicle will decelerate as long
as the switch is pressed. If the switch is
pressed until the vehicle comes to a stop,
the EPB will remain applied.
The vehicle may automatically apply the EPB
in some situations when the vehicle is not
moving. This is normal, and is done to
periodically check the correct operation of
the EPB system, or at the request of other
safety functions that utilize the EPB.
If the EPB fails to apply, block the rear
wheels to prevent vehicle movement.
EPB Release
To release the EPB:1. Turn the ignition on or to accessory mode.
2. Apply and hold the brake pedal.
3. Press the EPB switch momentarily.
The EPB is released when the red parking
brake status light is off.
If the amber service parking brake warning
light is on, release the EPB by pressing and
holding the EPB switch. Continue to hold the
switch until the red parking brake status
light is off. If either light stays on after
release is attempted, see your dealer.
Caution
Driving with the parking brake on can
overheat the brake system and cause
premature wear or damage to brake
system parts. Make sure that the parking
brake is fully released and the brake
warning light is off before driving.
If you are towing a trailer and parking on a
hill, see Driving Characteristics and Towing
Tips 0270.
Automatic EPB Release
The EPB will automatically release if the
vehicle is running, placed into gear, and an
attempt is made to drive away. Avoid rapid
acceleration when the EPB is applied, to
preserve parking brake lining life.
Brake Assist
Brake Assist detects rapid brake pedal
applications due to emergency braking
situations and provides additional braking to
activate the Antilock Brake System (ABS) if
the brake pedal is not pushed hard enough
to activate ABS normally. Minor noise, brake
pedal pulsation, and/or pedal movement
during this time may occur. Continue to apply the brake pedal as the driving
situation dictates. Brake Assist disengages
when the brake pedal is released.
Hill Start Assist (HSA)
{Warning
Do not rely on the HSA feature. HSA does
not replace the need to pay attention
and drive safely. You may not hear or
feel alerts or warnings provided by this
system. Failure to use proper care when
driving may result in injury, death,
or vehicle damage. See
Defensive Driving
0 194.
When the vehicle is stopped on a grade, Hill
Start Assist (HSA) prevents the vehicle from
rolling in an unintended direction during the
transition from brake pedal release to
accelerator pedal apply. The brakes release
when the accelerator pedal is applied. If the
accelerator pedal is not applied within a few
minutes, the Electric Parking Brake will
apply. The brakes may also release under
other conditions. Do not rely on HSA to hold
the vehicle.