seats CHEVROLET SILVERADO 2024 Owners Manual
[x] Cancel search | Manufacturer: CHEVROLET, Model Year: 2024, Model line: SILVERADO, Model: CHEVROLET SILVERADO 2024Pages: 433, PDF Size: 14.15 MB
Page 3 of 433
Chevrolet Silverado 2500 HD/3500 HD Owner Manual (GMNA-Localizing-U.
S./Canada/Mexico-16908339) - 2024 - CRC - 12/5/22
Contents
Introduction . . . . . . . . . . . . . . . . . . . . . . . . . . . . . . 1
Keys, Doors, and Windows . . . . . . . . . . . . . . . 11
Seats and Restraints . . . . . . . . . . . . . . . . . . . . . 43
Storage . . . . . . . . . . . . . . . . . . . . . . . . . . . . . . . . . 94
Instruments and Controls . . . . . . . . . . . . . . . 99
Lighting . . . . . . . . . . . . . . . . . . . . . . . . . . . . . . . . 138
Infotainment System . . . . . . . . . . . . . . . . . . . 148
Climate Controls . . . . . . . . . . . . . . . . . . . . . . . . 185
Driving and Operating . . . . . . . . . . . . . . . . . . 192
Vehicle Care . . . . . . . . . . . . . . . . . . . . . . . . . . . . 303
Service and Maintenance . . . . . . . . . . . . . . . 387
Technical Data . . . . . . . . . . . . . . . . . . . . . . . . . 395
Customer Information . . . . . . . . . . . . . . . . . . 399
Reporting Safety Defects . . . . . . . . . . . . . . . 407
OnStar . . . . . . . . . . . . . . . . . . . . . . . . . . . . . . . . . 410
Connected Services . . . . . . . . . . . . . . . . . . . . . 415
Index . . . . . . . . . . . . . . . . . . . . . . . . . . 418
Introduction
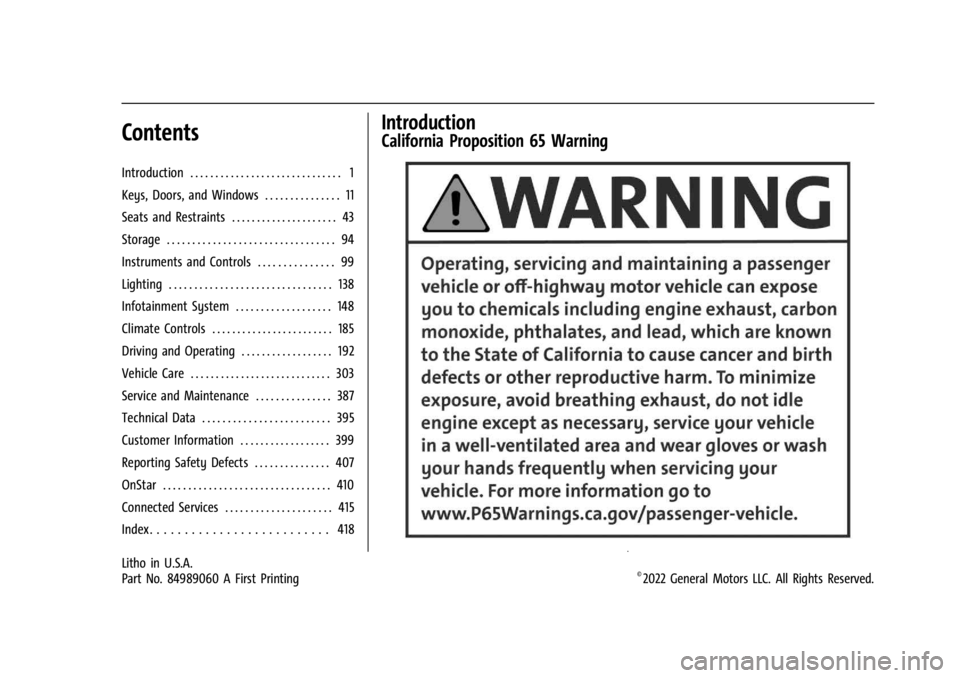
California Proposition 65 Warning
Litho in U.S.A.
Part No. 84989060 A First Printing©2022 General Motors LLC. All Rights Reserved.
Page 11 of 433

Chevrolet Silverado 2500 HD/3500 HD Owner Manual (GMNA-Localizing-U.
S./Canada/Mexico-16908339) - 2024 - CRC - 12/5/22
Introduction 9
1.Head-Up Display (HUD) 0130 (If
Equipped).
2. Air Vents 0190.
3. Turn Signal Lever. See Turn and
Lane-Change Signals 0142.
Windshield Wiper/Washer 0101.
4. Instrument Cluster (Base Level) 0107 or
Instrument Cluster (Uplevel) 0108.
5. Shift Lever. See Automatic Transmission
0 218.
Range Selection Mode. See Manual Mode
0 220.
6. Infotainment System. See Overview
(Uplevel Radio) 0150 or
Overview (Base Radio) 0149.
7. Light Sensor. See Automatic Headlamp
System 0140.
Vehicle Alarm System. See Vehicle
Security 029.
8. Upper Glove Box. See Glove Box094.
9. Lower Glove Box. See Glove Box094.
10. Upper Glove Box Button. See Glove Box
0 94.
11. Power Release Tailgate (If Equipped). See Tailgate 021.
Hazard Warning Flashers 0141. Traction Control/Electronic Stability
Control
0230.
Hill Descent Control Switch (If Equipped).
See Hill Descent Control (HDC) 0231.
Power Assist Steps 028 (If Equipped).
Express Window Down Button (If
Equipped). See Power Windows 039.
Tow/Haul Mode 0221 (On Some
Models).
Exhaust Brake (If Equipped). See Duramax
Diesel Supplement.
Power Take-Off (PTO) (If Equipped). See
Duramax Diesel Supplement.
12. USB Port 0158.
13. Climate Control Systems 0185 (If
Equipped).
Dual Automatic Climate Control System
0 187 (If Equipped).
Heated and Ventilated Front Seats 050
(If Equipped).
14. Front Center Console Storage.
15. Cupholders 094.
16. Trailer Brake Control Panel (If Equipped). See“Integrated Trailer Brake Control
System” underTowing Equipment 0278. 17. ENGINE START/STOP. See
Ignition
Positions 0211.
18. Steering Wheel Controls 0151.
Driver Information Center (DIC) Controls.
See Driver Information Center (DIC) (Base
Level) 0126 or
Driver Information Center (DIC) (Uplevel)
0 128.
19. Horn 0101.
20. Steering Wheel Adjustment 0100 (Out
of View).
21. Hood Release. See Hood0305.
22. Cruise Control 0233.
Adaptive Cruise Control (Camera) 0235
(If Equipped).
Forward Collision Alert (FCA) System
0 257 (If Equipped).
Heated Steering Wheel 0100 (If
Equipped).
23. Fog Lamps 0142 (If Equipped).
Instrument Panel Illumination Control
0 144.
Exterior Cargo Lamps 0144.
Exterior Lamp Controls 0138.
Task Lighting 0143 (If Equipped).
Page 14 of 433
Chevrolet Silverado 2500 HD/3500 HD Owner Manual (GMNA-Localizing-U.
S./Canada/Mexico-16908339) - 2024 - CRC - 12/5/22
12 Keys, Doors, and Windows
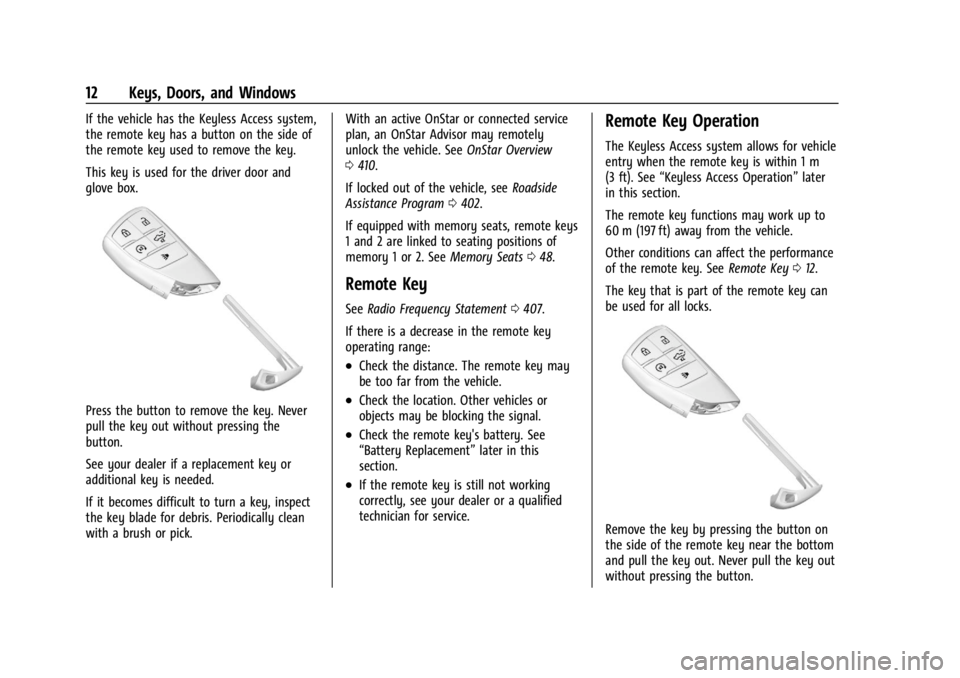
If the vehicle has the Keyless Access system,
the remote key has a button on the side of
the remote key used to remove the key.
This key is used for the driver door and
glove box.
Press the button to remove the key. Never
pull the key out without pressing the
button.
See your dealer if a replacement key or
additional key is needed.
If it becomes difficult to turn a key, inspect
the key blade for debris. Periodically clean
with a brush or pick.With an active OnStar or connected service
plan, an OnStar Advisor may remotely
unlock the vehicle. See
OnStar Overview
0 410.
If locked out of the vehicle, see Roadside
Assistance Program 0402.
If equipped with memory seats, remote keys
1 and 2 are linked to seating positions of
memory 1 or 2. See Memory Seats048.
Remote Key
See Radio Frequency Statement 0407.
If there is a decrease in the remote key
operating range:
.Check the distance. The remote key may
be too far from the vehicle.
.Check the location. Other vehicles or
objects may be blocking the signal.
.Check the remote key's battery. See
“Battery Replacement” later in this
section.
.If the remote key is still not working
correctly, see your dealer or a qualified
technician for service.
Remote Key Operation
The Keyless Access system allows for vehicle
entry when the remote key is within 1 m
(3 ft). See “Keyless Access Operation” later
in this section.
The remote key functions may work up to
60 m (197 ft) away from the vehicle.
Other conditions can affect the performance
of the remote key. See Remote Key012.
The key that is part of the remote key can
be used for all locks.
Remove the key by pressing the button on
the side of the remote key near the bottom
and pull the key out. Never pull the key out
without pressing the button.
Page 16 of 433
Chevrolet Silverado 2500 HD/3500 HD Owner Manual (GMNA-Localizing-U.
S./Canada/Mexico-16908339) - 2024 - CRC - 12/5/22
14 Keys, Doors, and Windows
Press and hold7for more than
three seconds to activate the panic alarm.
The turn signal lamps flash and the horn
sounds repeatedly for 30 seconds. The alarm
turns off when the ignition is turned on or
7is pressed again. The ignition must be off
for the panic alarm to work.
Keyless Access Operation
The Keyless Access system allows for doors
and the tailgate to be accessed without
pressing the remote key button. The remote
key must be within 1 m (3 ft) of the tailgate
or door being opened. If the vehicle has this
feature, there will be a button on the
outside door handles.
Keyless Access can be programmed to
unlock all doors on the first lock/unlock
press from the driver door. Keyless
Unlocking can also be turned off. To view
available settings from the infotainment
screen, touch Settings > Vehicle > Remote
Lock, Unlock, Start.
If equipped with memory seats, remote keys
1 and 2 are linked to seating positions of
memory 1 or 2. See Memory Seats048. Keyless Unlocking/Locking from the
Driver Door
When the doors are locked and the remote
key is within 1 m (3 ft) of the door handle,
pressing the lock/unlock button on the
driver door handle will unlock the driver
door. If the lock/unlock button is pressed
again within five seconds, all passenger
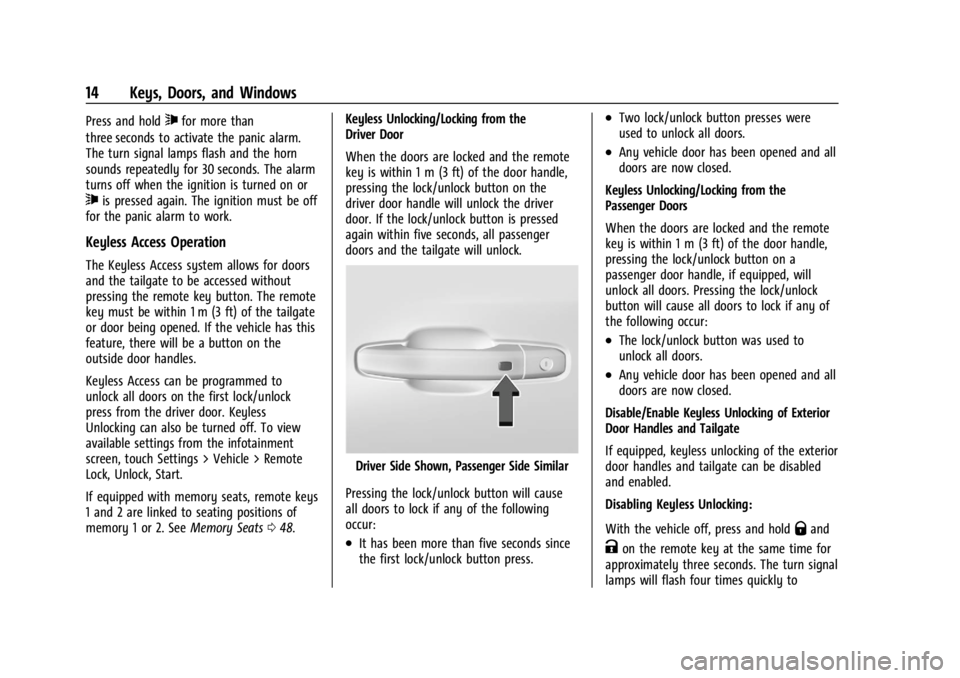
doors and the tailgate will unlock.
Driver Side Shown, Passenger Side Similar
Pressing the lock/unlock button will cause
all doors to lock if any of the following
occur:
.It has been more than five seconds since
the first lock/unlock button press.
.Two lock/unlock button presses were
used to unlock all doors.
.Any vehicle door has been opened and all
doors are now closed.
Keyless Unlocking/Locking from the
Passenger Doors
When the doors are locked and the remote
key is within 1 m (3 ft) of the door handle,
pressing the lock/unlock button on a
passenger door handle, if equipped, will
unlock all doors. Pressing the lock/unlock
button will cause all doors to lock if any of
the following occur:
.The lock/unlock button was used to
unlock all doors.
.Any vehicle door has been opened and all
doors are now closed.
Disable/Enable Keyless Unlocking of Exterior
Door Handles and Tailgate
If equipped, keyless unlocking of the exterior
door handles and tailgate can be disabled
and enabled.
Disabling Keyless Unlocking:
With the vehicle off, press and hold
Qand
Kon the remote key at the same time for
approximately three seconds. The turn signal
lamps will flash four times quickly to
Page 20 of 433
Chevrolet Silverado 2500 HD/3500 HD Owner Manual (GMNA-Localizing-U.
S./Canada/Mexico-16908339) - 2024 - CRC - 12/5/22
18 Keys, Doors, and Windows
4. Pull the seal by pulling on the tab toaccess the battery.
5. Remove the old battery. Do not use a metal object.
6. Insert the new battery, positive side facing up. Replace with a CR2450 or
equivalent battery.
7. Place the seal back into the groove around the battery compartment.
8. Replace the battery cover by snapping it back into the remote key.
9. Reinsert the mechanical key.
Remote Vehicle Start
If equipped with the remote start feature,
the climate control system will come on
when the vehicle is started remotely,
depending on the outside temperature.
The rear defog and heated and ventilated
seats, if equipped, may also come on. See
Heated and Ventilated Front Seats 050. To
view available settings from the
infotainment screen, touch Settings >
Vehicle > Comfort and Convenience.
If equipped, the automatic heated steering
wheel may also come on. See Heated
Steering Wheel 0100. Laws in some communities may restrict the
use of remote starters. Check local
regulations for any requirements on remote
starting of vehicles.
Do not use remote start if the vehicle is low
on fuel. The vehicle may run out of fuel.
The vehicle cannot be remote started if:
.The remote key is inside the vehicle or if
the key is in the ignition.
.The hood is not closed.
.There is an emission control system
malfunction and the lamp is on.
.The ignition is in any mode other
than off.
.The hazard warning flashers are on.
.The 30 minutes of engine run time have
been used.
.The vehicle is not in P (Park).
The engine will turn off during a remote
vehicle start if:
.The coolant temperature gets too high.
.The oil pressure gets low.
The remote key range may be reduced
while the vehicle is running.
Other conditions can affect the performance
of the remote key. See Remote Key012. Starting the Engine Using Remote Start
Press
Stwice on the remote key. The turn
signal lamps will flash. The lamps flash to
confirm the request to remote start the
vehicle has been received. During the
remote start the parking lamps will remain
on as long as the engine is running.
The engine will shut off after 15 minutes or
after the remainder of the 30 minute total
running time is used, unless you stop the
remote start before engine running has
completed or the vehicle is turned on.
Press the brake pedal and turn the ignition
on to drive the vehicle.
Total Engine Run Time
Remote start can be used for up to
30 minutes of total engine run time.
After two remote starts of 15 minutes,
or multiple shorter time starts totaling
30 minutes have been used, the vehicle
must be started and then turned off before
the remote start can be used again.
Canceling a Remote Start
To cancel a remote start, do one of the
following:
.PressS. The parking lamps will turn off.
Page 35 of 433
Chevrolet Silverado 2500 HD/3500 HD Owner Manual (GMNA-Localizing-U.
S./Canada/Mexico-16908339) - 2024 - CRC - 12/5/22
Keys, Doors, and Windows 33
To adjust each mirror:1. Press
jor|to select the driver or
passenger side mirror. The indicator light
will illuminate.
2. Press the arrows on the control pad to move the mirror in the desired direction.
3. Adjust each outside mirror so that a little of the vehicle and the area behind it can
be seen.
4. Press
jor|again to deselect the
mirror.
Turn Signal Indicator
If equipped, the mirror has turn signal
indicator lights, which flash in the direction
of the turn or lane change.
Task Lighting
If equipped, task lighting projects light from
the outside mirrors to the sides of the
vehicle. See Task Lighting 0143.
Puddle Lamps
If equipped, puddle lamps project light from
the bottom of the mirror to the area of
ground below the driver and passenger
doors. See Entry Lighting 0146 and
Exit Lighting 0146. Memory Mirrors
The vehicle may have memory mirrors. See
Memory Seats
048.
Lane Change Alert (LCA)
The vehicle may have LCA. See Lane Change
Alert (LCA) 0262.
Folding Mirrors
Manual Folding Mirrors
If equipped, push the mirror toward the
vehicle to fold. Push the mirror outward to
return to its original position.
Manually fold the mirrors inward to prevent
damage when going through an automatic
car wash.
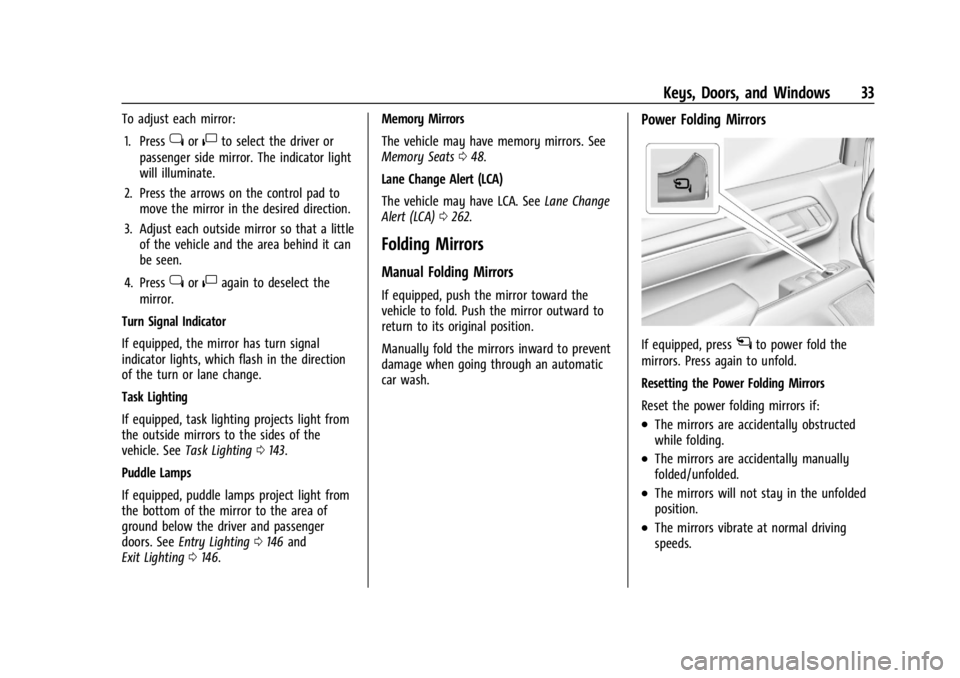
Power Folding Mirrors
If equipped, pressgto power fold the
mirrors. Press again to unfold.
Resetting the Power Folding Mirrors
Reset the power folding mirrors if:
.The mirrors are accidentally obstructed
while folding.
.The mirrors are accidentally manually
folded/unfolded.
.The mirrors will not stay in the unfolded
position.
.The mirrors vibrate at normal driving
speeds.
Page 37 of 433
Chevrolet Silverado 2500 HD/3500 HD Owner Manual (GMNA-Localizing-U.
S./Canada/Mexico-16908339) - 2024 - CRC - 12/5/22
Keys, Doors, and Windows 35
1. When the approaching vehicle is a longdistance away, the image in the main
mirror is small and near the inboard
edge of the mirror.
2. As the vehicle gets closer, the image in the main mirror gets larger and moves
outboard.
3. As the vehicle enters the blind zone, the image transitions from the main mirror
to the blind spot mirror.
4. When the vehicle is in the blind zone, the image only appears in the blind spot
mirror.
Using the Outside Mirror with the Blind
Spot Mirror
1. Set the main mirror so that the side ofthe vehicle can just be seen and the
blind spot mirror has an
unobstructed view.
2. When checking for traffic or before changing a lane, look at the main driver/
passenger side mirror to observe traffic
in the adjacent lane, behind your vehicle.
Check the blind spot mirror for a vehicle
in the blind zone. Then, glance over your
shoulder to double check before moving
slowly into the adjacent lane.
Reverse Tilt Mirrors
If equipped with reverse tilt mirrors and
memory seats, the passenger and/or driver
mirror tilts to a preselected position when
the vehicle is in R (Reverse). This allows the
curb to be seen when parallel parking.
The mirror(s) may move from their tilted
position when:
.The vehicle is shifted out of R (Reverse),
or remains in R (Reverse) for about
30 seconds.
.The vehicle is turned off.
.The vehicle is driven in R (Reverse) above
a set speed.
To view available settings from the
infotainment screen, touch Settings >
Vehicle > Comfort and Convenience.
Interior Mirrors
Interior Rearview Mirrors
Adjust the rearview mirror for a clear view
of the area behind your vehicle.
Do not spray glass cleaner directly on the
mirror. Use a soft towel dampened with
water.
Manual Rearview Mirror
If equipped, push the tab forward for
daytime use and pull it rearward for
nighttime use to avoid glare from the
headlamps from behind.
Automatic Dimming Rearview
Mirror
If equipped, the mirror will automatically
reduce the glare of the headlamps from
behind. The dimming feature comes on each
time the vehicle is started.
Rear Camera Mirror
If equipped, this automatic dimming mirror
provides a wide angle camera view of the
area behind the vehicle.
Page 45 of 433
Chevrolet Silverado 2500 HD/3500 HD Owner Manual (GMNA-Localizing-U.
S./Canada/Mexico-16908339) - 2024 - CRC - 12/5/22
Seats and Restraints 43
Seats and Restraints
Head Restraints
Head Restraints . . . . . . . . . . . . . . . . . . . . . . . . 44
Front Seats
Seat Adjustment . . . . . . . . . . . . . . . . . . . . . . . . 45
Center Seat . . . . . . . . . . . . . . . . . . . . . . . . . . . . . 45
Power Seat Adjustment . . . . . . . . . . . . . . . . 46
Reclining Seatbacks . . . . . . . . . . . . . . . . . . . . . 46
Lumbar Adjustment . . . . . . . . . . . . . . . . . . . . 47
Memory Seats . . . . . . . . . . . . . . . . . . . . . . . . . 48
Heated and Ventilated Front Seats . . . . . 50
Rear Seats
Rear Seats . . . . . . . . . . . . . . . . . . . . . . . . . . . . . . 51
Heated Rear Seats . . . . . . . . . . . . . . . . . . . . . . 52
Seat Belts
Seat Belts . . . . . . . . . . . . . . . . . . . . . . . . . . . . . . 53
Buckle To Drive . . . . . . . . . . . . . . . . . . . . . . . . . 54
How to Wear Seat Belts Properly . . . . . . 54
Lap-Shoulder Belt . . . . . . . . . . . . . . . . . . . . . . . 56
Seat Belt Use During Pregnancy . . . . . . . . 59
Seat Belt Extender . . . . . . . . . . . . . . . . . . . . . . 59
Safety System Check . . . . . . . . . . . . . . . . . . . 59
Seat Belt Care . . . . . . . . . . . . . . . . . . . . . . . . . . 60
Replacing Seat Belt System Parts after aCrash . . . . . . . . . . . . . . . . . . . . . . . . . . . . . . . . . 60
Airbag System
Airbag System . . . . . . . . . . . . . . . . . . . . . . . . . 60
Where Are the Airbags? . . . . . . . . . . . . . . . . 62
When Should an Airbag Inflate? . . . . . . . . 63
What Makes an Airbag Inflate? . . . . . . . . 64
How Does an Airbag Restrain? . . . . . . . . . 64
What Will You See after an AirbagInflates? . . . . . . . . . . . . . . . . . . . . . . . . . . . . . . 64
Passenger Sensing System . . . . . . . . . . . . . 65
Servicing the Airbag-Equipped Vehicle . . . . . . . . . . . . . . . . . . . . . . . . . . . . . . . 69
Adding Equipment to the Airbag-Equipped Vehicle . . . . . . . . . . . . . . 69
Airbag System Check . . . . . . . . . . . . . . . . . . . 70
Replacing Airbag System Parts after a Crash . . . . . . . . . . . . . . . . . . . . . . . . . . . . . . . . . 70
Child Restraints
Older Children . . . . . . . . . . . . . . . . . . . . . . . . . . 71
Infants and Young Children . . . . . . . . . . . . . 72
Child Restraint Systems . . . . . . . . . . . . . . . . 74
Where to Put the Restraint . . . . . . . . . . . . . 76
Lower Anchors and Tethers for Children(LATCH System) . . . . . . . . . . . . . . . . . . . . . . . 77
Replacing LATCH System Parts After a Crash . . . . . . . . . . . . . . . . . . . . . . . . . . . . . . . . . 87
Securing Child Restraints (With the Seat Belt in the Rear Seat) . . . . . . . . . . . . . . . . . 87 Securing Child Restraints (With the Seat
Belt in the Front Passenger Seat) . . . . . 91
Securing Child Restraints (With the Seat Belt in the Center Front Seat) . . . . . . . . 93
Page 46 of 433
Chevrolet Silverado 2500 HD/3500 HD Owner Manual (GMNA-Localizing-U.
S./Canada/Mexico-16908339) - 2024 - CRC - 12/5/22
44 Seats and Restraints
Head Restraints{
Warning
With head restraints that are not
installed and adjusted properly, there is a
greater chance that occupants will suffer
a neck/spinal injury in a crash. Do not
drive until the head restraints for all
occupants are installed and adjusted
properly.
Front Seats
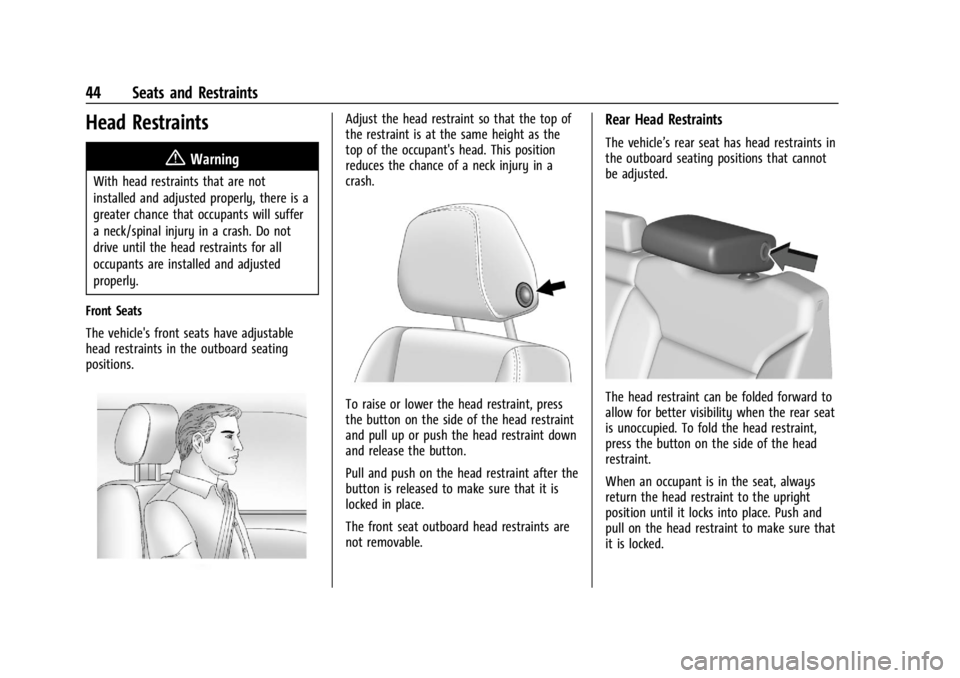
The vehicle's front seats have adjustable
head restraints in the outboard seating
positions.
Adjust the head restraint so that the top of
the restraint is at the same height as the
top of the occupant's head. This position
reduces the chance of a neck injury in a
crash.
To raise or lower the head restraint, press
the button on the side of the head restraint
and pull up or push the head restraint down
and release the button.
Pull and push on the head restraint after the
button is released to make sure that it is
locked in place.
The front seat outboard head restraints are
not removable.
Rear Head Restraints
The vehicle’s rear seat has head restraints in
the outboard seating positions that cannot
be adjusted.
The head restraint can be folded forward to
allow for better visibility when the rear seat
is unoccupied. To fold the head restraint,
press the button on the side of the head
restraint.
When an occupant is in the seat, always
return the head restraint to the upright
position until it locks into place. Push and
pull on the head restraint to make sure that
it is locked.
Page 47 of 433
Chevrolet Silverado 2500 HD/3500 HD Owner Manual (GMNA-Localizing-U.
S./Canada/Mexico-16908339) - 2024 - CRC - 12/5/22
Seats and Restraints 45
If you are installing a child restraint in the
rear seat, seeLower Anchors and Tethers for
Children (LATCH System) 077.
Center Headrest
The vehicle’s rear seat may be equipped
with a headrest in the center seating
position that cannot be adjusted.
If you are installing a child restraint in the
rear seat, see Lower Anchors and Tethers for
Children (LATCH System) 077.
Front Seats
Seat Adjustment
{Warning
You can lose control of the vehicle if you
try to adjust a driver seat while the
vehicle is moving. Adjust the driver seat
only when the vehicle is not moving.
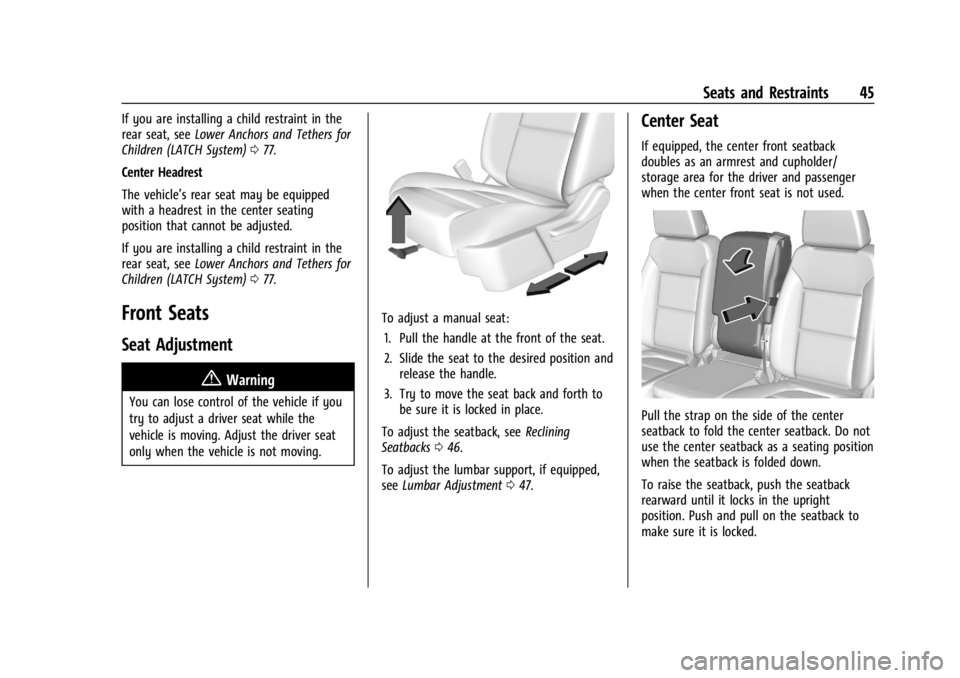
To adjust a manual seat:
1. Pull the handle at the front of the seat.
2. Slide the seat to the desired position and release the handle.
3. Try to move the seat back and forth to be sure it is locked in place.
To adjust the seatback, see Reclining
Seatbacks 046.
To adjust the lumbar support, if equipped,
see Lumbar Adjustment 047.
Center Seat
If equipped, the center front seatback
doubles as an armrest and cupholder/
storage area for the driver and passenger
when the center front seat is not used.
Pull the strap on the side of the center
seatback to fold the center seatback. Do not
use the center seatback as a seating position
when the seatback is folded down.
To raise the seatback, push the seatback
rearward until it locks in the upright
position. Push and pull on the seatback to
make sure it is locked.