seat memory CHEVROLET SILVERADO 2500 2022 Owners Manual
[x] Cancel search | Manufacturer: CHEVROLET, Model Year: 2022, Model line: SILVERADO 2500, Model: CHEVROLET SILVERADO 2500 2022Pages: 441, PDF Size: 14.4 MB
Page 9 of 441
Chevrolet Silverado 2500 HD/3500 HD Owner Manual (GMNA-Localizing-U.
S./Canada/Mexico-15546003) - 2022 - CRC - 5/12/21
8 Keys, Doors, and Windows
{Warning
If the key is unintentionally rotated while
the vehicle is running, the ignition could
be moved out of the RUN position. This
could be caused by heavy items hanging
from the key ring, or by large or long
items attached to the key ring that could
be contacted by the driver or steering
wheel. If the ignition moves out of the
RUN position, the engine will shut off,
braking and steering power assist may be
impacted, and airbags may not deploy.
To reduce the risk of unintentional
rotation of the ignition key, do not
change the way the ignition key and
Remote Keyless Entry (RKE) transmitter,
if equipped, are connected to the
provided key rings.
The ignition key and key rings, and RKE
transmitter, if equipped, are designed to
work together as a system to reduce the
risk of unintentionally moving the key out
of the RUN position. The ignition key has a
small hole to allow attachment of the
provided key ring. It is important that any replacement ignition keys have a small hole.
See your dealer if a replacement key is
required.
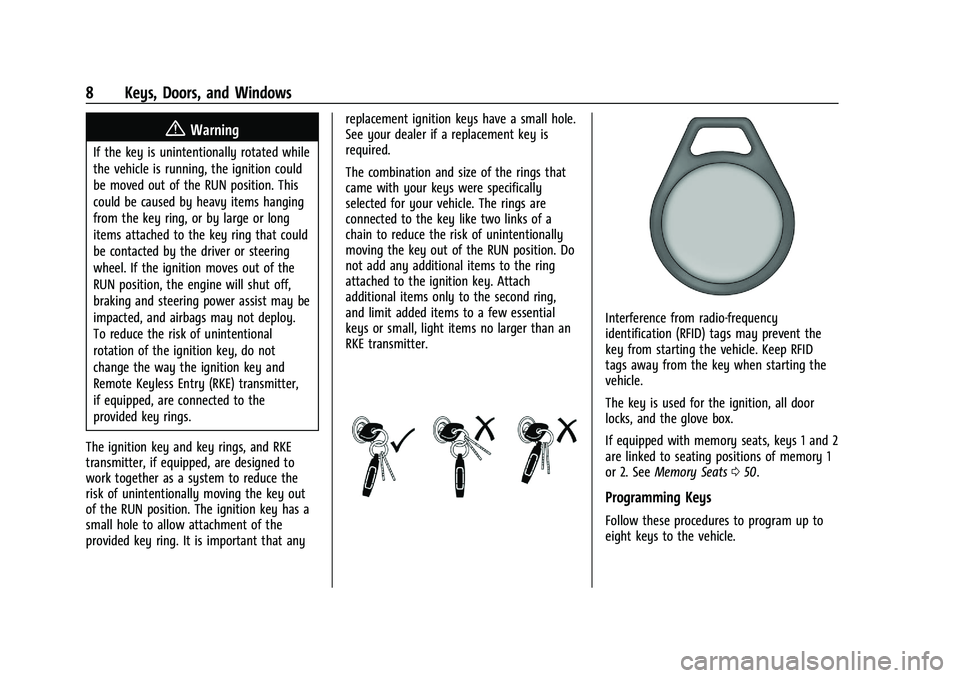
The combination and size of the rings that
came with your keys were specifically
selected for your vehicle. The rings are
connected to the key like two links of a
chain to reduce the risk of unintentionally
moving the key out of the RUN position. Do
not add any additional items to the ring
attached to the ignition key. Attach
additional items only to the second ring,
and limit added items to a few essential
keys or small, light items no larger than an
RKE transmitter.
Interference from radio-frequency
identification (RFID) tags may prevent the
key from starting the vehicle. Keep RFID
tags away from the key when starting the
vehicle.
The key is used for the ignition, all door
locks, and the glove box.
If equipped with memory seats, keys 1 and 2
are linked to seating positions of memory 1
or 2. See
Memory Seats 050.
Programming Keys
Follow these procedures to program up to
eight keys to the vehicle.
Page 11 of 441
Chevrolet Silverado 2500 HD/3500 HD Owner Manual (GMNA-Localizing-U.
S./Canada/Mexico-15546003) - 2022 - CRC - 5/12/21
10 Keys, Doors, and Windows
Warning (Continued)
with the RKE transmitter in the vehicle,
and children or others could be caught in
the path of a closing window. Do not
leave children in a vehicle with the
ignition key or an RKE transmitter.
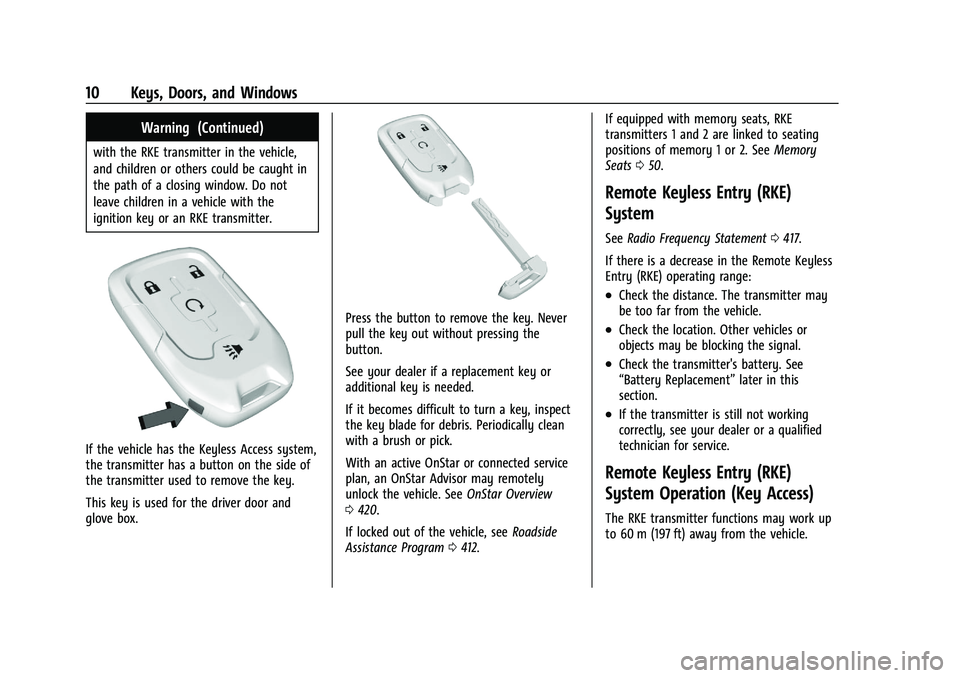
If the vehicle has the Keyless Access system,
the transmitter has a button on the side of
the transmitter used to remove the key.
This key is used for the driver door and
glove box.
Press the button to remove the key. Never
pull the key out without pressing the
button.
See your dealer if a replacement key or
additional key is needed.
If it becomes difficult to turn a key, inspect
the key blade for debris. Periodically clean
with a brush or pick.
With an active OnStar or connected service
plan, an OnStar Advisor may remotely
unlock the vehicle. SeeOnStar Overview
0 420.
If locked out of the vehicle, see Roadside
Assistance Program 0412. If equipped with memory seats, RKE
transmitters 1 and 2 are linked to seating
positions of memory 1 or 2. See
Memory
Seats 050.
Remote Keyless Entry (RKE)
System
See Radio Frequency Statement 0417.
If there is a decrease in the Remote Keyless
Entry (RKE) operating range:
.Check the distance. The transmitter may
be too far from the vehicle.
.Check the location. Other vehicles or
objects may be blocking the signal.
.Check the transmitter's battery. See
“Battery Replacement” later in this
section.
.If the transmitter is still not working
correctly, see your dealer or a qualified
technician for service.
Remote Keyless Entry (RKE)
System Operation (Key Access)
The RKE transmitter functions may work up
to 60 m (197 ft) away from the vehicle.
Page 15 of 441
Chevrolet Silverado 2500 HD/3500 HD Owner Manual (GMNA-Localizing-U.
S./Canada/Mexico-15546003) - 2022 - CRC - 5/12/21
14 Keys, Doors, and Windows
If the driver door is open whenQis
pressed, all doors will lock and then the
driver door will immediately unlock,
if enabled. See Vehicle Personalization 0131.
If the passenger door is open when
Qis
pressed, all doors lock.
Pressing
Qarms the alarm system. See
Vehicle Alarm System 031.
If equipped with remote mirror folding,
pressing and holding
Qfor one second will
fold the mirrors, if enabled. See Vehicle
Personalization 0131.
K:Press once to unlock only the driver
door. If
Kis pressed again within
three seconds, all remaining doors and the
tailgate unlock. The interior lamps may
come on and stay on for 20 seconds or until
the ignition is turned on.
If enabled, the turn signal lamps flash twice
to indicate unlocking has occurred.
If enabled, the exterior lamps may turn on.
See Vehicle Personalization 0131.
Pressing
Kon the RKE transmitter disarms
the alarm system. See Vehicle Alarm System
0 31. If equipped with remote mirror folding,
pressing and holding
Kfor one second will
unfold the mirrors, if enabled. See Vehicle
Personalization 0131.
Press and hold
Kuntil the windows fully
open, if remote window operation is
enabled. See Vehicle Personalization 0131.
x:Press twice quickly to release the
tailgate, if equipped.
7: Press and release to initiate vehicle
locator. The turn signal lamps flash and the
horn sounds three times.
Press and hold
7for more than
three seconds to activate the panic alarm.
The turn signal lamps flash and the horn
sounds repeatedly for 30 seconds. The alarm
turns off when the ignition is turned on or
7is pressed again. The ignition must be off
for the panic alarm to work.
Keyless Access Operation
The Keyless Access system allows for doors
and the tailgate to be accessed without
pressing the RKE transmitter button. The RKE
transmitter must be within 1 m (3 ft) of the tailgate or door being opened. If the vehicle
has this feature, there will be a button on
the outside door handles.
Keyless Access can be programmed to
unlock all doors on the first lock/unlock
press from the driver door. Keyless
Unlocking can also be turned off. See
Vehicle
Personalization 0131.
If equipped with memory seats, RKE
transmitters 1 and 2 are linked to seating
positions of memory 1 or 2. See Memory
Seats 050.
Keyless Unlocking/Locking from the
Driver Door
When the doors are locked and the RKE
transmitter is within 1 m (3 ft) of the door
handle, pressing the lock/unlock button on
the driver door handle will unlock the driver
door. If the lock/unlock button is pressed
again within five seconds, all passenger
doors and the tailgate will unlock.
Page 37 of 441
Chevrolet Silverado 2500 HD/3500 HD Owner Manual (GMNA-Localizing-U.
S./Canada/Mexico-15546003) - 2022 - CRC - 5/12/21
36 Keys, Doors, and Windows
Power Mirrors
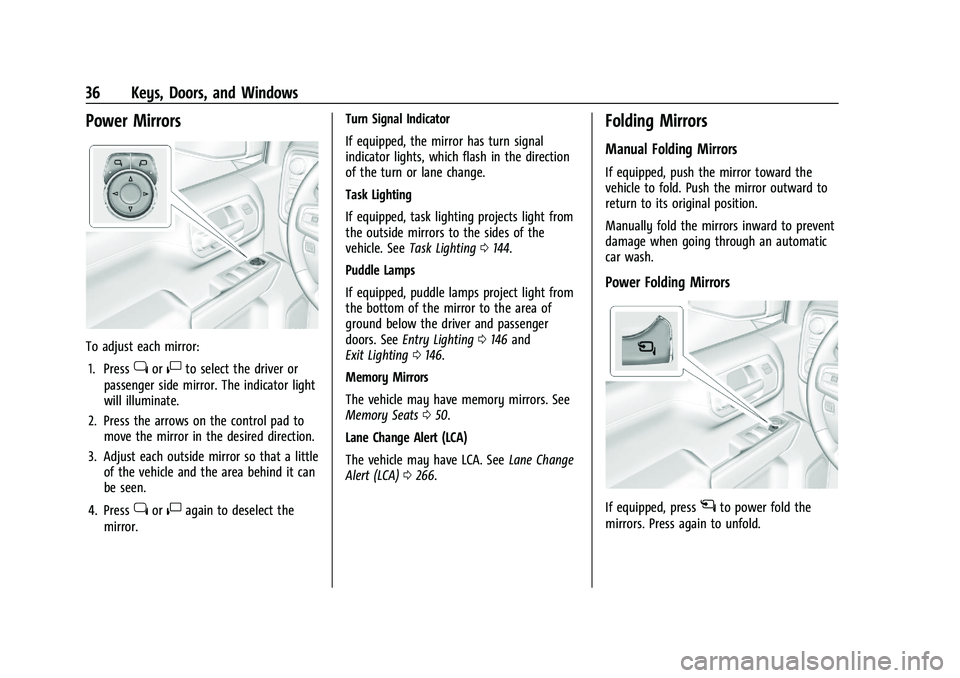
To adjust each mirror:1. Press
jor|to select the driver or
passenger side mirror. The indicator light
will illuminate.
2. Press the arrows on the control pad to move the mirror in the desired direction.
3. Adjust each outside mirror so that a little of the vehicle and the area behind it can
be seen.
4. Press
jor|again to deselect the
mirror. Turn Signal Indicator
If equipped, the mirror has turn signal
indicator lights, which flash in the direction
of the turn or lane change.
Task Lighting
If equipped, task lighting projects light from
the outside mirrors to the sides of the
vehicle. See
Task Lighting 0144.
Puddle Lamps
If equipped, puddle lamps project light from
the bottom of the mirror to the area of
ground below the driver and passenger
doors. See Entry Lighting 0146 and
Exit Lighting 0146.
Memory Mirrors
The vehicle may have memory mirrors. See
Memory Seats 050.
Lane Change Alert (LCA)
The vehicle may have LCA. See Lane Change
Alert (LCA) 0266.
Folding Mirrors
Manual Folding Mirrors
If equipped, push the mirror toward the
vehicle to fold. Push the mirror outward to
return to its original position.
Manually fold the mirrors inward to prevent
damage when going through an automatic
car wash.
Power Folding Mirrors
If equipped, pressgto power fold the
mirrors. Press again to unfold.
Page 39 of 441
Chevrolet Silverado 2500 HD/3500 HD Owner Manual (GMNA-Localizing-U.
S./Canada/Mexico-15546003) - 2022 - CRC - 5/12/21
38 Keys, Doors, and Windows
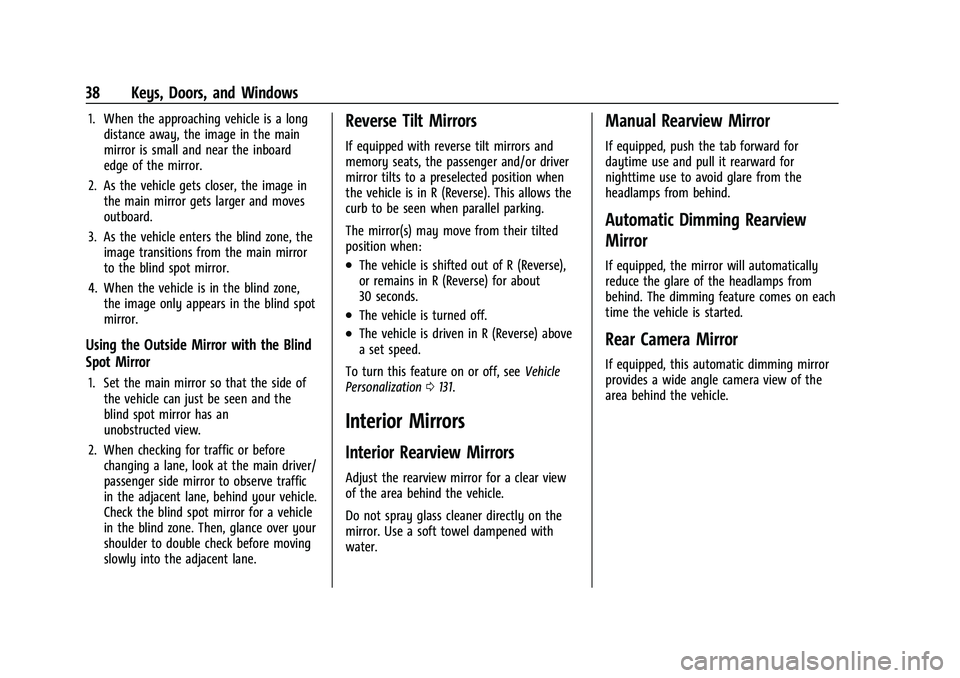
1. When the approaching vehicle is a longdistance away, the image in the main
mirror is small and near the inboard
edge of the mirror.
2. As the vehicle gets closer, the image in the main mirror gets larger and moves
outboard.
3. As the vehicle enters the blind zone, the image transitions from the main mirror
to the blind spot mirror.
4. When the vehicle is in the blind zone, the image only appears in the blind spot
mirror.
Using the Outside Mirror with the Blind
Spot Mirror
1. Set the main mirror so that the side ofthe vehicle can just be seen and the
blind spot mirror has an
unobstructed view.
2. When checking for traffic or before changing a lane, look at the main driver/
passenger side mirror to observe traffic
in the adjacent lane, behind your vehicle.
Check the blind spot mirror for a vehicle
in the blind zone. Then, glance over your
shoulder to double check before moving
slowly into the adjacent lane.
Reverse Tilt Mirrors
If equipped with reverse tilt mirrors and
memory seats, the passenger and/or driver
mirror tilts to a preselected position when
the vehicle is in R (Reverse). This allows the
curb to be seen when parallel parking.
The mirror(s) may move from their tilted
position when:
.The vehicle is shifted out of R (Reverse),
or remains in R (Reverse) for about
30 seconds.
.The vehicle is turned off.
.The vehicle is driven in R (Reverse) above
a set speed.
To turn this feature on or off, see Vehicle
Personalization 0131.
Interior Mirrors
Interior Rearview Mirrors
Adjust the rearview mirror for a clear view
of the area behind the vehicle.
Do not spray glass cleaner directly on the
mirror. Use a soft towel dampened with
water.
Manual Rearview Mirror
If equipped, push the tab forward for
daytime use and pull it rearward for
nighttime use to avoid glare from the
headlamps from behind.
Automatic Dimming Rearview
Mirror
If equipped, the mirror will automatically
reduce the glare of the headlamps from
behind. The dimming feature comes on each
time the vehicle is started.
Rear Camera Mirror
If equipped, this automatic dimming mirror
provides a wide angle camera view of the
area behind the vehicle.
Page 47 of 441
Chevrolet Silverado 2500 HD/3500 HD Owner Manual (GMNA-Localizing-U.
S./Canada/Mexico-15546003) - 2022 - CRC - 5/5/21
46 Seats and Restraints
Seats and Restraints
Head Restraints
Head Restraints . . . . . . . . . . . . . . . . . . . . . . . . 46
Front Seats
Seat Adjustment . . . . . . . . . . . . . . . . . . . . . . . . 47
Center Seat . . . . . . . . . . . . . . . . . . . . . . . . . . . . 48
Power Seat Adjustment . . . . . . . . . . . . . . . . 48
Reclining Seatbacks . . . . . . . . . . . . . . . . . . . . . 49
Lumbar Adjustment . . . . . . . . . . . . . . . . . . . . 50
Memory Seats . . . . . . . . . . . . . . . . . . . . . . . . . . 50
Heated and Ventilated Front Seats . . . . . 53
Rear Seats
Rear Seats . . . . . . . . . . . . . . . . . . . . . . . . . . . . . . 54
Heated Rear Seats . . . . . . . . . . . . . . . . . . . . . . 55
Seat Belts
Seat Belts . . . . . . . . . . . . . . . . . . . . . . . . . . . . . . 55
How to Wear Seat Belts Properly . . . . . . 56
Lap-Shoulder Belt . . . . . . . . . . . . . . . . . . . . . . . 58
Seat Belt Use During Pregnancy . . . . . . . . 61
Seat Belt Extender . . . . . . . . . . . . . . . . . . . . . . 61
Safety System Check . . . . . . . . . . . . . . . . . . . 61
Seat Belt Care . . . . . . . . . . . . . . . . . . . . . . . . . . 62
Replacing Seat Belt System Parts after aCrash . . . . . . . . . . . . . . . . . . . . . . . . . . . . . . . . . 62
Airbag System
Airbag System . . . . . . . . . . . . . . . . . . . . . . . . . . 62 Where Are the Airbags? . . . . . . . . . . . . . . . . 64
When Should an Airbag Inflate? . . . . . . . . 65
What Makes an Airbag Inflate? . . . . . . . . 66
How Does an Airbag Restrain? . . . . . . . . . 66
What Will You See after an Airbag
Inflates? . . . . . . . . . . . . . . . . . . . . . . . . . . . . . . 66
Passenger Sensing System . . . . . . . . . . . . . . 67
Servicing the Airbag-Equipped Vehicle . . . 71
Adding Equipment to the Airbag-Equipped Vehicle . . . . . . . . . . . . . . . 71
Airbag System Check . . . . . . . . . . . . . . . . . . . 72
Replacing Airbag System Parts after a Crash . . . . . . . . . . . . . . . . . . . . . . . . . . . . . . . . . 72
Child Restraints
Older Children . . . . . . . . . . . . . . . . . . . . . . . . . . 73
Infants and Young Children . . . . . . . . . . . . . 74
Child Restraint Systems . . . . . . . . . . . . . . . . 76
Where to Put the Restraint . . . . . . . . . . . . . 78
Lower Anchors and Tethers for Children(LATCH System) . . . . . . . . . . . . . . . . . . . . . . . 79
Replacing LATCH System Parts After a Crash . . . . . . . . . . . . . . . . . . . . . . . . . . . . . . . . . 89
Securing Child Restraints (With the Seat Belt in the Rear Seat) . . . . . . . . . . . . . . . . 89
Securing Child Restraints (With the Seat Belt in the Front Passenger Seat) . . . . . 93
Securing Child Restraints (With the Seat Belt in the Center Front Seat) . . . . . . . . 95
Head Restraints
{
Warning
With head restraints that are not
installed and adjusted properly, there is a
greater chance that occupants will suffer
a neck/spinal injury in a crash. Do not
drive until the head restraints for all
occupants are installed and adjusted
properly.
Front Seats
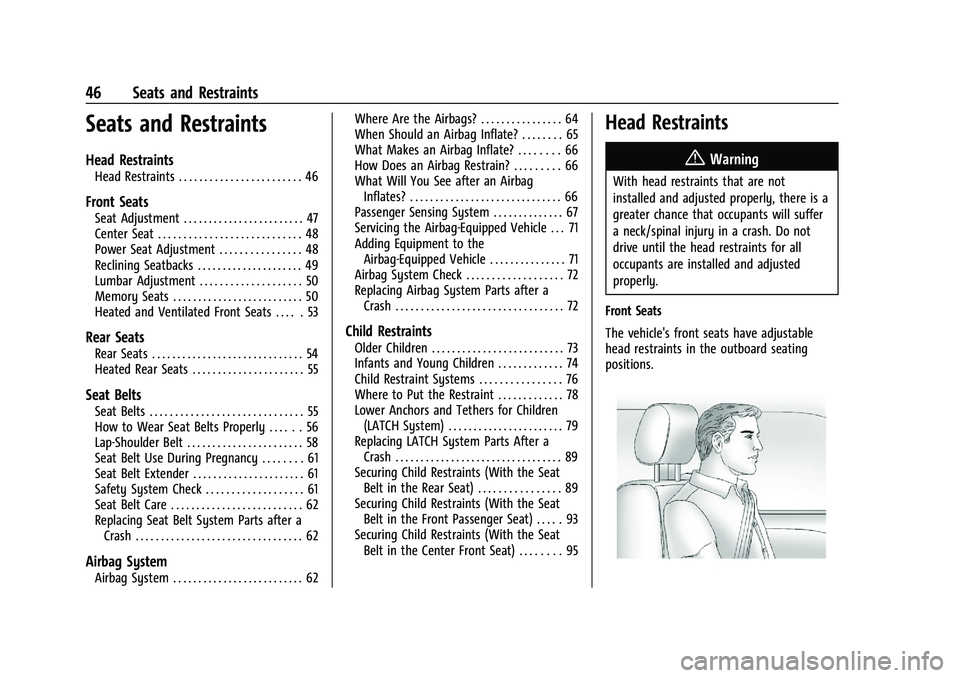
The vehicle's front seats have adjustable
head restraints in the outboard seating
positions.
Page 51 of 441
Chevrolet Silverado 2500 HD/3500 HD Owner Manual (GMNA-Localizing-U.
S./Canada/Mexico-15546003) - 2022 - CRC - 5/5/21
50 Seats and Restraints
2. Push and pull on the seatback to makesure it is locked.
Power Reclining Seatbacks
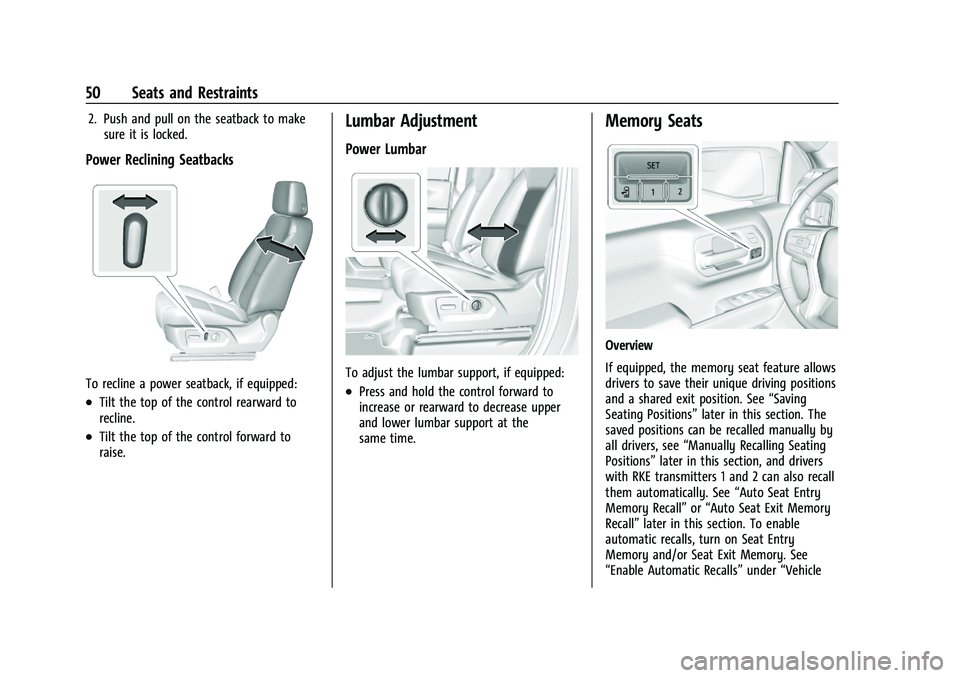
To recline a power seatback, if equipped:
.Tilt the top of the control rearward to
recline.
.Tilt the top of the control forward to
raise.
Lumbar Adjustment
Power Lumbar
To adjust the lumbar support, if equipped:
.Press and hold the control forward to
increase or rearward to decrease upper
and lower lumbar support at the
same time.
Memory Seats
Overview
If equipped, the memory seat feature allows
drivers to save their unique driving positions
and a shared exit position. See “Saving
Seating Positions” later in this section. The
saved positions can be recalled manually by
all drivers, see “Manually Recalling Seating
Positions” later in this section, and drivers
with RKE transmitters 1 and 2 can also recall
them automatically. See “Auto Seat Entry
Memory Recall” or“Auto Seat Exit Memory
Recall” later in this section. To enable
automatic recalls, turn on Seat Entry
Memory and/or Seat Exit Memory. See
“Enable Automatic Recalls” under“Vehicle
Page 52 of 441
Chevrolet Silverado 2500 HD/3500 HD Owner Manual (GMNA-Localizing-U.
S./Canada/Mexico-15546003) - 2022 - CRC - 5/5/21
Seats and Restraints 51
Personalization Settings”later in this section.
The memory recalls may be cancelled at any
time during the recall. See “Cancel Memory
Seating Recalls” later in this section.
Identifying Driver Number
The vehicle identifies the current driver by
their RKE transmitter number 1–8. The
current RKE transmitter number may be
identified by Driver Information Center (DIC)
welcome message, “You are driver x for
memory recalls.” This message is displayed
the first few times the vehicle is turned on
when a different RKE transmitter is used. For
Seat Entry Memory to work properly, save
positions to the 1 or 2 memory button
matching the driver number of this welcome
message. To aid in identifying transmitter
IDs, it is recommended to only carry one
RKE transmitter when entering the vehicle.
Perform the following if the welcome
message is not displayed:
1. Move all keys and RKE transmitters away from the vehicle.
2. Start the vehicle with another RKE transmitter. A DIC welcome message
should display indicating the driver
number of the other RKE transmitter. Turn the vehicle off and remove the
other key or RKE transmitter from the
vehicle.
3. Start the vehicle with the initial key or RKE transmitter. The DIC welcome
message should display the driver
number of the initial RKE transmitter.
Saving Seating Positions
Read these instructions completely before
saving memory positions.
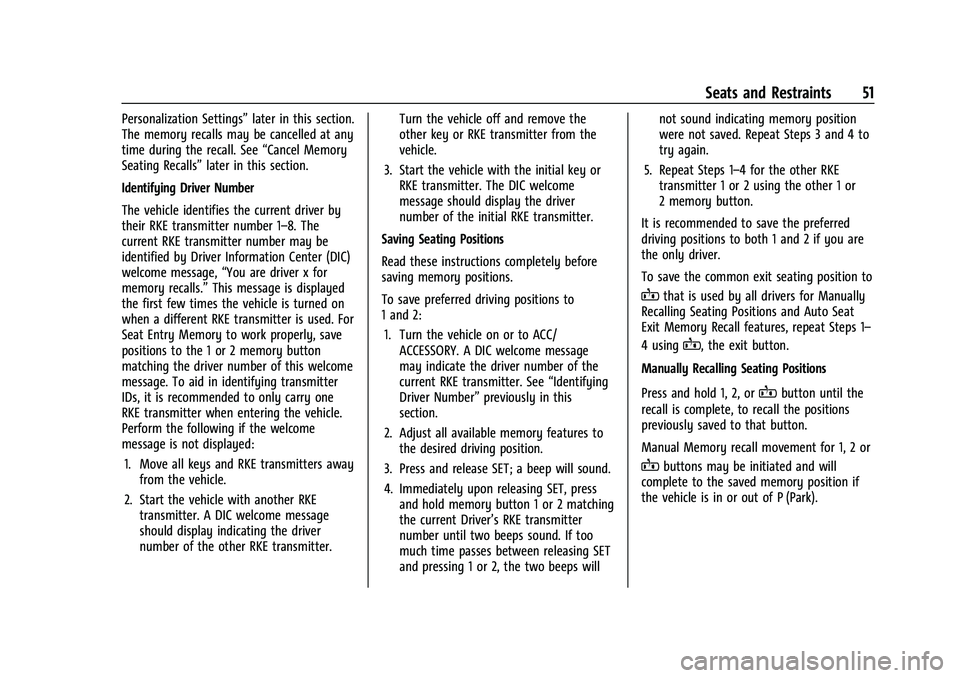
To save preferred driving positions to
1 and 2: 1. Turn the vehicle on or to ACC/ ACCESSORY. A DIC welcome message
may indicate the driver number of the
current RKE transmitter. See “Identifying
Driver Number” previously in this
section.
2. Adjust all available memory features to the desired driving position.
3. Press and release SET; a beep will sound.
4. Immediately upon releasing SET, press and hold memory button 1 or 2 matching
the current Driver’s RKE transmitter
number until two beeps sound. If too
much time passes between releasing SET
and pressing 1 or 2, the two beeps will not sound indicating memory position
were not saved. Repeat Steps 3 and 4 to
try again.
5. Repeat Steps 1–4 for the other RKE transmitter 1 or 2 using the other 1 or
2 memory button.
It is recommended to save the preferred
driving positions to both 1 and 2 if you are
the only driver.
To save the common exit seating position to
Bthat is used by all drivers for Manually
Recalling Seating Positions and Auto Seat
Exit Memory Recall features, repeat Steps 1–
4 using
B, the exit button.
Manually Recalling Seating Positions
Press and hold 1, 2, or
Bbutton until the
recall is complete, to recall the positions
previously saved to that button.
Manual Memory recall movement for 1, 2 or
Bbuttons may be initiated and will
complete to the saved memory position if
the vehicle is in or out of P (Park).
Page 53 of 441
Chevrolet Silverado 2500 HD/3500 HD Owner Manual (GMNA-Localizing-U.
S./Canada/Mexico-15546003) - 2022 - CRC - 5/5/21
52 Seats and Restraints
Enable Automatic Recalls under Vehicle
Personalization Settings
.For Seat Entry Memory that begins
movement to the preferred driving
position of the 1 or 2 button when the
vehicle is turned on, select the Settings
menu, then Vehicle, then Seating Position,
then Seat Entry Memory, and then Select
ON or OFF. See“Auto Seat Entry Memory
Recall” later in this section.
.For Seat Exit Memory that begins
movement to the preferred exit position
of the
Bbutton when the vehicle is
turned off and the driver door is open or
opened, select the Settings menu, then
Vehicle, then Seating Position, then Seat
Exit Memory, and then Select ON or OFF.
See “Auto Seat Exit Memory Recall” later
in this section.
.See Vehicle Personalization 0131 for
additional setting information.
Auto Seat Entry Memory Recall
Seat Entry Memory will automatically begin
movement to the seating positions of the 1
or 2 button corresponding to the driver’s
RKE Transmitter number 1 or 2 detected by
the vehicle when:
.The vehicle is turned ON.
.Seating positions have been previously
saved to the same 1 or 2 button. See
“Saving Seating Positions” previously in
this section.
.Seat Entry Memory is enabled. See
“Enable Automatic Recalls” under“Vehicle
Personalization Settings” previously in this
section.
.The shift lever is in P (Park).
Seat Entry Memory Recall will continue if
the vehicle is shifted out of P (Park) prior to
reaching the saved memory position.
If the saved memory seat position does not
automatically recall, verify the recall is
enabled. See “Enable Automatic Recalls”
under “Vehicle Personalization Settings”
previously in this section.
If the memory seat recalls to the wrong
position, the driver’s RKE transmitter number
1 or 2 may not match the memory button
number positions they were saved to. Try
the other RKE transmitter or try saving the
positions to the other 1 or 2 memory
button. See “Saving Seating Positions”
previously in this section. Automatic Seat Entry Memory recalls are
only available for driver’s RKE Transmitter
numbers 1 and 2. RKE transmitters 3–8 will
not provide Seat Entry Memory recalls.
Auto Seat Exit Memory Recall
Seat Exit Memory will begin movement to
the seating position of the
B
button when:
.The vehicle is turned off and the driver
door is open or opened within a
short time.
.A seating position has been previously
been saved to the
Bmemory button.
See “Saving Seating Positions” previously
in this section.
.Seat Exit Memory is enabled. See “Enable
Automatic Recalls” under“Vehicle
Personalization Settings” previously in this
section.
.The shift lever is in P (Park).
Seat Exit Memory recall will continue if the
vehicle is shifted out of P (Park) prior to
reaching the saved memory position.
Seat Exit Memory is not linked to the
driver’s RKE transmitter. The seating position
saved to
Bis used for all drivers.
Page 54 of 441
Chevrolet Silverado 2500 HD/3500 HD Owner Manual (GMNA-Localizing-U.
S./Canada/Mexico-15546003) - 2022 - CRC - 5/5/21
Seats and Restraints 53
Cancel Memory Seating Recalls
.During any memory recall:
Press a power seat control
Press SET memory button
.During Manual memory recall:
Release 1, 2, or
Bmemory button
.During Auto Seat Entry Memory Recall:
Turn vehicle off
Press SET, 1, 2, or
Bmemory buttons
.During Auto Seat Exit Memory Recall:
Press SET, 1, 2, or
Bmemory buttons
Obstructions
If something has blocked the seat while
recalling a memory position, the recall may
stop. Remove the obstruction and try the
recall again. If the memory position still
does not recall, see your dealer.
Heated and Ventilated Front
Seats
{Warning
If temperature change or pain to the skin
cannot be felt, the seat heater may cause
burns. To reduce the risk of burns, use
care when using the seat heater,
especially for long periods of time. Do
not place anything on the seat that
insulates against heat, such as a blanket,
cushion, cover, or similar item. This may
cause the seat heater to overheat. An
overheated seat heater may cause a burn
or may damage the seat.
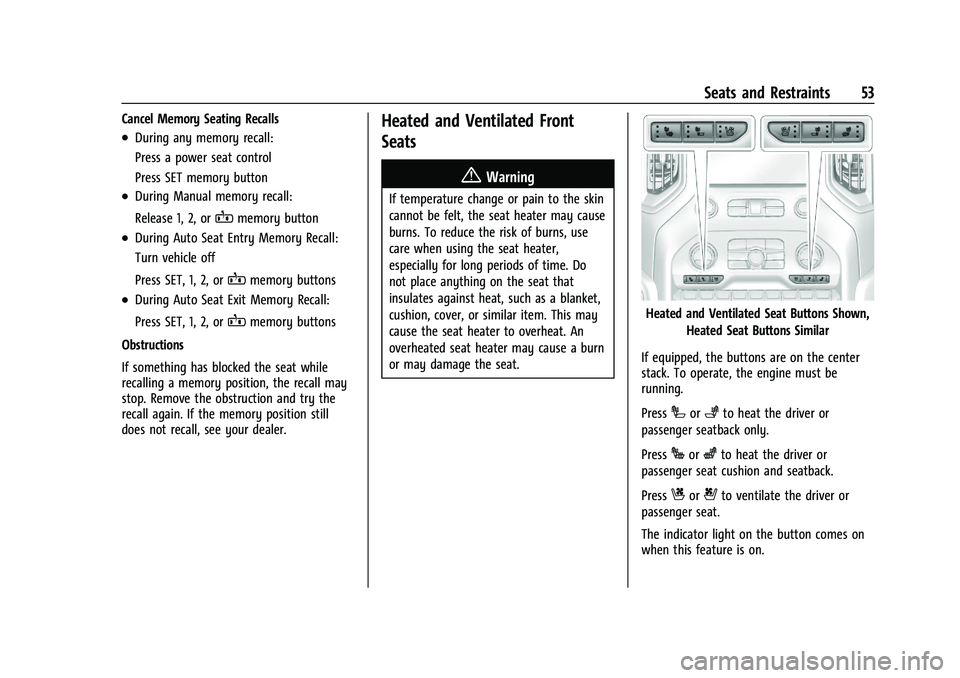
Heated and Ventilated Seat Buttons Shown, Heated Seat Buttons Similar
If equipped, the buttons are on the center
stack. To operate, the engine must be
running.
Press
Ior+to heat the driver or
passenger seatback only.
Press
Jorzto heat the driver or
passenger seat cushion and seatback.
Press
Cor{to ventilate the driver or
passenger seat.
The indicator light on the button comes on
when this feature is on.