power steering CHEVROLET SILVERADO 2500 2023 User Guide
[x] Cancel search | Manufacturer: CHEVROLET, Model Year: 2023, Model line: SILVERADO 2500, Model: CHEVROLET SILVERADO 2500 2023Pages: 441, PDF Size: 14.4 MB
Page 213 of 441
Chevrolet Silverado 2500 HD/3500 HD Owner Manual (GMNA-Localizing-U.
S./Canada/Mexico-15546003) - 2022 - CRC - 5/5/21
212 Driving and Operating
Steering
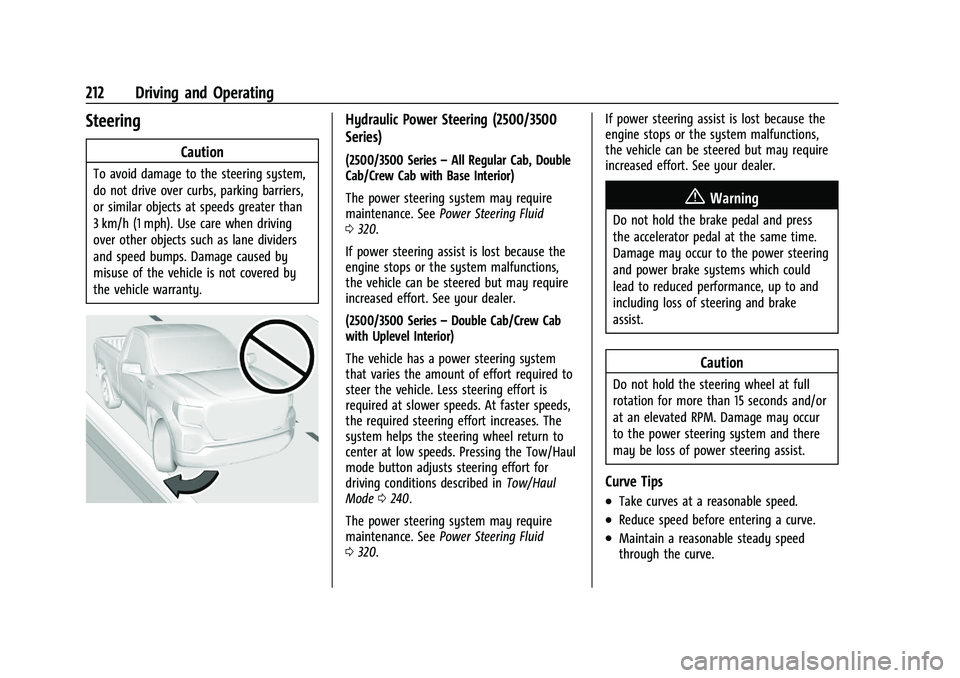
Caution
To avoid damage to the steering system,
do not drive over curbs, parking barriers,
or similar objects at speeds greater than
3 km/h (1 mph). Use care when driving
over other objects such as lane dividers
and speed bumps. Damage caused by
misuse of the vehicle is not covered by
the vehicle warranty.
Hydraulic Power Steering (2500/3500
Series)
(2500/3500 Series–All Regular Cab, Double
Cab/Crew Cab with Base Interior)
The power steering system may require
maintenance. See Power Steering Fluid
0 320.
If power steering assist is lost because the
engine stops or the system malfunctions,
the vehicle can be steered but may require
increased effort. See your dealer.
(2500/3500 Series –Double Cab/Crew Cab
with Uplevel Interior)
The vehicle has a power steering system
that varies the amount of effort required to
steer the vehicle. Less steering effort is
required at slower speeds. At faster speeds,
the required steering effort increases. The
system helps the steering wheel return to
center at low speeds. Pressing the Tow/Haul
mode button adjusts steering effort for
driving conditions described in Tow/Haul
Mode 0240.
The power steering system may require
maintenance. See Power Steering Fluid
0 320. If power steering assist is lost because the
engine stops or the system malfunctions,
the vehicle can be steered but may require
increased effort. See your dealer.
{Warning
Do not hold the brake pedal and press
the accelerator pedal at the same time.
Damage may occur to the power steering
and power brake systems which could
lead to reduced performance, up to and
including loss of steering and brake
assist.
Caution
Do not hold the steering wheel at full
rotation for more than 15 seconds and/or
at an elevated RPM. Damage may occur
to the power steering system and there
may be loss of power steering assist.
Curve Tips
.Take curves at a reasonable speed.
.Reduce speed before entering a curve.
.Maintain a reasonable steady speed
through the curve.
Page 221 of 441
Chevrolet Silverado 2500 HD/3500 HD Owner Manual (GMNA-Localizing-U.
S./Canada/Mexico-15546003) - 2022 - CRC - 5/5/21
220 Driving and Operating
Rocking the Vehicle to Get It OutCaution
Do not hold the steering wheel at full
rotation for more than 15 seconds and/or
at an elevated RPM. Damage may occur
to the power steering system and there
may be loss of power steering assist.
Turn the steering wheel left and right to
clear the area around the front wheels. Then
make sure the wheels are pointed straight
ahead. For four-wheel-drive vehicles, shift
into Four-Wheel Drive High. Turn the TCS
off. Shift back and forth between R (Reverse)
and a forward gear, spinning the wheels as
little as possible. To prevent transmission
wear, wait until the wheels stop spinning
before shifting gears. Slowly spinning the
wheels in the forward and reverse directions
causes a rocking motion that could free the
vehicle. If that does not get the vehicle out
after a few tries, it might need to be towed
out. See Towing the Vehicle 0377. Recovery
hooks can be used, if the vehicle has them.
Recovery Hooks
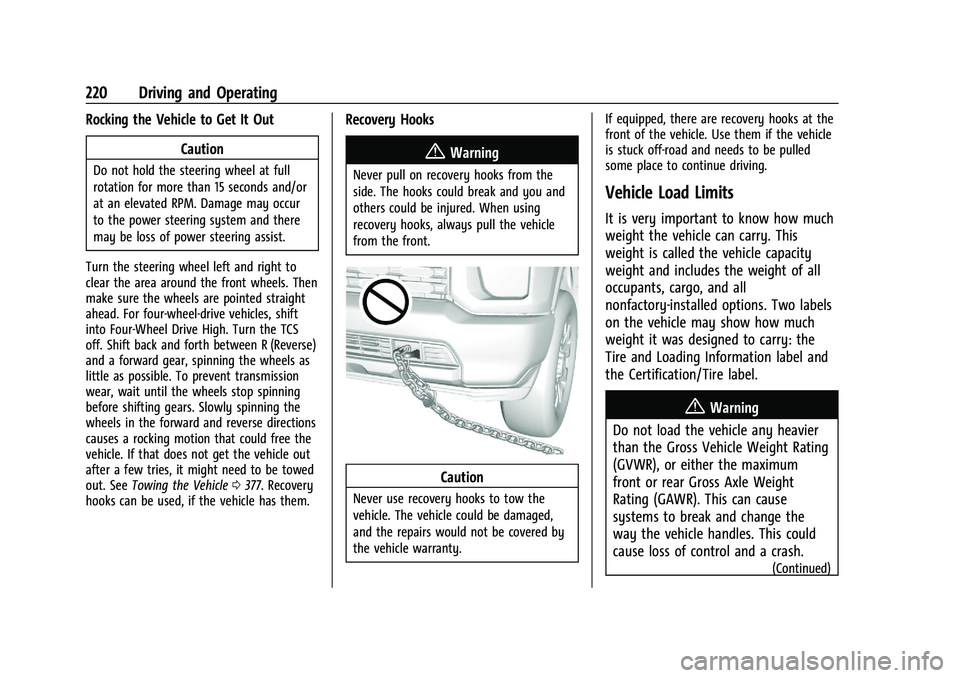
{Warning
Never pull on recovery hooks from the
side. The hooks could break and you and
others could be injured. When using
recovery hooks, always pull the vehicle
from the front.
Caution
Never use recovery hooks to tow the
vehicle. The vehicle could be damaged,
and the repairs would not be covered by
the vehicle warranty. If equipped, there are recovery hooks at the
front of the vehicle. Use them if the vehicle
is stuck off-road and needs to be pulled
some place to continue driving.
Vehicle Load Limits
It is very important to know how much
weight the vehicle can carry. This
weight is called the vehicle capacity
weight and includes the weight of all
occupants, cargo, and all
nonfactory-installed options. Two labels
on the vehicle may show how much
weight it was designed to carry: the
Tire and Loading Information label and
the Certification/Tire label.
{Warning
Do not load the vehicle any heavier
than the Gross Vehicle Weight Rating
(GVWR), or either the maximum
front or rear Gross Axle Weight
Rating (GAWR). This can cause
systems to break and change the
way the vehicle handles. This could
cause loss of control and a crash.
(Continued)
Page 229 of 441
Chevrolet Silverado 2500 HD/3500 HD Owner Manual (GMNA-Localizing-U.
S./Canada/Mexico-15546003) - 2022 - CRC - 5/5/21
228 Driving and Operating
6. Release the brake pedal.
See your dealer if the key can be removed
in any other position.
Retained Accessory Power (RAP) will remain
active. See Retained Accessory Power (RAP)
0 232.
A warning chime will sound when the driver
door is opened and the key is in the
ignition.
If equipped with a locking steering column,
the steering can bind with the front wheels
turned off center, which may prevent key
rotation out of LOCK/OFF. If this happens,
move the steering wheel from right to left
while turning the key to ACC/ACCESSORY.
If this does not work, then the vehicle needs
service.
{Warning
Turning off the vehicle while moving may
cause loss of power assist in the brake
and steering systems and disable the
airbags. While driving, turn off the
vehicle only in an emergency.
In an emergency, if the vehicle cannot be
pulled over and must be turned off while
driving: 1. Push the key all the way in toward the
steering column, then turn the key to
ACC/ACCESSORY.
2. Brake using firm and steady pressure. Do not pump the brakes repeatedly. This
may deplete power assist, requiring
increased brake pedal force.
3. Shift the vehicle to N (Neutral). This can be done while the vehicle is moving.
Continue braking and steer the vehicle to
a safe location.
4. Come to a complete stop.
5. Shift to P (Park).
6. Push the key all the way in toward the steering column (1), then turn the
ignition to LOCK/OFF (2).
7. Set the parking brake. See Electric
Parking Brake 0245.
8. Remove the key.
9. Release the brake pedal.
Caution
Use the correct key, make sure it is all
the way in —or pushed all the way in
toward the steering column when turning
off the vehicle —and turn it only with
your hand. 1 (ACC/ACCESSORY) :
This position allows
features such as the infotainment system to
operate while the vehicle is off. It also
unlocks the steering column, if equipped
with a locking steering column. Use this
position if the vehicle must be pushed or
towed. See Retained Accessory Power (RAP)
0 232.
From ON/RUN, push the key all the way in
toward the steering column, then turn the
key to ACC/ACCESSORY.
If the key is left in ACC/ACCESSORY with the
engine off, the battery could drain and the
vehicle may not start.
A warning chime will sound when the driver
door is opened and the key is in the
ignition.
2 (ON/RUN) : This position can be used to
operate the electrical accessories and to
display some instrument cluster warning
and indicator lights. This position can also
be used for service and diagnostics, and to
verify the proper operation of the
malfunction indicator lamp as may be
required for emission inspection purposes.
The switch stays in this position when the
engine is running. The transmission is also
unlocked in this position.
Page 230 of 441
Chevrolet Silverado 2500 HD/3500 HD Owner Manual (GMNA-Localizing-U.
S./Canada/Mexico-15546003) - 2022 - CRC - 5/5/21
Driving and Operating 229
If the key is left in ON/RUN with the engine
off, the battery could drain and the vehicle
may not start.
3 (START) :This is the position that starts
the engine. When the engine starts, release
the key. The ignition returns to ON/RUN for
driving.
Ignition Positions (Keyless Access)
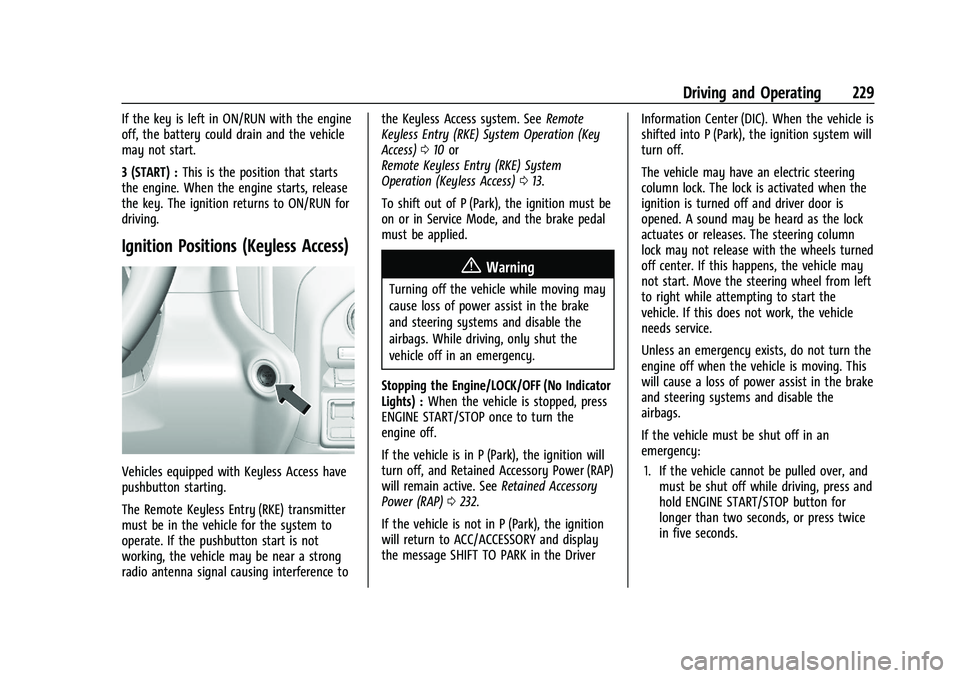
Vehicles equipped with Keyless Access have
pushbutton starting.
The Remote Keyless Entry (RKE) transmitter
must be in the vehicle for the system to
operate. If the pushbutton start is not
working, the vehicle may be near a strong
radio antenna signal causing interference to the Keyless Access system. See
Remote
Keyless Entry (RKE) System Operation (Key
Access) 010 or
Remote Keyless Entry (RKE) System
Operation (Keyless Access) 013.
To shift out of P (Park), the ignition must be
on or in Service Mode, and the brake pedal
must be applied.
{Warning
Turning off the vehicle while moving may
cause loss of power assist in the brake
and steering systems and disable the
airbags. While driving, only shut the
vehicle off in an emergency.
Stopping the Engine/LOCK/OFF (No Indicator
Lights) : When the vehicle is stopped, press
ENGINE START/STOP once to turn the
engine off.
If the vehicle is in P (Park), the ignition will
turn off, and Retained Accessory Power (RAP)
will remain active. See Retained Accessory
Power (RAP) 0232.
If the vehicle is not in P (Park), the ignition
will return to ACC/ACCESSORY and display
the message SHIFT TO PARK in the Driver Information Center (DIC). When the vehicle is
shifted into P (Park), the ignition system will
turn off.
The vehicle may have an electric steering
column lock. The lock is activated when the
ignition is turned off and driver door is
opened. A sound may be heard as the lock
actuates or releases. The steering column
lock may not release with the wheels turned
off center. If this happens, the vehicle may
not start. Move the steering wheel from left
to right while attempting to start the
vehicle. If this does not work, the vehicle
needs service.
Unless an emergency exists, do not turn the
engine off when the vehicle is moving. This
will cause a loss of power assist in the brake
and steering systems and disable the
airbags.
If the vehicle must be shut off in an
emergency:
1. If the vehicle cannot be pulled over, and must be shut off while driving, press and
hold ENGINE START/STOP button for
longer than two seconds, or press twice
in five seconds.
Page 231 of 441
Chevrolet Silverado 2500 HD/3500 HD Owner Manual (GMNA-Localizing-U.
S./Canada/Mexico-15546003) - 2022 - CRC - 5/5/21
230 Driving and Operating
2. Brake using a firm and steady pressure.Do not pump the brakes repeatedly. This
may deplete power assist, requiring
increased brake pedal force.
3. Shift the vehicle to N (Neutral). This can be done while the vehicle is moving.
After shifting to N (Neutral), firmly apply
the brakes and steer the vehicle to a
safe location.
4. Come to a complete stop, shift to P (Park), and make sure engine is off.
The shift lever must be in P (Park) to
turn the ignition off.
5. Set the parking brake. See Electric
Parking Brake 0245.
{Warning
Turning off the vehicle while moving may
cause loss of power assist in the brake
and steering systems and disable the
airbags. While driving, only shut the
vehicle off in an emergency.
ACC/ACCESSORY (Amber Indicator Light) :
This mode allows some electrical accessories
to be used when the engine is off. With the ignition off, pressing the ENGINE
START/STOP button one time without the
brake pedal applied will place the ignition
system in ACC/ACCESSORY.
The ignition will switch from ACC/
ACCESSORY to off after five minutes to
prevent battery rundown.
ON/RUN/START (Green Indicator Light) :
This
mode is for driving and starting. With the
ignition off, and the brake pedal applied,
pressing ENGINE START/STOP button once
will turn the ignition on. Once engine
cranking begins, release the button. Engine
cranking will continue until the engine
starts. See Starting the Engine 0230.
Service Mode
This power mode is available for service and
diagnostics, and to verify the proper
operation of the malfunction indicator lamp
as may be required for emission inspection
purposes. With the vehicle off, and the
brake pedal not applied, pressing and
holding the ENGINE START/STOP button for
more than five seconds will place the vehicle
in Service Mode. The instruments and audio
systems will operate as they do when the
ignition is on, but the vehicle will not be able to be driven. The engine will not start
in Service Mode. Press the ENGINE START/
STOP button again to turn the ignition off.
Starting the Engine
If the vehicle has a diesel engine, see the
Duramax diesel supplement.
Caution
If you add electrical parts or accessories,
you could change the way the engine
operates. Any resulting damage would
not be covered by the vehicle warranty.
See
Add-On Electrical Equipment 0303.
Move the shift lever to P (Park) or
N (Neutral). To restart the engine when the
vehicle is already moving, use
N (Neutral) only.
Caution
Do not try to shift to P (Park) if the
vehicle is moving. If you do, you could
damage the transmission. Shift to P (Park)
only when the vehicle is stopped.
Page 242 of 441
Chevrolet Silverado 2500 HD/3500 HD Owner Manual (GMNA-Localizing-U.
S./Canada/Mexico-15546003) - 2022 - CRC - 5/5/21
Driving and Operating 241
Caution
Do not drive on clean, dry pavement in
4
mand 4n(if equipped) for an extended
period of time. These conditions may
cause premature wear on the vehicle’s
powertrain.
Driving on clean, dry pavement in 4
mor
4
nmay:
.Cause a vibration to be felt in the
steering system.
.Cause tires to wear faster.
{Warning
If equipped with four-wheel drive, the
vehicle will be free to roll if the transfer
case is in N (Neutral), even when the shift
lever is in P (Park). You or someone else
could be seriously injured. Be sure the
transfer case is in a drive gear —2
m, 4m,
or 4
n— or set the parking brake before
placing the transfer case in N (Neutral).
See Shifting Into Park 0233.
Caution
Extended high-speed operation in 4n
may damage or shorten the life of the
drivetrain.
An engagement noise and bump is normal
when shifting between 4
nand 4mor
N (Neutral), with the engine running.
Shifting into 4
nwill turn Traction Control
and StabiliTrak/Electronic Stability Control
(ESC) off. See Traction Control/Electronic
Stability Control 0247.
Automatic Transfer Case
Two-Speed Transfer Case
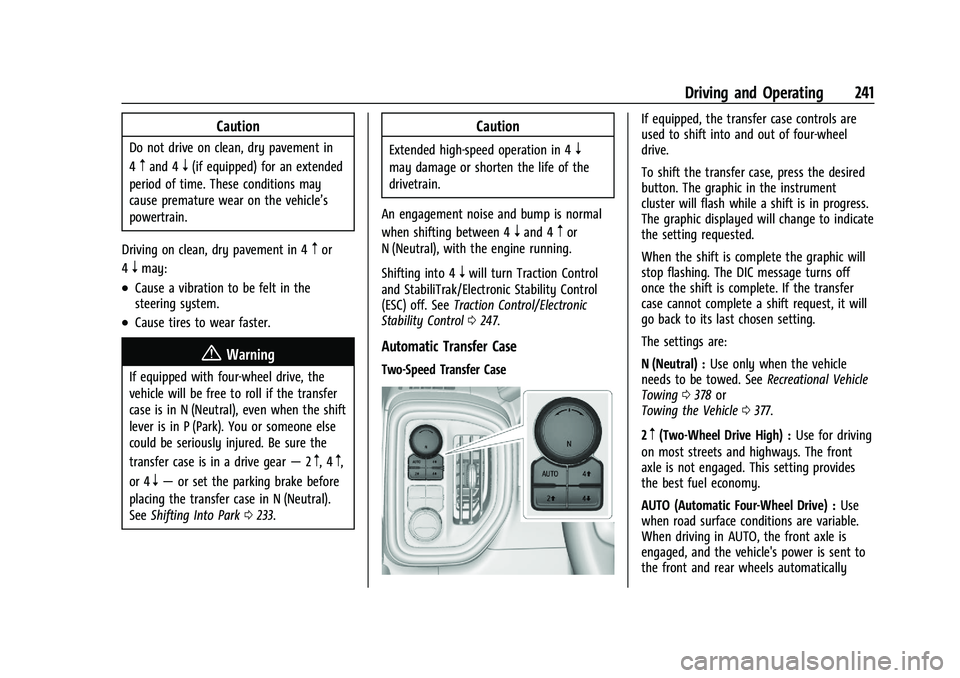
If equipped, the transfer case controls are
used to shift into and out of four-wheel
drive.
To shift the transfer case, press the desired
button. The graphic in the instrument
cluster will flash while a shift is in progress.
The graphic displayed will change to indicate
the setting requested.
When the shift is complete the graphic will
stop flashing. The DIC message turns off
once the shift is complete. If the transfer
case cannot complete a shift request, it will
go back to its last chosen setting.
The settings are:
N (Neutral) : Use only when the vehicle
needs to be towed. See Recreational Vehicle
Towing 0378 or
Towing the Vehicle 0377.
2
m(Two-Wheel Drive High) : Use for driving
on most streets and highways. The front
axle is not engaged. This setting provides
the best fuel economy.
AUTO (Automatic Four-Wheel Drive) : Use
when road surface conditions are variable.
When driving in AUTO, the front axle is
engaged, and the vehicle's power is sent to
the front and rear wheels automatically
Page 245 of 441
Chevrolet Silverado 2500 HD/3500 HD Owner Manual (GMNA-Localizing-U.
S./Canada/Mexico-15546003) - 2022 - CRC - 5/5/21
244 Driving and Operating
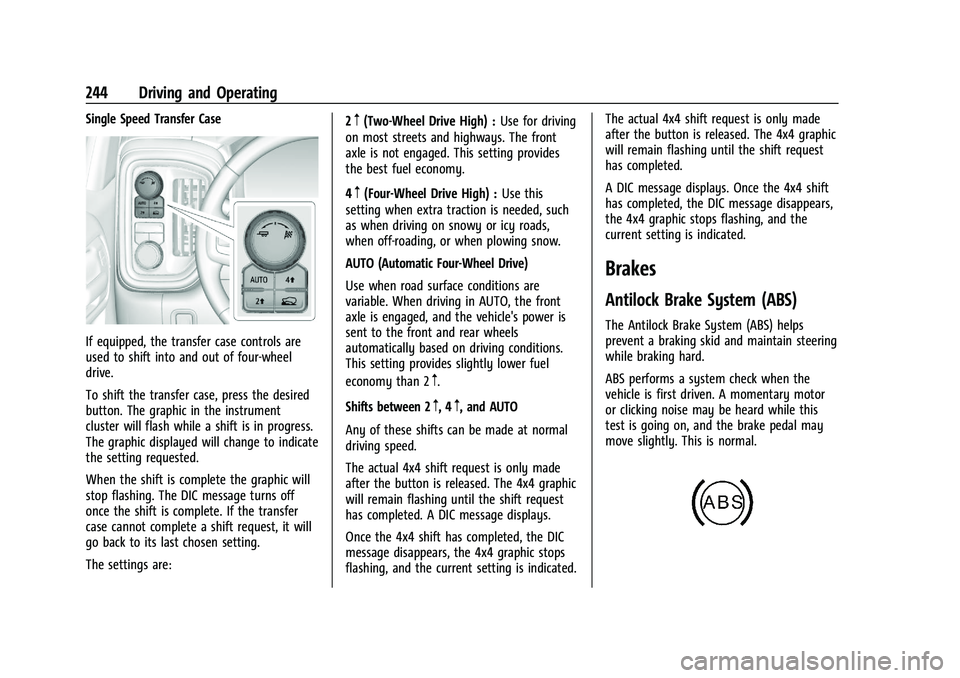
Single Speed Transfer Case
If equipped, the transfer case controls are
used to shift into and out of four-wheel
drive.
To shift the transfer case, press the desired
button. The graphic in the instrument
cluster will flash while a shift is in progress.
The graphic displayed will change to indicate
the setting requested.
When the shift is complete the graphic will
stop flashing. The DIC message turns off
once the shift is complete. If the transfer
case cannot complete a shift request, it will
go back to its last chosen setting.
The settings are:2
m(Two-Wheel Drive High) :
Use for driving
on most streets and highways. The front
axle is not engaged. This setting provides
the best fuel economy.
4
m(Four-Wheel Drive High) : Use this
setting when extra traction is needed, such
as when driving on snowy or icy roads,
when off-roading, or when plowing snow.
AUTO (Automatic Four-Wheel Drive)
Use when road surface conditions are
variable. When driving in AUTO, the front
axle is engaged, and the vehicle's power is
sent to the front and rear wheels
automatically based on driving conditions.
This setting provides slightly lower fuel
economy than 2
m.
Shifts between 2
m, 4m, and AUTO
Any of these shifts can be made at normal
driving speed.
The actual 4x4 shift request is only made
after the button is released. The 4x4 graphic
will remain flashing until the shift request
has completed. A DIC message displays.
Once the 4x4 shift has completed, the DIC
message disappears, the 4x4 graphic stops
flashing, and the current setting is indicated. The actual 4x4 shift request is only made
after the button is released. The 4x4 graphic
will remain flashing until the shift request
has completed.
A DIC message displays. Once the 4x4 shift
has completed, the DIC message disappears,
the 4x4 graphic stops flashing, and the
current setting is indicated.
Brakes
Antilock Brake System (ABS)
The Antilock Brake System (ABS) helps
prevent a braking skid and maintain steering
while braking hard.
ABS performs a system check when the
vehicle is first driven. A momentary motor
or clicking noise may be heard while this
test is going on, and the brake pedal may
move slightly. This is normal.
Page 246 of 441
Chevrolet Silverado 2500 HD/3500 HD Owner Manual (GMNA-Localizing-U.
S./Canada/Mexico-15546003) - 2022 - CRC - 5/5/21
Driving and Operating 245
If there is a problem with ABS, this warning
light stays on. SeeAntilock Brake System
(ABS) Warning Light 0118.
ABS does not change the time needed to
get a foot on the brake pedal and does not
always decrease stopping distance. If you
get too close to the vehicle ahead, there will
not be enough time to apply the brakes if
that vehicle suddenly slows or stops. Always
leave enough room ahead to stop, even
with ABS.
Using ABS
Do not pump the brakes. Just hold the brake
pedal down firmly. Hearing or feeling ABS
operate is normal.
Braking in Emergencies
ABS allows steering and braking at the same
time. In many emergencies, steering can
help even more than braking.
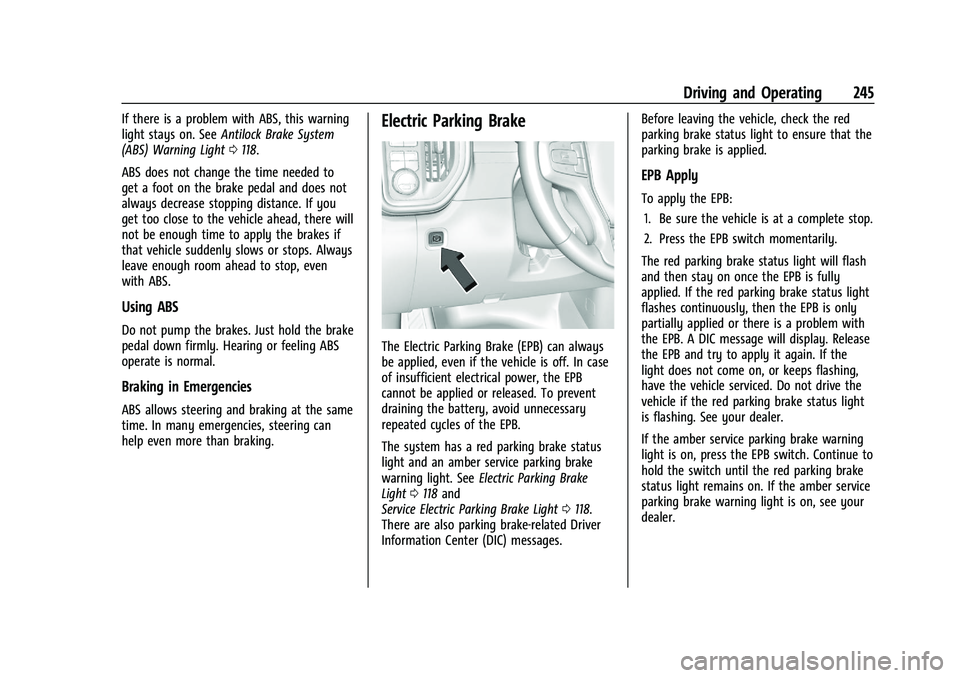
Electric Parking Brake
The Electric Parking Brake (EPB) can always
be applied, even if the vehicle is off. In case
of insufficient electrical power, the EPB
cannot be applied or released. To prevent
draining the battery, avoid unnecessary
repeated cycles of the EPB.
The system has a red parking brake status
light and an amber service parking brake
warning light. See Electric Parking Brake
Light 0118 and
Service Electric Parking Brake Light 0118.
There are also parking brake-related Driver
Information Center (DIC) messages. Before leaving the vehicle, check the red
parking brake status light to ensure that the
parking brake is applied.
EPB Apply
To apply the EPB:
1. Be sure the vehicle is at a complete stop.
2. Press the EPB switch momentarily.
The red parking brake status light will flash
and then stay on once the EPB is fully
applied. If the red parking brake status light
flashes continuously, then the EPB is only
partially applied or there is a problem with
the EPB. A DIC message will display. Release
the EPB and try to apply it again. If the
light does not come on, or keeps flashing,
have the vehicle serviced. Do not drive the
vehicle if the red parking brake status light
is flashing. See your dealer.
If the amber service parking brake warning
light is on, press the EPB switch. Continue to
hold the switch until the red parking brake
status light remains on. If the amber service
parking brake warning light is on, see your
dealer.
Page 262 of 441
Chevrolet Silverado 2500 HD/3500 HD Owner Manual (GMNA-Localizing-U.
S./Canada/Mexico-15546003) - 2022 - CRC - 5/5/21
Driving and Operating 261
Troubleshooting
The Transparent Trailer calibration may take
longer than expected or not calibrate if:
.The vehicle is driven too fast during
calibration. Speed should be maintained
below 50 km/h (31 mph).
.The vehicle is not driven straight during
calibration. Steering should be maintained
as straight as possible, excessive steering
during calibration may extend
calibration time.
.The calibration is attempted in low light.
Calibration should be attempted when
there is enough light.
.The calibration is attempted during
adverse weather conditions. Calibration
during conditions such as snow or heavy
rain should be avoided.
.The road surface is not ideal for
calibration. Calibration should be
attempted on an alternate road surface.
.The accessory trailer cameras are
swapped at the hitch connector. Ensure
that the camera mounted to the rear of
the trailer is connected to the rear trailer
camera input.
.The accessory trailer camera is mounted,
angled or rotated outside of the defined
mounting location (see camera
installation instructions).
Distortion may be observed in the calibrated
Transparent Trailer View if:
.The accessory trailer camera is mounted,
angled or rotated outside of the defined
mounting location (see camera
installation instructions).
The Transparent Trailer icon may appear
grayed out if:
.A compatible trailer profile is not
configured or a non-compatible trailer
profile is selected.
.The vehicle is in R (Reverse).
.The trailer is not connected.
.The accessory rear trailer camera is not
connected or connected to the incorrect
input.
The preview may not be provided or the
wrong preview may be provided if:
.The accessory cameras are not recognized.
Ensure that the accessory camera(s) are
connected and power cycle the vehicle.
.The accessory trailer cameras are
swapped at the hitch connector. Ensure
that the accessory camera(s) are
connected to the correct input.
.The accessory trailer camera(s) are
connected to the correct camera input.
.The accessory trailer camera(s) are not
installed according to the installation
instructions.
A feature may be unavailable or not
activating as expected if:
.The customization is disabled. Check the
customization settings where applicable.
.The accessory trailer cameras are
swapped at the hitch connector. Ensure
that the accessory camera(s) are
connected to the correct camera input.
A view may switch automatically if:
.The vehicle is shifted to another gear.
Park Assist
If the vehicle has Rear Park Assist (RPA) or
Front and Rear Park Assist (FRPA), as the
vehicle moves at speeds of less than 8 km/h
(5 mph) the sensors on the bumpers may
detect objects up to 1.2 m (4 ft) in front and
2.5 m (8 ft) behind the vehicle within a zone
25 cm (10 in) high off the ground and below
Page 289 of 441
Chevrolet Silverado 2500 HD/3500 HD Owner Manual (GMNA-Localizing-U.
S./Canada/Mexico-15546003) - 2022 - CRC - 5/5/21
288 Driving and Operating
Tow/Haul Mode is most useful when towing
a heavy trailer or carrying a large or
heavy load:
.Through rolling terrain.
.In stop-and-go traffic.
.In busy parking lots.
Operating the vehicle in Tow/Haul Mode
when lightly loaded or not towing will not
cause damage; however, it is not
recommended and may result in unpleasant
engine and transmission driving
characteristics, heavy or light steering
efforts, and reduced fuel economy.
Integrated Trailer Brake Control System
The vehicle may have an Integrated Trailer
Brake Control (ITBC) system for use with
electric trailer brakes or most electric over
hydraulic trailer brake systems. These
instructions apply to both types of electric
trailer brakes.
This symbol is on the Trailer Brake Control
Panel on vehicles with an ITBC system. The
power output to the trailer brakes is
proportional to the amount of vehicle
braking. This available power output to the
trailer brakes can be adjusted to a wide
range of trailering situations.
The ITBC system is integrated with the
vehicle’s brake, antilock brake, and
StabiliTrak/Electronic Stability Control (ESC)
systems. In trailering conditions that cause
the vehicle’s antilock brake or StabiliTrak/
ESC systems to activate, power sent to the
trailer's brakes will be automatically
adjusted to minimize trailer wheel lock-up.
This does not imply that the trailer has
StabiliTrak/ESC.
If the vehicle’s brake, antilock brake,
or StabiliTrak/ESC systems are not
functioning properly, the ITBC system may
not function fully or at all. Make sure all of
these systems are fully operational to allow
the ITBC system to function properly.
The ITBC system is powered through the
vehicle's electrical system. Turning the
ignition off will also turn off the ITBC
system. The ITBC system is fully functional
only when the ignition is in on.{Warning
Connecting a trailer that has an air brake
system may result in reduced or
complete loss of trailer braking, including
increased stopping distance or trailer
instability which could result in serious
injury, death, or property damage. Only
use the ITBC system with electric or
electric over hydraulic trailer brake
systems.
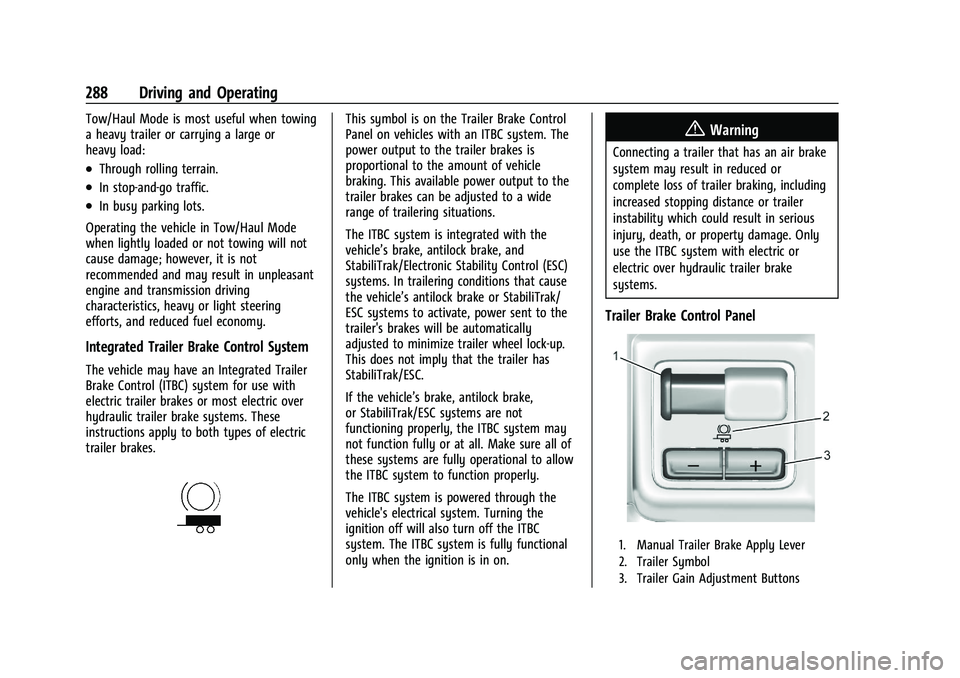
Trailer Brake Control Panel
1. Manual Trailer Brake Apply Lever
2. Trailer Symbol
3. Trailer Gain Adjustment Buttons