lock CHEVROLET SONIC 2013 2.G Manual Online
[x] Cancel search | Manufacturer: CHEVROLET, Model Year: 2013, Model line: SONIC, Model: CHEVROLET SONIC 2013 2.GPages: 382, PDF Size: 6.71 MB
Page 241 of 382

Black plate (7,1)Chevrolet Sonic Owner Manual - 2013 - 2nd PrintReady - 10/11/12
Vehicle Care 10-7
1.Engine Air Cleaner/Filter on
page 10‑13.
2. Engine Oil Dipstick. See Engine
Oil on page 10‑9.
3. Engine Cooling Fan (Out of View). See Cooling System on
page 10‑15.
4. Engine Oil Fill Cap. See Engine
Oil on page 10‑9.
5. Engine Coolant Surge Tank and Pressure Cap. See Cooling
System on page 10‑15.
6. Brake/Clutch Fluid Reservoir. See Brakes on page 10‑21 and
Hydraulic Clutch on page 10‑13.
7. Battery on page 10‑23.
8. Windshield Washer Fluid Reservoir. See Washer Fluid on
page 10‑20.
9. Engine Compartment Fuse
Block on page 10‑33.
Page 243 of 382
Black plate (9,1)Chevrolet Sonic Owner Manual - 2013 - 2nd PrintReady - 10/11/12
Vehicle Care 10-9
1.Engine Air Cleaner/Filter on
page 10‑13.
2. Engine Oil Dipstick. See Engine
Oil on page 10‑9.
3. Engine Cooling Fan (Out of View). See Cooling System on
page 10‑15.
4. Engine Oil Fill Cap. See Engine
Oil on page 10‑9.
5. Engine Coolant Surge Tank and Pressure Cap. See Cooling
System on page 10‑15.
6. Brake/Clutch Fluid Reservoir. See Brakes on page 10‑21 and
Hydraulic Clutch on page 10‑13.
7. Battery on page 10‑23.
8. Engine Compartment Fuse
Block on page 10‑33.
9. Windshield Washer Fluid Reservoir. See Washer Fluid on
page 10‑20.Engine Oil
To ensure proper engine
performance and long life, careful
attention must be paid to engine oil.
Following these simple, but
important steps will help protect
your investment:
.Always use engine oil approved
to the proper specification and of
the proper viscosity grade. See
“Selecting the Right Engine Oil”
in this section.
.Check the engine oil level
regularly and maintain the
proper oil level. See “Checking
Engine Oil” and“When to Add
Engine Oil” in this section.
.Change the engine oil at the
appropriate time. See Engine Oil
Life System on page 10‑11.
.Always dispose of engine oil
properly. See “What to Do with
Used Oil” in this section.
If the engine oil pressure light
comes on, check the engine oil level
right away. The oil pressure light is
on the instrument cluster. See
Engine Oil Pressure Light on
page 5‑19. Check the engine oil
level regularly; this is an added
reminder.
Checking Engine Oil
It is a good idea to check the engine
oil level at each fuel fill. In order to
get an accurate reading, the oil
must be warm and the vehicle must
be on level ground. The engine oil
dipstick handle is a loop. See
Engine Compartment Overview on
page 10‑6 for the location of the
engine oil dipstick.
1. If the engine has been running recently, turn off the engine and
allow several minutes for the oil
Page 252 of 382
Black plate (18,1)Chevrolet Sonic Owner Manual - 2013 - 2nd PrintReady - 10/11/12
10-18 Vehicle Care
{WARNING
Adding only plain water or some
other liquid to the cooling system
can be dangerous. Plain water
and other liquids, can boil before
the proper coolant mixture will.
The coolant warning system is set
for the proper coolant mixture.
With plain water or the wrong
mixture, the engine could get too
hot but you would not get the
overheat warning. The engine
could catch fire and you or others
could be burned. Use a
50/50 mixture of clean, drinkable
water and DEX-COOL coolant.
Notice: In cold weather, water
can freeze and crack the engine,
radiator, heater core and other
parts. Use the recommended
coolant and the proper coolant
mixture.
{WARNING
You can be burned if you spill
coolant on hot engine parts.
Coolant contains ethylene glycol
and it will burn if the engine parts
are hot enough. Do not spill
coolant on a hot engine.
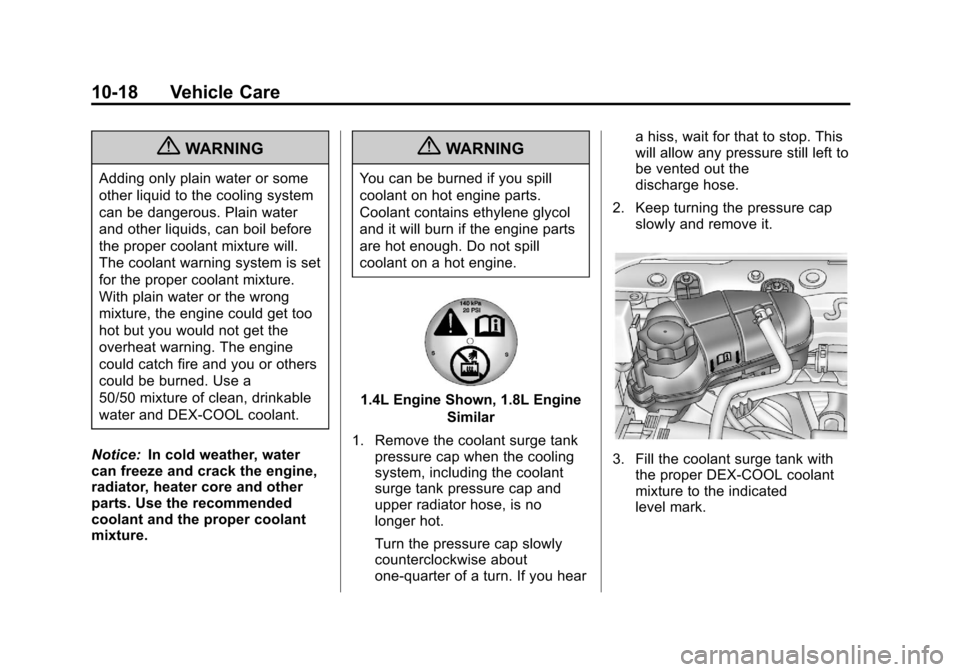
1.4L Engine Shown, 1.8L Engine
Similar
1. Remove the coolant surge tank pressure cap when the cooling
system, including the coolant
surge tank pressure cap and
upper radiator hose, is no
longer hot.
Turn the pressure cap slowly
counterclockwise about
one-quarter of a turn. If you hear a hiss, wait for that to stop. This
will allow any pressure still left to
be vented out the
discharge hose.
2. Keep turning the pressure cap slowly and remove it.
3. Fill the coolant surge tank withthe proper DEX-COOL coolant
mixture to the indicated
level mark.
Page 259 of 382
Black plate (25,1)Chevrolet Sonic Owner Manual - 2013 - 2nd PrintReady - 10/11/12
Vehicle Care 10-25
Automatic Transmission
Shift Lock Control
Function Check
{WARNING
When you are doing this
inspection, the vehicle could
move suddenly. If the vehicle
moves, you or others could be
injured.
1. Before starting this check, be sure there is enough room
around the vehicle. It should be
parked on a level surface.
2. Firmly apply the parking brake. See Parking Brake on
page 9‑26.
Be ready to apply the regular
brake immediately if the vehicle
begins to move.
3. With the engine off, turn the ignition on, but do not start the
engine. Without applying the
regular brake, try to move the shift lever out of P (Park) with
normal effort. If the shift lever
moves out of P (Park), contact
your dealer for service.
Ignition Transmission
Lock Check
While parked, and with the parking
brake set, try to turn the ignition to
LOCK/OFF in each shift lever
position.
.For automatic transmission
vehicles, the ignition should turn
to LOCK/OFF only when the
shift lever is in P (Park).
.For manual transmission
vehicles, the ignition should turn
to LOCK/OFF only when the
shift lever is in neutral.
On all vehicles, the ignition key
should come out only in LOCK/OFF.
Contact your dealer if service is
required.
Park Brake and P (Park)
Mechanism Check
{WARNING
When you are doing this check,
the vehicle could begin to move.
You or others could be injured
and property could be damaged.
Make sure there is room in front
of the vehicle in case it begins to
roll. Be ready to apply the regular
brake at once should the vehicle
begin to move.
Park on a fairly steep hill, with the
vehicle facing downhill. Keeping
your foot on the regular brake, set
the parking brake.
.To check the parking brake's
holding ability: With the engine
running and the transmission in
N (Neutral), slowly remove foot
pressure from the regular brake
pedal. Do this until the vehicle is
held by the parking brake only.
Page 260 of 382
Black plate (26,1)Chevrolet Sonic Owner Manual - 2013 - 2nd PrintReady - 10/11/12
10-26 Vehicle Care
.To check the P (Park)
mechanism's holding ability:
With the engine running, shift to
P (Park). Then release the
parking brake followed by the
regular brake.
Contact your dealer if service is
required.
Wiper Blade Replacement
Front Wiper Blade
Replacement
Windshield wiper blades should be
inspected for wear or cracking. See
the Maintenance Schedule on
page 11‑2 for more information.
Replacement blades come in
different types and are removed in
different ways. For proper
windshield wiper blade length and
type, see Maintenance
Replacement Parts on page 11‑14.
Notice: Allowing the wiper arm to
touch the windshield when no
wiper blade is installed could
damage the windshield. Any damage that occurs would not be
covered by your warranty. Do not
allow the wiper arm to touch the
windshield.
To replace the windshield wiper
blade:
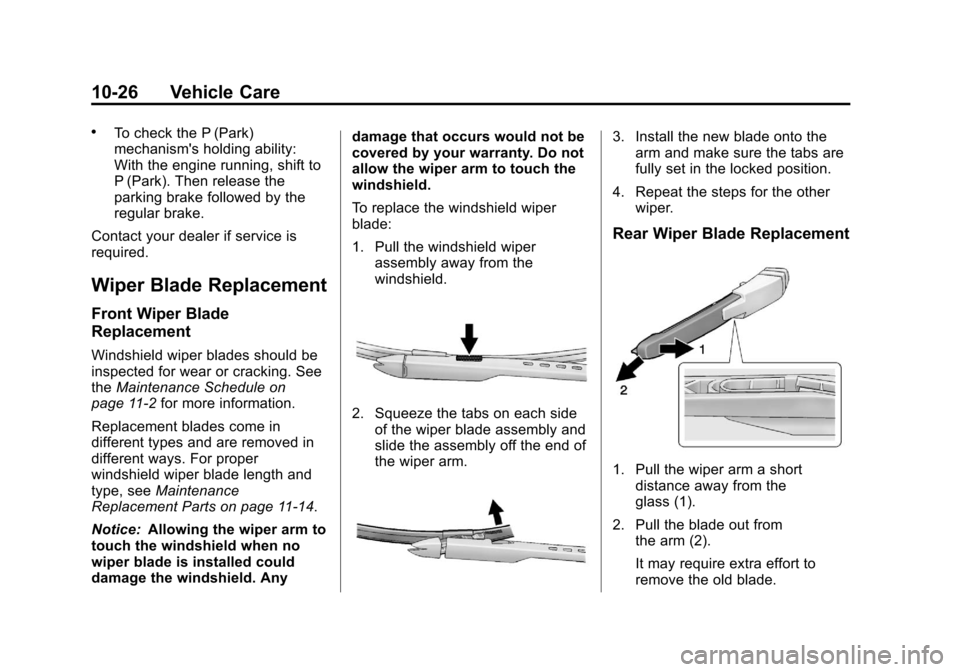
1. Pull the windshield wiper
assembly away from the
windshield.
2. Squeeze the tabs on each sideof the wiper blade assembly and
slide the assembly off the end of
the wiper arm.
3. Install the new blade onto thearm and make sure the tabs are
fully set in the locked position.
4. Repeat the steps for the other wiper.
Rear Wiper Blade Replacement
1. Pull the wiper arm a shortdistance away from the
glass (1).
2. Pull the blade out from the arm (2).
It may require extra effort to
remove the old blade.
Page 262 of 382
Black plate (28,1)Chevrolet Sonic Owner Manual - 2013 - 2nd PrintReady - 10/11/12
10-28 Vehicle Care
Headlamps, Front Turn
Signal and Parking
Lamps
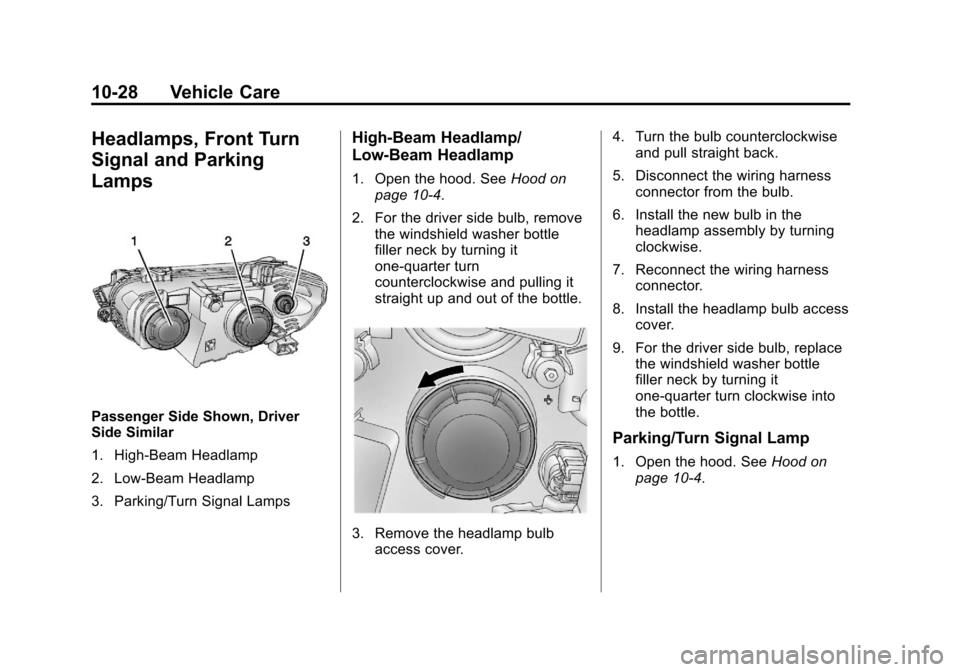
Passenger Side Shown, Driver
Side Similar
1. High-Beam Headlamp
2. Low-Beam Headlamp
3. Parking/Turn Signal Lamps
High-Beam Headlamp/
Low-Beam Headlamp
1. Open the hood. SeeHood on
page 10‑4.
2. For the driver side bulb, remove the windshield washer bottle
filler neck by turning it
one-quarter turn
counterclockwise and pulling it
straight up and out of the bottle.
3. Remove the headlamp bulbaccess cover. 4. Turn the bulb counterclockwise
and pull straight back.
5. Disconnect the wiring harness connector from the bulb.
6. Install the new bulb in the headlamp assembly by turning
clockwise.
7. Reconnect the wiring harness connector.
8. Install the headlamp bulb access cover.
9. For the driver side bulb, replace the windshield washer bottle
filler neck by turning it
one-quarter turn clockwise into
the bottle.
Parking/Turn Signal Lamp
1. Open the hood. See Hood on
page 10‑4.
Page 263 of 382
Black plate (29,1)Chevrolet Sonic Owner Manual - 2013 - 2nd PrintReady - 10/11/12
Vehicle Care 10-29
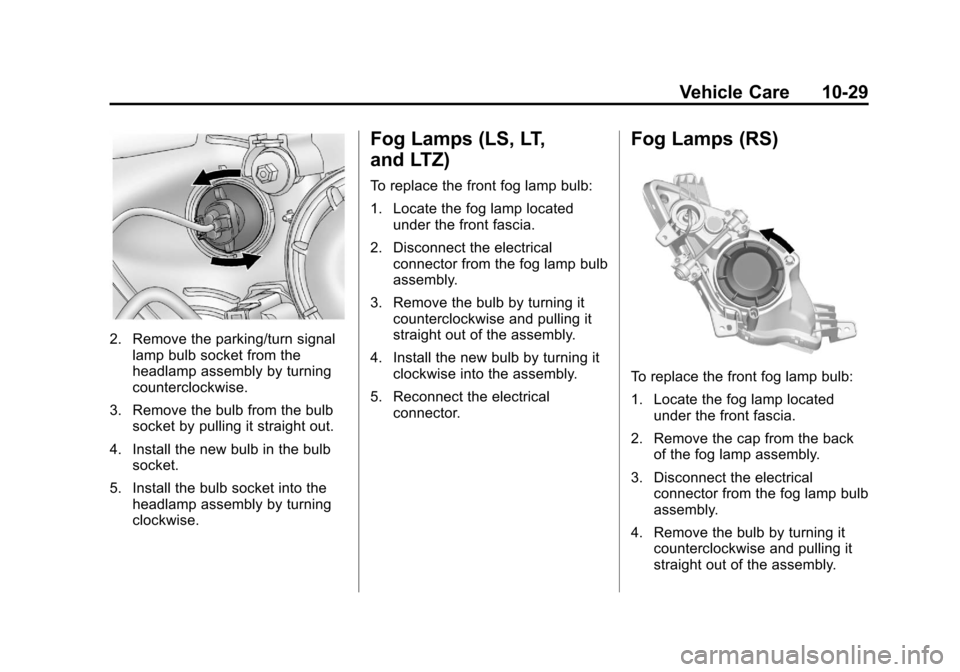
2. Remove the parking/turn signallamp bulb socket from the
headlamp assembly by turning
counterclockwise.
3. Remove the bulb from the bulb socket by pulling it straight out.
4. Install the new bulb in the bulb socket.
5. Install the bulb socket into the headlamp assembly by turning
clockwise.
Fog Lamps (LS, LT,
and LTZ)
To replace the front fog lamp bulb:
1. Locate the fog lamp locatedunder the front fascia.
2. Disconnect the electrical connector from the fog lamp bulb
assembly.
3. Remove the bulb by turning it counterclockwise and pulling it
straight out of the assembly.
4. Install the new bulb by turning it clockwise into the assembly.
5. Reconnect the electrical connector.
Fog Lamps (RS)
To replace the front fog lamp bulb:
1. Locate the fog lamp locatedunder the front fascia.
2. Remove the cap from the back of the fog lamp assembly.
3. Disconnect the electrical connector from the fog lamp bulb
assembly.
4. Remove the bulb by turning it counterclockwise and pulling it
straight out of the assembly.
Page 264 of 382
Black plate (30,1)Chevrolet Sonic Owner Manual - 2013 - 2nd PrintReady - 10/11/12
10-30 Vehicle Care
5. Install the new bulb by turning itclockwise into the assembly.
6. Reconnect the electrical connector.
7. Replace the cap on the back of the fog lamp assembly.
Taillamps, Turn Signal,
Stoplamps, and Back-Up
Lamps
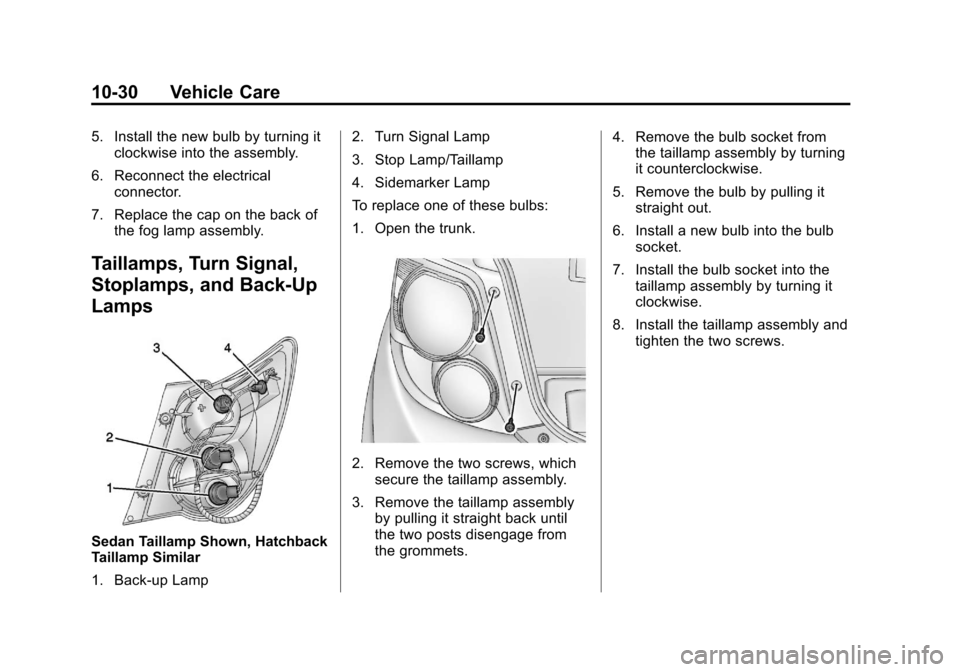
Sedan Taillamp Shown, Hatchback
Taillamp Similar
1. Back-up Lamp 2. Turn Signal Lamp
3. Stop Lamp/Taillamp
4. Sidemarker Lamp
To replace one of these bulbs:
1. Open the trunk.
2. Remove the two screws, which
secure the taillamp assembly.
3. Remove the taillamp assembly by pulling it straight back until
the two posts disengage from
the grommets. 4. Remove the bulb socket from
the taillamp assembly by turning
it counterclockwise.
5. Remove the bulb by pulling it straight out.
6. Install a new bulb into the bulb socket.
7. Install the bulb socket into the taillamp assembly by turning it
clockwise.
8. Install the taillamp assembly and tighten the two screws.
Page 265 of 382
Black plate (31,1)Chevrolet Sonic Owner Manual - 2013 - 2nd PrintReady - 10/11/12
Vehicle Care 10-31
License Plate Lamp
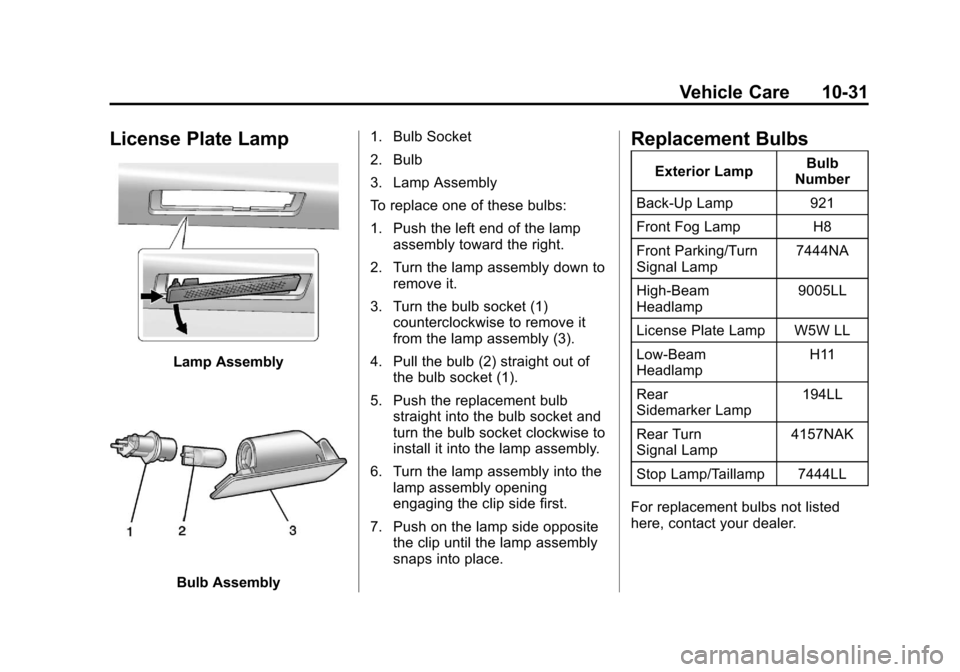
Lamp Assembly
Bulb Assembly1. Bulb Socket
2. Bulb
3. Lamp Assembly
To replace one of these bulbs:
1. Push the left end of the lamp
assembly toward the right.
2. Turn the lamp assembly down to remove it.
3. Turn the bulb socket (1) counterclockwise to remove it
from the lamp assembly (3).
4. Pull the bulb (2) straight out of the bulb socket (1).
5. Push the replacement bulb straight into the bulb socket and
turn the bulb socket clockwise to
install it into the lamp assembly.
6. Turn the lamp assembly into the lamp assembly opening
engaging the clip side first.
7. Push on the lamp side opposite the clip until the lamp assembly
snaps into place.
Replacement Bulbs
Exterior Lamp Bulb
Number
Back-Up Lamp 921
Front Fog Lamp H8
Front Parking/Turn
Signal Lamp 7444NA
High-Beam
Headlamp 9005LL
License Plate Lamp W5W LL
Low-Beam
Headlamp H11
Rear
Sidemarker Lamp 194LL
Rear Turn
Signal Lamp 4157NAK
Stop Lamp/Taillamp 7444LL
For replacement bulbs not listed
here, contact your dealer.
Page 267 of 382
Black plate (33,1)Chevrolet Sonic Owner Manual - 2013 - 2nd PrintReady - 10/11/12
Vehicle Care 10-33
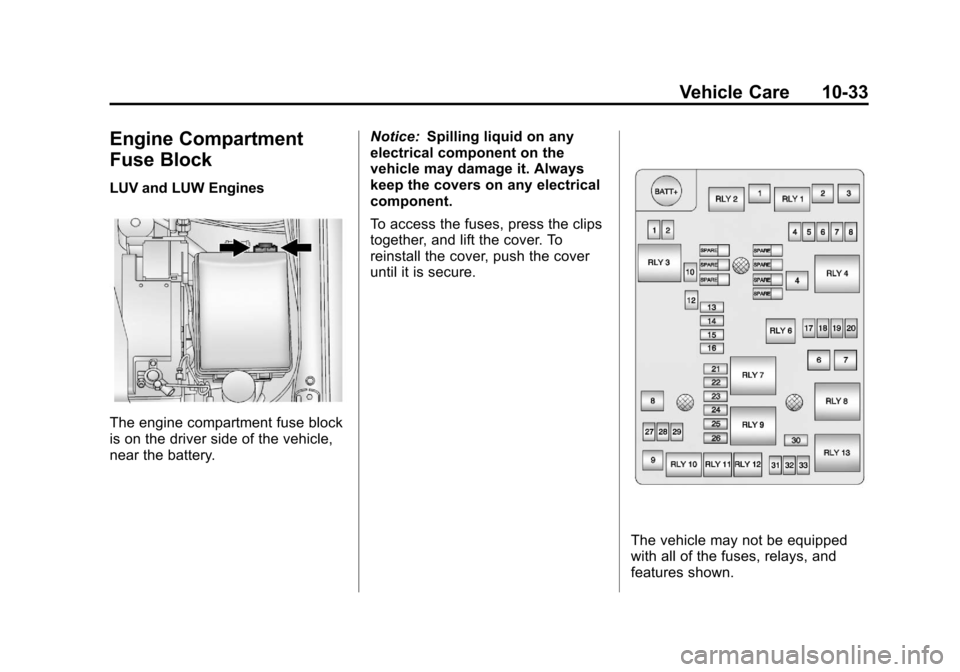
Engine Compartment
Fuse Block
LUV and LUW Engines
The engine compartment fuse block
is on the driver side of the vehicle,
near the battery.Notice:
Spilling liquid on any
electrical component on the
vehicle may damage it. Always
keep the covers on any electrical
component.
To access the fuses, press the clips
together, and lift the cover. To
reinstall the cover, push the cover
until it is secure.
The vehicle may not be equipped
with all of the fuses, relays, and
features shown.