air condition CHEVROLET SONIC 2016 2.G Owners Manual
[x] Cancel search | Manufacturer: CHEVROLET, Model Year: 2016, Model line: SONIC, Model: CHEVROLET SONIC 2016 2.GPages: 353, PDF Size: 7.74 MB
Page 4 of 353
Chevrolet Sonic Owner Manual (GMNA-Localizing-U.S/Canada-9085902) -
2016 - CRC - 5/27/15
Introduction 3
{Warning
Warning indicates a hazard that
could result in injury or death.
Caution
Caution indicates a hazard that
could result in property or vehicle
damage.
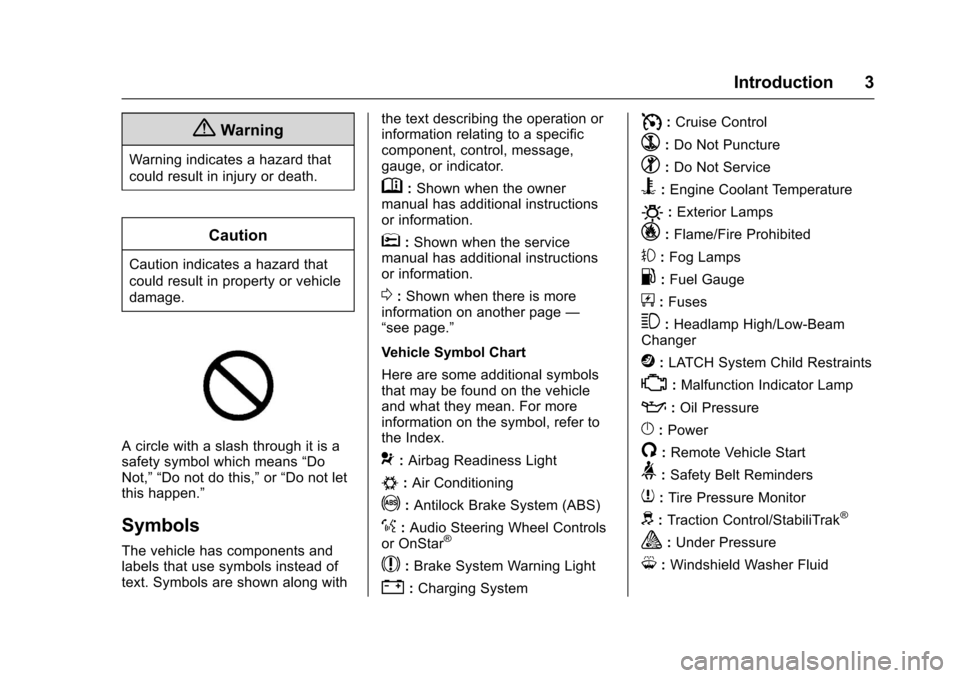
A circle with a slash through it is a
safety symbol which means“Do
Not,” “Do not do this,” or“Do not let
this happen.”
Symbols
The vehicle has components and
labels that use symbols instead of
text. Symbols are shown along with the text describing the operation or
information relating to a specific
component, control, message,
gauge, or indicator.
M:
Shown when the owner
manual has additional instructions
or information.
*: Shown when the service
manual has additional instructions
or information.
0: Shown when there is more
information on another page —
“see page.”
Vehicle Symbol Chart
Here are some additional symbols
that may be found on the vehicle
and what they mean. For more
information on the symbol, refer to
the Index.
9: Airbag Readiness Light
#:Air Conditioning
!:Antilock Brake System (ABS)
%:Audio Steering Wheel Controls
or OnStar®
$: Brake System Warning Light
":Charging System
I: Cruise Control
`:Do Not Puncture
^:Do Not Service
B:Engine Coolant Temperature
O:Exterior Lamps
_: Flame/Fire Prohibited
#:Fog Lamps
.:Fuel Gauge
+: Fuses
3:Headlamp High/Low-Beam
Changer
j: LATCH System Child Restraints
*:Malfunction Indicator Lamp
::Oil Pressure
}:Power
/:Remote Vehicle Start
>: Safety Belt Reminders
7:Tire Pressure Monitor
d:Traction Control/StabiliTrak®
a:Under Pressure
M: Windshield Washer Fluid
Page 13 of 353
Chevrolet Sonic Owner Manual (GMNA-Localizing-U.S/Canada-9085902) -
2016 - CRC - 5/27/15
12 In Brief
To return the seatback to the upright
position:1. Lift the lever fully without applying pressure to the
seatback, and the seatback will
return to the upright position.
2. Push and pull on the seatback to make sure it is locked.
See Reclining Seatbacks 046.
Second Row Seats
The rear seatbacks can be folded
down to increase cargo space.
See Rear Seats 048.
Head Restraint
Adjustment
Do not drive until the head restraints
for all occupants are installed and
adjusted properly.
To achieve a comfortable seating
position, change the seatback
recline angle as little as necessary
while keeping the seat and the head
restraint height in the proper
position. See
Head Restraints 043 and Seat
Adjustment 045.
Safety Belts
Refer to the following sections for
important information on how to use
safety belts properly:
.
Safety Belts 050.
. How to Wear Safety Belts
Properly 051.
. Lap-Shoulder Belt 052.
. Lower Anchors and Tethers for
Children (LATCH System) 074.
Passenger Sensing
System
United States
Canada
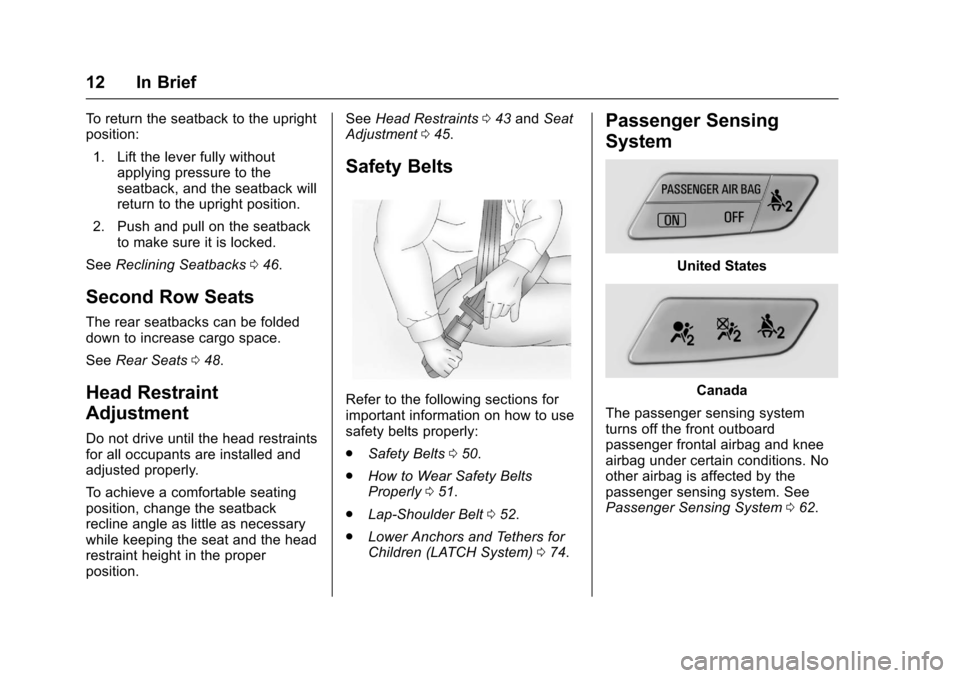
The passenger sensing system
turns off the front outboard
passenger frontal airbag and knee
airbag under certain conditions. No
other airbag is affected by the
passenger sensing system. See
Passenger Sensing System 062.
Page 17 of 353
Chevrolet Sonic Owner Manual (GMNA-Localizing-U.S/Canada-9085902) -
2016 - CRC - 5/27/15
16 In Brief
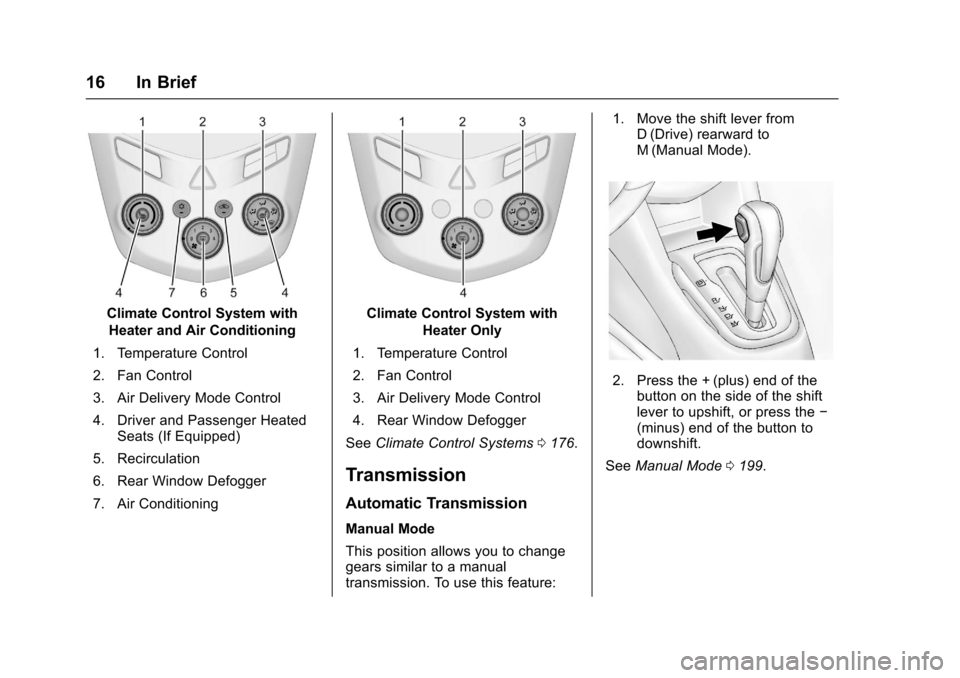
Climate Control System withHeater and Air Conditioning
1. Temperature Control
2. Fan Control
3. Air Delivery Mode Control
4. Driver and Passenger Heated Seats (If Equipped)
5. Recirculation
6. Rear Window Defogger
7. Air ConditioningClimate Control System with Heater Only
1. Temperature Control
2. Fan Control
3. Air Delivery Mode Control
4. Rear Window Defogger
See Climate Control Systems 0176.
Transmission
Automatic Transmission
Manual Mode
This position allows you to change
gears similar to a manual
transmission. To use this feature: 1. Move the shift lever from
D (Drive) rearward to
M (Manual Mode).
2. Press the + (plus) end of the
button on the side of the shift
lever to upshift, or press the −
(minus) end of the button to
downshift.
See Manual Mode 0199.
Page 63 of 353
Chevrolet Sonic Owner Manual (GMNA-Localizing-U.S/Canada-9085902) -
2016 - CRC - 5/27/15
62 Seats and Restraints
Additional windshield breakage may
also occur from the front outboard
passenger airbag.
.Airbags are designed to inflate
only once. After an airbag
inflates, you will need some new
parts for the airbag system.
If you do not get them, the
airbag system will not be there
to help protect you in another
crash. A new system will include
airbag modules and possibly
other parts. The service manual
for the vehicle covers the need
to replace other parts.
. The vehicle has a crash sensing
and diagnostic module which
records information after a
crash. See Vehicle Data
Recording and Privacy 0330
and Event Data Recorders
0 330.
. Let only qualified technicians
work on the airbag systems.
Improper service can mean that
an airbag system will not work
properly. See your dealer for
service.Passenger Sensing
System
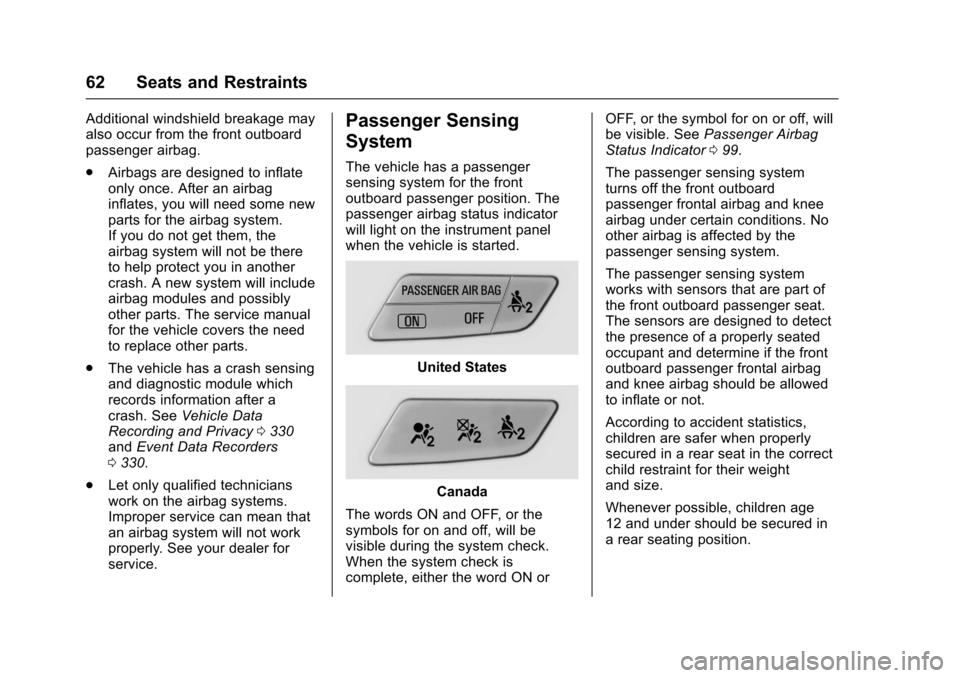
The vehicle has a passenger
sensing system for the front
outboard passenger position. The
passenger airbag status indicator
will light on the instrument panel
when the vehicle is started.
United States
Canada
The words ON and OFF, or the
symbols for on and off, will be
visible during the system check.
When the system check is
complete, either the word ON or OFF, or the symbol for on or off, will
be visible. See
Passenger Airbag
Status Indicator 099.
The passenger sensing system
turns off the front outboard
passenger frontal airbag and knee
airbag under certain conditions. No
other airbag is affected by the
passenger sensing system.
The passenger sensing system
works with sensors that are part of
the front outboard passenger seat.
The sensors are designed to detect
the presence of a properly seated
occupant and determine if the front
outboard passenger frontal airbag
and knee airbag should be allowed
to inflate or not.
According to accident statistics,
children are safer when properly
secured in a rear seat in the correct
child restraint for their weight
and size.
Whenever possible, children age
12 and under should be secured in
a rear seating position.
Page 83 of 353
Chevrolet Sonic Owner Manual (GMNA-Localizing-U.S/Canada-9085902) -
2016 - CRC - 5/27/15
82 Seats and Restraints
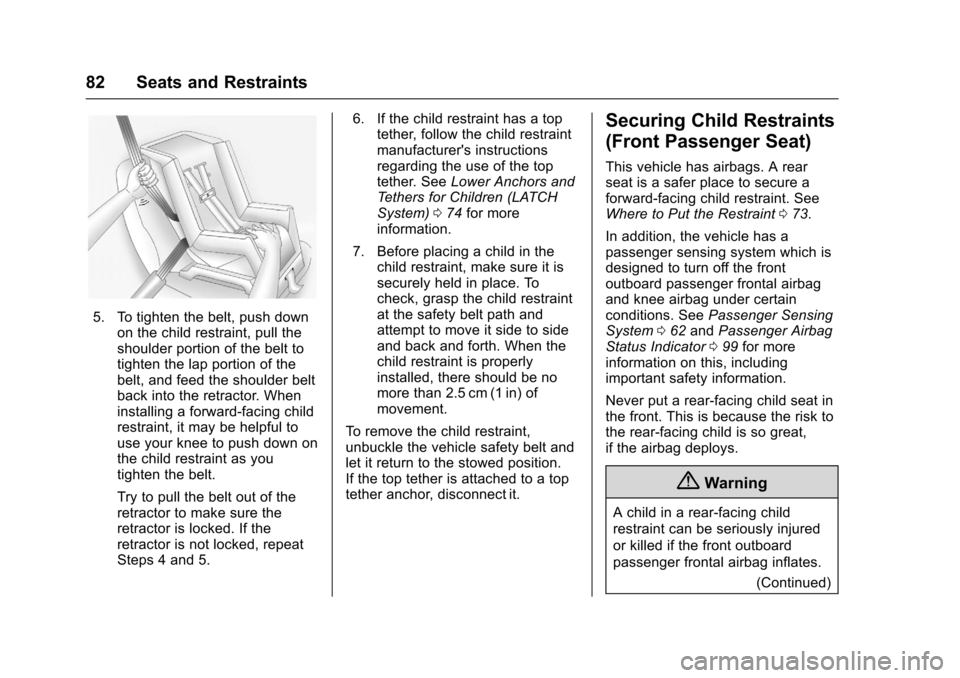
5. To tighten the belt, push downon the child restraint, pull the
shoulder portion of the belt to
tighten the lap portion of the
belt, and feed the shoulder belt
back into the retractor. When
installing a forward-facing child
restraint, it may be helpful to
use your knee to push down on
the child restraint as you
tighten the belt.
Try to pull the belt out of the
retractor to make sure the
retractor is locked. If the
retractor is not locked, repeat
Steps 4 and 5. 6. If the child restraint has a top
tether, follow the child restraint
manufacturer's instructions
regarding the use of the top
tether. See Lower Anchors and
Tethers for Children (LATCH
System) 074 for more
information.
7. Before placing a child in the child restraint, make sure it is
securely held in place. To
check, grasp the child restraint
at the safety belt path and
attempt to move it side to side
and back and forth. When the
child restraint is properly
installed, there should be no
more than 2.5 cm (1 in) of
movement.
To remove the child restraint,
unbuckle the vehicle safety belt and
let it return to the stowed position.
If the top tether is attached to a top
tether anchor, disconnect it.
Securing Child Restraints
(Front Passenger Seat)
This vehicle has airbags. A rear
seat is a safer place to secure a
forward-facing child restraint. See
Where to Put the Restraint 073.
In addition, the vehicle has a
passenger sensing system which is
designed to turn off the front
outboard passenger frontal airbag
and knee airbag under certain
conditions. See Passenger Sensing
System 062 and Passenger Airbag
Status Indicator 099 for more
information on this, including
important safety information.
Never put a rear-facing child seat in
the front. This is because the risk to
the rear-facing child is so great,
if the airbag deploys.
{Warning
A child in a rear-facing child
restraint can be seriously injured
or killed if the front outboard
passenger frontal airbag inflates.
(Continued)
Page 101 of 353
Chevrolet Sonic Owner Manual (GMNA-Localizing-U.S/Canada-9085902) -
2016 - CRC - 5/27/15
100 Instruments and Controls
outboard passenger frontal airbag
and knee airbag are allowed to
inflate.
If the word OFF or the off symbol is
lit on the passenger airbag status
indicator, it means that the
passenger sensing system has
turned off the front outboard
passenger frontal airbag and knee
airbag.
If, after several seconds, both status
indicator lights remain on, or if there
are no lights at all, there may be a
problem with the lights or the
passenger sensing system. See
your dealer for service.
{Warning
If the airbag readiness light ever
comes on and stays on, it means
that something may be wrong
with the airbag system. To help
avoid injury to yourself or others,
have the vehicle serviced right
away. SeeAirbag Readiness
Light 099 for more information,
including important safety
information.
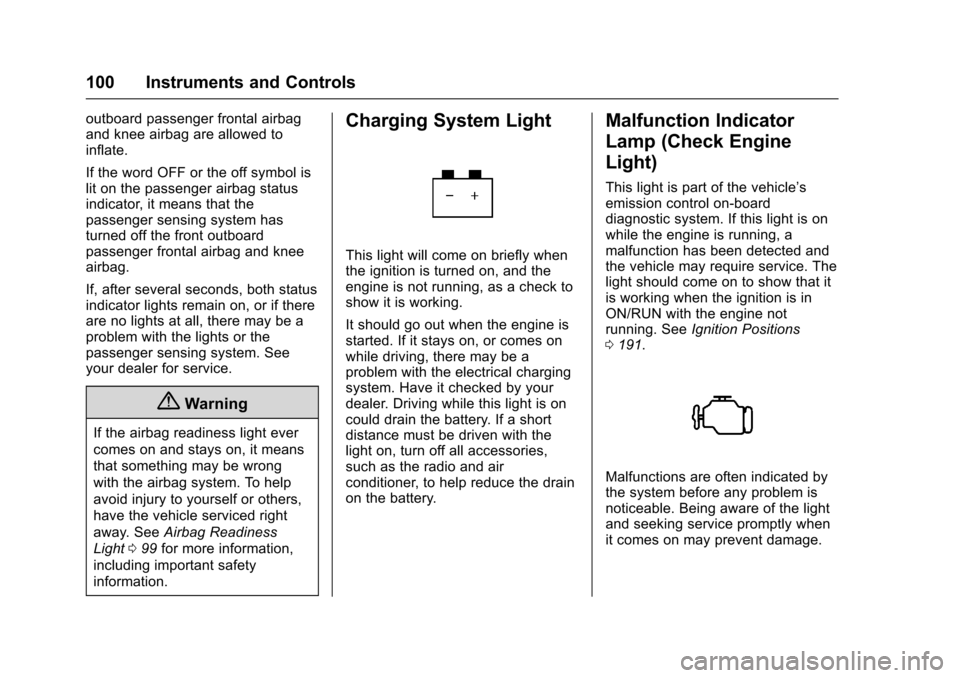
Charging System Light
This light will come on briefly when
the ignition is turned on, and the
engine is not running, as a check to
show it is working.
It should go out when the engine is
started. If it stays on, or comes on
while driving, there may be a
problem with the electrical charging
system. Have it checked by your
dealer. Driving while this light is on
could drain the battery. If a short
distance must be driven with the
light on, turn off all accessories,
such as the radio and air
conditioner, to help reduce the drain
on the battery.
Malfunction Indicator
Lamp (Check Engine
Light)
This light is part of the vehicle’s
emission control on-board
diagnostic system. If this light is on
while the engine is running, a
malfunction has been detected and
the vehicle may require service. The
light should come on to show that it
is working when the ignition is in
ON/RUN with the engine not
running. See Ignition Positions
0 191.
Malfunctions are often indicated by
the system before any problem is
noticeable. Being aware of the light
and seeking service promptly when
it comes on may prevent damage.
Page 112 of 353
Chevrolet Sonic Owner Manual (GMNA-Localizing-U.S/Canada-9085902) -
2016 - CRC - 5/27/15
Instruments and Controls 111
Vehicle Messages
DIC messages display when the
status of the vehicle has changed
and action may be needed to
correct the condition. Multiple
messages appear one after another.
Press any of the DIC buttons on the
turn signal lever to acknowledge
and clear them from the display.
More urgent messages cannot be
cleared from the DIC display. All
messages should be taken
seriously. Clearing messages will
not correct the problem.
Vehicle messages appear as code
numbers.
25 :Left Front Turn Signal Failure
26 : Left Rear Turn Signal Failure
27 : Right Front Turn Signal Failure
28 : Right Rear Turn Signal Failure
49 : Lane Departure Warning
Unavailable
52 : Change Timing Belt
77 : Service Front Camera System
84 : Engine Power Is Reduced 89 :
Service Vehicle SoonEngine Oil Messages
:
% CHANGE
This message displays when the
engine oil needs to be changed.
When changing the engine oil, be
sure to reset the Oil Life System.
See Engine Oil Life System 0228,
Engine Oil 0226, and Maintenance
Schedule 0302.
Tire Messages
LF XX, RF XX, LR XX,
or RR XX
A message displays when the tire
pressure is low. It shows the
location of the low tire and the
approximate pressure of the low tire.
If a tire pressure message appears,
stop as soon as you can. Inflate the
tires by adding air until the tire
pressure is equal to the values
shown on the Tire and Loading
Information label. See Tires0254,
Vehicle Load Limits 0187, and Tire
Pressure 0261.
Trip Computer
The trip computer is located in the
Driver Information Center (DIC).
It provides the driver with driving
information such as average speed,
fuel range, average fuel economy,
and a timer.
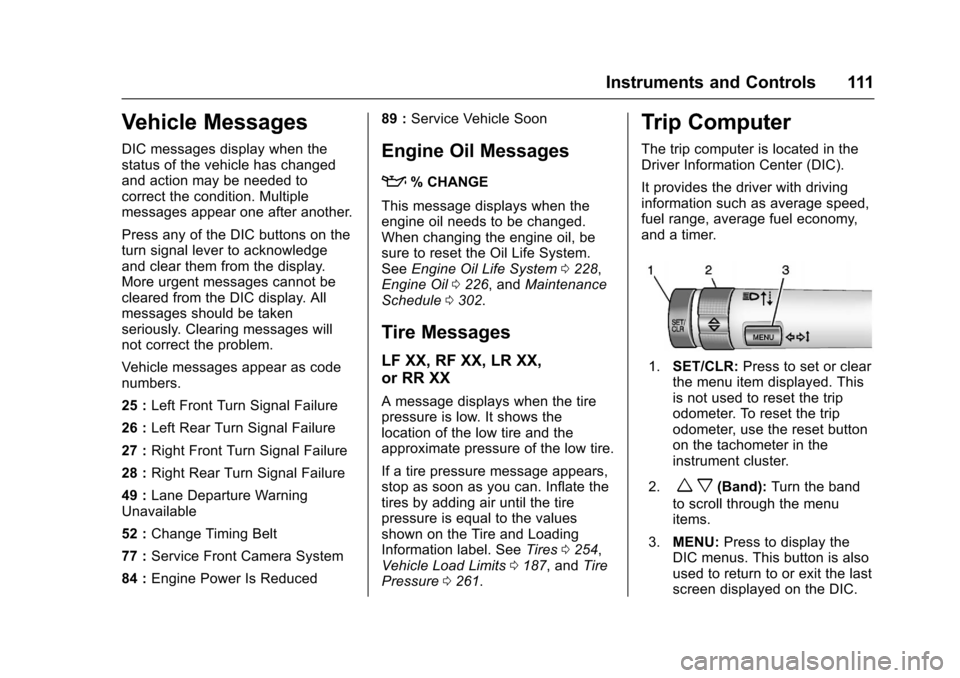
1. SET/CLR: Press to set or clear
the menu item displayed. This
is not used to reset the trip
odometer. To reset the trip
odometer, use the reset button
on the tachometer in the
instrument cluster.
2.
w x(Band): Turn the band
to scroll through the menu
items.
3. MENU: Press to display the
DIC menus. This button is also
used to return to or exit the last
screen displayed on the DIC.
Page 177 of 353
Chevrolet Sonic Owner Manual (GMNA-Localizing-U.S/Canada-9085902) -
2016 - CRC - 5/27/15
176 Climate Controls
Climate Controls
Climate Control Systems
Climate Control Systems . . . . . 176
Air Vents
Air Vents . . . . . . . . . . . . . . . . . . . . . 178
Maintenance
Air Intake . . . . . . . . . . . . . . . . . . . . . 179
Passenger Compartment AirFilter . . . . . . . . . . . . . . . . . . . . . . . . 179
Climate Control
Systems
These climate control systems
control the heating, cooling, and
ventilation for the vehicle.
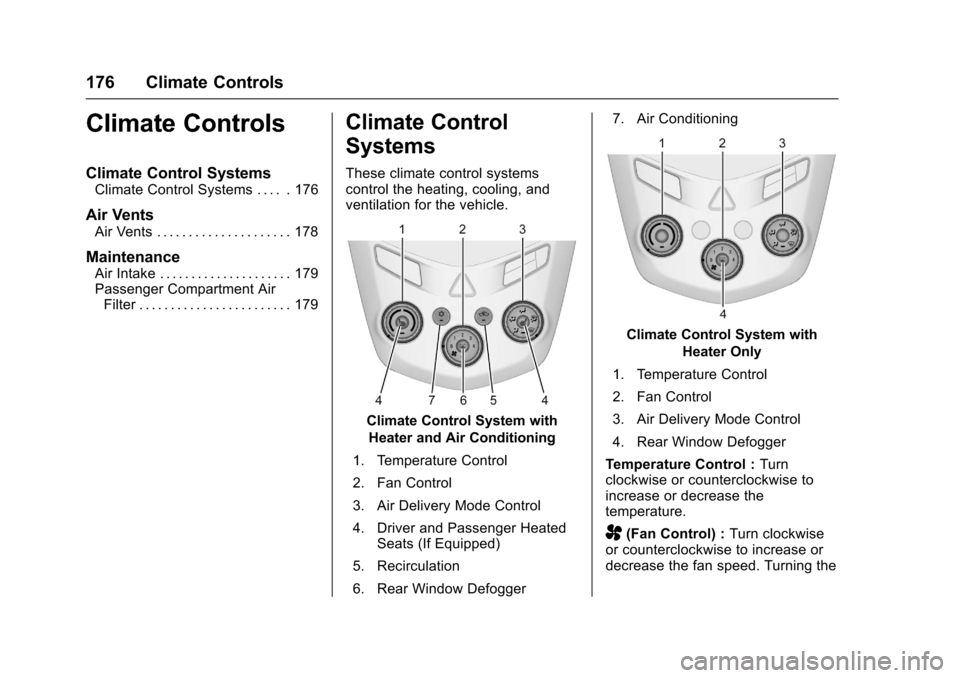
Climate Control System with
Heater and Air Conditioning
1. Temperature Control
2. Fan Control
3. Air Delivery Mode Control
4. Driver and Passenger Heated Seats (If Equipped)
5. Recirculation
6. Rear Window Defogger 7. Air Conditioning
Climate Control System with
Heater Only
1. Temperature Control
2. Fan Control
3. Air Delivery Mode Control
4. Rear Window Defogger
Temperature Control : Turn
clockwise or counterclockwise to
increase or decrease the
temperature.
A(Fan Control) : Turn clockwise
or counterclockwise to increase or
decrease the fan speed. Turning the
Page 178 of 353
Chevrolet Sonic Owner Manual (GMNA-Localizing-U.S/Canada-9085902) -
2016 - CRC - 5/27/15
Climate Controls 177
fan control to 0 turns the fan off. The
fan must be turned on to run the air
conditioning compressor.
Air Delivery Mode Control :Turn
clockwise or counterclockwise to
change the current airflow mode.
Select from the following air delivery
modes:
Y(Vent) : Air is directed to the
instrument panel outlets.
\(Bi-Level) : Air is divided
between the instrument panel and
floor outlets.
[(Floor) : Air is directed to the
floor outlets, with some air directed
to the rear outlets.
W(Defog) : This mode clears the
windows of fog or moisture. Air is
directed to the floor, windshield, and
side window outlets.
1(Defrost) : This mode clears the
windshield of fog or frost more
quickly. Air is directed to the
windshield and side window outlets.
Do not drive the vehicle until all
windows are clear. In defrost or defog mode, excessive
air conditioning use can cause the
windows to fog. If this happens,
change the air delivery mode to
Y
and reduce the fan speed.
#(Air Conditioning) :
If equipped
with air conditioning, follow these
steps to use the system. Turn
Ato
the desired speed. The air
conditioning does not operate when
the fan control knob is in the off
position. Press
#to turn the air
conditioning on and off. When
#is
pressed, an indicator light comes on
to show that the air conditioning
is on.
For quick cool down on hot days:
1. Open the windows to let hot air escape.
2. Press
M.
3. Press
#.
4. Select the coolest temperature.
5. Select the highest
Aspeed. Using these settings together for
long periods of time may cause the
air inside the vehicle to become too
dry. To prevent this from happening,
after the air in the vehicle has
cooled, turn the recirculation
mode off.
M(Recirculation) :
This mode
recirculates and helps to quickly
cool the air inside the vehicle. It can
be used to reduce the entry of
outside air and odors.
Press the button to turn the
recirculation mode on. An indicator
light comes on to show that the
recirculation is on. Press the button
again to return to outside air mode.
Using the recirculation mode for
extended periods may cause the
windows to fog. If this happens,
select the defrost mode.
Max
#is available when the air
conditioning is selected and the
temperature is set to the coolest
setting while the outside air
temperature is warm. When Max
#
is activated, the air inside the
vehicle is automatically recirculated,
Page 179 of 353
Chevrolet Sonic Owner Manual (GMNA-Localizing-U.S/Canada-9085902) -
2016 - CRC - 5/27/15
178 Climate Controls
which helps to quickly cool the
vehicle. The recirculation indicator
will not be lit.
To allow outside air to enter in these
conditions, press the recirculation
button twice. The recirculation
indicator will not be lit.
MorL(Heated Seats, If
Equipped) : Press to heat the driver
or passenger seat. See Heated
Front Seats 047.
Rear Window and Outside
Mirror Defogger
1(Rear Window Defogger) :
Press to turn the rear window and
outside mirror defogger on or off. An
indicator light comes on to show
that the feature is on.
The rear window defogger can be
turned off by pressing
1again or
by turning the ignition to ACC/
ACCESSORY or LOCK/OFF. If equipped with heated outside
rearview mirrors, they turn on with
the rear window defogger and help
to clear fog or frost from the surface
of the mirror. See
Heated Mirrors
0 39.
Caution
Using a razor blade or sharp
object on the inside rear window
can damage the antenna or
defogger. Repairs would not be
covered by the vehicle warranty.
Do not stick anything to the rear
window.
Air Vents
Use the air vents located in the
center and on the side of the
instrument panel to direct the
airflow. Move the slats on the center
air vents to direct airflow.
Turn the knobs on the side air vents
counterclockwise or clockwise to
open or close off the airflow.
Operation Tips
.
Clear away any ice, snow,
or leaves from the air inlets at
the base of the windshield that
may block the flow of air into the
vehicle.
. Use of non-GM approved hood
deflectors may adversely affect
the performance of the system.
. Keep the path under the front
seats clear of objects to help
circulate the air inside the
vehicle more effectively.