maintenance schedule CHEVROLET SONIC 2017 2.G Owners Manual
[x] Cancel search | Manufacturer: CHEVROLET, Model Year: 2017, Model line: SONIC, Model: CHEVROLET SONIC 2017 2.GPages: 342, PDF Size: 7.2 MB
Page 26 of 342
Chevrolet Sonic Owner Manual (GMNA-Localizing-U.S./Canada-10122660) -2017 - crc - 5/13/16
In Brief 25
.Follow recommended scheduledmaintenance.
Roadside Assistance
Program
U.S.: 1-800-243-8872
TTY Users (U.S. Only):1-888-889-2438
Canada: 1-800-268-6800
New Chevrolet owners areautomatically enrolled in theRoadside Assistance Program.
SeeRoadside AssistanceProgram0311.
Page 77 of 342
Chevrolet Sonic Owner Manual (GMNA-Localizing-U.S./Canada-10122660) -2017 - crc - 5/13/16
76 Seats and Restraints
from working properly. Theoperation of the airbag system canalso be affected by changing anyparts of the front seats, safety belts,the airbag sensing and diagnosticmodule, steering wheel, instrumentpanel, any of the airbag modules,ceiling or pillar garnish trim, frontsensors, side impact sensors,or airbag wiring.
Yo u r d e a l e r a n d t h e s e r v i c e m a n u a lhave information about the locationof the airbag sensors, sensing anddiagnostic module, and airbagwiring.
In addition, the vehicle has apassenger sensing system for thefront outboard passenger position,which includes sensors that are partof the passenger seat. Thepassenger sensing system may notoperate properly if the original seattrim is replaced with non-GMcovers, upholstery, or trim; or withGM covers, upholstery, or trimdesigned for a different vehicle. Anyobject, such as an aftermarket seatheater or a comfort-enhancing pador device, installed under or on topof the seat fabric, could also
interfere with the operation of thepassenger sensing system. Thiscould either prevent properdeployment of the passengerairbag(s) or prevent the passengersensing system from properlyturning off the passenger airbag(s).SeePassenger SensingSystem071.
If the vehicle has rollover roof-railairbags, seeDifferent Size Tiresand Wheels0264for additionalimportant information.
If you have to modify your vehiclebecause you have a disability andhave questions about whether themodifications will affect the vehicle'sairbag system, or if you havequestions about whether the airbagsystem will be affected if the vehicleis modified for any other reason, callCustomer Assistance. SeeCustomer Assistance Offices0309.
Airbag System Check
The airbag system does not needregularly scheduled maintenance orreplacement. Make sure the airbagreadiness light is working. SeeAirbag Readiness Light011 0.
Caution
If an airbag covering is damaged,
opened, or broken, the airbag
may not work properly. Do not
open or break the airbag
coverings. If there are any
opened or broken airbag
coverings, have the airbag
covering and/or airbag module
replaced. For the location of the
airbags, seeWhere Are the
Airbags?067.Seeyourdealer
for service.
Page 120 of 342
Chevrolet Sonic Owner Manual (GMNA-Localizing-U.S./Canada-10122660) -2017 - crc - 5/13/16
Instruments and Controls 119
Caution (Continued)
level is within the operating range
and the oil pressure is still low,
have the vehicle serviced. Always
follow the maintenance schedule
for changing engine oil.
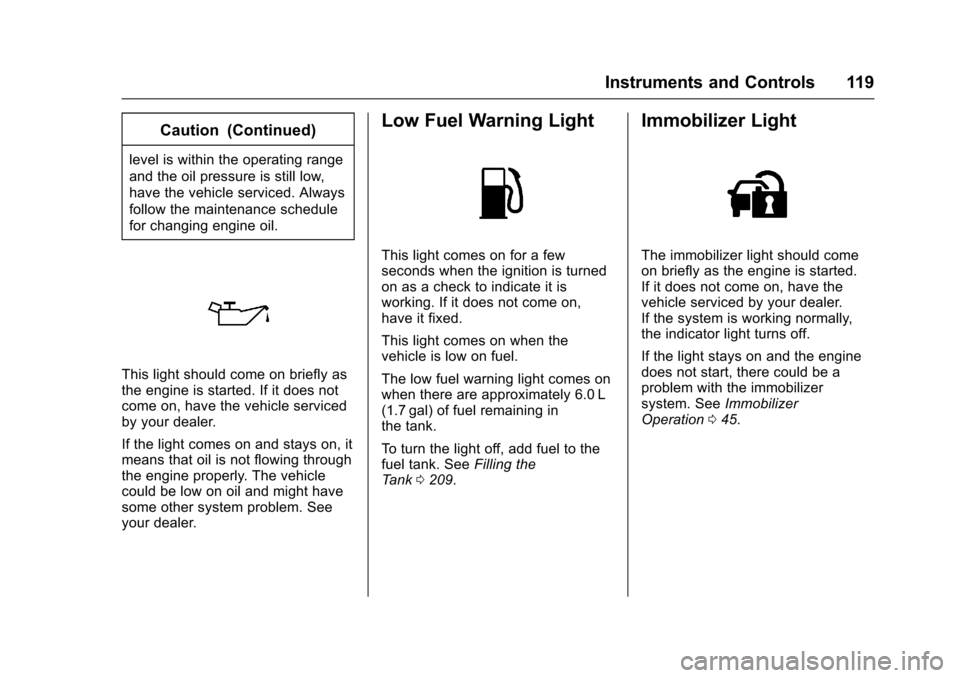
This light should come on briefly asthe engine is started. If it does notcome on, have the vehicle servicedby your dealer.
If the light comes on and stays on, itmeans that oil is not flowing throughthe engine properly. The vehiclecould be low on oil and might havesome other system problem. Seeyour dealer.
Low Fuel Warning Light
This light comes on for a fewseconds when the ignition is turnedon as a check to indicate it isworking. If it does not come on,have it fixed.
This light comes on when thevehicle is low on fuel.
The low fuel warning light comes onwhen there are approximately 6.0 L(1.7 gal) of fuel remaining inthe tank.
To t u r n t h e l i g h t o f f , a d d f u e l t o t h efuel tank. SeeFilling theTa n k0209.
Immobilizer Light
The immobilizer light should comeon briefly as the engine is started.If it does not come on, have thevehicle serviced by your dealer.If the system is working normally,the indicator light turns off.
If the light stays on and the enginedoes not start, there could be aproblem with the immobilizersystem. SeeImmobilizerOperation045.
Page 123 of 342
Chevrolet Sonic Owner Manual (GMNA-Localizing-U.S./Canada-10122660) -2017 - crc - 5/13/16
122 Instruments and Controls
Remaining Oil Life
This menu is not available while thevehicle is moving. This displayshows an estimate of the oil's
remaining useful life. If 99:%is
displayed, that means 99% of thecurrent oil life remains.
When the remaining oil life is low,
the:%CHANGEmessagewill
appear on the display. The oilshould changed as soon aspossible. SeeEngine Oil0220.Inaddition to the engine oil life systemmonitoring the oil life, additionalmaintenance is recommended in theMaintenance Schedule. SeeMaintenance Schedule0290.
Remember, the Oil Life display mustbe reset after each oil change. It willnot reset itself. Also, be careful notto reset the Oil Life displayaccidentally at any time other thanwhen the oil has just been changed.It cannot be reset accurately untilthe next oil change. To reset theengine oil life system, press SET/CLR while the Oil Life display isactive. SeeEngine Oil LifeSystem0222.
Units
This menu is not available while thevehicle is moving. Press SET/CLRwhile the unit display is active and
movew/xto change units when
UNIT SET is displayed. Press SET/CLR to confirm the setting. Select 1,2, or 3 for the unit display. 1 ismetric units, 2 is Imperial units, and3isUSunits.Thiswillchangethedisplays on the cluster and DIC tothe type of measurements selected.
Tire Learn
This display allows for matching ofthe TPMS sensors. The display willshow a vehicle with the approximatepressures of all four tires. Tirepressure is displayed in eitherkilopascal (kPa) or pounds persquare inch (psi). SeeTire PressureMonitor System0257andTirePressure Monitor Operation0258.
Trip/Fuel Menu Items (Base
Level DIC)
Press MENU until the Trip/Fuel
menu is displayed. Usew/xto
scroll through the menu items. On
some models, use the trip odometerreset stem to scroll through themenu. Not all items are available onevery vehicle. The following is a listof possible menu items:
.Trip Odometer
.Fuel Range
.Average Vehicle Speed
.Instantaneous Fuel Economy
.Average Fuel Economy
.Timer
Trip Odometer
This display shows the currentdistance traveled, in eitherkilometers (km) or miles (mi), sincethe last reset for the trip odometer.The trip odometer can be reset tozero by pressing SET/CLR orpressing and holding the tripodometer reset stem while the tripodometer display is showing.
Fuel Range
This display shows the approximatedistance the vehicle can be drivenwithout refueling. The fuel rangeestimate is based on an average of
Page 126 of 342
Chevrolet Sonic Owner Manual (GMNA-Localizing-U.S./Canada-10122660) -2017 - crc - 5/13/16
Instruments and Controls 125
briefly while Timer is displayed. Toreset the timer to zero, press andhold SET/CLR.
Navigation
This display is used for theTurn-by-Turn navigation,if equipped.
Vehicle Information Menu
Items (Uplevel DIC)
Press MENU on the turn signallever until Vehicle Information menu
is displayed. Usew/xto scroll
through the following possible menuitems:
.Display Units
.Tire Pressure
.Remaining Oil Life
Display Units
Movew/xto switch between
metric or US when the Unit displayis active. Press SET/CLR to confirmthe setting. This will change thedisplays on the cluster and DIC toeither metric or English (US)measurements.
Tire Pressure
The display will show a vehicle withthe approximate pressures of allfour tires. Tire pressure is displayedin either kilopascal (kPa) or poundsper square inch (psi). SeeTirePressure Monitor System0257andTire Pressure MonitorOperation0258.
Remaining Oil Life
This menu is not available while thevehicle is moving. This displayshows an estimate of the oil'sremaining useful life. If REMAININGOIL LIFE 99 % is displayed, thatmeans 99% of the current oil liferemains.
When the remaining oil life is low,the CHANGE ENGINE OIL SOONmessage will appear on the display.The oil should changed as soon aspossible. SeeEngine Oil0220.Inaddition to the engine oil life systemmonitoring the oil life, additionalmaintenance is recommended in theMaintenance Schedule. SeeMaintenance Schedule0290.
Remember, the Oil Life display mustbe reset after each oil change. It willnot reset itself. Also, be careful notto reset the Oil Life displayaccidentally at any time other thanwhen the oil has just been changed.It cannot be reset accurately untilthe next oil change. To reset theengine oil life system, press SET/CLR while the Oil Life display isactive. SeeEngine Oil LifeSystem0222.
Page 128 of 342
Chevrolet Sonic Owner Manual (GMNA-Localizing-U.S./Canada-10122660) -2017 - crc - 5/13/16
Instruments and Controls 127
Messages that require immediateaction cannot be cleared until thataction is performed. Clearingmessages does not correct theproblem.
Engine Oil Messages
:% CHANGE
This message displays when theengine oil needs to be changed.When changing the engine oil, besure to reset the Oil Life System.SeeEngine Oil Life System0222,Engine Oil0220,andMaintenanceSchedule0290.
Tire Messages
LF XX, RF XX, LR XX,
or RR XX
Amessagedisplayswhenthetirepressure is low. It shows thelocation of the low tire and theapproximate pressure of the low tire.
If a tire pressure message appears,stop as soon as you can. Inflate thetires by adding air until the tirepressure is equal to the valuesshown on the Tire and LoadingInformation label. SeeTires0248,Vehicle Load Limits0178,andTirePressure0256.
Vehicle
Personalization
Use the audio system controls toaccess the personalization menusfor customizing vehicle features.
The following are all possiblepersonalization features. Dependingon the vehicle, some may not beavailable.
Radio Audio System Controls
1. Touch the desired feature todisplay a list of availableoptions.
2. Touch to select the desiredfeature setting.
3. PressoBACK on the
faceplate or touch0to return
to the previous menu or exit.
Turn the vehicle to ON/RUN toaccess the Settings menu, thenselect SETTINGS from the HomePage on the infotainment systemdisplay.
Page 170 of 342
Chevrolet Sonic Owner Manual (GMNA-Localizing-U.S./Canada-10122660) -2017 - crc - 5/13/16
Climate Controls 169
Maintenance
Air Intake
Clear away any ice, snow, or leavesfrom the air intake at the base of thewindshield that can block the flow ofair into the vehicle.
Passenger Compartment
Air Filter
The filter removes dust, pollen, andother airborne irritants from outsideair that is pulled into the vehicle.
The filter should be replaced as partof routine scheduled maintenance.SeeMaintenance Schedule0290.To f i n d o u t w h a t t y p e o f f i l t e r t o u s e ,seeMaintenance ReplacementParts0301.
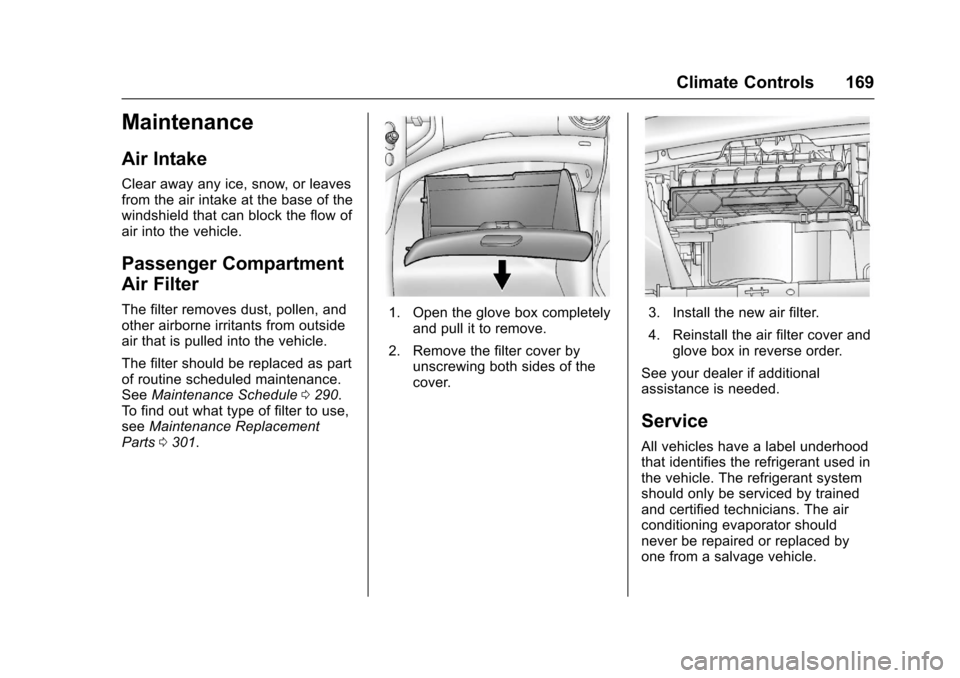
1. Open the glove box completelyand pull it to remove.
2. Remove the filter cover byunscrewing both sides of thecover.
3. Install the new air filter.
4. Reinstall the air filter cover andglove box in reverse order.
See your dealer if additionalassistance is needed.
Service
All vehicles have a label underhoodthat identifies the refrigerant used inthe vehicle. The refrigerant systemshould only be serviced by trainedand certified technicians. The airconditioning evaporator shouldnever be repaired or replaced byone from a salvage vehicle.
Page 225 of 342
Chevrolet Sonic Owner Manual (GMNA-Localizing-U.S./Canada-10122660) -2017 - crc - 5/13/16
224 Vehicle Care
Change the fluid at the intervalslisted inMaintenance Schedule0290,andbesuretousethefluidlisted inRecommended Fluids andLubricants0300.
Manual Transmission
Fluid
It is not necessary to check themanual transmission fluid level.Atransmissionfluidleakistheonlyreason for fluid loss. If a leakoccurs, take the vehicle to yourdealer and have it repaired as soonas possible. SeeRecommendedFluids and Lubricants0300for theproper fluid to use.
Hydraulic Clutch
For vehicles with a manualtransmission, it is not necessary toregularly check brake/clutch fluidunless there is a leak suspected.Adding fluid will not correct a leak.Afluidlossinthissystemcouldindicate a problem. Have thesystem inspected and repaired.
When to Check and What
to Use
The common hydraulic clutch andbrake master cylinder fluid reservoiris filled with DOT 3 brake fluid asindicated on the reservoir cap. SeeEngine Compartment Overview0217for reservoir location.
How to Check and Add Fluid
Visually check the brake/clutch fluidreservoir to make sure the fluid levelis at the MIN (minimum) line on theside of the reservoir. The brake/hydraulic clutch fluid system shouldbe closed and sealed.
Do not remove the cap to check thefluid level or to top⇣off the fluid level.Remove the cap only whennecessary to add the proper fluiduntil the level reaches the MIN line.
Engine Air Cleaner/Filter
The engine air cleaner/filter islocated in the engine compartmenton the passenger side of thevehicle. SeeEngine CompartmentOverview0217for more informationon location.
When to Inspect the Engine Air
Cleaner/Filter
For intervals on changing andinspecting the engine air cleaner/filter, seeMaintenanceSchedule0290.
How to Inspect the Engine Air
Cleaner/Filter
Do not start the engine or have theengine running with the engine aircleaner/filter housing open. Beforeremoving the engine air cleaner/filter, make sure that the engine aircleaner/filter housing and nearbycomponents are free of dirt anddebris. Remove the engine aircleaner/filter. Lightly tap and shakethe engine air cleaner/filter (awayfrom the vehicle), to release loosedust and dirt. Inspect the engine aircleaner/filter for damage, andreplace if damaged. Do not cleanthe engine air cleaner/filter orcomponents with water orcompressed air.
Page 234 of 342
Chevrolet Sonic Owner Manual (GMNA-Localizing-U.S./Canada-10122660) -2017 - crc - 5/13/16
Vehicle Care 233
Brake Fluid
The brake/clutch master cylinderreservoir is filled with GM approvedDOT 3 brake fluid as indicated onthe reservoir cap. SeeEngineCompartment Overview0217forthe location of the reservoir.
Checking Brake Fluid
Place the vehicle in P (Park) orNeutral with the parking brakeapplied if equipped with a manualtransmission. On a level surface,the brake fluid level should bebetween the minimum andmaximum marks on the brake fluidreservoir.
There are only two reasons why thebrake fluid level in the reservoir maygo down:
.Normal brake lining wear. Whennew linings are installed, thefluid level goes back up.
.Afluidleakinthebrake/clutchhydraulic system. Have thebrake/clutch hydraulic systemfixed. With a leak, the brakes willnot work well.
Always clean the brake fluidreservoir cap and the area aroundthe cap before removing it.
Do not top off the brake/clutch fluid.Adding fluid does not correct a leak.If fluid is added when the linings areworn, there will be too much fluidwhen new brake linings areinstalled. Add or remove fluid, asnecessary, only when work is doneon the brake/clutch hydraulicsystem.
{Warning
If too much brake fluid is added, it
can spill on the engine and burn,
if the engine is hot enough. You
or others could be burned, and
(Continued)
Warning (Continued)
the vehicle could be damaged.
Add brake fluid only when work is
done on the brake/clutch
hydraulic system.
When the brake/clutch fluid falls to alow level, the brake warning lightcomes on. SeeBrake SystemWarning Light011 4.
Brake fluid absorbs water over timewhich degrades the effectiveness ofthe brake fluid. Replace brake fluidat the specified intervals to preventincreased stopping distance. SeeMaintenance Schedule0290.
What to Add
Use only GM approved DOT 3brake fluid from a clean, sealedcontainer. SeeRecommendedFluids and Lubricants0300.
Page 237 of 342
Chevrolet Sonic Owner Manual (GMNA-Localizing-U.S./Canada-10122660) -2017 - crc - 5/13/16
236 Vehicle Care
Park Brake and P (Park)
Mechanism Check
{Warning
When you are doing this check,
the vehicle could begin to move.
Yo u o r o t h e r s c o u l d b e i n j u r e d
and property could be damaged.
Make sure there is room in front
of the vehicle in case it begins to
roll. Be ready to apply the regular
brake at once should the vehicle
begin to move.
Park on a fairly steep hill, with thevehicle facing downhill. Keepingyour foot on the regular brake, setthe parking brake.
.To c h e c k t h e p a r k i n g b r a k e ' sholding ability: With the enginerunning and the transmission inN(Neutral), slowly remove footpressure from the regular brakepedal. Do this until the vehicle isheld by the parking brake only.
.To c h e c k t h e P ( P a r k )mechanism's holding ability:With the engine running, shift toP(Park). Then release theparking brake followed by theregular brake.
Contact your dealer if service isrequired.
Wiper Blade Replacement
Front Wiper Blade
Replacement
Windshield wiper blades should beinspected for wear or cracking. SeetheMaintenance Schedule0290formore information.
Replacement blades come indifferent types and are removed indifferent ways. For properwindshield wiper blade length andtype, seeMaintenanceReplacement Parts0301.
Caution
Allowing the wiper arm to touch
the windshield when no wiper
blade is installed could damage
the windshield. Any damage that
occurs would not be covered by
the vehicle warranty. Do not allow
the wiper arm to touch the
windshield.
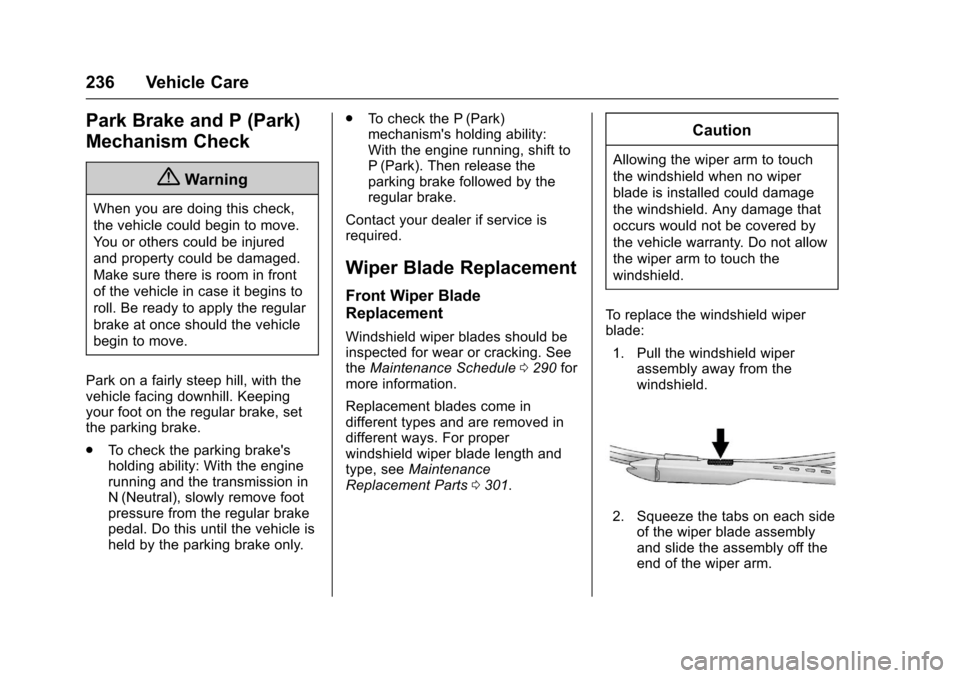
To r e p l a c e t h e w i n d s h i e l d w i p e rblade:
1. Pull the windshield wiperassembly away from thewindshield.
2. Squeeze the tabs on each sideof the wiper blade assemblyand slide the assembly off theend of the wiper arm.