four wheel drive CHEVROLET SPARK 2017 4.G Owners Manual
[x] Cancel search | Manufacturer: CHEVROLET, Model Year: 2017, Model line: SPARK, Model: CHEVROLET SPARK 2017 4.GPages: 331, PDF Size: 5.56 MB
Page 196 of 331
Chevrolet Spark Owner Manual (GMNA-Localizing-U.S./Canada-9956101) -
2017 - crc - 4/25/16
Driving and Operating 195
shortly following the release to
override cruise control, briefly
moving the thumbwheel toward
SET/- will result in cruise control set
to the current vehicle speed.
Using Cruise Control on Hills
How well cruise control works on
hills depends on the vehicle speed,
load, and the steepness of the hills.
When going up steep hills, you
might have to step on the
accelerator pedal to maintain the
vehicle speed. When going
downhill, you might have to brake or
shift to a lower gear to keep your
speed down. If the brake pedal is
applied, cruise control will
disengage.Ending Cruise Control
There are four ways to end cruise
control:
.
To disengage cruise control,
step lightly on the brake pedal or
clutch for manual transmission.
. Press
non the steering wheel.
. Shift the transmission to
N (Neutral).
. To turn off cruise control,
press
oon the steering wheel.
Erasing Speed Memory
The cruise control set speed is
erased from memory if the
obutton
is pressed or if the ignition is
turned off.
Driver Assistance
Systems
Rear Vision
Camera (RVC)
If equipped, the RVC system can
assist the driver when backing up by
displaying a view of the area behind
the vehicle.
{Warning
The camera(s) do not display
children, pedestrians, bicyclists,
crossing traffic, animals, or any
other object outside of the
cameras’ field of view, below the
bumper, or under the vehicle.
Shown distances may be different
from actual distances. Do not
drive or park the vehicle using
only these camera(s). Always
check behind and around the
vehicle before driving. Failure to
use proper care may result in
injury, death, or vehicle damage.
Page 252 of 331
Chevrolet Spark Owner Manual (GMNA-Localizing-U.S./Canada-9956101) -
2017 - crc - 4/25/16
Vehicle Care 251
installed and the sensor
matching process is performed
successfully. See your dealer for
service.
. Replacement tires or wheels do
not match the original equipment
tires or wheels. Tires and wheels
other than those recommended
could prevent the TPMS from
functioning properly. See Buying
New Tires 0254.
. Operating electronic devices or
being near facilities using radio
wave frequencies similar to the
TPMS could cause the TPMS
sensors to malfunction.
If the TPMS is not functioning
properly, it cannot detect or signal a
low tire condition. See your dealer
for service if the TPMS malfunction
light and DIC message, if equipped,
come on and stay on.
TPMS Sensor Matching
Process
Each TPMS sensor has a unique
identification code. The identification
code needs to be matched to a new
tire/wheel position after rotating the vehicle’s tires or replacing one or
more of the TPMS sensors. Also,
the TPMS sensor matching process
should be performed after replacing
a spare tire with a road tire
containing the TPMS sensor. The
malfunction light and the DIC
message, if equipped, should go off
at the next ignition cycle. The
sensors are matched to the tire/
wheel positions, using a TPMS
relearn tool, in the following order:
driver side front tire, passenger side
front tire, passenger side rear tire,
and driver side rear. See your
dealer for service or to purchase a
relearn tool. A TPMS relearn tool
can also be purchased. See Tire
Pressure Monitor Sensor Activation
Tool at
www.gmtoolsandequipment.com or
call 1-800-GM TOOLS
(1-800-468-6657).
There are two minutes to match the
first tire/wheel position, and
five minutes overall to match all four
tire/wheel positions. If it takes
longer, the matching process stops
and must be restarted.
The TPMS sensor matching
process is:
1. Set the parking brake.
2. Turn the ignition to ON/RUN with the engine off or place the
vehicle power mode in ON/
RUN/START. See Ignition
Positions (Key Access) 0176
or Ignition Positions (Keyless
Access) 0177.
3. Use MENU to select the Vehicle Information Menu
(Menu 2) in the Driver
Information Center (DIC).
4. Use the thumbwheel (or up and down arrows) to scroll to the
Tire Pressure Learn Menu Item
(Base DIC) or the Tire
Pressure Menu Item screen
(Uplevel DIC).
5. Press and hold SET/CLR to begin the sensor matching
process.
A message requesting
acceptance of the process may
display.
6. If requested, press SET/CLR again to confirm the selection.
Page 253 of 331
Chevrolet Spark Owner Manual (GMNA-Localizing-U.S./Canada-9956101) -
2017 - crc - 4/25/16
252 Vehicle Care
The horn sounds twice to
signal the receiver is in relearn
mode and the TIRE LEARN or
TIRE LEARNING ACTIVE
message displays on the DIC
screen.
7. Start with the driver side front tire.
8. Place the relearn tool against the tire sidewall, near the valve
stem. Then press the button to
activate the TPMS sensor.
A horn chirp confirms that the
sensor identification code has
been matched to this tire and
wheel position.
9. Proceed to the passenger side front tire, and repeat the
procedure in Step 8.
10. Proceed to the passenger side rear tire, and repeat the
procedure in Step 8.
11. Proceed to the driver side rear tire, and repeat the procedure
in Step 8. The horn sounds two
times to indicate the sensor
identification code has been
matched to the driver side rear tire, and the TPMS sensor
matching process is no longer
active. The TIRE LEARN or
TIRE LEARNING ACTIVE
message on the DIC display
screen goes off.
12. Turn the ignition to LOCK/OFF or press ENGINE START/
STOP to turn the ignition off.
13. Set all four tires to the recommended air pressure
level as indicated on the Tire
and Loading Information label.
Tire Inspection
We recommend that the tires,
including the spare tire, if the
vehicle has one, be inspected
for signs of wear or damage at
least once a month.
Replace the tire if:
.The indicators at three or
more places around the tire
can be seen.
.There is cord or fabric
showing through the tire's
rubber.
.The tread or sidewall is
cracked, cut, or snagged
deep enough to show cord or
fabric.
.The tire has a bump, bulge,
or split.
.The tire has a puncture, cut,
or other damage that cannot
be repaired well because of
the size or location of the
damage.
Tire Rotation
Tires should be rotated every
12 000 km (7,500 mi). See
Maintenance Schedule 0281.
Tires are rotated to achieve a
more uniform wear for all tires.
The first rotation is the most
important.
Anytime unusual wear is
noticed, rotate the tires as soon
as possible, check for proper tire
inflation pressure, and check for
damaged tires or wheels. If the
unusual wear continues after the
Page 269 of 331
Chevrolet Spark Owner Manual (GMNA-Localizing-U.S./Canada-9956101) -
2017 - crc - 4/25/16
268 Vehicle Care
10. Try to start the vehicle that hadthe dead battery. If it will not
start after a few tries, it
probably needs service.
Caution
If the jumper cables are
connected or removed in the
wrong order, electrical shorting
may occur and damage the
vehicle. The repairs would not be
covered by the vehicle warranty.
Always connect and remove the
jumper cables in the correct order,
making sure that the cables do
not touch each other or other
metal.
Jumper Cable Removal
Reverse the sequence exactly when
removing the jumper cables.
After starting the disabled vehicle
and removing the jumper cables,
allow it to idle for several minutes.
Towing the Vehicle
Caution
Incorrectly towing a disabled
vehicle may cause damage. The
damage would not be covered by
the vehicle warranty.
Do not lash or hook to
suspension components. Use the
proper straps around the tires to
secure the vehicle.
Use only a flatbed tow truck for
towing a disabled vehicle. Never
use a sling type lift or damage will
occur. Use ramps to help reduce
approach angles if necessary.
A towed vehicle should have its
drive wheels off the ground.
Consult a professional towing
service if the disabled vehicle must
be towed.
Caution
Improper use of the tow eye can
cause vehicle damage. Use
caution and low speeds to
prevent damage to the vehicle.
If the vehicle is equipped with tow
eye, only use the tow eye to pull the
vehicle onto a flatbed car carrier
from a flat road surface. Do not use
the tow eye to pull the vehicle from
snow, mud or sand.
Recreational Vehicle
Towing
Recreational vehicle towing refers to
towing the vehicle behind another
vehicle, such as behind a motor
home. The two most common types
of recreational vehicle towing are
known as dinghy towing and dolly
towing. Dinghy towing is towing the
vehicle with all four wheels on the
ground. Dolly towing is towing the
vehicle with two wheels on the
ground and two wheels up on a
device known as a dolly.
Page 270 of 331
Chevrolet Spark Owner Manual (GMNA-Localizing-U.S./Canada-9956101) -
2017 - crc - 4/25/16
Vehicle Care 269
Here are some important things to
consider before recreational vehicle
towing:
.The towing capacity of the
towing vehicle. Be sure to read
the tow vehicle manufacturer's
recommendations.
. How far the vehicle will be
towed. Some vehicles have
restrictions on how far and how
long they can tow.
. The proper towing equipment.
See your dealer or trailering
professional for additional advice
and equipment
recommendations.
. If the vehicle is ready to be
towed. Just as preparing the
vehicle for a long trip, make sure
the vehicle is prepared to be
towed.
Caution
Use of a shield mounted in front
of the vehicle grille could restrict
airflow and cause damage to the
(Continued)
Caution (Continued)
transmission. The repairs would
not be covered by the vehicle
warranty. If using a shield, only
use one that attaches to the
towing vehicle.
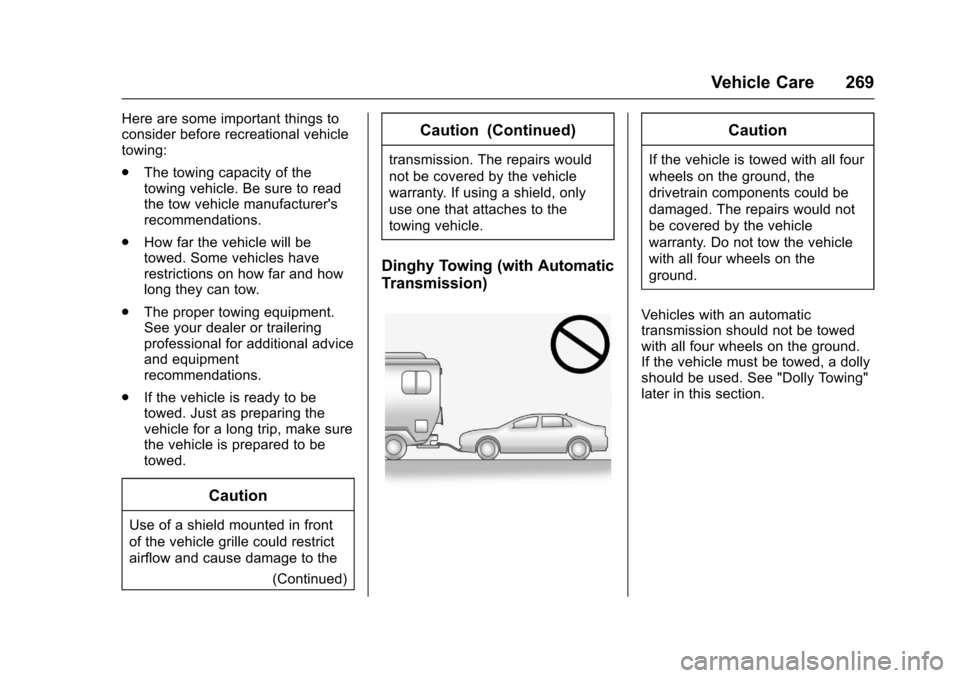
Dinghy Towing (with Automatic
Transmission)
Caution
If the vehicle is towed with all four
wheels on the ground, the
drivetrain components could be
damaged. The repairs would not
be covered by the vehicle
warranty. Do not tow the vehicle
with all four wheels on the
ground.
Vehicles with an automatic
transmission should not be towed
with all four wheels on the ground.
If the vehicle must be towed, a dolly
should be used. See "Dolly Towing"
later in this section.