display CHEVROLET SPARK 2021 Get To Know Guide
[x] Cancel search | Manufacturer: CHEVROLET, Model Year: 2021, Model line: SPARK, Model: CHEVROLET SPARK 2021Pages: 16, PDF Size: 3.42 MB
Page 7 of 16

7
LIGHTING
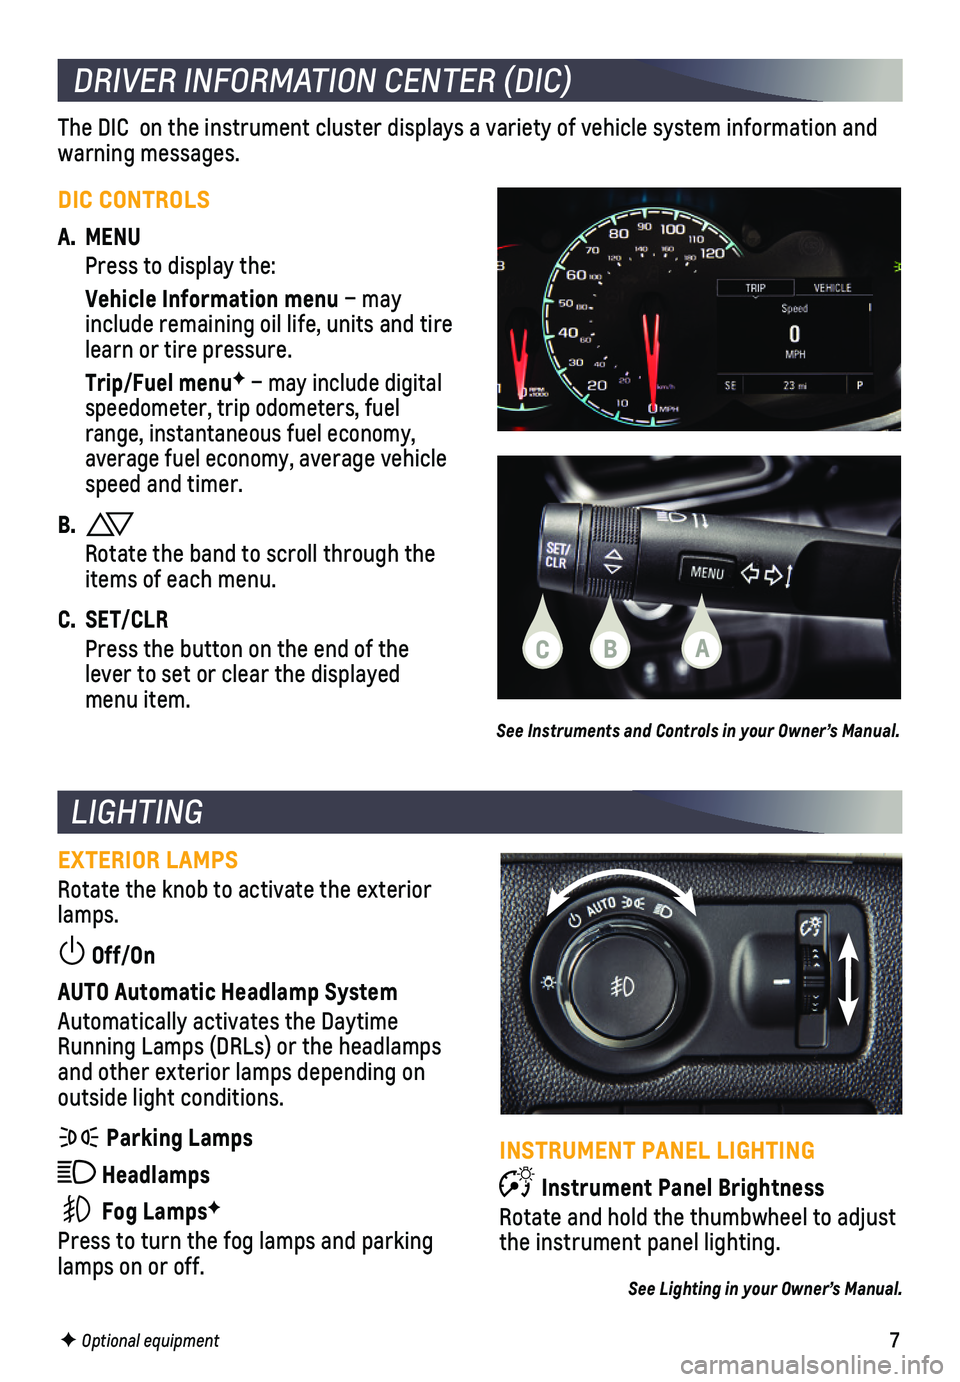
EXTERIOR LAMPS
Rotate the knob to activate the exterior lamps.
Off/On
AUTO Automatic Headlamp System
Automatically activates the Daytime Running Lamps (DRLs) or the headlamps and other exterior lamps depending on outside light conditions.
Parking Lamps
Headlamps
Fog LampsF
Press to turn the fog lamps and parking lamps on or off.
F Optional equipment
INSTRUMENT PANEL LIGHTING
Instrument Panel Brightness
Rotate and hold the thumbwheel to adjust the instrument panel lighting.
See Lighting in your Owner’s Manual.
DRIVER INFORMATION CENTER (DIC)
The DIC on the instrument cluster displays a variety of vehicle system \
information and warning messages.
DIC CONTROLS
A. MENU
Press to display the:
Vehicle Information menu – may include remaining oil life, units and tire learn or tire pressure.
Trip/Fuel menuF – may include digital speedometer, trip odometers, fuel range, instantaneous fuel economy, average fuel economy, average vehicle speed and timer.
B.
Rotate the band to scroll through the items of each menu.
C. SET/CLR
Press the button on the end of the lever to set or clear the displayed menu item.
See Instruments and Controls in your Owner’s Manual.
CBA
Page 9 of 16

9
INFOTAINMENT SYSTEM
STORING FAVORITES
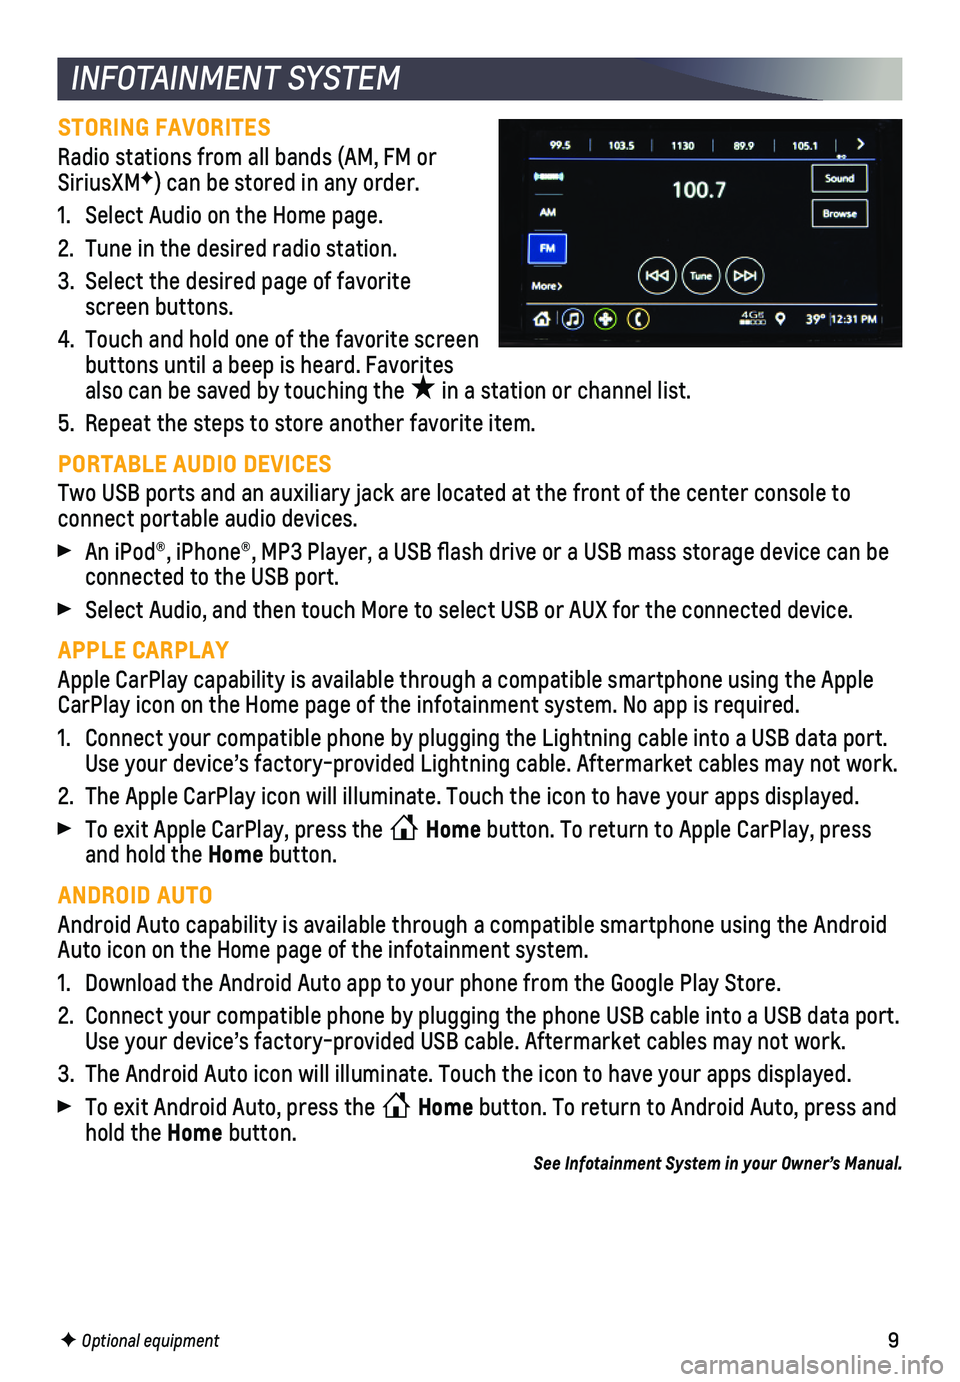
Radio stations from all bands (AM, FM or SiriusXMF) can be stored in any order.
1. Select Audio on the Home page.
2. Tune in the desired radio station.
3. Select the desired page of favorite screen buttons.
4. Touch and hold one of the favorite screen buttons until a beep is heard. Favorites also can be saved by touching the ★ in a station or channel list.
5. Repeat the steps to store another favorite item.
PORTABLE AUDIO DEVICES
Two USB ports and an auxiliary jack are located at the front of the cent\
er console to
connect portable audio devices.
An iPod®, iPhone®, MP3 Player, a USB flash drive or a USB mass s\
torage device can be connected to the USB port.
Select Audio, and then touch More to select USB or AUX for the connected\
device.
APPLE CARPLAY
Apple CarPlay capability is available through a compatible smartphone us\
ing the Apple CarPlay icon on the Home page of the infotainment system. No app is requ\
ired.
1. Connect your compatible phone by plugging the Lightning cable into a USB\
data port. Use your device’s factory-provided Lightning cable. Aftermarket cable\
s may not work.
2. The Apple CarPlay icon will illuminate. Touch the icon to have your apps\
displayed.
To exit Apple CarPlay, press the Home button. To return to Apple CarPlay, press and hold the Home button.
ANDROID AUTO
Android Auto capability is available through a compatible smartphone usi\
ng the Android Auto icon on the Home page of the infotainment system.
1. Download the Android Auto app to your phone from the Google Play Store.
2. Connect your compatible phone by plugging the phone USB cable into a USB\
data port. Use your device’s factory-provided USB cable. Aftermarket cables may \
not work.
3. The Android Auto icon will illuminate. Touch the icon to have your apps \
displayed.
To exit Android Auto, press the Home button. To return to Android Auto, press and hold the Home button.
See Infotainment System in your Owner’s Manual.
F Optional equipment
Page 10 of 16

10
AUDIO STEERING WHEEL CONTROLSF
BLUETOOTH® SYSTEM
Read your Owner’s Manual for important information about using the Bluetooth system while driving.
Before using a Bluetooth-enabled device in the vehicle, it must be paired with the in-vehicle Bluetooth system. The vehicle must be stopped to pair a devic\
e. Not all devices will support all functions. Visit my.chevrolet.com/how-to-support for more information.
PAIR A PHONE
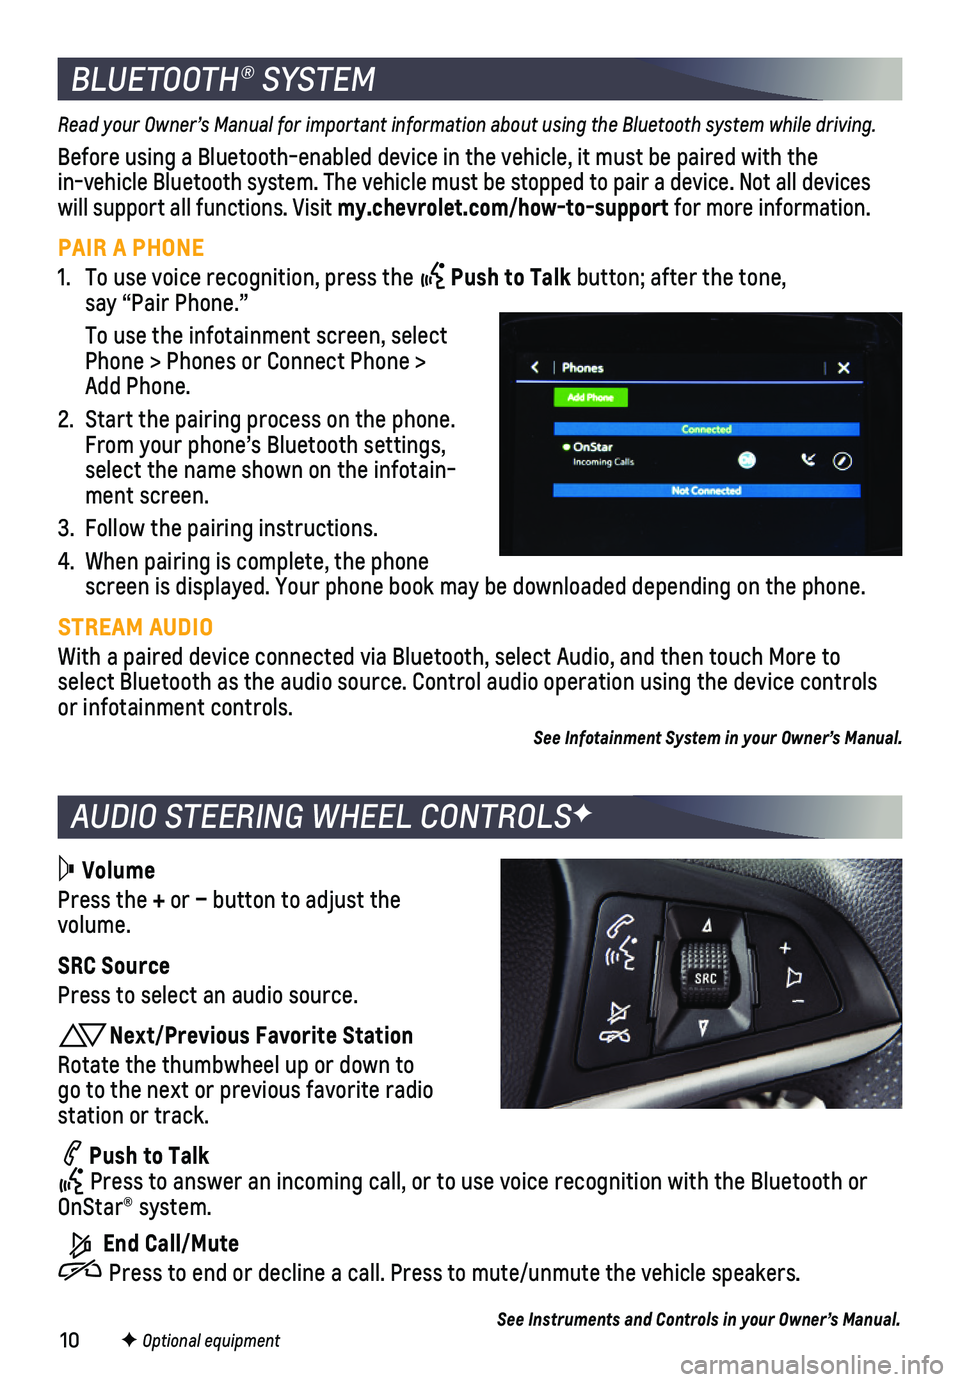
1. To use voice recognition, press the Push to Talk button; after the tone, say “Pair Phone.”
To use the infotainment screen, select Phone > Phones or Connect Phone > Add Phone.
2. Start the pairing process on the phone. From your phone’s Bluetooth settings, select the name shown on the infotain-ment screen.
3. Follow the pairing instructions.
4. When pairing is complete, the phone screen is displayed. Your phone book may be downloaded depending on the \
phone.
STREAM AUDIO
With a paired device connected via Bluetooth, select Audio, and then tou\
ch More to select Bluetooth as the audio source. Control audio operation using the \
device controls or infotainment controls.
See Infotainment System in your Owner’s Manual.
Volume
Press the + or – button to adjust the volume.
SRC Source
Press to select an audio source.
Next/Previous Favorite Station
Rotate the thumbwheel up or down to go to the next or previous favorite radio station or track.
Push to Talk Press to answer an incoming call, or to use voice recognition with the B\
luetooth or OnStar® system.
End Call/Mute
Press to end or decline a call. Press to mute/unmute the vehicle speakers.
See Instruments and Controls in your Owner’s Manual.F Optional equipment
Page 15 of 16

15
1. Unlock the vehicle to unlock the fuel door.
2. Pull up the fuel door release handle on the floor near the driver’s seat.
3. The fuel door will pop open. Pull the door open to refuel the vehicle.
See Driving and Operating in your Owner’s Manual.
The Oil Life System calculates oil life based on vehicle use and display\
s a Change Engine Oil message on the Driver Information Center when it’s necessary to c\
hange the engine oil and filter. The system should be reset to 100% only following an o\
il change.
See Vehicle Care in your Owner’s Manual.
The Low Tire Pressure warning light on the instrument cluster illuminates wh\
en one or more of the vehicle’s tires is significantly underinflated. Fi\
ll the tires to the proper tire pressures listed on the Tire and Loading Information label, located belo\
w the driver’s door latch. Current tire pressures can be viewed on the Driver Informati\
on Center (DIC).
See Vehicle Care in your Owner’s Manual.
Recreational towing means towing the vehicle behind another vehicle. Veh\
icles with an automatic transmission should be towed from the front with the two rear \
wheels on the ground and the two front wheels on a dolly. Vehicles with a manual trans\
mission can be towed from the front with all four wheels on the ground (dinghy towing)\
or with the two rear wheels on the ground and the two front wheels on a dolly. Refer to \
your Owner’s Manual for the proper towing procedure.
See Vehicle Care in your Owner’s Manual.
REFUELING THE VEHICLE
ENGINE OIL LIFE SYSTEM
TIRE PRESSURE MONITOR
RECREATIONAL TOWING
When stopped on a steep hill, the Hill Start Assist feature prevents the\
vehicle from roll-ing before driving off, whether facing uphill or downhill. During the tr\
ansition between when the driver releases the brake pedal and starts to accelerate, Hill \
Start Assist holds the brake pressure (for up to 2 seconds) to ensure the vehicle doesn’\
t roll.
See Driving and Operating in your Owner’s Manual.
HILL START ASSIST