check engine CHEVROLET SPARK 2021 User Guide
[x] Cancel search | Manufacturer: CHEVROLET, Model Year: 2021, Model line: SPARK, Model: CHEVROLET SPARK 2021Pages: 270, PDF Size: 8.19 MB
Page 88 of 270
Chevrolet Spark Owner Manual (GMNA-Localizing-U.S./Canada-14622955) -
2021 - CRC - 8/17/20
Instruments and Controls 87
oil change. To reset the engine oil life
system, press SET/CLR while the Oil Life
display is active. SeeEngine Oil Life System
0 168.
Vehicle Messages
Vehicle Messages (Base Level
Cluster)
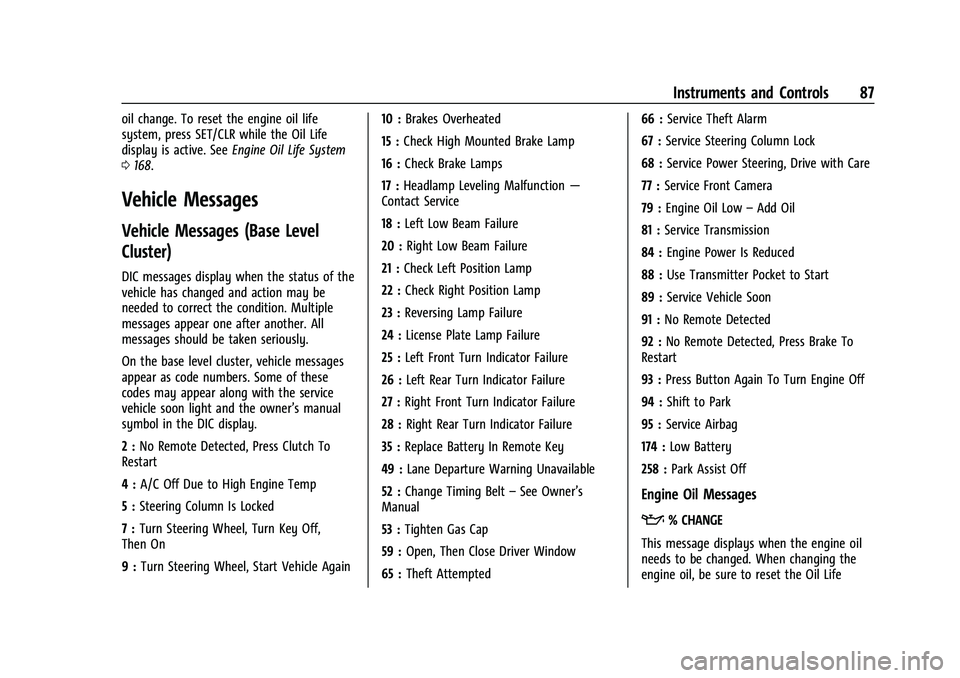
DIC messages display when the status of the
vehicle has changed and action may be
needed to correct the condition. Multiple
messages appear one after another. All
messages should be taken seriously.
On the base level cluster, vehicle messages
appear as code numbers. Some of these
codes may appear along with the service
vehicle soon light and the owner’s manual
symbol in the DIC display.
2 : No Remote Detected, Press Clutch To
Restart
4 : A/C Off Due to High Engine Temp
5 : Steering Column Is Locked
7 : Turn Steering Wheel, Turn Key Off,
Then On
9 : Turn Steering Wheel, Start Vehicle Again 10 :
Brakes Overheated
15 : Check High Mounted Brake Lamp
16 : Check Brake Lamps
17 : Headlamp Leveling Malfunction —
Contact Service
18 : Left Low Beam Failure
20 : Right Low Beam Failure
21 : Check Left Position Lamp
22 : Check Right Position Lamp
23 : Reversing Lamp Failure
24 : License Plate Lamp Failure
25 : Left Front Turn Indicator Failure
26 : Left Rear Turn Indicator Failure
27 : Right Front Turn Indicator Failure
28 : Right Rear Turn Indicator Failure
35 : Replace Battery In Remote Key
49 : Lane Departure Warning Unavailable
52 : Change Timing Belt –See Owner’s
Manual
53 : Tighten Gas Cap
59 : Open, Then Close Driver Window
65 : Theft Attempted 66 :
Service Theft Alarm
67 : Service Steering Column Lock
68 : Service Power Steering, Drive with Care
77 : Service Front Camera
79 : Engine Oil Low –Add Oil
81 : Service Transmission
84 : Engine Power Is Reduced
88 : Use Transmitter Pocket to Start
89 : Service Vehicle Soon
91 : No Remote Detected
92 : No Remote Detected, Press Brake To
Restart
93 : Press Button Again To Turn Engine Off
94 : Shift to Park
95 : Service Airbag
174 : Low Battery
258 : Park Assist Off
Engine Oil Messages
:% CHANGE
This message displays when the engine oil
needs to be changed. When changing the
engine oil, be sure to reset the Oil Life
Page 130 of 270
Chevrolet Spark Owner Manual (GMNA-Localizing-U.S./Canada-14622955) -
2021 - CRC - 8/17/20
Driving and Operating 129
Hill and Mountain Roads
Driving on steep hills or through mountains
is different than driving on flat or rolling
terrain. Tips include:
.Keep the vehicle serviced and in good
shape.
.Check all fluid levels and brakes, tires,
cooling system, and transmission.
.Shift to a lower gear when going down
steep or long hills.
{Warning
Using the brakes to slow the vehicle on a
long downhill slope can cause brake
overheating, can reduce brake
performance, and could result in a loss of
braking. Shift the transmission to a lower
gear to let the engine assist the brakes
on a steep downhill slope.
{Warning
Coasting downhill in N (Neutral) or with
the ignition off is dangerous. This can
cause overheating of the brakes and loss
of steering assist. Always have the engine
running and the vehicle in gear.
.Drive at speeds that keep the vehicle in
its own lane. Do not swing wide or cross
the center line.
.Be alert on top of hills; something could
be in your lane (e.g., stalled car, crash).
.Pay attention to special road signs (e.g.,
falling rocks area, winding roads, long
grades, passing or no-passing zones) and
take appropriate action.
Winter Driving
Driving on Snow or Ice
Snow or ice between the tires and the road
creates less traction or grip, so drive
carefully. Wet ice can occur at about 0 °C
(32 °F) when freezing rain begins to fall.
Avoid driving on wet ice or in freezing rain
until roads can be treated.
For Slippery Road Driving:
.Accelerate gently. Accelerating too quickly
causes the wheels to spin and makes the
surface under the tires slick.
.Turn on Traction Control. SeeTraction
Control/Electronic Stability Control 0147.
.The Antilock Brake System (ABS) improves
vehicle stability during hard stops, but
the brakes should be applied sooner than
when on dry pavement. See Antilock
Brake System (ABS) 0146.
.Allow greater following distance and
watch for slippery spots. Icy patches can
occur on otherwise clear roads in shaded
areas. The surface of a curve or an
overpass can remain icy when the
surrounding roads are clear. Avoid sudden
steering maneuvers and braking while
on ice.
.Turn off cruise control.
Blizzard Conditions
Stop the vehicle in a safe place and signal
for help. Stay with the vehicle unless there
is help nearby. If possible, use Roadside
Assistance. See Roadside Assistance Program
0 243. To get help and keep everyone in the
vehicle safe:
.Turn on the hazard warning flashers.
.Tie a red cloth to an outside mirror.
Page 140 of 270

Chevrolet Spark Owner Manual (GMNA-Localizing-U.S./Canada-14622955) -
2021 - CRC - 8/17/20
Driving and Operating 139
from the engine. Do not race the engine
immediately after starting it. Operate
the engine and transmission gently until
the oil warms up and lubricates all
moving parts.
Engine Heater
The engine heater can provide easier
starting and better fuel economy during
engine warm-up in cold weather conditions
at or below−18 °C or 0 °F. Vehicles with an
engine heater should be plugged in at least
four hours before starting.
{Warning
Do not plug in the engine block heater
while the vehicle is parked in a garage or
under a carport. Property damage or
personal injury may result. Always park
the vehicle in a clear open area away
from buildings or structures.
1. Turn off the engine.
2. Open the hood and unwrap the electrical cord. The cord is in the driver side of the
engine compartment, near the engine
coolant surge tank. It is shipped from the
factory with a tie holding it in place. Use
care in removing the tie so that the cord
is not damaged.
Check the heater cord for damage. If it is
damaged, do not use it. See your dealer
for a replacement. Inspect the cord for
damage yearly.
3. Plug it into a normal, grounded 110-volt AC outlet.
{Warning
Improper use of the heater cord or an
extension cord can damage the cord and
may result in overheating and fire.
.Plug the cord into a three-prong
electrical utility receptacle that is
protected by a ground fault detection
function. An ungrounded outlet could
cause an electric shock.
.Use a weatherproof, heavy-duty,
15 amp-rated extension cord if needed.
Failure to use the recommended
extension cord in good operating
condition, or using a damaged heater
(Continued)
Page 148 of 270
Chevrolet Spark Owner Manual (GMNA-Localizing-U.S./Canada-14622955) -
2021 - CRC - 8/17/20
Driving and Operating 147
Brake Assist
Brake Assist detects rapid brake pedal
applications due to emergency braking
situations and provides additional braking to
activate the Antilock Brake System (ABS) if
the brake pedal is not pushed hard enough
to activate ABS normally. Minor noise, brake
pedal pulsation, and/or pedal movement
during this time may occur. Continue to
apply the brake pedal as the driving
situation dictates. Brake Assist disengages
when the brake pedal is released.
Hill Start Assist (HSA)
{Warning
Do not rely on the HSA feature. HSA does
not replace the need to pay attention
and drive safely. You may not hear or
feel alerts or warnings provided by this
system. Failure to use proper care when
driving may result in injury, death,
or vehicle damage. SeeDefensive Driving
0 125.
When the vehicle is stopped on a grade, Hill
Start Assist (HSA) temporarily prevents the
vehicle from rolling in an unintended
direction during the transition from brake pedal release to accelerator pedal apply. The
brakes release when the accelerator pedal is
applied or automatically release after a few
seconds. The brakes may also release under
other conditions. Do not rely on HSA to hold
the vehicle.
HSA is available when the vehicle is facing
uphill in a forward gear, or when facing
downhill in R (Reverse). The vehicle must
come to a complete stop on a grade for HSA
to activate.
Ride Control Systems
Traction Control/Electronic
Stability Control
System Operation
The vehicle has a Traction Control System
(TCS) and StabiliTrak/Electronic Stability
Control (ESC), an electronic stability control
system. These systems help limit wheel slip
and assist the driver in maintaining control,
especially on slippery road conditions.
TCS activates if it senses that any of the
drive wheels are spinning or beginning to
lose traction. When this happens, TCS
applies the brakes to the spinning wheels
and reduces engine power to limit
wheel spin.
StabiliTrak/ESC activates when the vehicle
senses a difference between the intended
path and the direction the vehicle is actually
traveling. StabiliTrak/ESC selectively applies
braking pressure to any one of the vehicle
wheel brakes to assist the driver in keeping
the vehicle on the intended path.
If cruise control is being used and traction
control or StabiliTrak/ESC begins to limit
wheel spin, cruise control will disengage.
Cruise control may be turned back on when
road conditions allow.
Both systems come on automatically when
the vehicle is started and begins to move.
The systems may be heard or felt while
they are operating or while performing
diagnostic checks. This is normal and does
not mean there is a problem with the
vehicle.
It is recommended to leave both systems on
for normal driving conditions, but it may be
necessary to turn TCS off if the vehicle gets
stuck in sand, mud, ice, or snow. See
If the
Vehicle Is Stuck 0130 and “Turning the
Systems Off and On” later in this section.
Page 160 of 270

Chevrolet Spark Owner Manual (GMNA-Localizing-U.S./Canada-14622955) -
2021 - CRC - 8/17/20
Driving and Operating 159
The fuel door unlocks when the vehicle
doors are unlocked. SeeRemote Keyless
Entry (RKE) System Operation (Key Access)
0 9or
Remote Keyless Entry (RKE) System
Operation (Keyless Access) 011.
To open the fuel door, lift the fuel door
release lever. The lever is on the floor, on
the left front side of the driver seat.
Turn the fuel cap counterclockwise to
remove. When refueling, hang the fuel cap
from the hook on the fuel door. Fully insert
and latch the fill nozzle, begin fueling.
{Warning
Overfilling the fuel tank by more than
three clicks of a standard fill nozzle may
cause:
.Vehicle performance issues, including
engine stalling and damage to the fuel
system.
.Fuel spills.
.Under certain conditions, fuel fires.
Be careful not to spill fuel. Wait five seconds
after you have finished pumping before
removing the fill nozzle. Clean fuel from painted surfaces as soon as possible. See
Exterior Care
0217. Reinstall the cap by
turning it clockwise until it clicks. Push the
fuel door closed until it latches.
{Warning
If a fire starts while you are refueling, do
not remove the fill nozzle. Shut off the
flow of fuel by shutting off the pump or
by notifying the station attendant. Leave
the area immediately.
Caution
If a new fuel cap is needed, get the right
type of cap from your dealer. The wrong
type of fuel cap may not fit properly,
may turn on the malfunction indicator
lamp, and could damage the fuel system
and emissions system. See Malfunction
Indicator Lamp (Check Engine Light) 075.
Page 161 of 270
Chevrolet Spark Owner Manual (GMNA-Localizing-U.S./Canada-14622955) -
2021 - CRC - 8/17/20
160 Driving and Operating
Filling a Portable Fuel Container
{Warning
Never fill a portable fuel container while
it is in the vehicle. Static electricity
discharge from the container can ignite
the fuel vapor. You or others could be
badly burned and the vehicle could be
damaged. To help avoid injury to you
and others:
.Dispense fuel only into approved
containers.
.Do not fill a container while it is
inside a vehicle, in a vehicle's trunk, in
a pickup bed, or on any surface other
than the ground.
.Bring the fill nozzle in contact with
the inside of the fill opening before
operating the nozzle. Maintain contact
until filling is complete.
.Keep sparks, flames, and smoking
materials away from fuel.
.Avoid using electronic devices while
pumping fuel.
Trailer Towing
General Towing Information
{Warning
Never tow a trailer with your vehicle.
It was not designed or intended to tow a
trailer.
Conversions and Add-Ons
Add-On Electrical Equipment
{Warning
The Data Link Connector (DLC) is used for
vehicle service and Emission Inspection/
Maintenance testing. SeeMalfunction
Indicator Lamp (Check Engine Light) 075.
A device connected to the DLC —such as
an aftermarket fleet or driver-behavior
tracking device —may interfere with
vehicle systems. This could affect vehicle
operation and cause a crash. Such devices
may also access information stored in the
vehicle’s systems.
Caution
Some electrical equipment can damage
the vehicle or cause components to not
work and would not be covered by the
vehicle warranty. Always check with your
dealer before adding electrical equipment.
Add-on equipment can drain the vehicle's
12-volt battery, even if the vehicle is not
operating.
The vehicle has an airbag system. Before
attempting to add anything electrical to the
vehicle, see Servicing the Airbag-Equipped
Vehicle 045 and
Adding Equipment to the Airbag-Equipped
Vehicle 045.
Page 162 of 270
Chevrolet Spark Owner Manual (GMNA-Localizing-U.S./Canada-14622955) -
2021 - CRC - 8/17/20
Vehicle Care 161
Vehicle Care
General Information
General Information . . . . . . . . . . . . . . . . . . . 162
California Proposition 65 Warning . . . . . 162
California Perchlorate MaterialsRequirements . . . . . . . . . . . . . . . . . . . . . . . . 162
Accessories and Modifications . . . . . . . . . 162
Vehicle Checks
Doing Your Own Service Work . . . . . . . . . 163
Hood . . . . . . . . . . . . . . . . . . . . . . . . . . . . . . . . . . 163
Engine Compartment Overview . . . . . . . . 165
Engine Oil . . . . . . . . . . . . . . . . . . . . . . . . . . . . . 166
Engine Oil Life System . . . . . . . . . . . . . . . . 168
Automatic Transmission Fluid . . . . . . . . . 169
Manual Transmission Fluid . . . . . . . . . . . . 169
Hydraulic Clutch . . . . . . . . . . . . . . . . . . . . . . . 169
Engine Air Cleaner/Filter . . . . . . . . . . . . . . 169
Cooling System . . . . . . . . . . . . . . . . . . . . . . . . 170
Engine Overheating . . . . . . . . . . . . . . . . . . . . 173
Washer Fluid . . . . . . . . . . . . . . . . . . . . . . . . . . 174
Brakes . . . . . . . . . . . . . . . . . . . . . . . . . . . . . . . . . 175
Brake Fluid . . . . . . . . . . . . . . . . . . . . . . . . . . . . . 175
Battery - North America . . . . . . . . . . . . . . . 176
Starter Switch Check . . . . . . . . . . . . . . . . . . . 178
Automatic Transmission Shift Lock Control Function Check . . . . . . . . . . . . . . 178
Ignition Transmission Lock Check . . . . . . 178 Park Brake and P (Park) Mechanism
Check . . . . . . . . . . . . . . . . . . . . . . . . . . . . . . . . 179
Wiper Blade Replacement . . . . . . . . . . . . . 179
Windshield Replacement . . . . . . . . . . . . . . 180
Gas Strut(s) . . . . . . . . . . . . . . . . . . . . . . . . . . . 180
Headlamp Aiming
Front Headlamp Aiming . . . . . . . . . . . . . . . . 181
Bulb Replacement
Bulb Replacement . . . . . . . . . . . . . . . . . . . . . . 181
Halogen Bulbs . . . . . . . . . . . . . . . . . . . . . . . . . 181
High Intensity Discharge (HID) Lighting . . . . . . . . . . . . . . . . . . . . . . . . . . . . . . 181
LED Lighting . . . . . . . . . . . . . . . . . . . . . . . . . . . 182
Headlamps, Front Turn Signal, Sidemarker, and Parking Lamps . . . . . . 182
Taillamps, Turn Signal, Stoplamps, and Back-Up Lamps . . . . . . . . . . . . . . . . . . . . . . 184
License Plate Lamp . . . . . . . . . . . . . . . . . . . . 184
Electrical System
Electrical System Overload . . . . . . . . . . . . . 185
Fuses and Circuit Breakers . . . . . . . . . . . . . 185
Engine Compartment Fuse Block . . . . . . 186
Instrument Panel Fuse Block . . . . . . . . . . . 188
Wheels and Tires
Tires . . . . . . . . . . . . . . . . . . . . . . . . . . . . . . . . . . 190
All-Season Tires . . . . . . . . . . . . . . . . . . . . . . . 190
Winter Tires . . . . . . . . . . . . . . . . . . . . . . . . . . . 191
Tire Sidewall Labeling . . . . . . . . . . . . . . . . . . 191 Tire Designations . . . . . . . . . . . . . . . . . . . . . . 193
Tire Terminology and Definitions . . . . . . 193
Tire Pressure . . . . . . . . . . . . . . . . . . . . . . . . . . 195
Tire Pressure Monitor System . . . . . . . . . 196
Tire Pressure Monitor Operation . . . . . . . 197
Tire Inspection . . . . . . . . . . . . . . . . . . . . . . . . 199
Tire Rotation . . . . . . . . . . . . . . . . . . . . . . . . . . 200
When It Is Time for New Tires . . . . . . . . 201
Buying New Tires . . . . . . . . . . . . . . . . . . . . . 202
Different Size Tires and Wheels . . . . . . . 203
Wheel Covers . . . . . . . . . . . . . . . . . . . . . . . . . 203
Uniform Tire Quality Grading . . . . . . . . . 203
Wheel Alignment and Tire Balance . . . . 204
Wheel Replacement . . . . . . . . . . . . . . . . . . . 204
Tire Chains . . . . . . . . . . . . . . . . . . . . . . . . . . . . 205
If a Tire Goes Flat . . . . . . . . . . . . . . . . . . . . . 205
Tire Changing . . . . . . . . . . . . . . . . . . . . . . . . . 207
Compact Spare Tire . . . . . . . . . . . . . . . . . . . . 210
Jump Starting
Jump Starting - North America . . . . . . . . . 211
Towing the Vehicle
Towing the Vehicle . . . . . . . . . . . . . . . . . . . . 213
Recreational Vehicle Towing . . . . . . . . . . . 214
Appearance Care
Exterior Care . . . . . . . . . . . . . . . . . . . . . . . . . . . 217
Interior Care . . . . . . . . . . . . . . . . . . . . . . . . . . . 220
Floor Mats . . . . . . . . . . . . . . . . . . . . . . . . . . . . . 223
Page 164 of 270

Chevrolet Spark Owner Manual (GMNA-Localizing-U.S./Canada-14622955) -
2021 - CRC - 8/17/20
Vehicle Care 163
Also, seeAdding Equipment to the
Airbag-Equipped Vehicle 045.
Vehicle Checks
Doing Your Own Service Work
{Warning
It can be dangerous to work on your
vehicle if you do not have the proper
knowledge, service manual, tools,
or parts. Always follow owner’s manual
procedures and consult the service
manual for your vehicle before doing any
service work.
If doing some of your own service work, use
the proper service manual. It tells you much
more about how to service the vehicle than
this manual can. To order the proper service
manual, see Publication Ordering
Information 0247.
This vehicle has an airbag system. Before
attempting to do your own service work,
see Servicing the Airbag-Equipped Vehicle
0 45. Keep a record with all parts receipts and list
the mileage and the date of any service
work performed. See
Maintenance Records
0 236.
Caution
Even small amounts of contamination can
cause damage to vehicle systems. Do not
allow contaminants to contact the fluids,
reservoir caps, or dipsticks.
Hood
{Warning
Turn the vehicle off before opening the
hood. If the engine is running with the
hood open, you or others could be
injured.
{Warning
Components under the hood can get hot
from running the engine. To help avoid
the risk of burning unprotected skin,
never touch these components until they
have cooled, and always use a glove or
towel to avoid direct skin contact. Clear any snow from the hood before
opening.
To open the hood:
1. Pull the hood release lever with the
isymbol. It is on the lower left side
of the instrument panel.
2. Go to the front of the vehicle and locate the secondary release lever under the
front center of the hood. Push the
secondary hood release lever to the right
to release.
Page 165 of 270

Chevrolet Spark Owner Manual (GMNA-Localizing-U.S./Canada-14622955) -
2021 - CRC - 8/17/20
164 Vehicle Care
3. Lift the hood and release the hood proprod from its retainer, in the front of the
engine compartment. Securely insert the
rod end into the slot marked with an
arrow, on the underside of the hood. To close the hood:
1. Before closing the hood, be sure all filler caps are on properly, and all tools are
removed.
2. Lift the hood and remove the hood prop rod from the underside of the hood.
Return the prop rod to its retainer. The
prop rod must click into place when
returning ti to the retainer to prevent
hood damage.
3. Lower the hood 20 cm (8 in) above the vehicle and release it. Check to make
sure the hood is latched completely.
Repeat this process with additional force
if necessary.
{Warning
Do not drive the vehicle if the hood is
not latched completely. The hood could
open fully, block your vision, and cause a
crash. You or others could be injured.
Always close the hood completely before
driving.
Page 167 of 270
Chevrolet Spark Owner Manual (GMNA-Localizing-U.S./Canada-14622955) -
2021 - CRC - 8/17/20
166 Vehicle Care
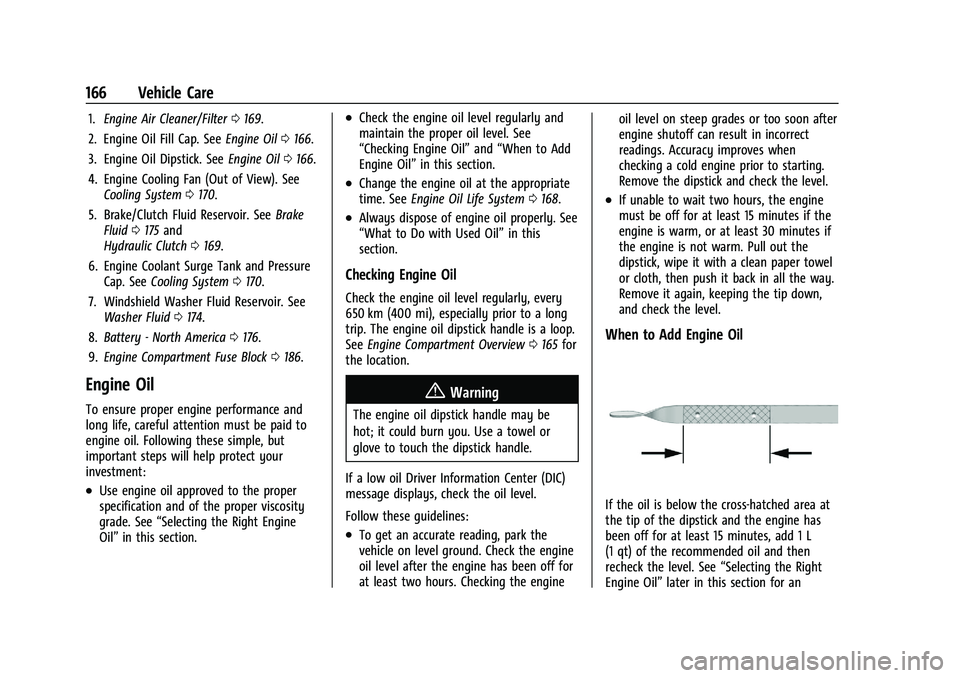
1.Engine Air Cleaner/Filter 0169.
2. Engine Oil Fill Cap. See Engine Oil0166.
3. Engine Oil Dipstick. See Engine Oil0166.
4. Engine Cooling Fan (Out of View). See Cooling System 0170.
5. Brake/Clutch Fluid Reservoir. See Brake
Fluid 0175 and
Hydraulic Clutch 0169.
6. Engine Coolant Surge Tank and Pressure Cap. See Cooling System 0170.
7. Windshield Washer Fluid Reservoir. See Washer Fluid 0174.
8. Battery - North America 0176.
9. Engine Compartment Fuse Block 0186.
Engine Oil
To ensure proper engine performance and
long life, careful attention must be paid to
engine oil. Following these simple, but
important steps will help protect your
investment:
.Use engine oil approved to the proper
specification and of the proper viscosity
grade. See “Selecting the Right Engine
Oil” in this section.
.Check the engine oil level regularly and
maintain the proper oil level. See
“Checking Engine Oil” and“When to Add
Engine Oil” in this section.
.Change the engine oil at the appropriate
time. SeeEngine Oil Life System 0168.
.Always dispose of engine oil properly. See
“What to Do with Used Oil” in this
section.
Checking Engine Oil
Check the engine oil level regularly, every
650 km (400 mi), especially prior to a long
trip. The engine oil dipstick handle is a loop.
See Engine Compartment Overview 0165 for
the location.
{Warning
The engine oil dipstick handle may be
hot; it could burn you. Use a towel or
glove to touch the dipstick handle.
If a low oil Driver Information Center (DIC)
message displays, check the oil level.
Follow these guidelines:
.To get an accurate reading, park the
vehicle on level ground. Check the engine
oil level after the engine has been off for
at least two hours. Checking the engine oil level on steep grades or too soon after
engine shutoff can result in incorrect
readings. Accuracy improves when
checking a cold engine prior to starting.
Remove the dipstick and check the level.
.If unable to wait two hours, the engine
must be off for at least 15 minutes if the
engine is warm, or at least 30 minutes if
the engine is not warm. Pull out the
dipstick, wipe it with a clean paper towel
or cloth, then push it back in all the way.
Remove it again, keeping the tip down,
and check the level.
When to Add Engine Oil
If the oil is below the cross-hatched area at
the tip of the dipstick and the engine has
been off for at least 15 minutes, add 1 L
(1 qt) of the recommended oil and then
recheck the level. See
“Selecting the Right
Engine Oil” later in this section for an