tire pressure monitor system CHEVROLET SPARK 2021 Owner's Manual
[x] Cancel search | Manufacturer: CHEVROLET, Model Year: 2021, Model line: SPARK, Model: CHEVROLET SPARK 2021Pages: 270, PDF Size: 8.19 MB
Page 81 of 270
Chevrolet Spark Owner Manual (GMNA-Localizing-U.S./Canada-14622955) -
2021 - CRC - 8/17/20
80 Instruments and Controls
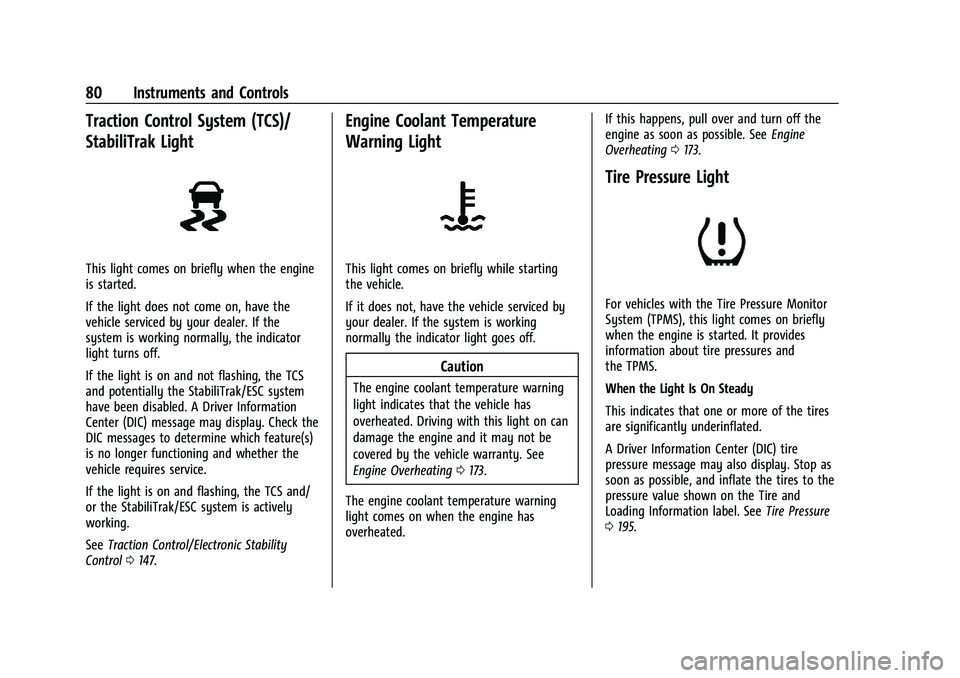
Traction Control System (TCS)/
StabiliTrak Light
This light comes on briefly when the engine
is started.
If the light does not come on, have the
vehicle serviced by your dealer. If the
system is working normally, the indicator
light turns off.
If the light is on and not flashing, the TCS
and potentially the StabiliTrak/ESC system
have been disabled. A Driver Information
Center (DIC) message may display. Check the
DIC messages to determine which feature(s)
is no longer functioning and whether the
vehicle requires service.
If the light is on and flashing, the TCS and/
or the StabiliTrak/ESC system is actively
working.
SeeTraction Control/Electronic Stability
Control 0147.
Engine Coolant Temperature
Warning Light
This light comes on briefly while starting
the vehicle.
If it does not, have the vehicle serviced by
your dealer. If the system is working
normally the indicator light goes off.
Caution
The engine coolant temperature warning
light indicates that the vehicle has
overheated. Driving with this light on can
damage the engine and it may not be
covered by the vehicle warranty. See
Engine Overheating 0173.
The engine coolant temperature warning
light comes on when the engine has
overheated. If this happens, pull over and turn off the
engine as soon as possible. See
Engine
Overheating 0173.
Tire Pressure Light
For vehicles with the Tire Pressure Monitor
System (TPMS), this light comes on briefly
when the engine is started. It provides
information about tire pressures and
the TPMS.
When the Light Is On Steady
This indicates that one or more of the tires
are significantly underinflated.
A Driver Information Center (DIC) tire
pressure message may also display. Stop as
soon as possible, and inflate the tires to the
pressure value shown on the Tire and
Loading Information label. See Tire Pressure
0 195.
Page 82 of 270
Chevrolet Spark Owner Manual (GMNA-Localizing-U.S./Canada-14622955) -
2021 - CRC - 8/17/20
Instruments and Controls 81
When the Light Flashes First and Then Is On
Steady
If the light flashes for about a minute and
then stays on, there may be a problem with
the TPMS. If the problem is not corrected,
the light will come on at every ignition
cycle. SeeTire Pressure Monitor Operation
0 197.
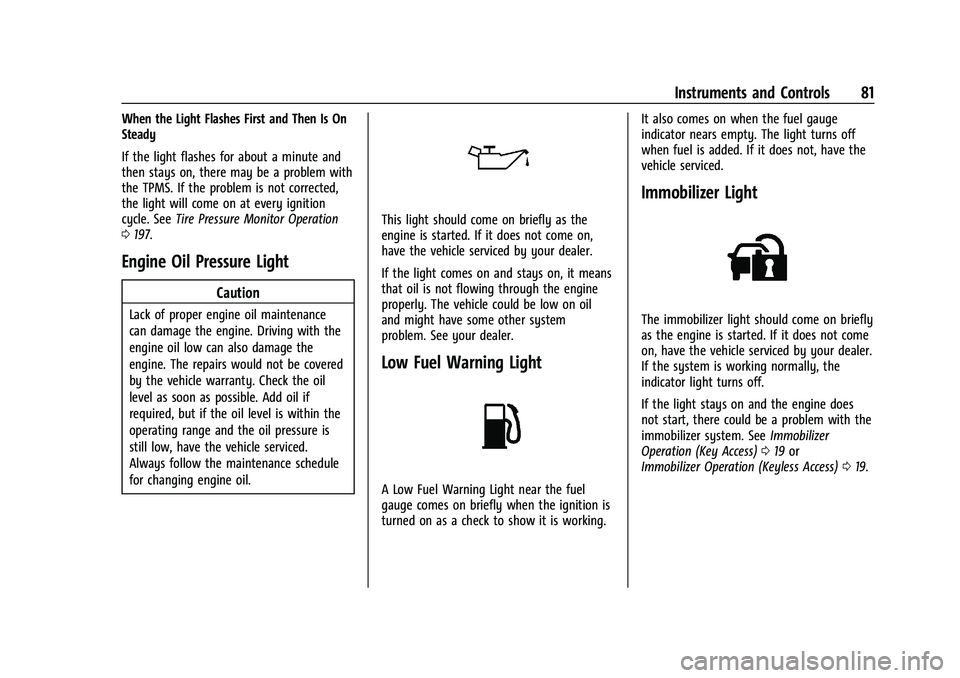
Engine Oil Pressure Light
Caution
Lack of proper engine oil maintenance
can damage the engine. Driving with the
engine oil low can also damage the
engine. The repairs would not be covered
by the vehicle warranty. Check the oil
level as soon as possible. Add oil if
required, but if the oil level is within the
operating range and the oil pressure is
still low, have the vehicle serviced.
Always follow the maintenance schedule
for changing engine oil.
This light should come on briefly as the
engine is started. If it does not come on,
have the vehicle serviced by your dealer.
If the light comes on and stays on, it means
that oil is not flowing through the engine
properly. The vehicle could be low on oil
and might have some other system
problem. See your dealer.
Low Fuel Warning Light
A Low Fuel Warning Light near the fuel
gauge comes on briefly when the ignition is
turned on as a check to show it is working. It also comes on when the fuel gauge
indicator nears empty. The light turns off
when fuel is added. If it does not, have the
vehicle serviced.
Immobilizer Light
The immobilizer light should come on briefly
as the engine is started. If it does not come
on, have the vehicle serviced by your dealer.
If the system is working normally, the
indicator light turns off.
If the light stays on and the engine does
not start, there could be a problem with the
immobilizer system. See
Immobilizer
Operation (Key Access) 019 or
Immobilizer Operation (Keyless Access) 019.
Page 85 of 270
Chevrolet Spark Owner Manual (GMNA-Localizing-U.S./Canada-14622955) -
2021 - CRC - 8/17/20
84 Instruments and Controls
the engine oil life system monitoring the oil
life, additional maintenance is
recommended. SeeMaintenance Schedule
0 226.
Remember, the Oil Life display must be
reset after each oil change. It will not reset
itself. Also, be careful not to reset the Oil
Life display accidentally at any time other
than when the oil has just been changed.
It cannot be reset accurately until the next
oil change. To reset the engine oil life
system, press SET/CLR while the Oil Life
display is active. See Engine Oil Life System
0 168.
Units
This menu is not available while the vehicle
is moving. Press SET/CLR while the unit
display is active and move
w/xto
change units when UNIT SET is displayed.
Press SET/CLR to confirm the setting. Select
1, 2, or 3 for the unit display. 1 is metric
units, 2 is Imperial units, and 3 is US units.
This will change the displays on the cluster
and DIC to the type of measurements
selected. Tire Learn
This display allows for matching of the
TPMS sensors. The display will show a
vehicle with the approximate pressures of all
four tires. Tire pressure is displayed in either
kilopascal (kPa) or pounds per square
inch (psi). See
Tire Pressure Monitor System
0 196 and
Tire Pressure Monitor Operation 0197.
Trip/Fuel Menu Items (Base Level DIC)
Press MENU until the Trip/Fuel menu is
displayed. Use
w/xto scroll through the
menu items. On some models, use the trip
odometer reset stem to scroll through the
menu. Not all items are available on every
vehicle. The following is a list of possible
menu items:
.Trip Odometer
.Fuel Range
.Average Vehicle Speed
.Instantaneous Fuel Economy
.Average Fuel Economy
.Timer
Trip Odometer
This display shows the current distance
traveled, in either kilometers (km) or
miles (mi), since the last reset for the trip odometer. The trip odometer can be reset to
zero by pressing SET/CLR or pressing and
holding the trip odometer reset stem while
the trip odometer display is showing.
Fuel Range
This display shows the approximate distance
the vehicle can be driven without refueling.
The fuel range estimate is based on an
average of the vehicle's fuel economy over
recent driving history and the amount of
fuel remaining in the fuel tank. Fuel range
cannot be reset.
Average Vehicle Speed
This display shows the average speed of the
vehicle in kilometers per hour (km/h) or
miles per hour (mph). This average is
calculated based on the various vehicle
speeds recorded since the last reset of this
value. The average speed can be reset by
pressing SET/CLR or pressing and holding the
trip odometer reset stem while the Average
Vehicle Speed display is showing.
Instantaneous Fuel Economy
The instantaneous fuel economy display
shows the current fuel economy in liters per
100 kilometers (L/100 km) or miles per
gallon (mpg). This number reflects only the
approximate fuel economy that the vehicle
Page 87 of 270
Chevrolet Spark Owner Manual (GMNA-Localizing-U.S./Canada-14622955) -
2021 - CRC - 8/17/20
86 Instruments and Controls
Average Fuel Economy
This display shows the approximate average
liters per 100 kilometers (L/100 km) or miles
per gallon (mpg). This number is calculated
based on the number of L/100 km (mpg)
recorded since the last time this menu item
was reset. This number reflects only the
approximate average fuel economy that the
vehicle has right now, and will change as
driving conditions change. The fuel economy
can be reset by pressing SET/CLR while the
Average Fuel Economy display is showing.
Average Vehicle Speed
This display shows the average speed of the
vehicle in kilometers per hour (km/h) or
miles per hour (mph). This average is
calculated based on the various vehicle
speeds recorded since the last reset of this
value. The average speed can be reset by
pressing SET/CLR while the Average Vehicle
Speed display is showing.
Timer
Available on some vehicles, this display can
be used as a timer. To start the timer, press
SET/CLR while Timer is displayed. The
display will show the amount of time that
has passed since the timer was last reset,
not including time the ignition is off. Timewill continue to be counted as long as the
ignition is on, even if another display is
being shown on the DIC. The timer will
record up to 99 hours, 59 minutes, and
59 seconds (99:59:59) after which the
display will return to zero. To stop the
timer, press SET/CLR briefly while Timer is
displayed. To reset the timer to zero, press
and hold SET/CLR.
Vehicle Information Menu Items
(Uplevel DIC)
Press MENU on the turn signal lever until
Vehicle Information menu is displayed. Use
w/xto scroll through the following
possible menu items:
.Display Units
.Tire Pressure
.Remaining Oil Life
Display Units
Move
w/xto switch between metric or
US when the Unit display is active. Press
SET/CLR to confirm the setting. This will
change the displays on the cluster and DIC
to either metric or English (US)
measurements. Tire Pressure
The display will show a vehicle with the
approximate pressures of all four tires. Tire
pressure is displayed in either
kilopascal (kPa) or pounds per square
inch (psi). See
Tire Pressure Monitor System
0 196 and
Tire Pressure Monitor Operation 0197.
Remaining Oil Life
This menu is not available while the vehicle
is moving. This display shows an estimate of
the oil's remaining useful life. If REMAINING
OIL LIFE 99 % is displayed, that means 99%
of the current oil life remains.
When the remaining oil life is low, the
CHANGE ENGINE OIL SOON message will
appear on the display. The oil should
changed as soon as possible. See Engine Oil
0 166. In addition to the engine oil life
system monitoring the oil life, additional
maintenance is recommended. See
Maintenance Schedule 0226.
Remember, the Oil Life display must be
reset after each oil change. It will not reset
itself. Also, be careful not to reset the Oil
Life display accidentally at any time other
than when the oil has just been changed.
It cannot be reset accurately until the next
Page 162 of 270
Chevrolet Spark Owner Manual (GMNA-Localizing-U.S./Canada-14622955) -
2021 - CRC - 8/17/20
Vehicle Care 161
Vehicle Care
General Information
General Information . . . . . . . . . . . . . . . . . . . 162
California Proposition 65 Warning . . . . . 162
California Perchlorate MaterialsRequirements . . . . . . . . . . . . . . . . . . . . . . . . 162
Accessories and Modifications . . . . . . . . . 162
Vehicle Checks
Doing Your Own Service Work . . . . . . . . . 163
Hood . . . . . . . . . . . . . . . . . . . . . . . . . . . . . . . . . . 163
Engine Compartment Overview . . . . . . . . 165
Engine Oil . . . . . . . . . . . . . . . . . . . . . . . . . . . . . 166
Engine Oil Life System . . . . . . . . . . . . . . . . 168
Automatic Transmission Fluid . . . . . . . . . 169
Manual Transmission Fluid . . . . . . . . . . . . 169
Hydraulic Clutch . . . . . . . . . . . . . . . . . . . . . . . 169
Engine Air Cleaner/Filter . . . . . . . . . . . . . . 169
Cooling System . . . . . . . . . . . . . . . . . . . . . . . . 170
Engine Overheating . . . . . . . . . . . . . . . . . . . . 173
Washer Fluid . . . . . . . . . . . . . . . . . . . . . . . . . . 174
Brakes . . . . . . . . . . . . . . . . . . . . . . . . . . . . . . . . . 175
Brake Fluid . . . . . . . . . . . . . . . . . . . . . . . . . . . . . 175
Battery - North America . . . . . . . . . . . . . . . 176
Starter Switch Check . . . . . . . . . . . . . . . . . . . 178
Automatic Transmission Shift Lock Control Function Check . . . . . . . . . . . . . . 178
Ignition Transmission Lock Check . . . . . . 178 Park Brake and P (Park) Mechanism
Check . . . . . . . . . . . . . . . . . . . . . . . . . . . . . . . . 179
Wiper Blade Replacement . . . . . . . . . . . . . 179
Windshield Replacement . . . . . . . . . . . . . . 180
Gas Strut(s) . . . . . . . . . . . . . . . . . . . . . . . . . . . 180
Headlamp Aiming
Front Headlamp Aiming . . . . . . . . . . . . . . . . 181
Bulb Replacement
Bulb Replacement . . . . . . . . . . . . . . . . . . . . . . 181
Halogen Bulbs . . . . . . . . . . . . . . . . . . . . . . . . . 181
High Intensity Discharge (HID) Lighting . . . . . . . . . . . . . . . . . . . . . . . . . . . . . . 181
LED Lighting . . . . . . . . . . . . . . . . . . . . . . . . . . . 182
Headlamps, Front Turn Signal, Sidemarker, and Parking Lamps . . . . . . 182
Taillamps, Turn Signal, Stoplamps, and Back-Up Lamps . . . . . . . . . . . . . . . . . . . . . . 184
License Plate Lamp . . . . . . . . . . . . . . . . . . . . 184
Electrical System
Electrical System Overload . . . . . . . . . . . . . 185
Fuses and Circuit Breakers . . . . . . . . . . . . . 185
Engine Compartment Fuse Block . . . . . . 186
Instrument Panel Fuse Block . . . . . . . . . . . 188
Wheels and Tires
Tires . . . . . . . . . . . . . . . . . . . . . . . . . . . . . . . . . . 190
All-Season Tires . . . . . . . . . . . . . . . . . . . . . . . 190
Winter Tires . . . . . . . . . . . . . . . . . . . . . . . . . . . 191
Tire Sidewall Labeling . . . . . . . . . . . . . . . . . . 191 Tire Designations . . . . . . . . . . . . . . . . . . . . . . 193
Tire Terminology and Definitions . . . . . . 193
Tire Pressure . . . . . . . . . . . . . . . . . . . . . . . . . . 195
Tire Pressure Monitor System . . . . . . . . . 196
Tire Pressure Monitor Operation . . . . . . . 197
Tire Inspection . . . . . . . . . . . . . . . . . . . . . . . . 199
Tire Rotation . . . . . . . . . . . . . . . . . . . . . . . . . . 200
When It Is Time for New Tires . . . . . . . . 201
Buying New Tires . . . . . . . . . . . . . . . . . . . . . 202
Different Size Tires and Wheels . . . . . . . 203
Wheel Covers . . . . . . . . . . . . . . . . . . . . . . . . . 203
Uniform Tire Quality Grading . . . . . . . . . 203
Wheel Alignment and Tire Balance . . . . 204
Wheel Replacement . . . . . . . . . . . . . . . . . . . 204
Tire Chains . . . . . . . . . . . . . . . . . . . . . . . . . . . . 205
If a Tire Goes Flat . . . . . . . . . . . . . . . . . . . . . 205
Tire Changing . . . . . . . . . . . . . . . . . . . . . . . . . 207
Compact Spare Tire . . . . . . . . . . . . . . . . . . . . 210
Jump Starting
Jump Starting - North America . . . . . . . . . 211
Towing the Vehicle
Towing the Vehicle . . . . . . . . . . . . . . . . . . . . 213
Recreational Vehicle Towing . . . . . . . . . . . 214
Appearance Care
Exterior Care . . . . . . . . . . . . . . . . . . . . . . . . . . . 217
Interior Care . . . . . . . . . . . . . . . . . . . . . . . . . . . 220
Floor Mats . . . . . . . . . . . . . . . . . . . . . . . . . . . . . 223
Page 197 of 270
Chevrolet Spark Owner Manual (GMNA-Localizing-U.S./Canada-14622955) -
2021 - CRC - 8/17/20
196 Vehicle Care
Warning (Continued)
.Rough ride.
.Needless damage from road
hazards.
The Tire and Loading Information label
on the vehicle indicates the original
equipment tires and the correct cold
tire inflation pressures. The
recommended pressure is the minimum
air pressure needed to support the
vehicle's maximum load carrying
capacity. See Vehicle Load Limits 0131.
How the vehicle is loaded affects
vehicle handling and ride comfort.
Never load the vehicle with more
weight than it was designed to carry.
When to Check
Check the pressure of the tires once a
month or more. Do not forget the
compact spare, if the vehicle has one.
The compact spare cold tire pressure
should be at 420 kPa (60 psi). See
Compact Spare Tire 0210. How to Check
Use a good quality pocket-type gauge
to check tire pressure. Proper tire
inflation cannot be determined by
looking at the tire. Check the tire
inflation pressure when the tires are
cold, meaning the vehicle has not been
driven for at least three hours or no
more than 1.6 km (1 mi).
Remove the valve cap from the tire
valve stem. Press the tire gauge firmly
onto the valve to get a pressure
measurement. If the cold tire inflation
pressure matches the recommended
pressure on the Tire and Loading
Information label, no further adjustment
is necessary. If the inflation pressure is
low, add air until the recommended
pressure is reached. If the inflation
pressure is high, press on the metal
stem in the center of the tire valve to
release air.
Recheck the tire pressure with the tire
gauge.
Put the valve caps back on the valve
stems to keep out dirt and moisture.
Use only valve caps designed for the
vehicle by GM. TPMS sensors could be
damaged and would not be covered by
the vehicle warranty.
Tire Pressure Monitor System
The Tire Pressure Monitor System (TPMS)
uses radio and sensor technology to check
tire pressure levels. The TPMS sensors
monitor the air pressure in your tires and
transmit tire pressure readings to a receiver
located in the vehicle.
Each tire, including the spare (if provided),
should be checked monthly when cold and
inflated to the inflation pressure
recommended by the vehicle manufacturer
on the vehicle placard or tire inflation
pressure label. (If your vehicle has tires of a
different size than the size indicated on the
vehicle placard or tire inflation pressure
label, you should determine the proper tire
inflation pressure for those tires.)
Page 198 of 270
Chevrolet Spark Owner Manual (GMNA-Localizing-U.S./Canada-14622955) -
2021 - CRC - 8/17/20
Vehicle Care 197
As an added safety feature, your vehicle has
been equipped with a tire pressure
monitoring system (TPMS) that illuminates a
low tire pressure telltale when one or more
of your tires is significantly under-inflated.
Accordingly, when the low tire pressure
telltale illuminates, you should stop and
check your tires as soon as possible, and
inflate them to the proper pressure. Driving
on a significantly under-inflated tire causes
the tire to overheat and can lead to tire
failure. Under-inflation also reduces fuel
efficiency and tire tread life, and may affect
the vehicle's handling and stopping ability.
Please note that the TPMS is not a
substitute for proper tire maintenance, and
it is the driver's responsibility to maintain
correct tire pressure, even if under-inflation
has not reached the level to trigger
illumination of the TPMS low tire pressure
telltale.
Your vehicle has also been equipped with a
TPMS malfunction indicator to indicate when
the system is not operating properly. The
TPMS malfunction indicator is combined
with the low tire pressure telltale. When the
system detects a malfunction, the telltale
will flash for approximately one minute and
then remain continuously illuminated. Thissequence will continue upon subsequent
vehicle start-ups as long as the malfunction
exists.
When the malfunction indicator is
illuminated, the system may not be able to
detect or signal low tire pressure as
intended. TPMS malfunctions may occur for
a variety of reasons, including the
installation of replacement or alternate tires
or wheels on the vehicle that prevent the
TPMS from functioning properly. Always
check the TPMS malfunction telltale after
replacing one or more tires or wheels on
your vehicle to ensure that the replacement
or alternate tires and wheels allow the
TPMS to continue to function properly.
See
Tire Pressure Monitor Operation 0197.
See Radio Frequency Statement 0248.
Tire Pressure Monitor Operation
This vehicle may have a Tire Pressure
Monitor System (TPMS). The TPMS is
designed to warn the driver when a low tire
pressure condition exists. TPMS sensors are
mounted onto each tire and wheel
assembly, excluding the spare tire and
wheel assembly. The TPMS sensors monitor the air pressure in the tires and transmit the
tire pressure readings to a receiver located
in the vehicle.
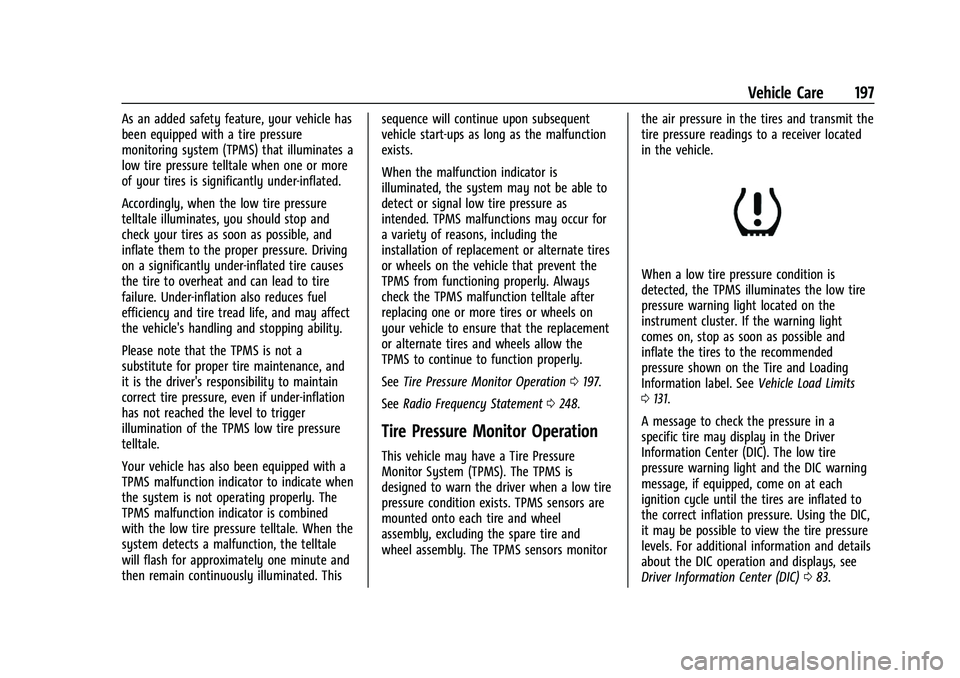
When a low tire pressure condition is
detected, the TPMS illuminates the low tire
pressure warning light located on the
instrument cluster. If the warning light
comes on, stop as soon as possible and
inflate the tires to the recommended
pressure shown on the Tire and Loading
Information label. See
Vehicle Load Limits
0 131.
A message to check the pressure in a
specific tire may display in the Driver
Information Center (DIC). The low tire
pressure warning light and the DIC warning
message, if equipped, come on at each
ignition cycle until the tires are inflated to
the correct inflation pressure. Using the DIC,
it may be possible to view the tire pressure
levels. For additional information and details
about the DIC operation and displays, see
Driver Information Center (DIC) 083.
Page 201 of 270
Chevrolet Spark Owner Manual (GMNA-Localizing-U.S./Canada-14622955) -
2021 - CRC - 8/17/20
200 Vehicle Care
Replace the tire if:
.The indicators at three or more
places around the tire can be seen.
.There is cord or fabric showing
through the tire's rubber.
.The tread or sidewall is cracked, cut,
or snagged deep enough to show
cord or fabric.
.The tire has a bump, bulge, or split.
.The tire has a puncture, cut, or other
damage that cannot be repaired well
because of the size or location of the
damage.
Tire Rotation
Tires should be rotated every 12 000 km
(7,500 mi). SeeMaintenance Schedule
0 226.
Tires are rotated to achieve a more
uniform wear for all tires. The first
rotation is the most important.
Anytime unusual wear is noticed, rotate
the tires as soon as possible, check for
proper tire inflation pressure, and check
for damaged tires or wheels. If the unusual wear continues after the
rotation, check the wheel alignment.
See
When It Is Time for New Tires 0201
and
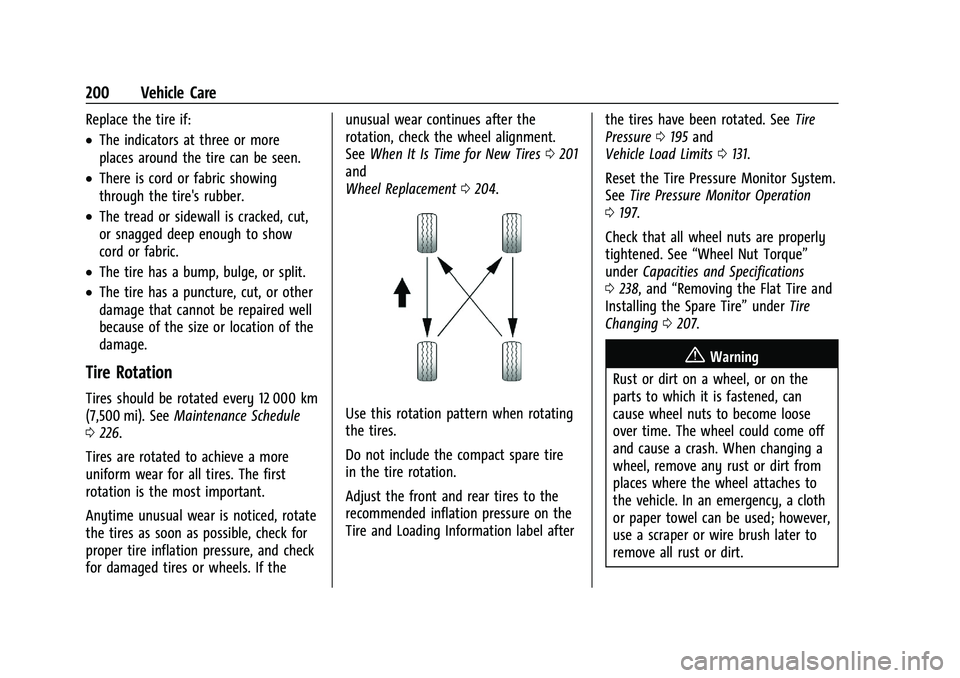
Wheel Replacement 0204.Use this rotation pattern when rotating
the tires.
Do not include the compact spare tire
in the tire rotation.
Adjust the front and rear tires to the
recommended inflation pressure on the
Tire and Loading Information label after the tires have been rotated. See
Tire
Pressure 0195 and
Vehicle Load Limits 0131.
Reset the Tire Pressure Monitor System.
See Tire Pressure Monitor Operation
0 197.
Check that all wheel nuts are properly
tightened. See “Wheel Nut Torque”
under Capacities and Specifications
0 238, and “Removing the Flat Tire and
Installing the Spare Tire” underTire
Changing 0207.
{Warning
Rust or dirt on a wheel, or on the
parts to which it is fastened, can
cause wheel nuts to become loose
over time. The wheel could come off
and cause a crash. When changing a
wheel, remove any rust or dirt from
places where the wheel attaches to
the vehicle. In an emergency, a cloth
or paper towel can be used; however,
use a scraper or wire brush later to
remove all rust or dirt.
Page 203 of 270

Chevrolet Spark Owner Manual (GMNA-Localizing-U.S./Canada-14622955) -
2021 - CRC - 8/17/20
202 Vehicle Care
Buying New Tires
GM has developed and matched specific
tires for the vehicle. The original
equipment tires installed were designed
to meet General Motors Tire
Performance Criteria Specification (TPC
Spec) system rating. When replacement
tires are needed, GM strongly
recommends buying tires with the same
TPC Spec rating.
GM's exclusive TPC Spec system
considers over a dozen critical
specifications that impact the overall
performance of the vehicle, including
brake system performance, ride and
handling, traction control, and tire
pressure monitoring performance. GM's
TPC Spec number is molded onto the
tire's sidewall near the tire size. If the
tires have an all-season tread design,
the TPC spec number will be followed
by MS, for mud and snow. SeeTire
Sidewall Labeling 0191.
GM recommends replacing worn tires in
complete sets of four. Uniform tread
depth on all tires will help to maintain the performance of the vehicle. Braking
and handling performance may be
adversely affected if all the tires are not
replaced at the same time. If proper
rotation and maintenance have been
done, all four tires should wear out at
about the same time. See
Tire Rotation
0 200. However, if it is necessary to
replace only one axle set of worn tires,
place the new tires on the rear axle.
Winter tires with the same speed rating
as the original equipment tires may not
be available for H, V, W, Y, and ZR
speed rated tires. Never exceed the
winter tires’ maximum speed capability
when using winter tires with a lower
speed rating.
{Warning
Tires could explode during improper
service. Attempting to mount or
dismount a tire could cause injury or
death. Only your dealer or authorized
tire service center should mount or
dismount the tires.
{Warning
Mixing tires of different sizes, brands,
or types may cause loss of control of
the vehicle, resulting in a crash or
other vehicle damage. Use the
correct size, brand, and type of tire
on all wheels.
{Warning
Using bias-ply tires on the vehicle
may cause the wheel rim flanges to
develop cracks after many miles of
driving. A tire and/or wheel could fail
suddenly and cause a crash. Use only
radial-ply tires with the wheels on
the vehicle.
If the vehicle tires must be replaced
with a tire that does not have a TPC
Spec number, make sure they are the
same size, load range, speed rating, and
construction (radial) as the original
tires.
Page 204 of 270

Chevrolet Spark Owner Manual (GMNA-Localizing-U.S./Canada-14622955) -
2021 - CRC - 8/17/20
Vehicle Care 203
Vehicles that have a tire pressure
monitoring system could give an
inaccurate low-pressure warning if
non-TPC Spec rated tires are installed.
SeeTire Pressure Monitor System 0196.
The Tire and Loading Information Label
indicates the original equipment tires
on the vehicle. See Vehicle Load Limits
0 131.
Different Size Tires and Wheels
If wheels or tires are installed that are a
different size than the original equipment
wheels and tires, vehicle performance,
including its braking, ride and handling
characteristics, stability, and resistance to
rollover may be affected. If the vehicle has
electronic systems such as antilock brakes,
rollover airbags, traction control, electronic
stability control, or All-Wheel Drive, the
performance of these systems can also be
affected.
{Warning
If different sized wheels are used, there
may not be an acceptable level of
performance and safety if tires not
(Continued)
Warning (Continued)
recommended for those wheels are
selected. This increases the chance of a
crash and serious injury. Only use GM
specific wheel and tire systems developed
for the vehicle, and have them properly
installed by a GM certified technician.
See Buying New Tires 0202 and
Accessories and Modifications 0162.
Wheel Covers
Installation
Tighten the wheel nut caps by hand while
pressing on the center of the wheel cover
with the other hand. Then tighten an
additional one-quarter turn with the wheel
wrench.
Uniform Tire Quality Grading
The following information relates to the
system developed by the United States
National Highway Traffic Safety
Administration (NHTSA), which grades
tires by treadwear, traction, and
temperature performance. This applies
only to vehicles sold in the United States. The grades are molded on the
sidewalls of most passenger car tires.
The Uniform Tire Quality Grading
(UTQG) system does not apply to deep
tread, winter tires, compact spare tires,
tires with nominal rim diameters of
10 to 12 inches (25 to 30 cm), or to some
limited-production tires.
While the tires available on General
Motors passenger cars and light trucks
may vary with respect to these grades,
they must also conform to federal
safety requirements and additional
General Motors Tire Performance
Criteria (TPC) standards.
Quality grades can be found where
applicable on the tire sidewall between
tread shoulder and maximum section
width. For example:Treadwear 200 Traction AA Temperature A
All Passenger Car Tires Must Conform to
Federal Safety Requirements In Addition
To These Grades.