brake light CHEVROLET SS 2015 User Guide
[x] Cancel search | Manufacturer: CHEVROLET, Model Year: 2015, Model line: SS, Model: CHEVROLET SS 2015Pages: 435, PDF Size: 6.27 MB
Page 255 of 435
Black plate (18,1)Chevrolet SS Sedan Owner Manual (GMNA-Localizing-U.S.-7707491) - 2015 -
crc - 9/11/14
9-18 Driving and Operating
The ignition will switch from ACC/
ACCESSORY to OFF after
five minutes to prevent battery
rundown.
ON/RUN/START (Green Indicator
Light):This mode is for driving and
starting. With the ignition off, and
the brake pedal applied for
automatic transmission vehicles,
and the clutch pedal applied for
manual transmission vehicles,
pressing the button once will place
the ignition system in ON/RUN/
START. Once engine cranking
begins, release the button. Engine
cranking will continue until the
engine starts. See Starting the
Engine on page 9-18. The ignition
will then remain in ON/RUN.
Service Only Mode
This power mode is available for
service and diagnostics, and to
verify the proper operation of the
malfunction indicator lamp as may
be required for emission inspection
purposes. With the vehicle off, and
the brake pedal not applied, pressing and holding the button for
more than five seconds will place
the vehicle in Service Only Mode.
The instruments and audio systems
will operate as they do in ON/RUN,
but the vehicle will not be able to be
driven. The engine will not start in
Service Only Mode. Press the
button again to turn the vehicle off.
Starting the Engine
Place the transmission in the
proper gear.
{Caution
If you add electrical parts or
accessories, you could change
the way the engine operates. Any
resulting damage would not be
covered by the vehicle warranty.
See
Add-On Electrical Equipment
on page 9-56. Automatic Transmission
Move the shift lever to P (Park) or
N (Neutral). To restart the vehicle
when it is already moving, use
N (Neutral) only.
{Caution
Do not try to shift to P (Park) if the
vehicle is moving. If you do, you
could damage the transmission.
Shift to P (Park) only when the
vehicle is stopped.
Manual Transmission
The shift lever should be in Neutral
and the parking brake engaged.
Hold the clutch pedal down to the
floor and start the engine.
ProCarManuals.com
Page 265 of 435
Black plate (28,1)Chevrolet SS Sedan Owner Manual (GMNA-Localizing-U.S.-7707491) - 2015 -
crc - 9/11/14
9-28 Driving and Operating
2 (Second):Press the clutch pedal
as you let up on the accelerator
pedal and shift into 2 (Second).
Then, slowly let up on the clutch
pedal as you press the accelerator
pedal.
3 (Third), 4 (Fourth), 5 (Fifth), and
6 (Sixth): Shift into 3 (Third),
4 (Fourth), 5 (Fifth), and 6 (Sixth) the
same way you do for 2 (Second).
Slowly let up on the clutch pedal as
you press the accelerator pedal.
To stop, let up on the accelerator
pedal and press the brake pedal.
Just before the vehicle stops, press
the clutch pedal and the brake
pedal, and shift to Neutral.
Neutral: Use this position when
you start or idle the engine. The
shift lever is in Neutral when it is
centered in the shift pattern, not in
any gear. R (Reverse):
To back up, press
down the clutch pedal and shift into
R (Reverse). Apply pressure to get
the lever past 5 (Fifth) and 6 (Sixth)
into R (Reverse). Let up on the
clutch pedal slowly while pressing
the accelerator pedal.
1–4 Shift Message
When the DIC displays this
message, the vehicle can only be
shifted from 1 (First) to 4 (Fourth).
See Transmission Messages on
page 5-31.
Brakes
Antilock Brake
System (ABS)
This vehicle has ABS, an advanced
electronic braking system that helps
prevent a braking skid.
When the vehicle begins to drive
away, ABS checks itself.
A momentary motor or clicking noise
might be heard while this test is
going on, and it might even be
noticed that the brake pedal moves
a little. This is normal.
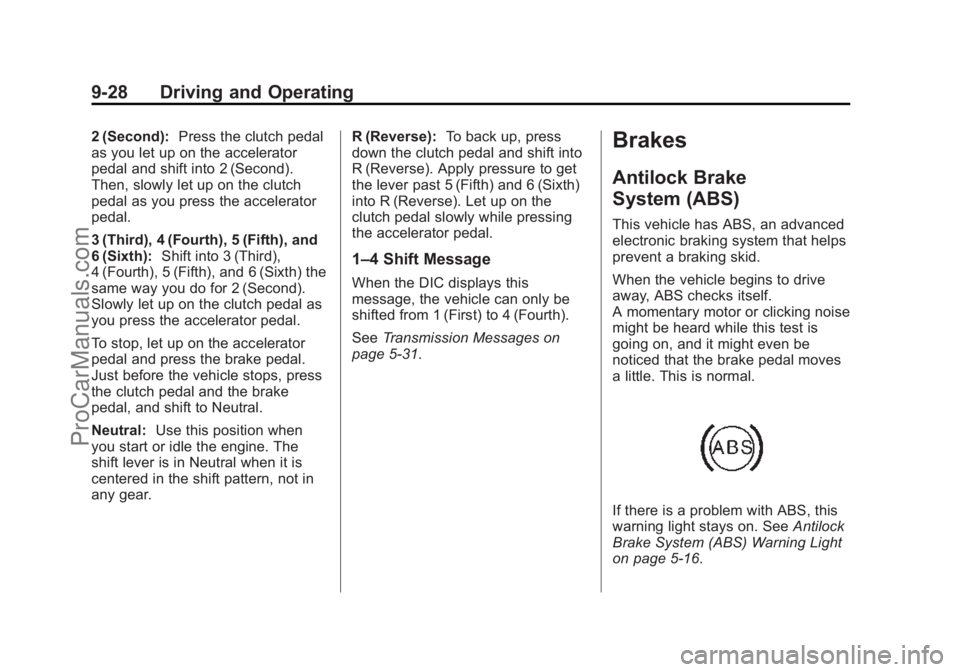
If there is a problem with ABS, this
warning light stays on. See Antilock
Brake System (ABS) Warning Light
on page 5-16.
ProCarManuals.com
Page 267 of 435
Black plate (30,1)Chevrolet SS Sedan Owner Manual (GMNA-Localizing-U.S.-7707491) - 2015 -
crc - 9/11/14
9-30 Driving and Operating
The system has a red parking brake
status light and an amber parking
brake warning light. SeeElectric
Parking Brake Light on page 5-15
and Service Electric Parking Brake
Light on page 5-15. There are also
parking brake-related Driver
Information Center (DIC) messages.
See Brake System Messages on
page 5-26. In case of insufficient
electrical power, the EPB cannot be
applied or released.
Before leaving the vehicle, check
the red parking brake status light to
ensure that the parking brake is
applied.
EPB Apply
To apply the EPB:
1. Be sure the vehicle is at a complete stop.
2. Lift up the EPB switch momentarily.
The red parking brake status light
will flash and then stay on once the
EPB is fully applied. If the red
parking brake status light flashes continuously, then the EPB is only
partially applied or there is a
problem with the EPB. A DIC
message will display. Release the
EPB and try to apply it again. If the
light does not come on, or keeps
flashing, have the vehicle serviced.
Do not drive the vehicle if the red
parking brake status light is flashing.
See your dealer. See
Electric
Parking Brake Light on page 5-15.
If the amber parking brake warning
light is on, lift up on the EPB switch
and hold it up. Continue to hold the
switch until the red parking brake
status light remains on. If the amber
parking brake warning light remains
on, see your dealer.
If the EPB is applied while the
vehicle is moving, the vehicle will
decelerate as long as the switch is
held up. If the switch is held up until
the vehicle comes to a stop, the
EPB will remain applied.
If the EPB fails to apply, the rear
wheels should be blocked to
prevent vehicle movement.
EPB Release
To release the EPB:
1. Place the ignition in the ACC/ ACCESSORY or ON/RUN
position.
2. Apply and hold the brake pedal.
3. Push down momentarily on the EPB switch.
The EPB is released when the red
parking brake status light is off.
If the amber parking brake warning
light is on, release the EPB by
pushing down on the EPB switch
and holding it down. Continue to
hold the switch until the red parking
brake status light is off. If either light
stays on after release is attempted,
see your dealer.
{Caution
Driving with the parking brake on
can overheat the brake system
and cause premature wear or (Continued)
ProCarManuals.com
Page 268 of 435
Black plate (31,1)Chevrolet SS Sedan Owner Manual (GMNA-Localizing-U.S.-7707491) - 2015 -
crc - 9/11/14
Driving and Operating 9-31
Caution (Continued)
damage to brake system parts.
Make sure that the parking brake
is fully released and the brake
warning light is off before driving.
Automatic EPB Release
The EPB will automatically release if
the vehicle is running, placed into
gear, and an attempt is made to
drive away. Avoid rapid acceleration
when the EPB is applied, to
preserve parking brake lining life.
The EPB can also be used to
prevent roll back for vehicles with a
manual transmission taking off on a
hill. When no roll back is desired, an
applied EPB will allow both feet to
be used for the clutch and
accelerator pedals in preparation for
starting the vehicle moving in the
intended direction. In this case,
there is no need to push the switch
to release the EPB.
Brake Assist
The Brake Assist feature is
designed to assist the driver in
stopping or decreasing vehicle
speed in emergency driving
conditions. This feature uses the
stability system hydraulic brake
control module to supplement the
power brake system under
conditions where the driver has
quickly and forcefully applied the
brake pedal in an attempt to quickly
stop or slow down the vehicle. The
stability system hydraulic brake
control module increases brake
pressure at each corner of the
vehicle until the ABS activates.
Minor brake pedal pulsation or
pedal movement during this time is
normal and the driver should
continue to apply the brake pedal as
the driving situation dictates. The
Brake Assist feature will
automatically disengage when the
brake pedal is released or brake
pedal pressure is quickly
decreased.
Hill Start Assist (HSA)
This vehicle has an HSA feature,
which may be useful when the
vehicle is stopped on a grade
sufficient enough to activate HSA.
This feature is designed to prevent
the vehicle from rolling, either
forward or rearward, during vehicle
drive off. After the driver completely
stops and holds the vehicle in a
complete standstill on a grade, HSA
will be automatically activated.
During the transition period between
when the driver releases the brake
pedal and starts to accelerate to
drive off on a grade, HSA holds the
braking pressure for a maximum of
two seconds to ensure that there is
no rolling. The brakes will
automatically release when the
accelerator pedal is applied within
the two-second window.
ProCarManuals.com
Page 277 of 435
Black plate (40,1)Chevrolet SS Sedan Owner Manual (GMNA-Localizing-U.S.-7707491) - 2015 -
crc - 9/11/14
9-40 Driving and Operating
The speedometer reading can be
displayed in either English or metric
units. SeeDriver Information Center
(DIC) on page 5-20. The increment
value used depends on the units
displayed.
Reducing Speed While Using
Cruise Control
If the cruise control system is
already activated:
.Move the thumbwheel toward
SET/− and hold until the desired
lower speed is reached, then
release it.
.To decrease the vehicle speed in
small increments, move the
thumbwheel toward SET/−
briefly. For each press, the
vehicle goes about 1.6 km/h
(1 mph) slower.
The speedometer reading can be
displayed in either English or metric
units. See Driver Information Center
(DIC) on page 5-20. The increment
value used depends on the units
displayed. Passing Another Vehicle While
Using Cruise Control
Use the accelerator pedal to
increase the vehicle speed. When
you take your foot off the pedal, the
vehicle slows down to the previously
set cruise control speed. While
pressing the accelerator pedal or
shortly following the release to
override cruise control, briefly
moving the thumbwheel toward
SET/–
will result in cruise control set
to the current vehicle speed.
Using Cruise Control on Hills
How well the cruise control works
on hills depends upon the vehicle
speed, load, and the steepness of
the hills. When going up steep hills,
you might have to step on the
accelerator pedal to maintain the
vehicle speed. When going
downhill, you might have to brake or
shift to a lower gear to keep your
speed down. If the brake pedal is
applied, cruise control will
disengage. Ending Cruise Control
There are four ways to disengage
cruise control:
.Step lightly on the brake pedal
or clutch for a manual
transmission.
.Press*.
.Shift the transmission to
N (Neutral).
.To turn off the cruise control,
press
1.
Erasing Speed Memory
The cruise control set speed is
erased from memory if
1is pressed
or if the vehicle is turned off.
ProCarManuals.com
Page 283 of 435
Black plate (46,1)Chevrolet SS Sedan Owner Manual (GMNA-Localizing-U.S.-7707491) - 2015 -
crc - 9/11/14
9-46 Driving and Operating
When the System Does Not Seem
to Work Properly
The APA system may require a
short period of driving along curves
to calibrate.
Assistance Systems for
Driving
If equipped, when driving the
vehicle, Forward Collision Alert
(FCA), Lane Departure Warning
(LDW), and Side Blind Zone Alert
(SBZA) can help to avoid a crash or
reduce crash damage.
Forward Collision Alert
(FCA) System
If equipped, the FCA system may
help to avoid or reduce the harm
caused by front-end crashes. When
approaching a vehicle ahead too
quickly, FCA provides a red flashing
alert on the windshield and rapidly
beeps. FCA also lights an amber
visual alert if following another
vehicle much too closely.FCA detects vehicles within a
distance of approximately 60 m
(197 ft) and operates at speeds
above 40 km/h (25 mph).
{Warning
FCA is a warning system and
does not apply the brakes. When
approaching a slower-moving or
stopped vehicle ahead too rapidly,
or when following a vehicle too
closely, FCA may not provide a
warning with enough time to help
avoid a crash. FCA does not warn
of pedestrians, animals, signs,
guardrails, bridges, construction
barrels, or other objects. Be ready
to take action and apply the
brakes. For more information, see
Defensive Driving on page 9-3.
FCA can be disabled with the FCA
steering wheel control.
Detecting the Vehicle Ahead
FCA warnings will not occur unless
the FCA system detects a vehicle
ahead. When a vehicle is detected,
the vehicle ahead indicator will
display green on the windshield.
Vehicles may not be detected on
curves, highway exit ramps, or hills;
or due to poor visibility. FCA will not
detect another vehicle ahead until it
is completely in the driving lane.
{Warning
FCA does not provide a warning
to help avoid a crash, unless it
detects a vehicle. FCA may not
detect a vehicle ahead if the FCA
sensor is blocked by dirt, snow, (Continued)
ProCarManuals.com
Page 294 of 435
Black plate (1,1)Chevrolet SS Sedan Owner Manual (GMNA-Localizing-U.S.-7707491) - 2015 -
crc - 9/16/14
Vehicle Care 10-1
Vehicle Care
General Information
General Information . . . . . . . . . . 10-2
California Proposition65 Warning . . . . . . . . . . . . . . . . . 10-2
California Perchlorate Materials Requirements . . . . 10-2
Accessories and Modifications . . . . . . . . . . . . . . . 10-2
Vehicle Checks
Doing Your OwnService Work . . . . . . . . . . . . . . . 10-3
Hood . . . . . . . . . . . . . . . . . . . . . . . . 10-4
Engine Compartment Overview . . . . . . . . . . . . . . . . . . . 10-5
Engine Oil . . . . . . . . . . . . . . . . . . . 10-6
Engine Oil Life System . . . . . . 10-8
Automatic Transmission Fluid . . . . . . . . . . . . . . . . . . . . . . . 10-9
Manual Transmission Fluid . . . . . . . . . . . . . . . . . . . . . . 10-10
Hydraulic Clutch . . . . . . . . . . . . 10-10
Engine Air Cleaner/Filter . . . . 10-10
Cooling System . . . . . . . . . . . . 10-12
Engine Coolant . . . . . . . . . . . . . 10-12
Engine Overheating . . . . . . . . 10-16 Washer Fluid . . . . . . . . . . . . . . . 10-18
Brakes . . . . . . . . . . . . . . . . . . . . . 10-18
Brake Fluid . . . . . . . . . . . . . . . . . 10-19
Battery . . . . . . . . . . . . . . . . . . . . . 10-21
Rear Axle . . . . . . . . . . . . . . . . . . 10-22
Starter Switch Check . . . . . . . 10-22
Automatic Transmission Shift
Lock Control Function
Check . . . . . . . . . . . . . . . . . . . . . 10-23
Park Brake and P (Park) Mechanism Check . . . . . . . . 10-23
Wiper Blade Replacement . . . . . . . . . . . . . . 10-24
Windshield Replacement . . . 10-24
Headlamp Aiming
Headlamp Aiming . . . . . . . . . . 10-25
Bulb Replacement
Bulb Replacement . . . . . . . . . . 10-25
High Intensity Discharge (HID) Lighting . . . . . . . . . . . . . 10-25
License Plate Lamp . . . . . . . . 10-26
Replacement Bulbs . . . . . . . . . 10-26
Electrical System
Electrical System Overload . . . . . . . . . . . . . . . . . . 10-27
Fuses . . . . . . . . . . . . . . . . . . . . . . 10-27 Engine Compartment Fuse
Block . . . . . . . . . . . . . . . . . . . . . 10-28
Instrument Panel Fuse Block . . . . . . . . . . . . . . . . . . . . . 10-30
Rear Compartment Fuse
Block . . . . . . . . . . . . . . . . . . . . . 10-33
Wheels and Tires
Tires . . . . . . . . . . . . . . . . . . . . . . . . 10-35
Winter Tires . . . . . . . . . . . . . . . . 10-36
Low-Profile Tires . . . . . . . . . . . 10-36
Summer Tires . . . . . . . . . . . . . . 10-37
Tire Sidewall Labeling . . . . . . 10-37
Tire Designations . . . . . . . . . . . 10-38
Tire Terminology andDefinitions . . . . . . . . . . . . . . . . 10-39
Tire Pressure . . . . . . . . . . . . . . . 10-42
Tire Pressure for High-Speed
Operation . . . . . . . . . . . . . . . . . 10-43
Tire Pressure Monitor System . . . . . . . . . . . . . . . . . . . 10-44
Tire Pressure Monitor Operation . . . . . . . . . . . . . . . . . 10-45
Tire Inspection . . . . . . . . . . . . . . 10-48
Tire Rotation . . . . . . . . . . . . . . . 10-48
When It Is Time for New Tires . . . . . . . . . . . . . . . . . . . . . . 10-49
Buying New Tires . . . . . . . . . . . 10-50
ProCarManuals.com
Page 312 of 435
Black plate (19,1)Chevrolet SS Sedan Owner Manual (GMNA-Localizing-U.S.-7707491) - 2015 -
crc - 9/16/14
Vehicle Care 10-19
Warning (Continued)
a crash. When the brake wear
warning sound is heard, have the
vehicle serviced.
{Caution
Continuing to drive with worn-out
brake pads could result in costly
brake repair.
Some driving conditions or climates
can cause a brake squeal when the
brakes are first applied or lightly
applied. This does not mean
something is wrong with the brakes.
Properly torqued wheel nuts are
necessary to help prevent brake
pulsation. When tires are rotated,
inspect brake pads for wear and
evenly tighten wheel nuts in the
proper sequence to torque
specifications. See Capacities and
Specifications on page 12-2. Brake pads should be replaced as
complete sets.
Brake Pedal Travel
See your dealer if the brake pedal
does not return to normal height,
or if there is a rapid increase in
pedal travel. This could be a sign
that brake service may be required.
Replacing Brake System Parts
Always replace brake system parts
with new, approved replacement
parts. If this is not done, the brakes
may not work properly. The braking
performance expected can change
in many other ways if the wrong
replacement brake parts are
installed or parts are improperly
installed.
Brake Fluid
The brake/clutch master cylinder
reservoir is filled with DOT 4 brake
fluid as indicated on the reservoir
cap. See
Engine Compartment
Overview on page 10-5 for the
location of the reservoir.
There are only two reasons why the
brake fluid level in the reservoir
might go down:
.The brake fluid level goes down
because of normal brake lining
wear. When new linings are
installed, the fluid level goes
back up.
.A fluid leak in the brake/clutch
hydraulic system can also cause
a low fluid level. Have the brake/
clutch hydraulic system fixed,
ProCarManuals.com
Page 313 of 435
Black plate (20,1)Chevrolet SS Sedan Owner Manual (GMNA-Localizing-U.S.-7707491) - 2015 -
crc - 9/16/14
10-20 Vehicle Care
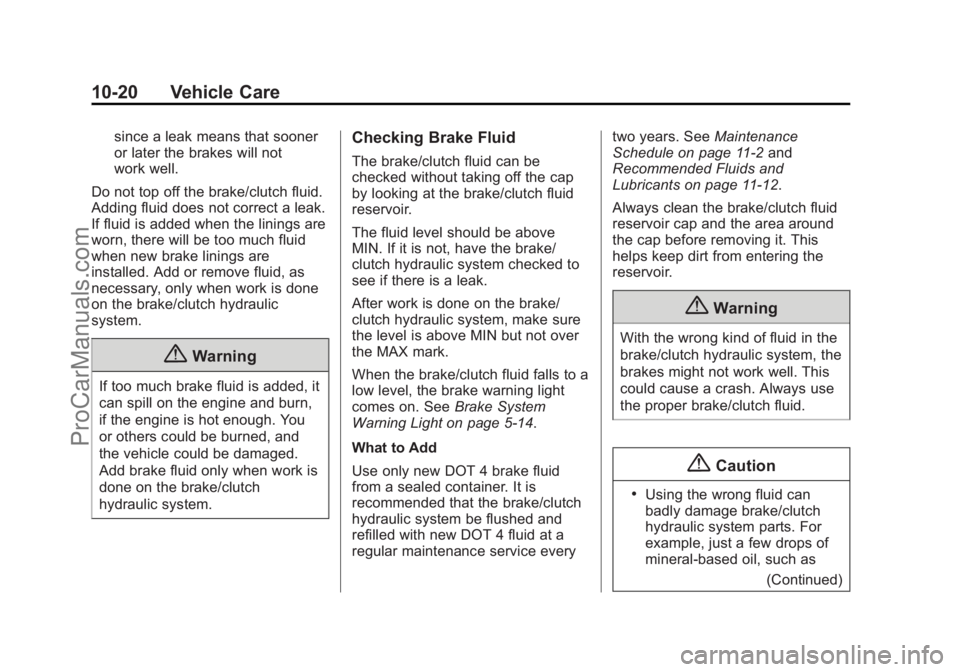
since a leak means that sooner
or later the brakes will not
work well.
Do not top off the brake/clutch fluid.
Adding fluid does not correct a leak.
If fluid is added when the linings are
worn, there will be too much fluid
when new brake linings are
installed. Add or remove fluid, as
necessary, only when work is done
on the brake/clutch hydraulic
system.
{Warning
If too much brake fluid is added, it
can spill on the engine and burn,
if the engine is hot enough. You
or others could be burned, and
the vehicle could be damaged.
Add brake fluid only when work is
done on the brake/clutch
hydraulic system.
Checking Brake Fluid
The brake/clutch fluid can be
checked without taking off the cap
by looking at the brake/clutch fluid
reservoir.
The fluid level should be above
MIN. If it is not, have the brake/
clutch hydraulic system checked to
see if there is a leak.
After work is done on the brake/
clutch hydraulic system, make sure
the level is above MIN but not over
the MAX mark.
When the brake/clutch fluid falls to a
low level, the brake warning light
comes on. See Brake System
Warning Light on page 5-14.
What to Add
Use only new DOT 4 brake fluid
from a sealed container. It is
recommended that the brake/clutch
hydraulic system be flushed and
refilled with new DOT 4 fluid at a
regular maintenance service every two years. See
Maintenance
Schedule on page 11-2 and
Recommended Fluids and
Lubricants on page 11-12.
Always clean the brake/clutch fluid
reservoir cap and the area around
the cap before removing it. This
helps keep dirt from entering the
reservoir.
{Warning
With the wrong kind of fluid in the
brake/clutch hydraulic system, the
brakes might not work well. This
could cause a crash. Always use
the proper brake/clutch fluid.
{Caution
.Using the wrong fluid can
badly damage brake/clutch
hydraulic system parts. For
example, just a few drops of
mineral-based oil, such as
(Continued)
ProCarManuals.com
Page 327 of 435
Black plate (34,1)Chevrolet SS Sedan Owner Manual (GMNA-Localizing-U.S.-7707491) - 2015 -
crc - 9/16/14
10-34 Vehicle Care
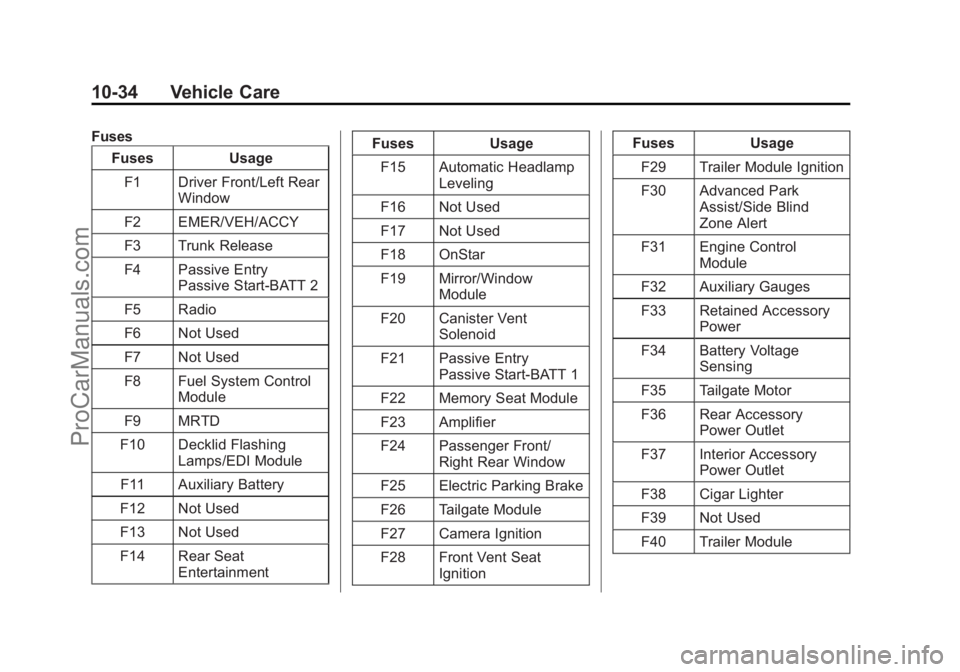
FusesFuses Usage
F1 Driver Front/Left Rear Window
F2 EMER/VEH/ACCY
F3 Trunk Release
F4 Passive Entry Passive Start-BATT 2
F5 Radio
F6 Not Used
F7 Not Used
F8 Fuel System Control Module
F9 MRTD
F10 Decklid Flashing Lamps/EDI Module
F11 Auxiliary Battery
F12 Not Used
F13 Not Used
F14 Rear Seat Entertainment Fuses Usage
F15 Automatic Headlamp Leveling
F16 Not Used
F17 Not Used
F18 OnStar
F19 Mirror/Window Module
F20 Canister Vent Solenoid
F21 Passive Entry Passive Start-BATT 1
F22 Memory Seat Module
F23 Amplifier
F24 Passenger Front/ Right Rear Window
F25 Electric Parking Brake
F26 Tailgate Module
F27 Camera Ignition
F28 Front Vent Seat Ignition Fuses Usage
F29 Trailer Module Ignition
F30 Advanced Park Assist/Side Blind
Zone Alert
F31 Engine Control Module
F32 Auxiliary Gauges
F33 Retained Accessory Power
F34 Battery Voltage Sensing
F35 Tailgate Motor
F36 Rear Accessory Power Outlet
F37 Interior Accessory Power Outlet
F38 Cigar Lighter
F39 Not Used
F40 Trailer Module
ProCarManuals.com