steering CHEVROLET SSR 2003 1.G User Guide
[x] Cancel search | Manufacturer: CHEVROLET, Model Year: 2003, Model line: SSR, Model: CHEVROLET SSR 2003 1.GPages: 374, PDF Size: 2.55 MB
Page 115 of 374
Exterior Lamps
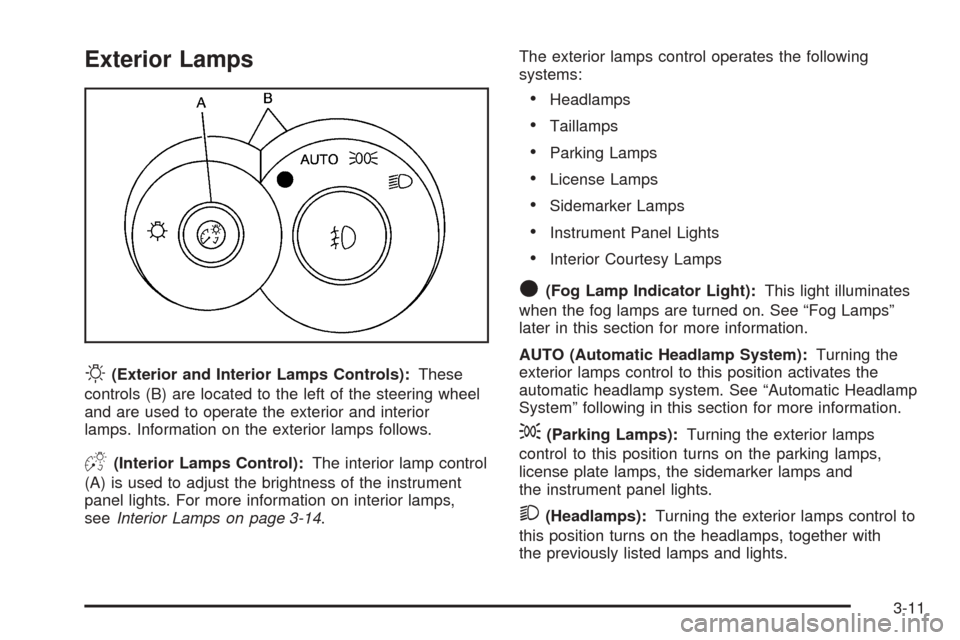
O(Exterior and Interior Lamps Controls):These
controls (B) are located to the left of the steering wheel
and are used to operate the exterior and interior
lamps. Information on the exterior lamps follows.
D(Interior Lamps Control):The interior lamp control
(A) is used to adjust the brightness of the instrument
panel lights. For more information on interior lamps,
seeInterior Lamps on page 3-14.The exterior lamps control operates the following
systems:
Headlamps
Taillamps
Parking Lamps
License Lamps
Sidemarker Lamps
Instrument Panel Lights
Interior Courtesy Lamps
O(Fog Lamp Indicator Light):This light illuminates
when the fog lamps are turned on. See “Fog Lamps”
later in this section for more information.
AUTO (Automatic Headlamp System):Turning the
exterior lamps control to this position activates the
automatic headlamp system. See “Automatic Headlamp
System” following in this section for more information.
;(Parking Lamps):Turning the exterior lamps
control to this position turns on the parking lamps,
license plate lamps, the sidemarker lamps and
the instrument panel lights.
2(Headlamps):Turning the exterior lamps control to
this position turns on the headlamps, together with
the previously listed lamps and lights.
3-11
Page 118 of 374
Interior Lamps
Instrument Panel Brightness
O
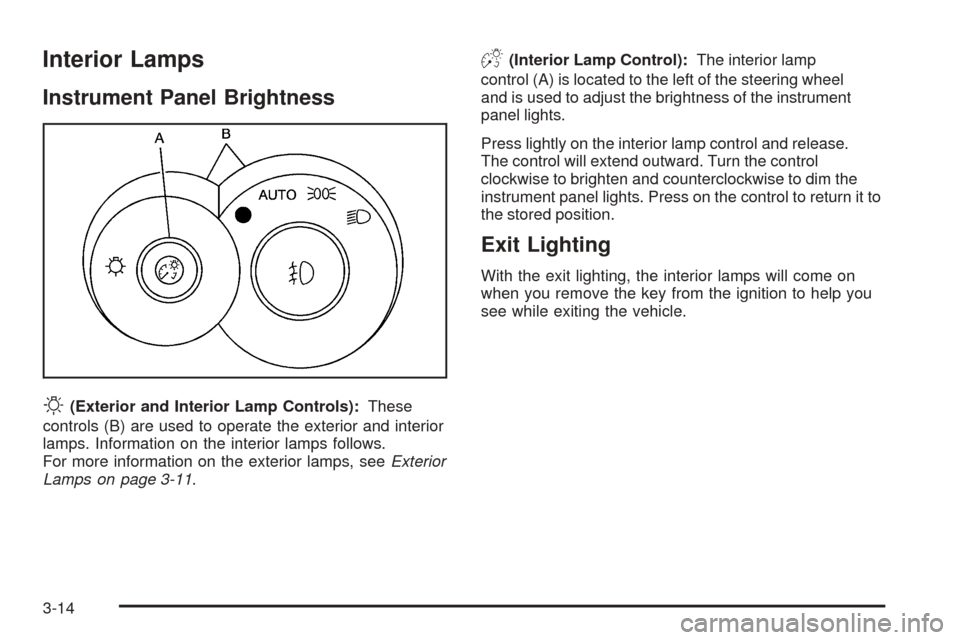
(Exterior and Interior Lamp Controls):These
controls (B) are used to operate the exterior and interior
lamps. Information on the interior lamps follows.
For more information on the exterior lamps, seeExterior
Lamps on page 3-11.
D(Interior Lamp Control):The interior lamp
control (A) is located to the left of the steering wheel
and is used to adjust the brightness of the instrument
panel lights.
Press lightly on the interior lamp control and release.
The control will extend outward. Turn the control
clockwise to brighten and counterclockwise to dim the
instrument panel lights. Press on the control to return it to
the stored position.
Exit Lighting
With the exit lighting, the interior lamps will come on
when you remove the key from the ignition to help you
see while exiting the vehicle.
3-14
Page 128 of 374
Speedometer and Odometer
The speedometer lets you see your speed in both miles
per hour (mph) and kilometers per hour (km/h).
The odometer shows how far your vehicle has been
driven, in either miles (used in the United States)
or kilometers (used in Canada).
The odometer mileage can be checked without the
vehicle running. Turn the ignition to RUN and press the
trip information button located on the steering wheel.
SeeDIC Controls and Displays on page 3-41for more
information.
You may wonder what happens if your vehicle needs a
new odometer installed. If the new one can be set to
the mileage total of the old odometer, then it must
be. But if it can’t, then it’s set at zero, and a label must
be put on the driver’s door to show the old mileage
reading when the new odometer was installed.
Trip Odometer
The trip odometer can tell you how far your vehicle has
been driven since you last set the trip odometer to zero.
Your trip odometer is part of your Driver Information
Center (DIC). The trip information button toggles
to display your trip odometer, Trip A, and Trip B
functions. See “Trip Odometer” underDIC Controls
and Displays on page 3-41for more information.
Tachometer
Notice:If you operate the engine with the
tachometer in the shaded warning area, your vehicle
could be damaged, and the damages would not be
covered by your warranty. Do not operate the engine
with the tachometer in the shaded warning area.
The tachometer displays the engine speed in revolutions
per minute (rpm).
Fuel will shut off at about 6500 rpm. It will turn back on
again once the vehicle rpm drops below 6500.
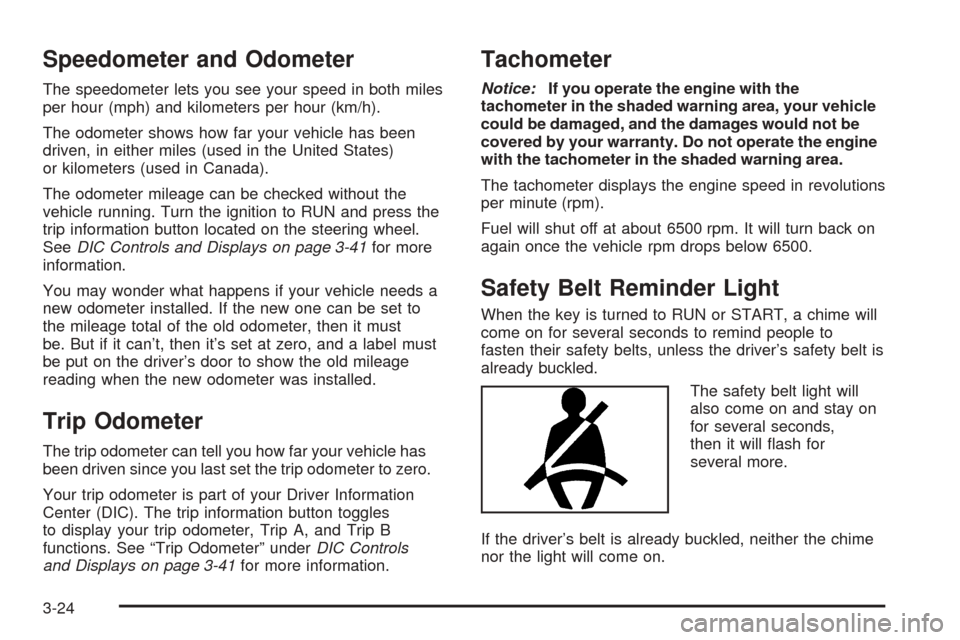
Safety Belt Reminder Light
When the key is turned to RUN or START, a chime will
come on for several seconds to remind people to
fasten their safety belts, unless the driver’s safety belt is
already buckled.
The safety belt light will
also come on and stay on
for several seconds,
then it will �ash for
several more.
If the driver’s belt is already buckled, neither the chime
nor the light will come on.
3-24
Page 145 of 374
Driver Information Center (DIC)
The Driver Information Center (DIC) gives you the
status of many of your vehicle’s systems. It is also
used to display driver personalization features and
warning/status messages. The DIC display is located
on the instrument panel cluster. The DIC buttons
are located on the steering wheel.
The DIC comes on when the ignition is on. After a short
delay the DIC will display the current driver and the
information that was last displayed before the engine
was turned off.
If a problem is detected, a warning message will appear
on the display. Be sure to take any message that
appears on the display seriously and remember that
clearing the message will only make the message
disappear, not correct the problem.
DIC Controls and Displays
The DIC has different modes which can be accessed by
pressing the four buttons located on the steering wheel.
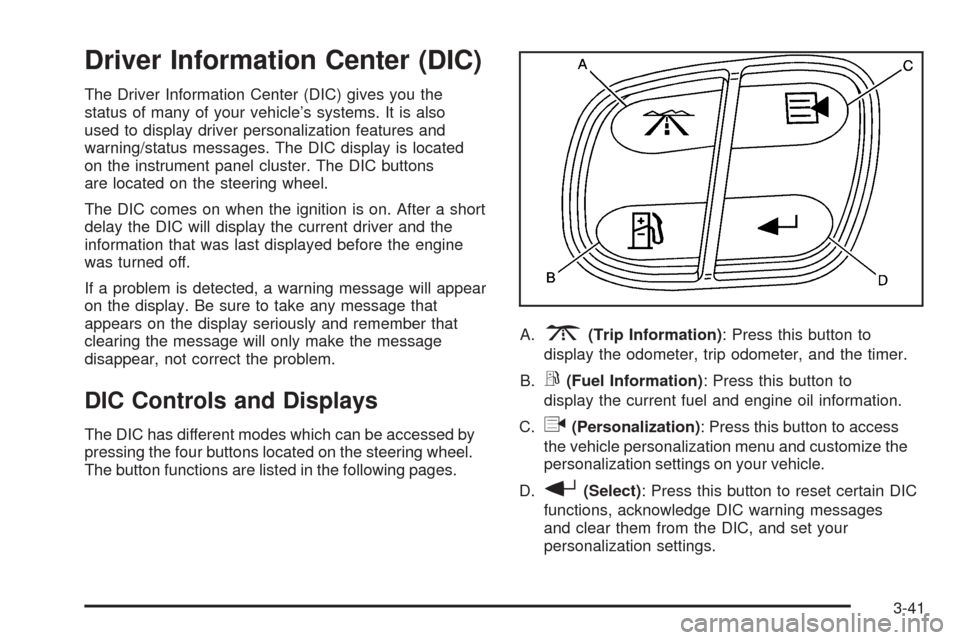
The button functions are listed in the following pages.A.
3(Trip Information): Press this button to
display the odometer, trip odometer, and the timer.
B.
r(Fuel Information): Press this button to
display the current fuel and engine oil information.
C.
q(Personalization): Press this button to access
the vehicle personalization menu and customize the
personalization settings on your vehicle.
D.
r(Select): Press this button to reset certain DIC
functions, acknowledge DIC warning messages
and clear them from the DIC, and set your
personalization settings.
3-41
Page 156 of 374
DIC Vehicle Personalization
Your vehicle has a personalization feature that allows you
to program certain features to a preferred setting for up to
two drivers. The number of programmable features
varies depending upon which model of the vehicle you
purchased. Once the features are programmed, the
saved settings are recalled by pressing the unlock button
on the remote keyless entry transmitter, 1 or 2, or by
pressing the appropriate memory button, 1 or 2, located
on the outboard side of the driver’s seat. SeeMemory
Seat on page 2-44for more information.
The following is a list of available programmable options:
AUTOMATIC LOCKING
AUTOMATIC UNLOCKING
REMOTE LOCK FEEDBACK
REMOTE UNLOCK FEEDBACK
HEADLAMPS ON AT EXIT
PERIMETER LIGHTING
SEAT POSITION RECALL (If equipped)
DISPLAY LANGUAGE
DISPLAY UNITS (U.S./MET)
y(Personalization):Press this button located on the
steering wheel to access the vehicle personalization
menu and customize the personalization settings
on your vehicle.
Automatic Locking
This feature allows you to choose how the vehicle’s
doors are locked. Press the personalization button
until AUTOMATIC LOCKING appears in the display.
To access the modes for AUTOMATIC LOCKING,
press the select button. Once AUTOMATIC LOCKING is
selected, press the select button to scroll through the
following modes:
Mode 1:LOCK DOORS OUT OF PARK
Mode 2:LOCK DOORS WITH SPEED
If you choose Mode 1, the doors will lock when the
vehicle is shifted out of PARK (P).
If you choose Mode 2, the doors will lock when
the vehicle speed is above 8 mph (13 km/h) for
three seconds.
Scroll through the list of modes. When the mode you
want is displayed on the DIC, press personalization
button to set your choice, return to the personalization
menu, and advance to the next programmable feature.
For more information on automatic door locks see
Programmable Automatic Door Locks on page 2-8.
3-52
Page 184 of 374
CD Messages
CHECK CD:If this message appears on the display
and/or the CD comes out, it could be for one of the
following reasons:
It is very hot. When the temperature returns to
normal, the CD should play.
You are driving on a very rough road. When the
road becomes smoother, the CD should play.
The CD is dirty, scratched, wet, or upside down.
The air is very humid. If so, wait about an hour
and try again.
There may have been a problem while burning
the CD.
The label may be caught in the CD player.
If the CD is not playing correctly, for any other reason,
try a known good CD.
If any error occurs repeatedly or if an error cannot be
corrected, contact your dealer. If the radio displays
an error message, write it down and provide it to your
dealer when reporting the problem.
Theft-Deterrent Feature
THEFTLOCK®is designed to discourage theft of your
vehicle’s radio. The feature works automatically by
learning a portion of the Vehicle Identi�cation Number
(VIN). If the radio is moved to a different vehicle, it will not
operate and LOCKED will appear on the display.
When the radio and vehicle are turned off, the blinking
red light indicates that THEFTLOCK
®is armed.
With THEFTLOCK®activated, the radio will not operate
if stolen.
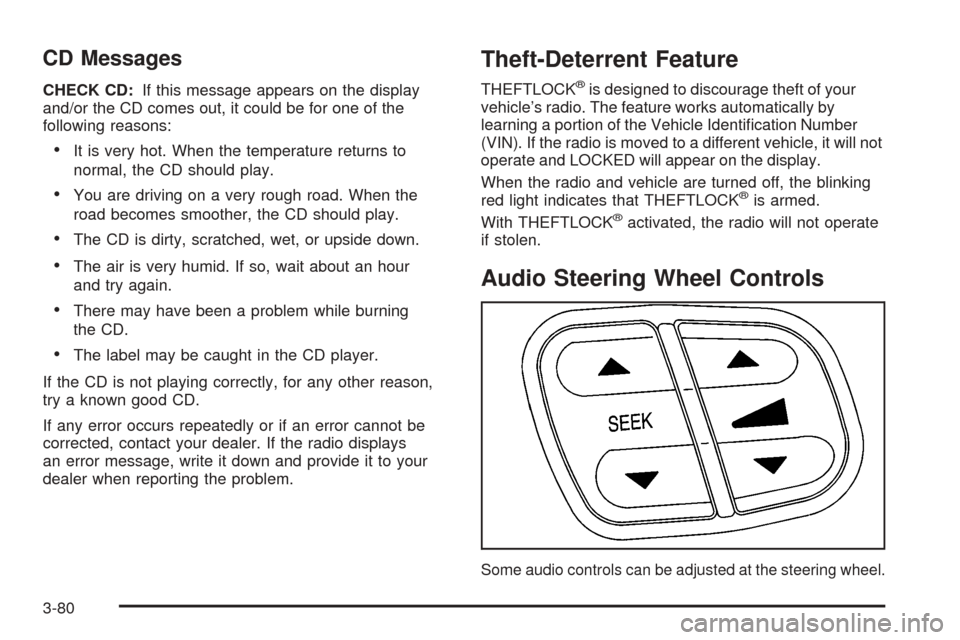
Audio Steering Wheel Controls
Some audio controls can be adjusted at the steering wheel.
3-80
Page 187 of 374
Your Driving, the Road, and Your Vehicle..........4-2
Defensive Driving...........................................4-2
Drunken Driving.............................................4-2
Control of a Vehicle........................................4-5
Braking.........................................................4-6
Traction Control System (TCS).........................4-8
Steering......................................................4-10
Off-Road Recovery.......................................4-12
Passing.......................................................4-12
Loss of Control.............................................4-13
Driving at Night............................................4-15
Driving in Rain and on Wet Roads..................4-17
City Driving..................................................4-20Freeway Driving...........................................4-21
Before Leaving on a Long Trip.......................4-22
Highway Hypnosis........................................4-23
Hill and Mountain Roads................................4-24
Winter Driving..............................................4-26
If Your Vehicle is Stuck in Sand, Mud, Ice
or Snow...................................................4-30
Towing..........................................................4-30
Towing Your Vehicle.....................................4-30
Recreational Vehicle Towing...........................4-31
Loading Your Vehicle....................................4-31
Trailer Recommendations...............................4-38
Towing a Trailer...........................................4-38
Section 4 Driving Your Vehicle
4-1
Page 191 of 374
{CAUTION:
Drinking and then driving is very dangerous.
Your re�exes, perceptions, attentiveness, and
judgment can be affected by even a small
amount of alcohol. You can have a serious — or
even fatal — collision if you drive after drinking.
Please do not drink and drive or ride with a
driver who has been drinking. Ride home in a
cab; or if you are with a group, designate a
driver who will not drink.
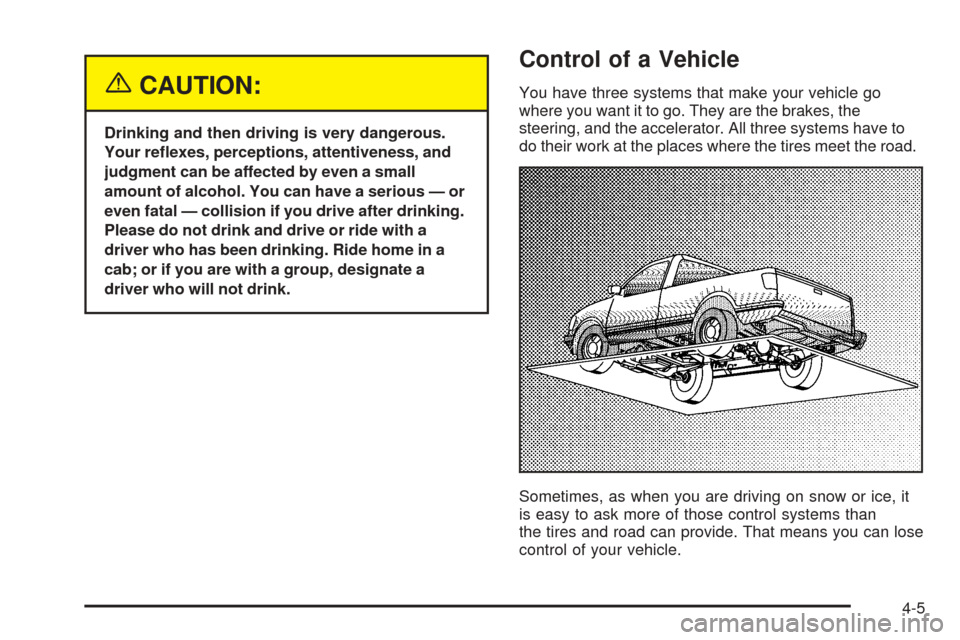
Control of a Vehicle
You have three systems that make your vehicle go
where you want it to go. They are the brakes, the
steering, and the accelerator. All three systems have to
do their work at the places where the tires meet the road.
Sometimes, as when you are driving on snow or ice, it
is easy to ask more of those control systems than
the tires and road can provide. That means you can lose
control of your vehicle.
4-5
Page 194 of 374
Remember: Anti-lock does not change the time you
need to get your foot up to the brake pedal or always
decrease stopping distance. If you get too close to
the vehicle in front of you, you will not have time to apply
your brakes if that vehicle suddenly slows or stops.
Always leave enough room up ahead to stop, even
though you have anti-lock brakes.
Using Anti-Lock
Do not pump the brakes. Just hold the brake pedal
down �rmly and let anti-lock work for you. You may feel
the brakes vibrate, or you may notice some noise,
but this is normal.
Braking in Emergencies
With anti-lock, you can steer and brake at the same
time. In many emergencies, steering can help you more
than even the very best braking.
Traction Control System (TCS)
Your vehicle has a Traction Control System (TCS) that
limits wheel spin. This is especially useful in slippery
road conditions. The system operates only if it senses
that one or both of the rear wheels are spinning or
beginning to lose traction. When this happens,
the system reduces engine power and may also
upshift the transmission to limit wheel spin.
You may feel or hear the system working, but this
is normal.
If your vehicle is in cruise control when the traction
control system begins to limit wheel spin, the cruise
control will automatically disengage. When road
conditions allow you to safely use it again, you may
re-engage the cruise control. See “Cruise Control”
inTurn Signal/Multifunction Lever on page 3-5.
The Traction Control System operates in all transmission
shift lever positions except for �rst gear. This is
normal. The system is deactivated when the
transmission is shifted into �rst gear. In this situation,
the “TRAC OFF” light on the instrument panel cluster will
come on. This is normal. The system can upshift the
transmission only as high as the shift lever position
you’ve chosen, so you should use the lower gears only
when necessary. SeeAutomatic Transmission
Operation on page 2-17.
4-8
Page 196 of 374
Steering
Power Steering
If you lose power steering assist because the engine
stops or the system is not functioning, you can steer but
it will take much more effort.
Steering Tips
Driving on Curves
It is important to take curves at a reasonable speed.
A lot of the “driver lost control” accidents mentioned on
the news happen on curves. Here is why:
Experienced driver or beginner, each of us is subject to
the same laws of physics when driving on curves.
The traction of the tires against the road surface makes
it possible for the vehicle to change its path when
you turn the front wheels. If there is no traction, inertia
will keep the vehicle going in the same direction. If
you have ever tried to steer a vehicle on wet ice, you
will understand this.
The traction you can get in a curve depends on the
condition of your tires and the road surface, the angle at
which the curve is banked, and your speed. While
you are in a curve, speed is the one factor you
can control.Suppose you are steering through a sharp curve.
Then you suddenly accelerate. Both control
systems — steering and acceleration — have to do
their work where the tires meet the road. Adding
the sudden acceleration can demand too much of those
places. You can lose control.
What should you do if this ever happens? Ease up on
the accelerator pedal, steer the vehicle the way you
want it to go, and slow down.
Speed limit signs near curves warn that you should
adjust your speed. Of course, the posted speeds
are based on good weather and road conditions. Under
less favorable conditions you will want to go slower.
If you need to reduce your speed as you approach
a curve, do it before you enter the curve, while your front
wheels are straight ahead.
Try to adjust your speed so you can “drive” through the
curve. Maintain a reasonable, steady speed. Wait to
accelerate until you are out of the curve, and then
accelerate gently into the straightaway.
4-10