tailgate CHEVROLET SSR 2006 1.G Owners Manual
[x] Cancel search | Manufacturer: CHEVROLET, Model Year: 2006, Model line: SSR, Model: CHEVROLET SSR 2006 1.GPages: 390, PDF Size: 2.44 MB
Page 61 of 390
Keys...............................................................2-3
Remote Keyless Entry System.........................2-5
Remote Keyless Entry System Operation...........2-6
Doors and Locks.............................................2-8
Door Locks....................................................2-8
Power Door Locks..........................................2-9
Programmable Automatic Door Locks..............2-10
Tailgate.......................................................2-10
Windows........................................................2-11
Power Windows............................................2-12
Sun Visors...................................................2-13
Theft-Deterrent Systems..................................2-13
Content Theft-Deterrent.................................2-13
Passlock
®....................................................2-15
Starting and Operating Your Vehicle................2-15
New Vehicle Break-In....................................2-15
Ignition Positions..........................................2-16
Retained Accessory Power (RAP)...................2-17
Starting the Engine.......................................2-17
Automatic Transmission Operation...................2-19
Manual Transmission Operation......................2-21
Parking Brake..............................................2-23Shifting Into Park (P).....................................2-23
Shifting Out of Park (P).................................2-24
Parking Your Vehicle
(Manual Transmission)...............................2-25
Parking Over Things That Burn.......................2-25
Engine Exhaust............................................2-26
Running the Engine While Parked...................2-26
Mirrors...........................................................2-27
Manual Rearview Mirror.................................2-27
Automatic Dimming Rearview Mirror with
Universal Home Remote.............................2-27
Outside Power Heated Mirrors........................2-28
Outside Convex Mirror...................................2-29
Outside Automatic Dimming Heated Mirror........2-29
Universal Home Remote System......................2-30
Universal Home Remote System Operation......2-30
Storage Areas................................................2-34
Glove Box...................................................2-34
Cupholder(s)................................................2-34
Instrument Panel Storage Area.......................2-34
Center Console Storage Area.........................2-35
Map Pocket.................................................2-35
Section 2 Features and Controls
2-1
Page 70 of 390

Programmable Automatic
Door Locks
Your vehicle is programmed from the factory to
automatically lock and unlock under certain conditions. If
all the doors are closed, when you move the shift lever
out of PARK (P) all of the doors will lock on a vehicle with
an automatic transmission or when the vehicle reaches a
speed of 8 mph (13 kph) on a vehicle with a manual
transmission. Every time you move the shift lever back
into PARK (P), the doors will unlock for a vehicle with an
automatic transmission or when the key is removed from
the ignition for a vehicle with a manual transmission. If
someone needs to get out while you are not in PARK (P)
or while the key is in the ignition, have that person use the
manual or power lock. When the door is closed again, it
will not lock automatically. Use the manual or power lock
to lock the door again.
Customizing Your Automatic Door
Locks Feature
The automatic door locks can be programmed to the
preferred settings for up to two drivers. SeeDIC Vehicle
Personalization on page 3-52for more information.
Tailgate
To open the tailgate, do the following:
1. Open the cargo cover using the remote keyless
entry transmitter or the cargo cover release
button in the glovebox. SeeRemote Keyless Entry
System Operation on page 2-6andCargo Cover
on page 2-35for more information.
2. Pull up on the handle inside and lower the tailgate.
To close the tailgate, do the following:
1. Close the cargo cover before closing the tailgate.
2. Push the tailgate upward to return it to its upright,
latched position. Push and pull on the tailgate to
make sure it is secure.
2-10
Page 95 of 390
Center Console Storage Area
Your center console has a storage area that can be
locked and unlocked with the center console storage
key. SeeKeys on page 2-3for more information.
Map Pocket
The map/storage pockets are located on both the driver
and passenger side doors.
Cargo Cover
Opening the Cargo Cover
Notice:Opening the cargo cover manually when
the convertible top is not in the full-open or
full-closed position could damage the tonneau
cover and the convertible top. Always make sure
the convertible top is in the full-closed or
full-opened position before manually opening the
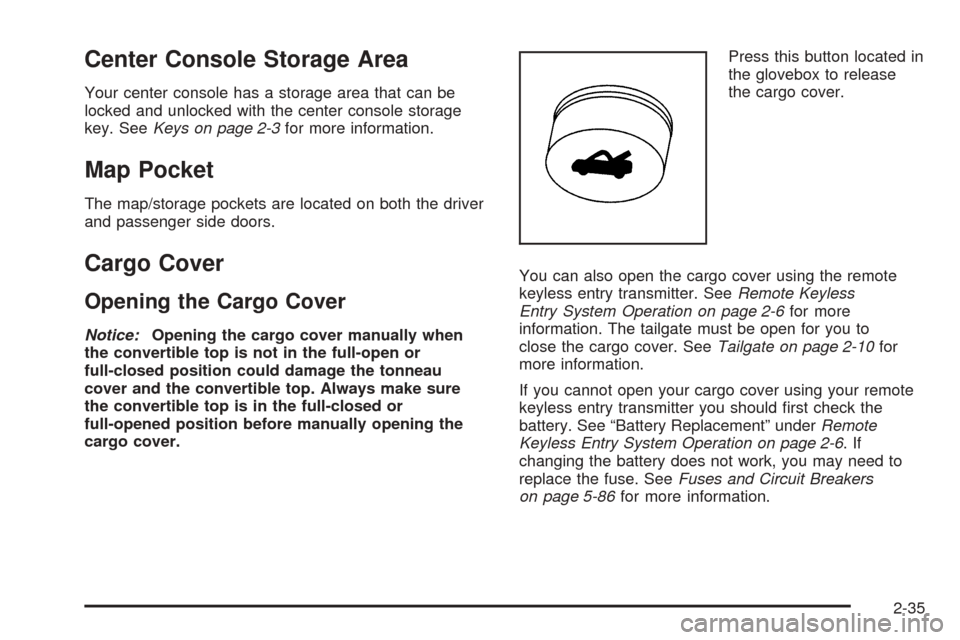
cargo cover.Press this button located in
the glovebox to release
the cargo cover.
You can also open the cargo cover using the remote
keyless entry transmitter. SeeRemote Keyless
Entry System Operation on page 2-6for more
information. The tailgate must be open for you to
close the cargo cover. SeeTailgate on page 2-10for
more information.
If you cannot open your cargo cover using your remote
keyless entry transmitter you should first check the
battery. See “Battery Replacement” underRemote
Keyless Entry System Operation on page 2-6.If
changing the battery does not work, you may need to
replace the fuse. SeeFuses and Circuit Breakers
on page 5-86for more information.
2-35
Page 96 of 390
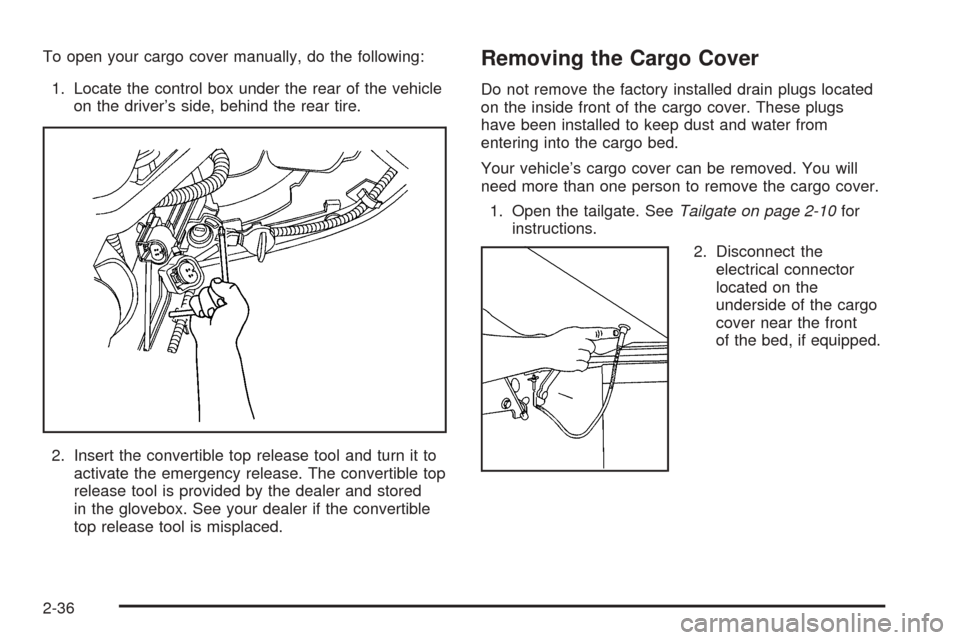
To open your cargo cover manually, do the following:
1. Locate the control box under the rear of the vehicle
on the driver’s side, behind the rear tire.
2. Insert the convertible top release tool and turn it to
activate the emergency release. The convertible top
release tool is provided by the dealer and stored
in the glovebox. See your dealer if the convertible
top release tool is misplaced.Removing the Cargo Cover
Do not remove the factory installed drain plugs located
on the inside front of the cargo cover. These plugs
have been installed to keep dust and water from
entering into the cargo bed.
Your vehicle’s cargo cover can be removed. You will
need more than one person to remove the cargo cover.
1. Open the tailgate. SeeTailgate on page 2-10for
instructions.
2. Disconnect the
electrical connector
located on the
underside of the cargo
cover near the front
of the bed, if equipped.
2-36
Page 98 of 390
Emergency Cargo Cover
Release Handle
Notice:Using the emergency cargo cover release
handle as a tie-down or anchor point when securing
items in the cargo area may damage it. Use the
emergency cargo cover release handle only to help
you open the cargo cover.
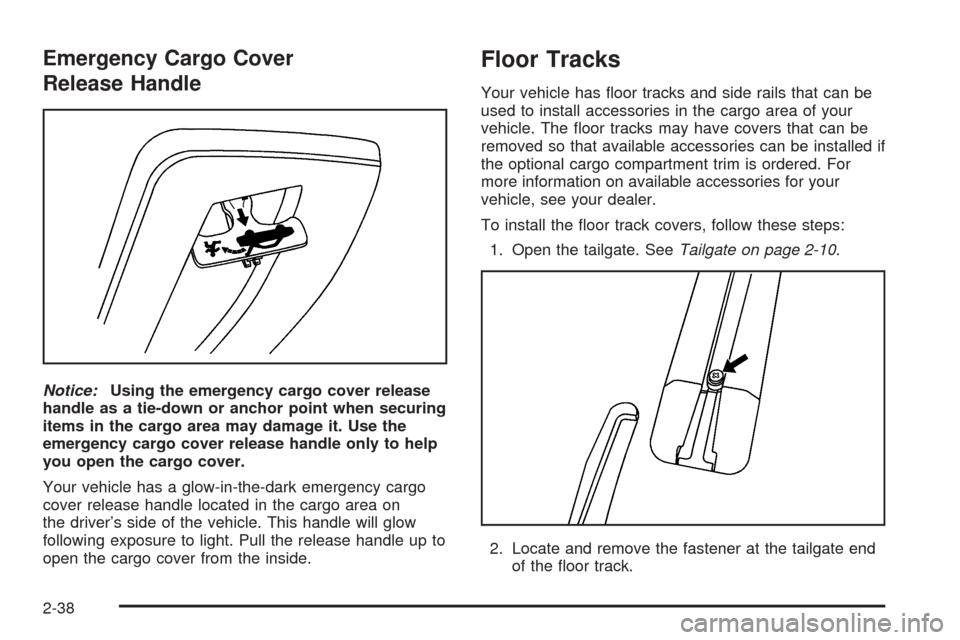
Your vehicle has a glow-in-the-dark emergency cargo
cover release handle located in the cargo area on
the driver’s side of the vehicle. This handle will glow
following exposure to light. Pull the release handle up to
open the cargo cover from the inside.
Floor Tracks
Your vehicle has floor tracks and side rails that can be
used to install accessories in the cargo area of your
vehicle. The floor tracks may have covers that can be
removed so that available accessories can be installed if
the optional cargo compartment trim is ordered. For
more information on available accessories for your
vehicle, see your dealer.
To install the floor track covers, follow these steps:
1. Open the tailgate. SeeTailgate on page 2-10.
2. Locate and remove the fastener at the tailgate end
of the floor track.
2-38
Page 100 of 390
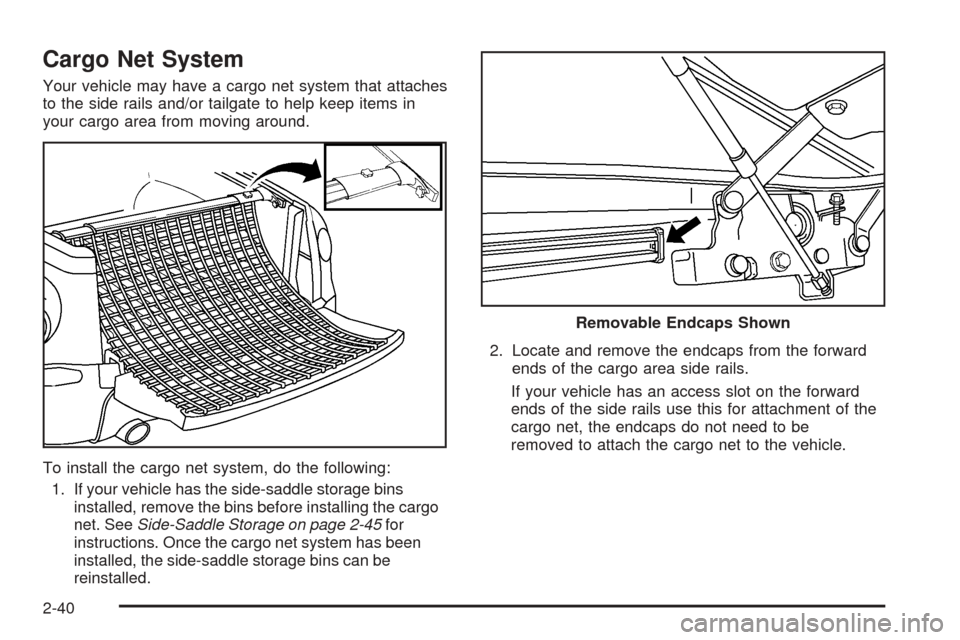
Cargo Net System
Your vehicle may have a cargo net system that attaches
to the side rails and/or tailgate to help keep items in
your cargo area from moving around.
To install the cargo net system, do the following:
1. If your vehicle has the side-saddle storage bins
installed, remove the bins before installing the cargo
net. SeeSide-Saddle Storage on page 2-45for
instructions. Once the cargo net system has been
installed, the side-saddle storage bins can be
reinstalled.2. Locate and remove the endcaps from the forward
ends of the cargo area side rails.
If your vehicle has an access slot on the forward
ends of the side rails use this for attachment of the
cargo net, the endcaps do not need to be
removed to attach the cargo net to the vehicle.
Removable Endcaps Shown
2-40
Page 104 of 390
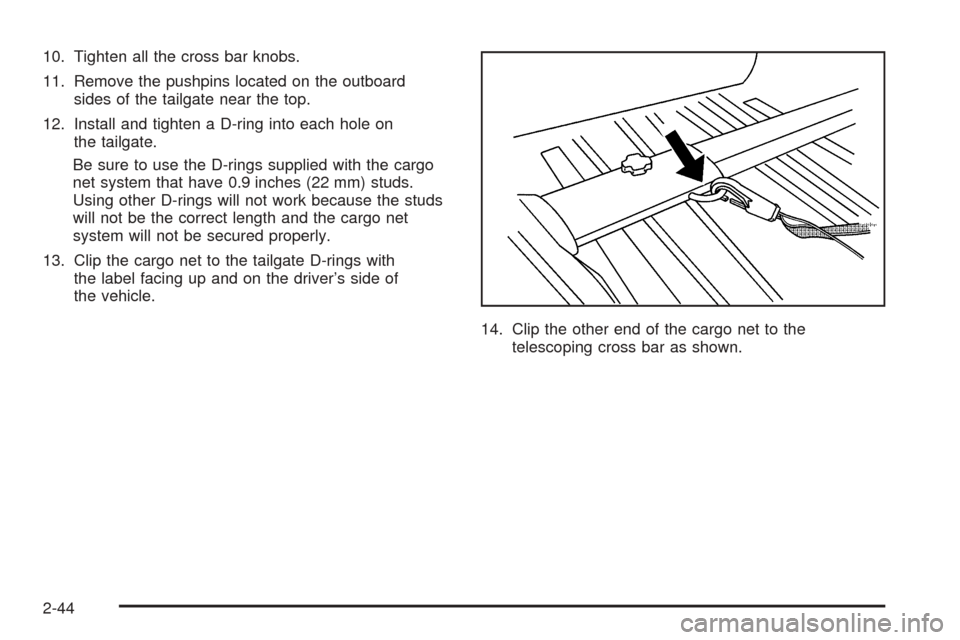
10. Tighten all the cross bar knobs.
11. Remove the pushpins located on the outboard
sides of the tailgate near the top.
12. Install and tighten a D-ring into each hole on
the tailgate.
Be sure to use the D-rings supplied with the cargo
net system that have 0.9 inches (22 mm) studs.
Using other D-rings will not work because the studs
will not be the correct length and the cargo net
system will not be secured properly.
13. Clip the cargo net to the tailgate D-rings with
the label facing up and on the driver’s side of
the vehicle.
14. Clip the other end of the cargo net to the
telescoping cross bar as shown.
2-44
Page 357 of 390
Usage Fluid/Lubricant
Chassis
LubricationChassis Lubricant
(GM Part No. U.S. 12377985, in
Canada 88901242) or lubricant
meeting requirements of NLGI #2,
Category LB or GC-LB.
Rear AxleSAE 75W-90 Synthetic
Axle Lubricant
(GM Part No. U.S. 12378261, in
Canada 10953455) meeting
GM Specification 9986115.
Hood Latch
Assembly,
Secondary
Latch, Pivots,
Spring Anchor,
and Release
PawlLubriplate Lubricant Aerosol
(GM Part No. U.S. 12346293, in
Canada 992723) or lubricant meeting
requirements of NLGI #2, Category
LB or GC-LB.Usage Fluid/Lubricant
Hood and Door
Hinges, Fuel
Filler Door, and
Folding SeatsMulti-Purpose Lubricant, Superlube
(GM Part No. U.S. 12346241, in
Canada 10953474).
Tailgate Handle
Pivot Points,
Hinges, Latch
Bolt, and
LinkageMulti-Purpose Lubricant, Superlube
(GM Part No. U.S. 12346241, in
Canada 10953474).
Weatherstrip
ConditioningDielectric Silicone Grease
(GM Part No. U.S. 12345579, in
Canada 992887).
Weatherstrip
SqueaksSynthetic Grease with
Teflon, Superlube
(GM Part No. U.S. 12371287,
in Canada 10953437).
6-13
Page 388 of 390

Seatback Latches............................................. 1-6
Seats
Heated Seats............................................... 1-4
Memory.....................................................2-53
Power Seats................................................. 1-2
Reclining Seatbacks...................................... 1-4
Seatback Latches.......................................... 1-6
Securing a Child Restraint
Passenger Seat Position...............................1-36
Security Light.................................................3-37
Service........................................................... 5-3
Accessories and Modifications......................... 5-3
Adding Equipment to the Outside of
Your Vehicle.............................................. 5-5
California Proposition 65 Warning.................... 5-3
Doing Your Own Work................................... 5-4
Engine Soon Light.......................................3-33
Publications Ordering Information...................7-14
Servicing Your Airbag-Equipped Vehicle..............1-51
Setting the Time.............................................3-60
Sheet Metal Damage.......................................5-83
Shifting Into Park (P).......................................2-23
Shifting Out of Park (P)...................................2-24
Side-Saddle Storage.......................................2-45
Signals, Turn and Lane-Change.......................... 3-7
Specifications, Capacities.................................5-95
Speedometer..................................................3-26
Starting Your Engine.......................................2-17
Steering........................................................4-11
Steering Wheel Controls, Audio.........................3-85Steering Wheel, Tilt Wheel................................. 3-6
Storage
Side-Saddle................................................2-45
Storage Areas
Cargo Management System..........................2-45
Cargo Net System.......................................2-40
Center Console Storage Area........................2-35
Cupholder(s)...............................................2-34
Glove Box..................................................2-34
Instrument Panel Storage Area......................2-34
Map Pocket................................................2-35
Stuck in Sand, Mud, Ice or Snow......................4-28
Sun Visors.....................................................2-13
Switchbanks
Center Console...........................................3-19
T
Tachometer....................................................3-26
Tailgate.........................................................2-10
Taillamps
Turn Signal, and Stoplamps..........................5-47
TCS Warning Light..........................................3-32
Theater Dimming............................................3-17
Theft-Deterrent, Radio.....................................3-84
Theft-Deterrent Systems...................................2-13
Content Theft-Deterrent................................2-13
Passlock
®...................................................2-15
Tilt Wheel........................................................ 3-6
10