ECO mode CHEVROLET SUBURBAN 1994 Owners Manual
[x] Cancel search | Manufacturer: CHEVROLET, Model Year: 1994, Model line: SUBURBAN, Model: CHEVROLET SUBURBAN 1994Pages: 385, PDF Size: 19.88 MB
Page 18 of 385
Rear Seats
Easy Entry Seat (Wagon Model Second Seat)
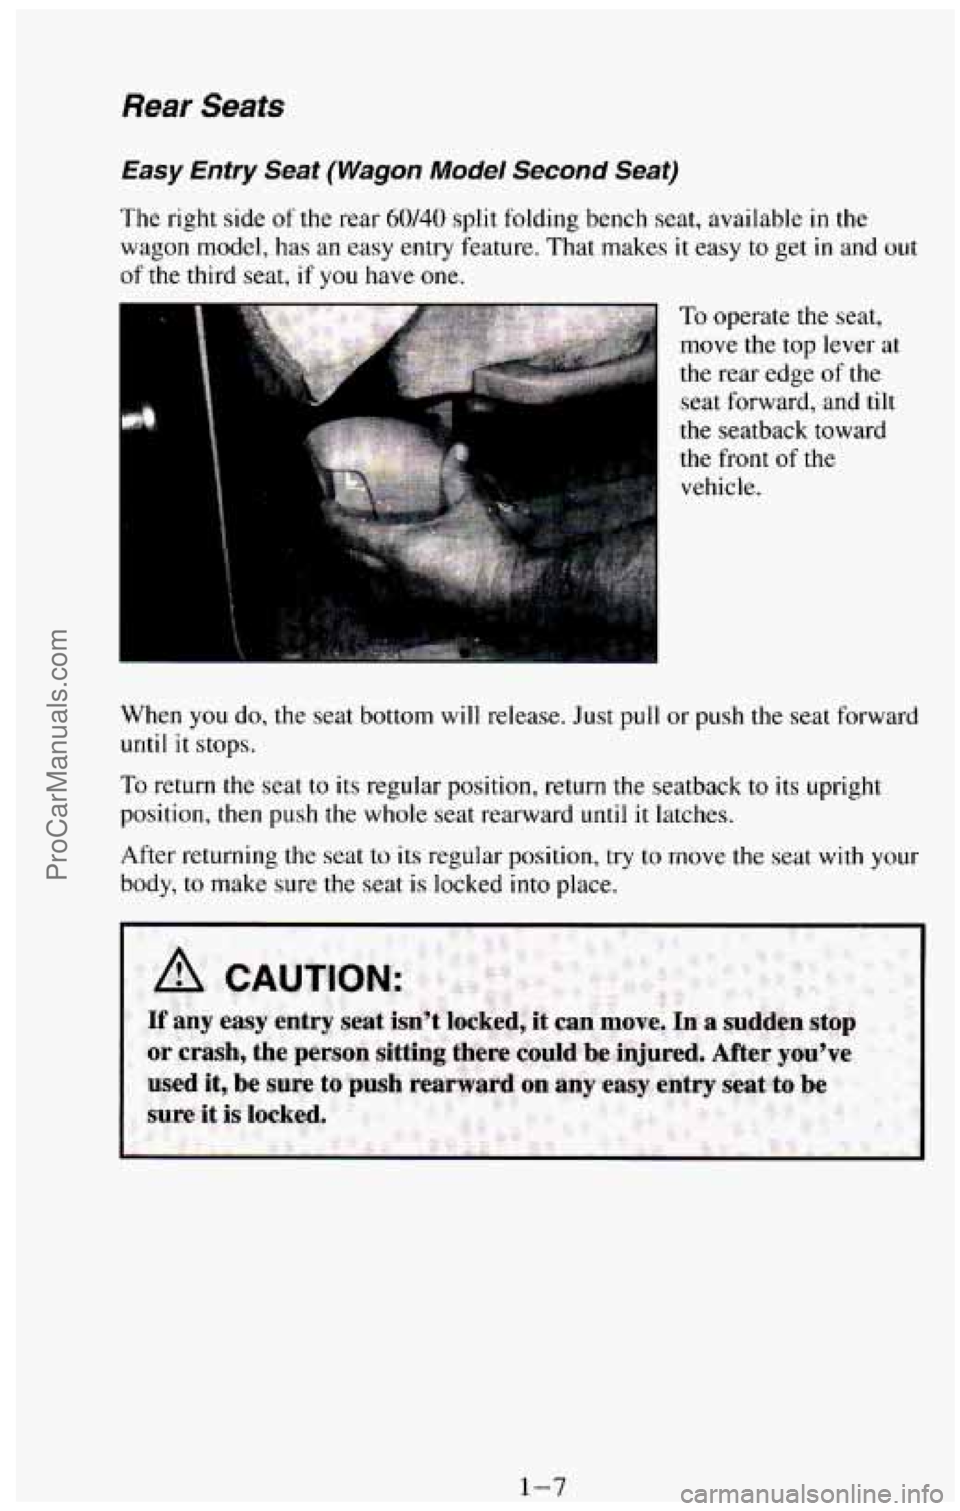
The right side of the rear 60/40 split folding bench seat, available in the
wagon model, has
an easy entry feature. That makes it easy to get in and out
of the third seat, if you have one.
the seatback toward
the front
of the
vehicle.
When you do,
the seat bottom will release. Just pull or push the seat forward
until it stops.
To return the seat to its regular position, return the seatback to its upright
position, then push the whole seat rearward
until it latches.
After returning the seat to its regular position, try to move
the seat with your
body, to make sure the seat is locked
into place.
ProCarManuals.com
Page 20 of 385
Folding Second Seat (Wagon Models)
If your vehicle has a 60/40 second seat, either side may be folded down to
give you more cargo space. Before folding, push the buckle portion of the
safety belt down into the seat cushion pockets, out of the way. Also, make
sure that nothing is under or in front of the seat. When the seat is folded, it
will lay flat on the floor.
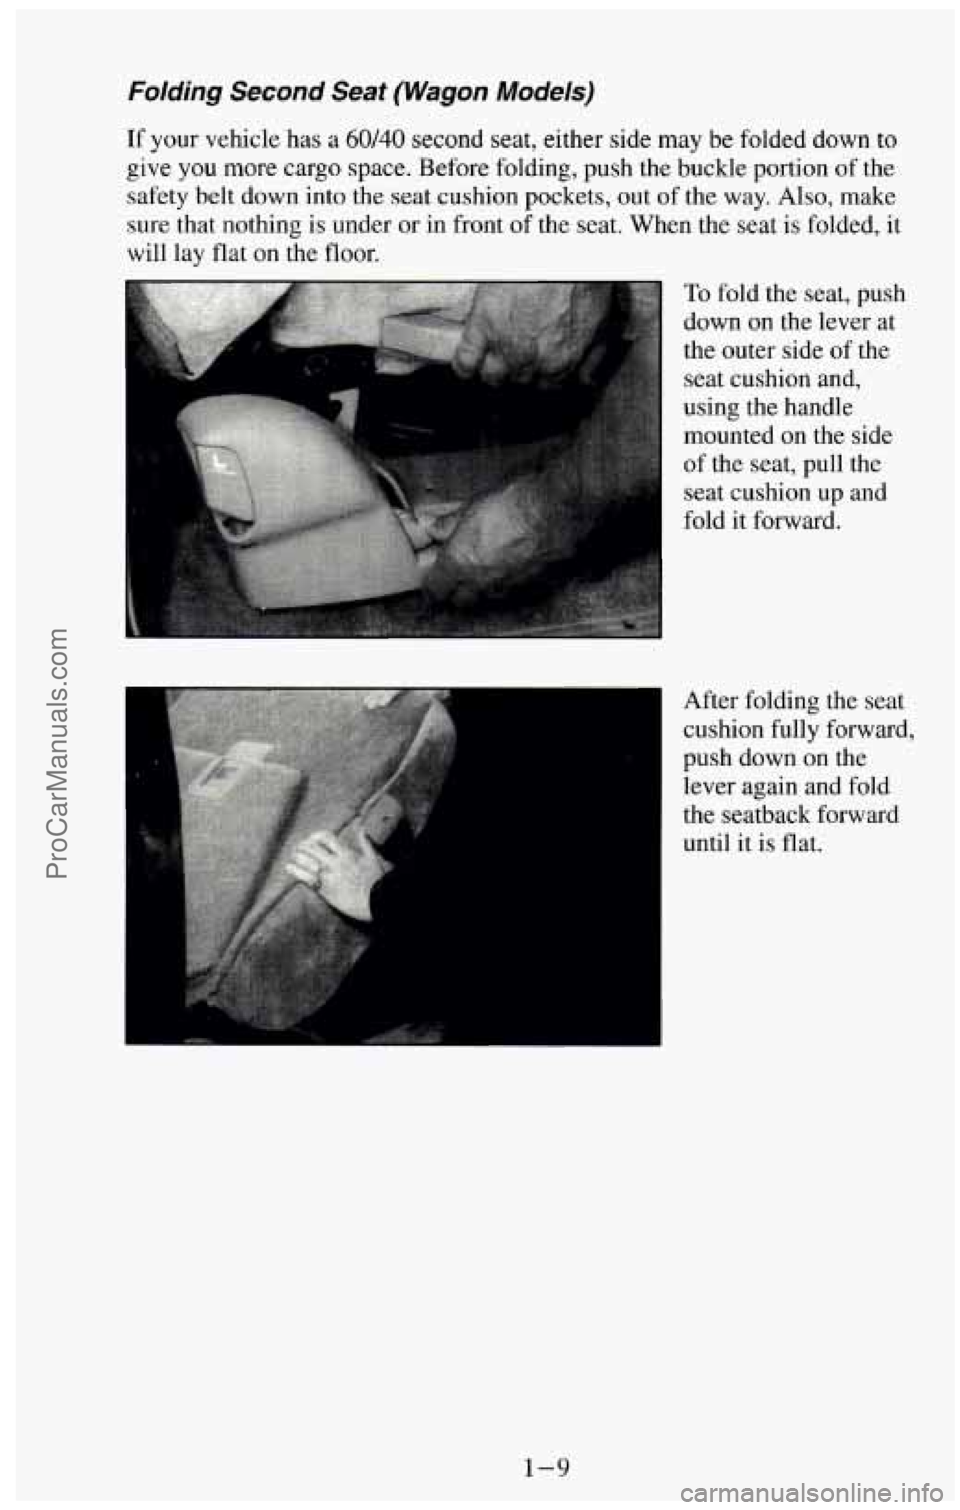
To fold the seat, push
down on the lever at
the outer side
of the
seat cushion and,
using the handle
mounted on the side
of the seat, pull the
seat cushion up and
fold it forward.
After folding the seat
cushion fully forward.
push down on the
lever again and fold
the seatback forward
until it is flat.
1-9
ProCarManuals.com
Page 127 of 385
This light will come on briefly when you are starting the engine. If the light
comes
on and stays on while you are driving, it could indicate a problem
with your vehicle. It could be a problem with your oil pressure, coolant
temperature, or some other problem. Check your various gages to see
if they
are
in the warning zones. If they are, have your vehicle serviced right away.
Daytime Running Lights (DRL) Indicator Light
(Canada Only)
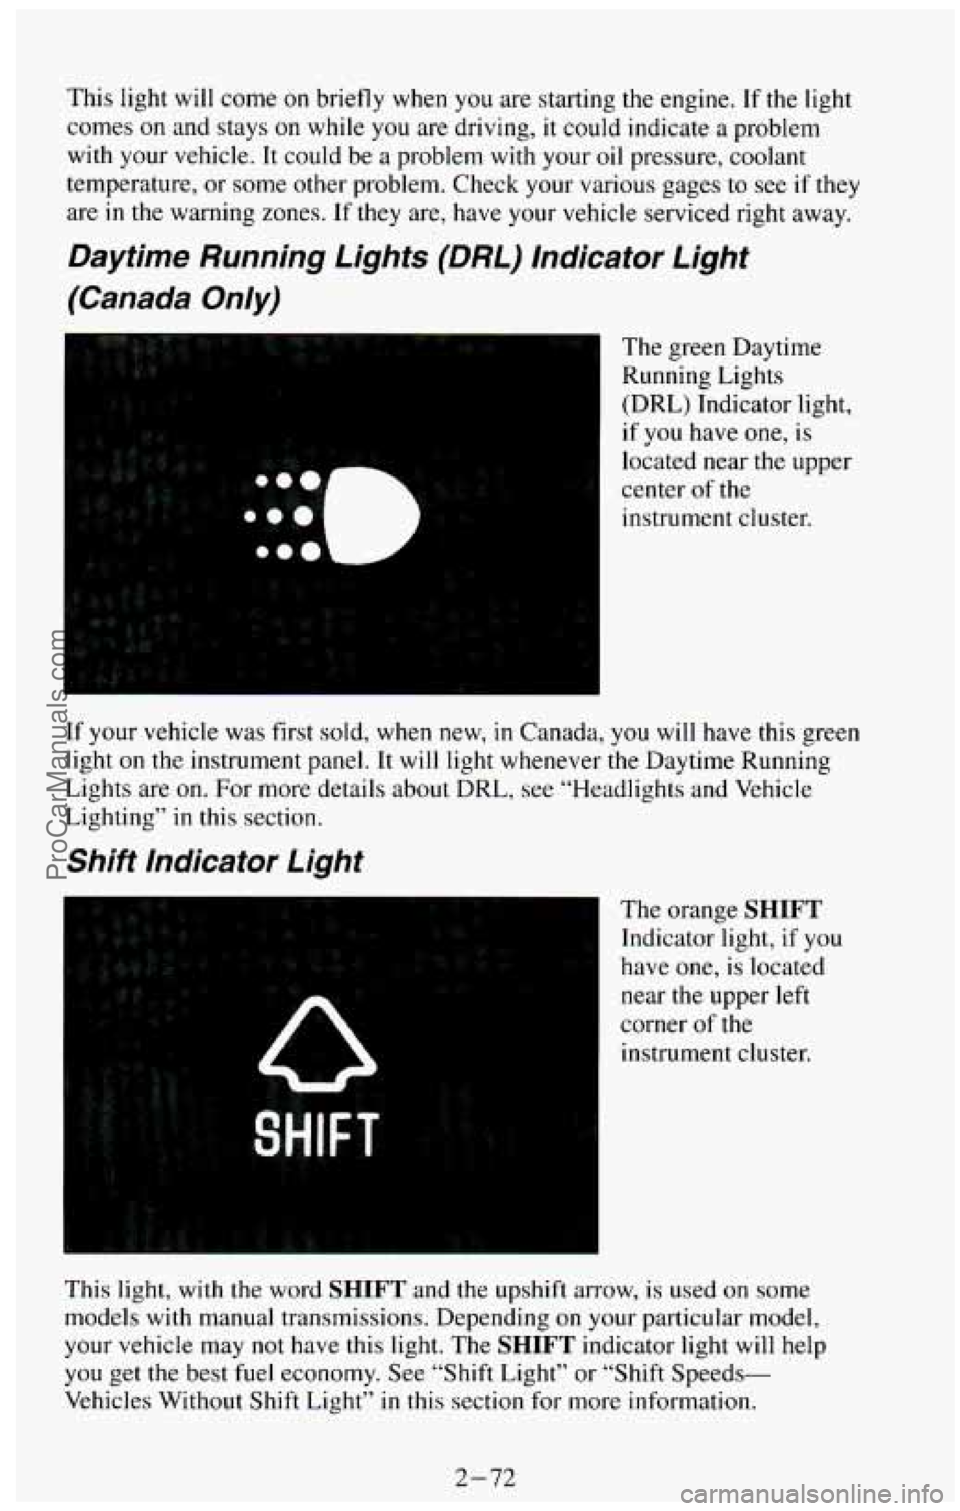
The green Daytime
Running Lights
(DRL) Indicator light,
if you have one,
is
located near the upper
center of the
instrument cluster.
If your vehicle was first sold, when new,
in Canada, you will have this green
light on the instrument panel. It will light whenever the Daytime Running
Lights are on.
For more details about DRL, see “Headlights and Vehicle
Lighting” in this section.
Shift Indicator Light
The orange SHIFT
Indicator light, if you
have one, is located
near the upper left
corner
of the
instrument cluster.
This light, with the word
SHIFT and the upshift arrow, is used on some
models with manual transmissions. Depending
on your particular model,
your vehicle may not have this light. The SHIFT indicator light will help
you get the best fuel economy. See “Shift Light” or “Shift Speeds-
Vehicles Without Shift Light”
in this section for more information.
2-72
ProCarManuals.com
Page 145 of 385
Fan Control Button
This button is in the upper right corner of your system control panel. The
fan has four settings
- low, medium low, medium high and high. Press the
top
of the button (+) to increase the air flow. Press the bottom of the button
(-) to decrease the air flow. The setting you select is shown on your display
as
LOW, MED LOW, MED HI or HI.
OFF Button
Press this button to turn the air conditioningheating system off. Pressing
OFF will erase the present mode of operation from the system’s \
memory,
Outside air will still come out of the heater outlet whenever the vehicle
is
moving forward.
If the OFF button was pressed, you must press A/C, MAX, or one of the
BLEND buttons for the system to come back on.
Rear Air Conditioning and Heating Systems (Wagon
Models)
If your vehicle has either or both of these systems, you can increase and
decrease the air flow at the rear vents. Depending
on the system you have
and the setting selected, you can send cooled
or heated air to the rear of the
vehicle.
Rear Air Conditioning (Without Rear Heater)
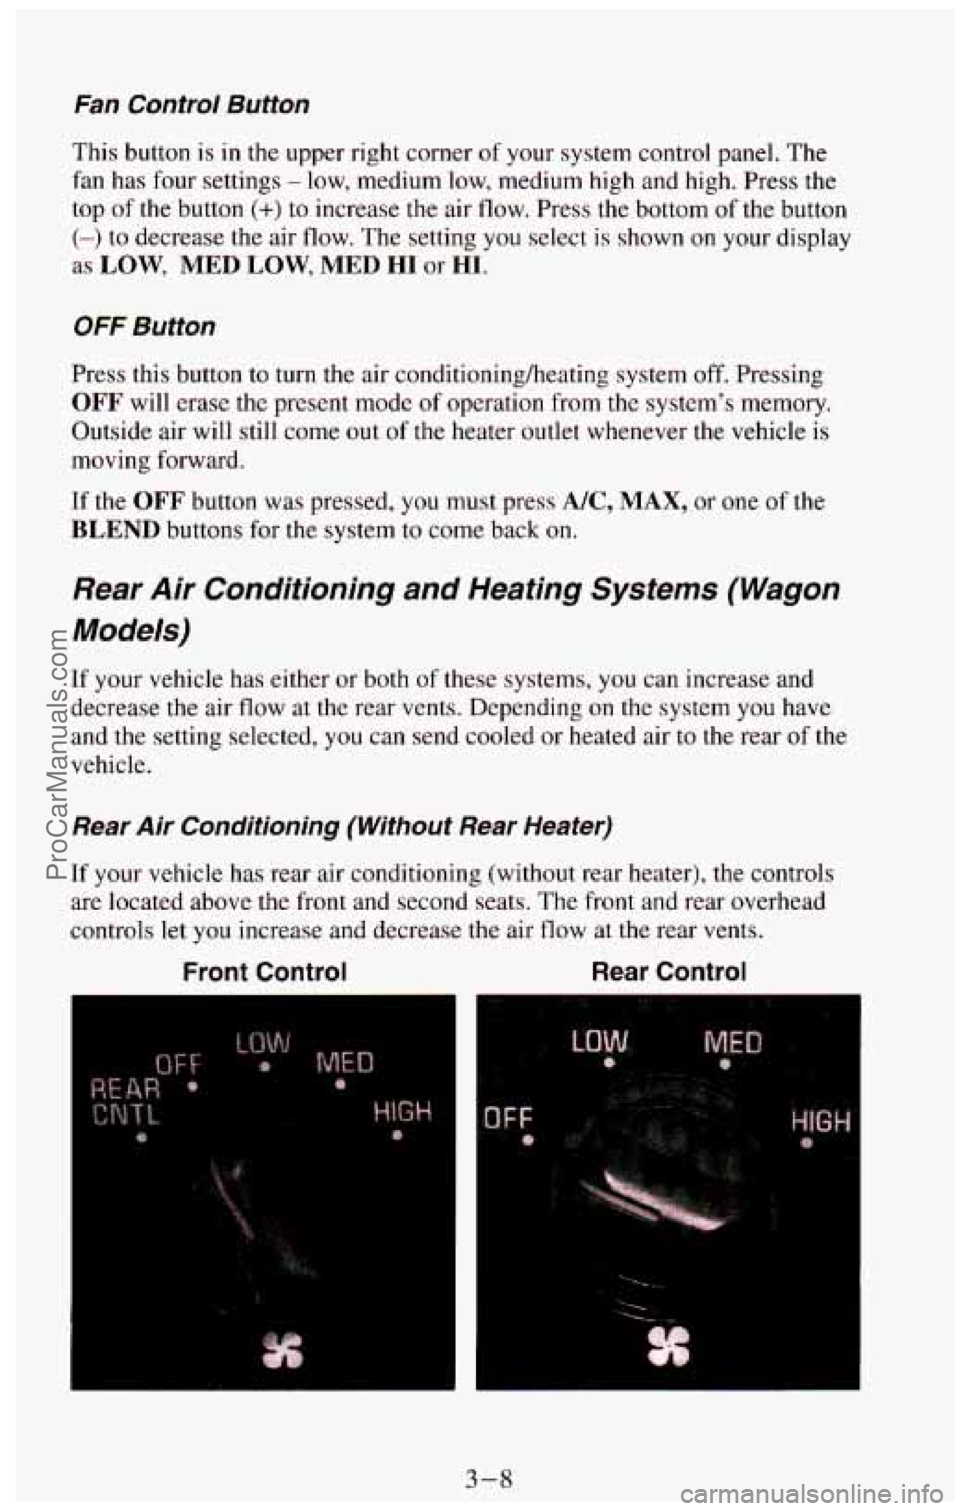
If your vehicle has rear air conditioning (without rear heater), the controls \
are located above the front and second seats.
The front and rear overhead
controls let
you increase and decrease the air flow at the rear vents.
Front Control Rear Control
e
F
t
3-8
ProCarManuals.com
Page 155 of 385
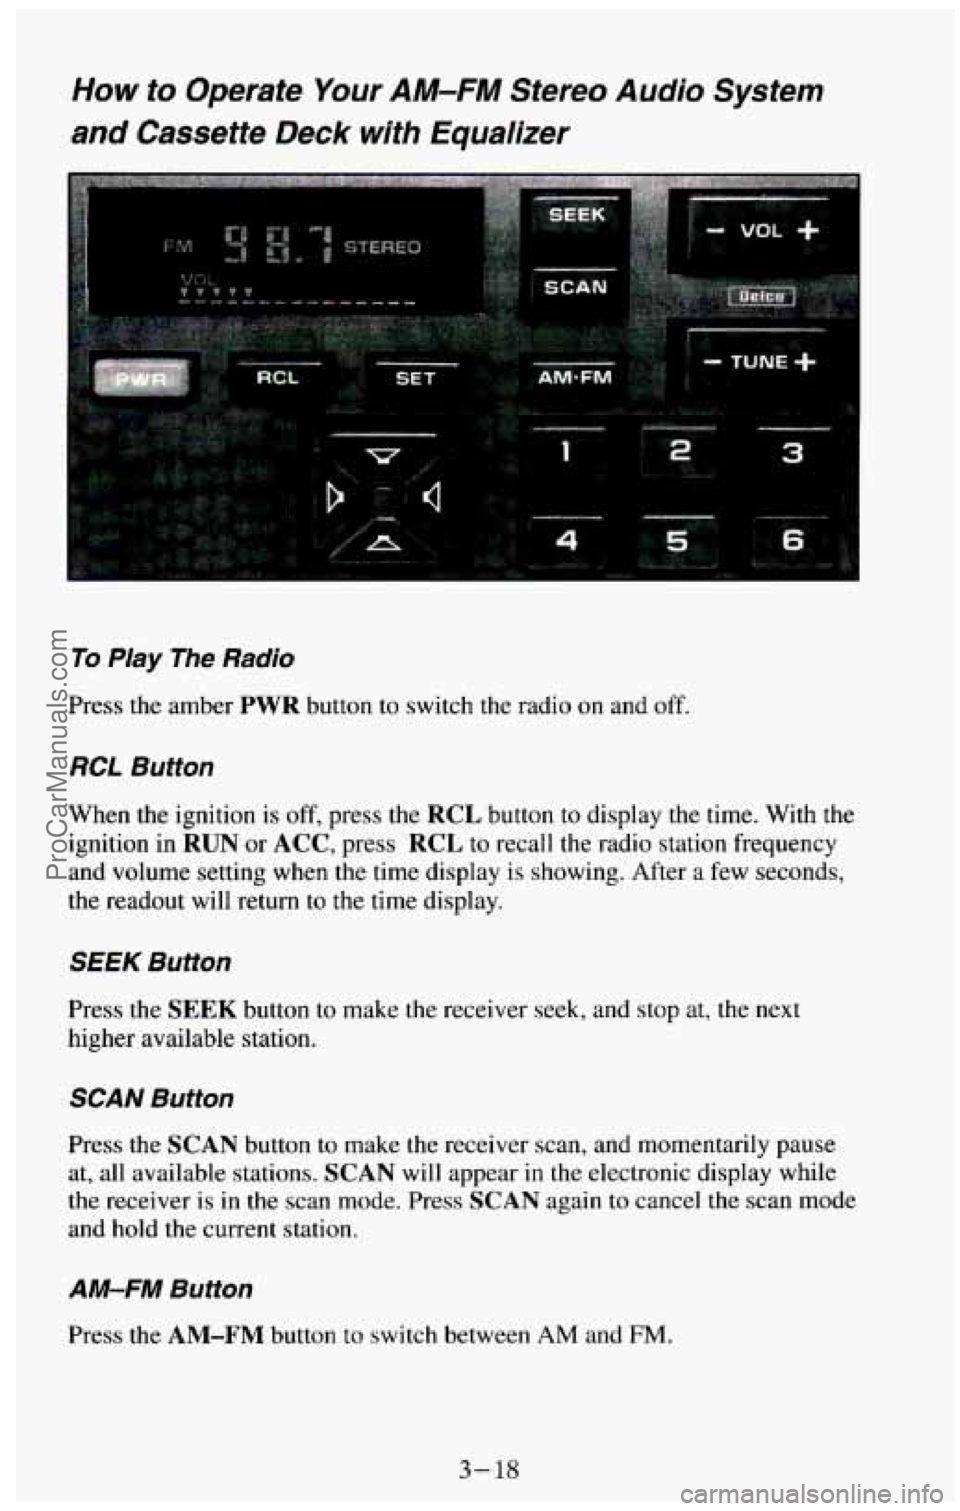
How to Operate Your AM-FM Stereo Audio System
and Cassette Deck with Equalizer
To Play The Radio
Press the amber PWR button to switch the radio on and off.
RCL Button
When the ignition is off, press the RCL button to display the time. With the
ignition in
RUN or ACC, press RCL to recall the radio station frequency
and volume setting when the time display is showing. After
a few seconds,
the readout will return to the time display.
SEEK Button
Press the SEEK button to make the receiver seek, and stop at, the next
higher available station.
SCAN Button
Press the SCAN button to make the receiver scan, and momentarily pause
at, all available stations.
SCAN will appear in the electronic display while
the receiver is in the scan mode. Press
SCAN again to cancel the scan mode
and hold the current
station.
AM-FM Button
Press the AM-FM button to switch between AM and FM.
3- 18
ProCarManuals.com
Page 158 of 385
002 Button
For better sound when playing high bias chrome or metal tapes, press the
Cr02 button. The light in the button will be on while the player is in the
Cr02 mode. When playing standard tapes, you will get better sound while
in the standard mode.
If the Cr02 button is lit, press it to return the player
to standard mode (the light will
go out).
PROG Button
To
go from one side of the tape to the other, press the PROG button.
Observe the lighted arrows to determine which side
of the tape is being
played.
If a tape is inserted with side “1” (or “A’) up, then the up arrow means that
that side is being played. Likewise, a down arrow would indicate that side
“2” (or “B”) had been selected. The player will automatically switch to the
other side
of the tape when the first side ends.
EJECT Button
Press the EJECT button to eject the cassette tape from the player (the radio
will then play.)
TAPE
The up arrow and down arrow, below the word TAPE on the cassette deck,
let you know which side of the tape is currently playing. For more
information, see
PROG in this section.
FWD Button
To
rapidly advance the tape, press the FWD button. The light in the button
will be lit and the tape will rapidly advance until you press the
PROG
button or press the FWD button again. If the end of the tape is reached
while in the
F”D mode, the tape will change direction, and play will
resume
on the opposite side of the tape.
SEEK Button
To search for the next selection on the tape, press the SEEK button. The
light in the
SEEK button will be lit and the player will seek the beginning
of the next selection. For the seek mode to stop at the next selection, there
must be at least a 4-second gap between selections
on the tape.
REV Button
To rapidly rewind the tape, press the REV button. The light in the button
will be lit and the tape will rapidly rewind until you press the
PROG button
or press the
REV button again. If the beginning of the tape is reached while
in the REV mode, play will resume on the same side of the tape.
3 -23
ProCarManuals.com
Page 159 of 385
REPT Butfon
Press the REPT button to repeat the currently playing selection on the tape.
For the
REPT mode to repeat a selection, there must be at least a 4-second
gap between selections on the tape.
Care of Your Cassette Tape Player
A tape player that is not cleaned regularly can result in reduced sound
quality, ruined cassettes, or a damaged player mechanism. Cassette tapes
should be stored in their plastic cases away from contaminants, direct
sunlight, and extreme heat. If they aren’t, they may not operate properly or
cause failure
of the tape player.
As regular maintenance, your tape player should be cleaned each month or
after every
15 hours of use. If you notice a reduction in sound quality, try a
known good cassette to see
if the tape or the tape player is at fault. If this
other cassette has
no improvement in sound quality, clean the tape player.
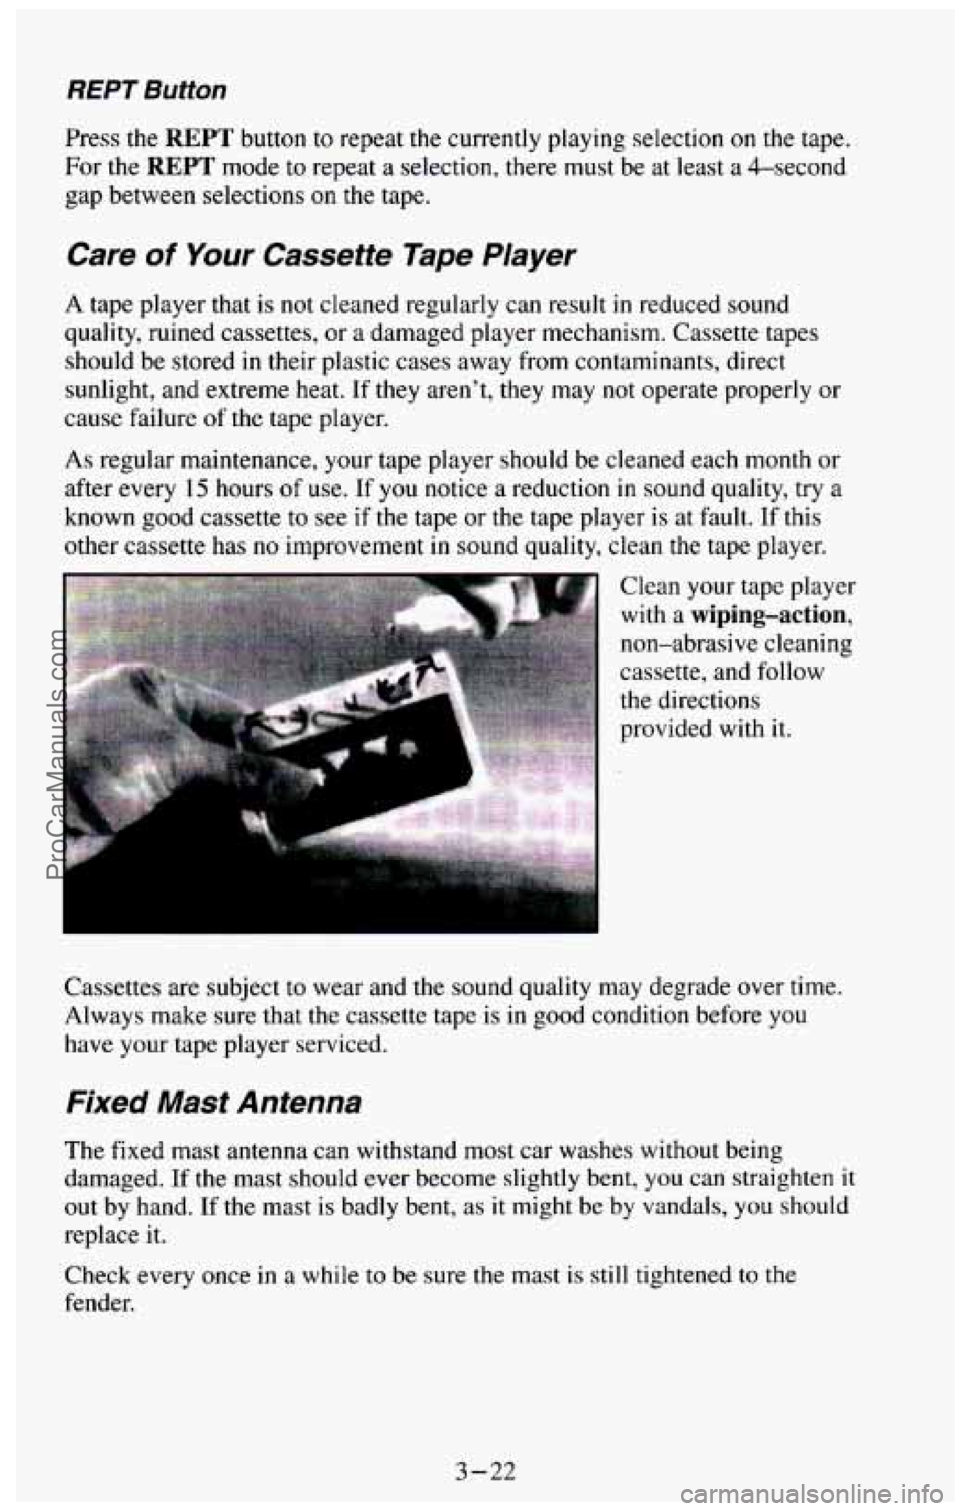
Clean your tape player
with a wiping-action,
non-abrasive cleaning
cassette, and follow
the directions
provided with it.
Cassettes are subject to wear and
the sound quality may degrade over time.
Always make sure that the cassette tape is in
good condition before you
have your tape player serviced.
Fixed Mast Antenna
The fixed mast antenna can withstand most car washes without being
damaged.
If the mast should ever become slightly bent, you can straighten it
out by hand. If the mast is badly bent, as it might be by vandals, you should
replace it.
Check every once
in a while to be sure the mast is still tightened to the
fender.
3-22
ProCarManuals.com
Page 196 of 385
I NOTICE:
Pulling a trailer improperly can damage your vehicle and result\
in costly repairs not covered
by your warranty. To pull a trailer
correctly,
follow the advice in this section, and see your GM
dealer for important information about towing a trailer with
your vehicle.
Every vehicle is ready for some trailer towing. If it was built with trailering
options, as many are, it’s ready for heavier trailers. But trailering is different
than just driving your vehicle
by itself. Trailering means changes in
handling, durability, and fuel economy. Successful, safe trailering takes
correct equipment, and
it has to be used properly.
That’s the reason for this section. In it are many time-tested, important
trailering tips and safety rules. Many of these are important for your safety
and that of your passengers.
So please read this section carefully before you
pull a trailer.
rf You Do Decide To Pull A Trailer
If you do, here are some important points.
There are many different laws having to do with trailering. Make sure
your rig will be legal, not only where you live but also where you’ll
be
driving. A good source for this information can be state or provincial
police.
Consider using a sway control with a utility model if your trailer will
weigh 3,000 pounds (1 36 1 kg) or less, or with a wagon model if your
trailer
will weigh 4,000 pounds (1 800 kg) or less. You should always
use a sway control
with a utility model if your trailer will weigh more
than
3,000 pounds (I 361 kg), or with a wagon model if your trailer
will weigh more than 4,000 pounds (1 800 kg).
You can ask
a hitch dealer about sway controls.
Don’t tow a trailer at all during the first 500 miles (800 km) your new
vehicle is driven. Your engine, axle or other parts could be damaged.
Then, during the first 500 miles (800 km) that you tow a trailer, don’t
drive over
50 mph (80 km/h) and don’t make starts at full throttle. This
helps your engine and other parts of your vehicle wear
in at the heavier
loads.
4-37
ProCarManuals.com
Page 198 of 385
After you’ve loaded your trailer, weigh the trailer and then the tongue,
separately, to
see if the weights are proper. If they aren’t, you may be able to
get them right simply by moving some items around in the trailer.
Total Weight on Your Vehicle’s Tires
Be sure your vehicle’s tires are inflated to the limit for cold tires. You’ll find
these numbers
on the Certification label at the rear edge of the driver’s door
or see “Tire Loading” in the Index. Then be sure you don’t go over the
GVW limit for your vehicle.
Hitches
It’s important to have the correct hitch equipment. Crosswinds, large trucKs
going by, and rough roads are a few reasons why you’ll need the right hitch.
Here are some rules
to follow:
If you use a step bumper hitch, and your trailer tongue has a V-shaped
foot, your bumper could be damaged
in sharp turns. Check the distance
from the front edge of
the foot to the middle of the hitch ball socket. If
the distance is less than 12 inches, take the foot off the trailer tongue.
If you’ll be pulling a trailer with a utility model that, when loaded, will
weigh more than
3,000 pounds (1 361 kg); or with a wagon model that,
when loaded, will weigh more than
4000 pounds (1 800 kg), be sure to
use
a properly mounted, weight-distributing hitch and sway control of
the proper size. This equipment is very important for proper vehicle
loading and good handling when you’re driving.
0 Will you have to make any holes in the body of your vehicle when you
install a trailer hitch? If
you do, then be sure to seal the holes later
when
you remove the hitch. If you don’t seal them, deadly carbon
monoxide
(CO) from your exhaust can get into your vehicle (see
“Carbon Monoxide”
in the Index). Dirt and water can, too.
Safety Chains
You should always attach chains between your vehicle and your trailer.
Cross the safety chains under
the tongue of the trailer so that the tongue will
not drop to the road if it becomes separated from the hitch. Instructions
about safety chains may be provided by
the hitch manufacturer or by the
trailer manufacturer. Follow the manufacturer’s recommendation for
attaching safety chains. Always leave
just enough slack so you can turn with
your rig. And, never allow safety chains to drag on the ground.
4-39
ProCarManuals.com
Page 291 of 385
Replacing Brake System Parts
The braking system on a modern vehicle is complex. Its many parts have to
be of top quality and work well together if the vehicle is to have really good
braking. Vehicles we design and test have top-quality
GM brake parts in
them, as your vehicle does when it is new. When you replace parts of your
braking system
- for example, when your brake linings wear down and
you have to have new ones put
in - be sure you get new genuine GM
replacement parts. If you don’t, your brakes may no longer work properly.
For example, if someone puts
in brake linings that are wrong for your
vehicle, the balance between your front and rear brakes can change, for the
worse. The braking performance you’ve come to expect can change
in many
other ways
if someone puts in the wrong replacement brake parts.
Other Maintenance Items
Front Suspension and Steering Linkage
Your maintenance schedule will tell you how often to lubricate the fittings.
See “Recommended Fluids and Lubricants” in the Index for the proper
lubricant to use.
Front Wheel Bearing
Your vehicle has front wheel bearings that must be cleaned and repacked.
Your maintenance schedule will tell you how often this must be done.
Front Shock Absorbers
The front shock absorbers of your vehicle do many things. They help the
vehicle ride smoothly and also control the travel of the suspension system.
When the shock absorbers are serviced, any replacement shock absorbers
must be the same as the original equipment shock absorbers
in both
extended length
and strength.
I NOTICE:
If you use shock absorbers that are not the same as the original
shock absorbers, the shock absorbers or suspension system
could be damaged.
6-46
ProCarManuals.com