brake fluid CHEVROLET SUBURBAN 1994 Owners Manual
[x] Cancel search | Manufacturer: CHEVROLET, Model Year: 1994, Model line: SUBURBAN, Model: CHEVROLET SUBURBAN 1994Pages: 385, PDF Size: 19.88 MB
Page 171 of 385
Off-Road Driving with Your
Four- Wheel Drive Vehicle
This off-road guide is for vehicles that have four-wheel drive.
Also, see ŌĆ£Anti-lock BrakesŌĆØ
in the Index.
If your vehicle doesnŌĆÖt have four-wheel drive, you shouldnŌĆÖt drive off-road
unless youŌĆÖre
on a level, solid surface.
Off-road driving
can be great fun. But it does have some definite hazards.
The greatest of these is the terrain itself.
ŌĆ£Off-roadingŌĆØ means youŌĆÖve left the great North American road system
behind. Traffic lanes arenŌĆÖt marked. Curves arenŌĆÖt banked. There are no
road signs. Surfaces can be slippery, rough, uphill or downhill. In short,
youŌĆÖve gone right back
to nature.
Off-road driving involves some new skills. And thatŌĆÖs
why itŌĆÖs very
important that you read this guide. YouŌĆÖll find many driving tips and
suggestions. These will help make your off-road driving safer and more
enjoyable.
Before You Go Off-Roading
There are some things to do before you go out. For example, be sure to have
all necessary maintenance and service work done. Be sure you read
all the
information about your four-wheel drive vehicle
in this manual. Is there
enough fuel?
Is the spare tire fully inflated? Are the fluid levels up where
they should be? What are the local laws that apply to off-roading where
youŌĆÖll be driving? If you donŌĆÖt know, you should check
with law
enforcement people in the area. Will you be on someoneŌĆÖs private land? If
so, be sure to get the necessary permission.
Loading Your Vehicle for Off-Road Driving
There are some important things to remember about how to load your
vehicle.
The heaviest things should be on the load floor and forward of your
Be sure the load is secured properly, so driving on the off-road terrain
rear axle.
Put heavier items as far forward as you can.
doesnŌĆÖt toss things around.
4-12
ProCarManuals.com
Page 189 of 385
Keep your vehicle in good shape. Check all fluid levels and also the
brakes, tires, cooling system and transmission. These parts can work
hard on mountain roads.
Know how to go down hills. The most important thing to know is this:
let your engine do some
of the slowing down. Shift to a lower gear
when you go down
a steep or long hill.
0 Know how to go uphill. You may want to shift down to a lower gear.
The lower gears help cool your engine and transmission, and you can
climb the hill better.
0 Stay in your own lane when driving on two-lane roads in hills or
mountains. DonŌĆÖt swing wide or cut across the center of the road. Drive
at speeds that let you stay in your own lane.
As you go over the top of a hill, be alert. There could be something in
your lane, like
a stalled car or an accident.
You may see highway signs on mountains that warn of special
problems. Examples are long grades, passing or no-passing zones, a
falling rocks area, or winding roads. Be alert to these and take
appropriate action.
4-30
i ProCarManuals.com
Page 199 of 385
Trailer Brakes
If your trailer weighs more than 1,000 pounds (450 kg) loaded, then it needs
its own brakes
- and they must be adequate. Be sure to read and follow the
instructions for the trailer brakes
so youŌĆÖll be able to install, adjust and
maintain them properly.
Your trailer brake system can tap into your vehicleŌĆÖs hydraulic brake system,
but consider the following:
Will the trailer brake system use more than 0.02 cubic inch (0.3 cc) of
fluid from your vehicleŌĆÖs master cylinder? If it will, donŌĆÖt tap into your
vehicleŌĆÖs brake system. Both braking systems
wonŌĆÖt work well, and you
could even lose your brakes altogether.
not, the trailer brake system must not be used with your vehicle.
If everything checks
out this far, make the brake tap at the port on the
master cylinder that sends the fluid to the rear brakes. But donŌĆÖt use copper
tubing for this. if you do, it will bend and finally break
off. Use steel brake
tubing.
Will the trailer brake parts take 3,000 psi (20 650 kPa) of pressure? If
Driving with a Trailer
Towing a trailer requires a certain amount of experience. Before setting out
for the open road,
youŌĆÖll want to get to know your rig. Acquaint yourself
with the feel
of handling and braking with the added weight of the trailer.
And always keep
in mind that the vehicle you are driving is now a good
deal longer and not nearly so responsive as your vehicle is by itself.
Before
you start, check the trailer hitch and platform, safety chains,
electrical connector, lights, tires and mirror adjustment. If the trailer has
electric brakes, start your vehicle and trailer moving and then apply the
trailer brake controller by hand to be sure the brakes are working. This lets
you check your electrical connection at the same time.
4-40
ProCarManuals.com
Page 203 of 385
Maintenance When Trailer Towing
Your vehicle will need service more often when youŌĆÖre pulling a trailer. See
the Maintenance Schedule for more on this. Things that are especially
important in trailer operation are automatic transmission fluid (donŌĆÖt
overfill), engine oil, axle lubricant, belt, cooling system, and brake
adjustment. Each
of these is covered in this manual, and the Index will help
you find them quickly. If youŌĆÖre trailering, itŌĆÖs a good idea to review these
sections before you start your trip.
Check periodically to see
that all hitch nuts and bolts are tight.
Trailer Light Wiring
See ŌĆ£Trailer Wiring HarnessŌĆØ in the Index.
4-44
ProCarManuals.com
Page 274 of 385
NOTICE:
Too much or too little fluid can damage your transmission. Too
much can mean that some of the fluid could come out and fall on
hot engine parts or exhaust system, starting a fire. Be sure to get
an accurate reading if you check your transmission fluid.
Wait at least 30 minutes before checking the transmission fluid level if you
have been driving:
0 When outside temperatures are above 90┬░F (32┬░C).
0 At high speed for quite a while.
In heavy traffic - especially in hot weather.
0 While pulling a trailer.
To get the right reading, the fluid should be at normal operating
temperature,
which is 180┬░F to 200┬░F (82┬░C to 93┬░C).
To check transmissionfluid hot: Get the vehicle warmed up by driving
about 15 miles
(24 km) when outside temperatures are above 50┬░F (IOOC).
If itŌĆÖs colder than 50┬░F (IOOC), drive the vehicle in ŌĆ£DŌĆØ (3rd Gear) until the
engine temperature gage moves and then remains steady for
ten minutes.
Then follow
the hot check procedures.
To check transmissionfluid cold: A cold check is made after the vehicle has
been sitting for eight hours or more with the engine off and
is used only as a
reference. Let the engine run at idle for five minutes if outside temperatures
are
50┬░F (10┬░C) or more. If itŌĆÖs colder than 50┬░F (IOOC), you may have to
idle the engine longer. Should
the fluid level be low during a cold check,
you
must perform a hot check before adding fluid. This will give you a more
accurate reading of the fluid level.
To check the fluid hot or cold
Park your vehicle on a level place.
e With the parking brake applied, place the shift lever in ŌĆ£PŌĆÖ (Park).
With your foot on the brake pedal, move the shift lever through each
gear range, pausing for about three seconds in each range. Then,
position the shift lever in
ŌĆ£PŌĆØ (Park).
Let the engine run at idle for three minutes or more.
Then, without shutting off the engine, follow these steps:
6-29 ProCarManuals.com
Page 287 of 385
Hydro-Boost Brake System (Hydraulic Pump)
The power steering pump is also used as the Hydro-boost pump. Refer to
ŌĆ£Power Steering SystemŌĆØ in this section when checking fluid level
or
adding fluid.
Windshield Washer Fluid
To Add
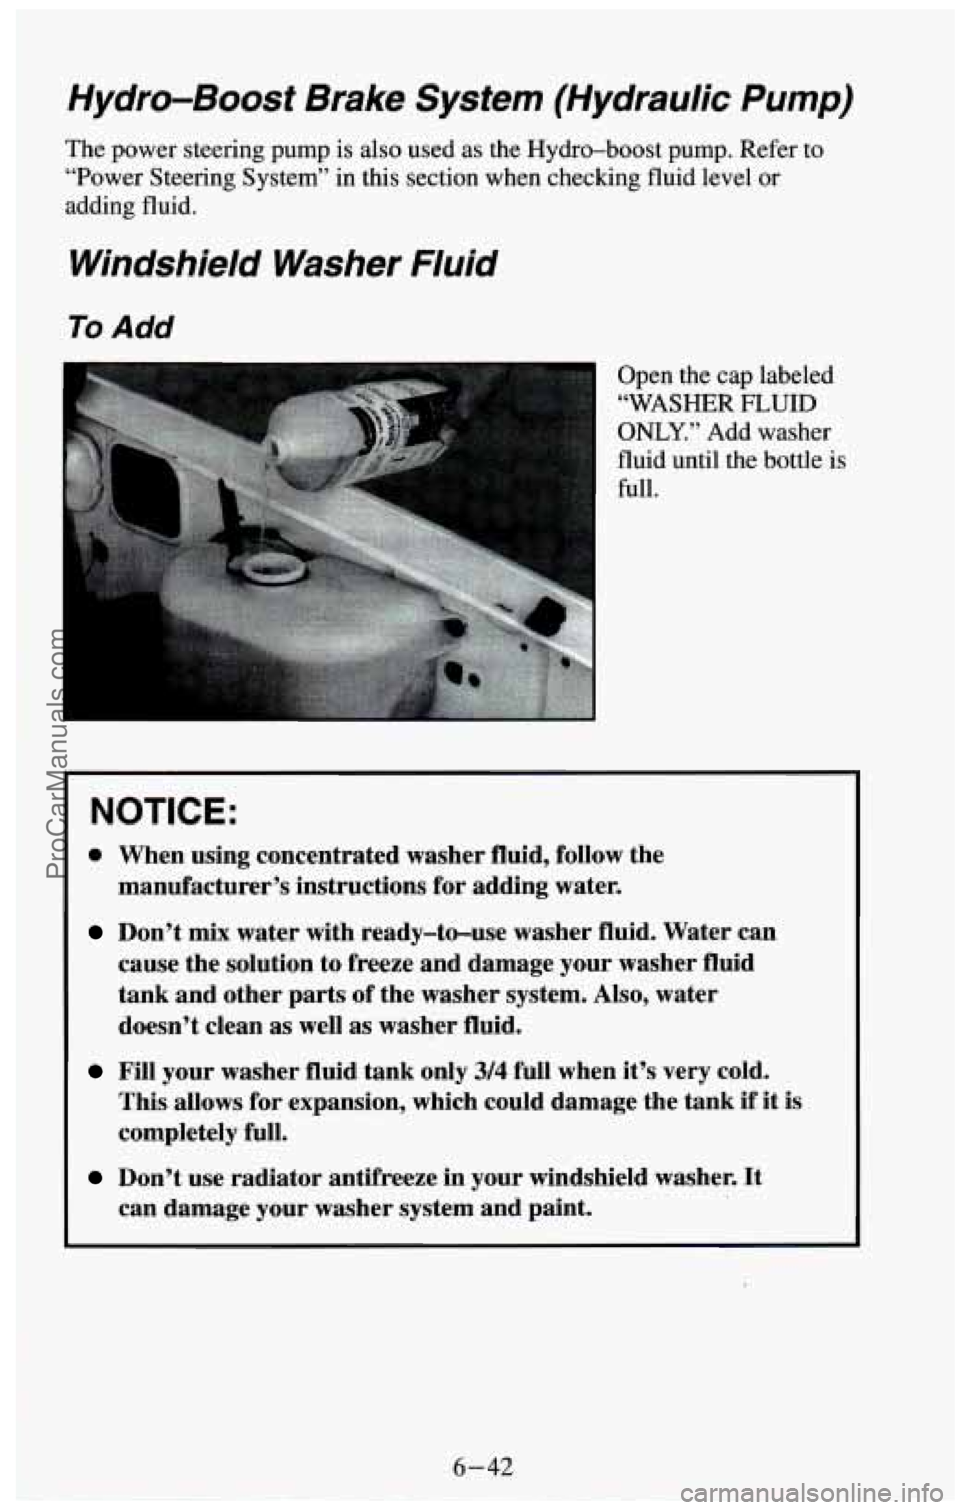
Open the cap labeled
ŌĆ£WASHER
FLUID
ONLY.ŌĆØ Add washer
fluid until the bottle is
full.
~ NOTICE:
0 When using concentrated washer fluid, follow the
manufacturerŌĆÖs instructions for adding water.
DonŌĆÖt mix water with ready-to-use washer fluid. Water can
cause the solution to freeze and damage your washer fluid
tank and other parts of the washer system. Also, water
doesnŌĆÖt clean as well
as washer fluid.
Fill your washer fluid tank only 3/4 full when itŌĆÖs very cold.
This allows for expansion, which could damage the tank
if it is
completely full.
DonŌĆÖt use radiator antifreeze in your windshield washer. It
can damage your washer system and paint.
ProCarManuals.com
Page 288 of 385
Brakes
Brake Master Cylinder
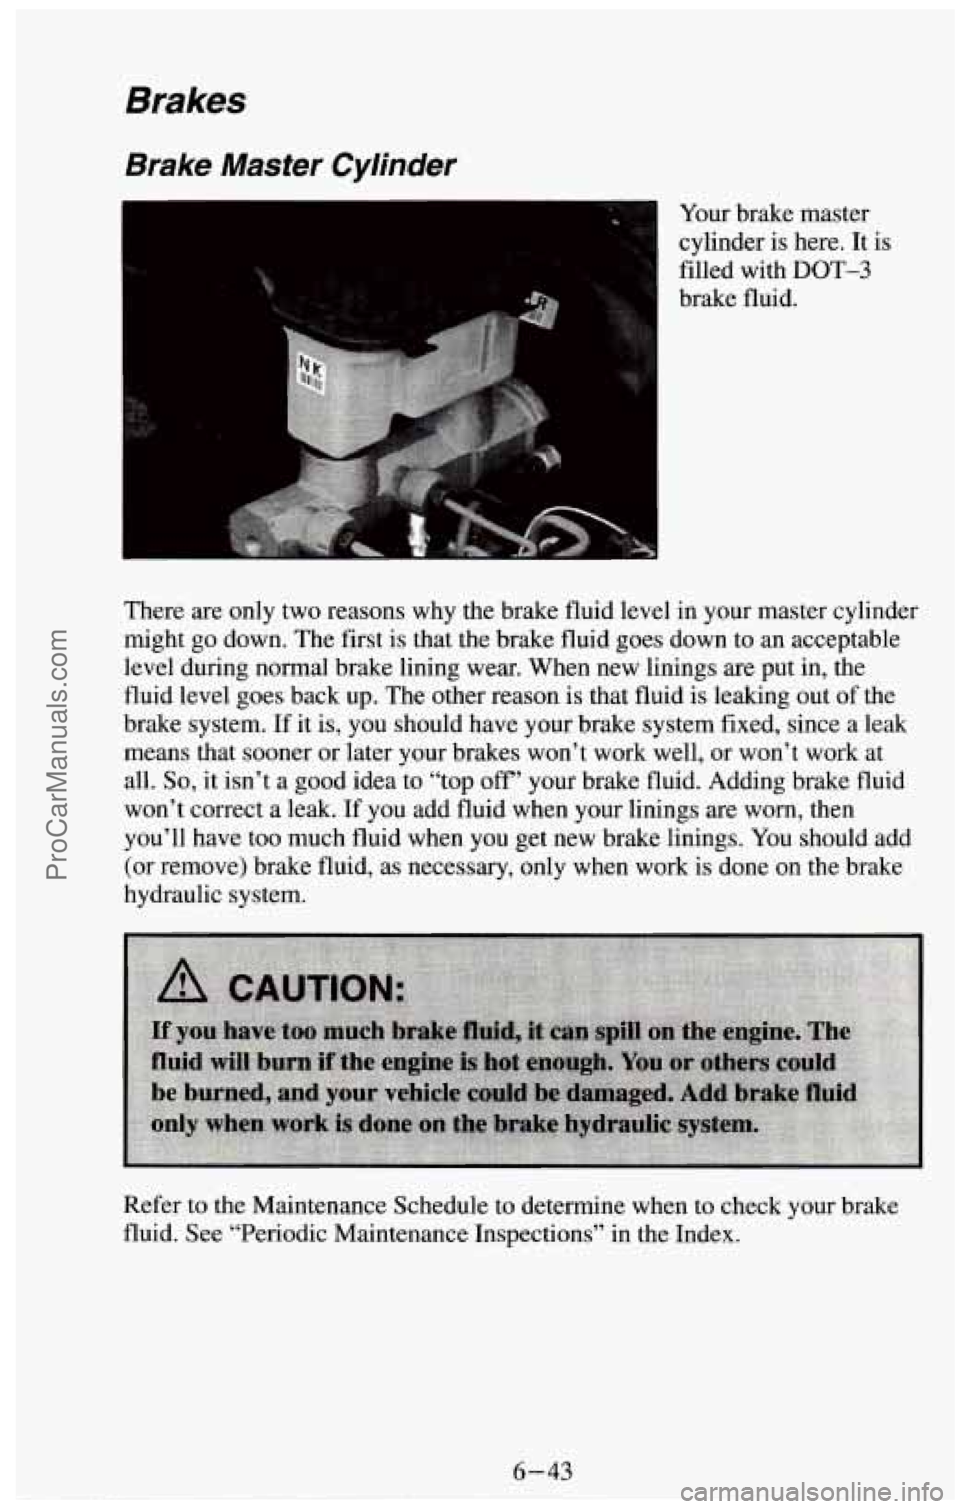
4 Your brake master
cylinder
is here. It is
filled with
DOT-3
brake fluid.
There are only two reasons why the brake fluid level in your master cylinder
might go down. The first is that the brake fluid goes down to an acceptable
level during normal brake lining wear. When new linings are put in, the
fluid level goes back up. The other reason is that fluid is leaking out
of the
brake system. If it is,
you should have your brake system fixed, since a leak
means that sooner or later your brakes wonŌĆÖt work well, or wonŌĆÖt work at
all.
So, it isnŌĆÖt a good idea to ŌĆ£top offŌĆÖ your brake fluid. Adding brake fluid
wonŌĆÖt correct
a leak. If you add fluid when your linings are worn, then
youŌĆÖll have too much fluid when you get new brake linings. You should add
(or remove) brake fluid, as necessary, only when work is done on the brake
hydraulic system.
Refer to the Maintenance Schedule to determine when to check your brake
fluid. See ŌĆ£Periodic Maintenance InspectionsŌĆØ in the Index.
ProCarManuals.com
Page 289 of 385
To Check Brake Fluid
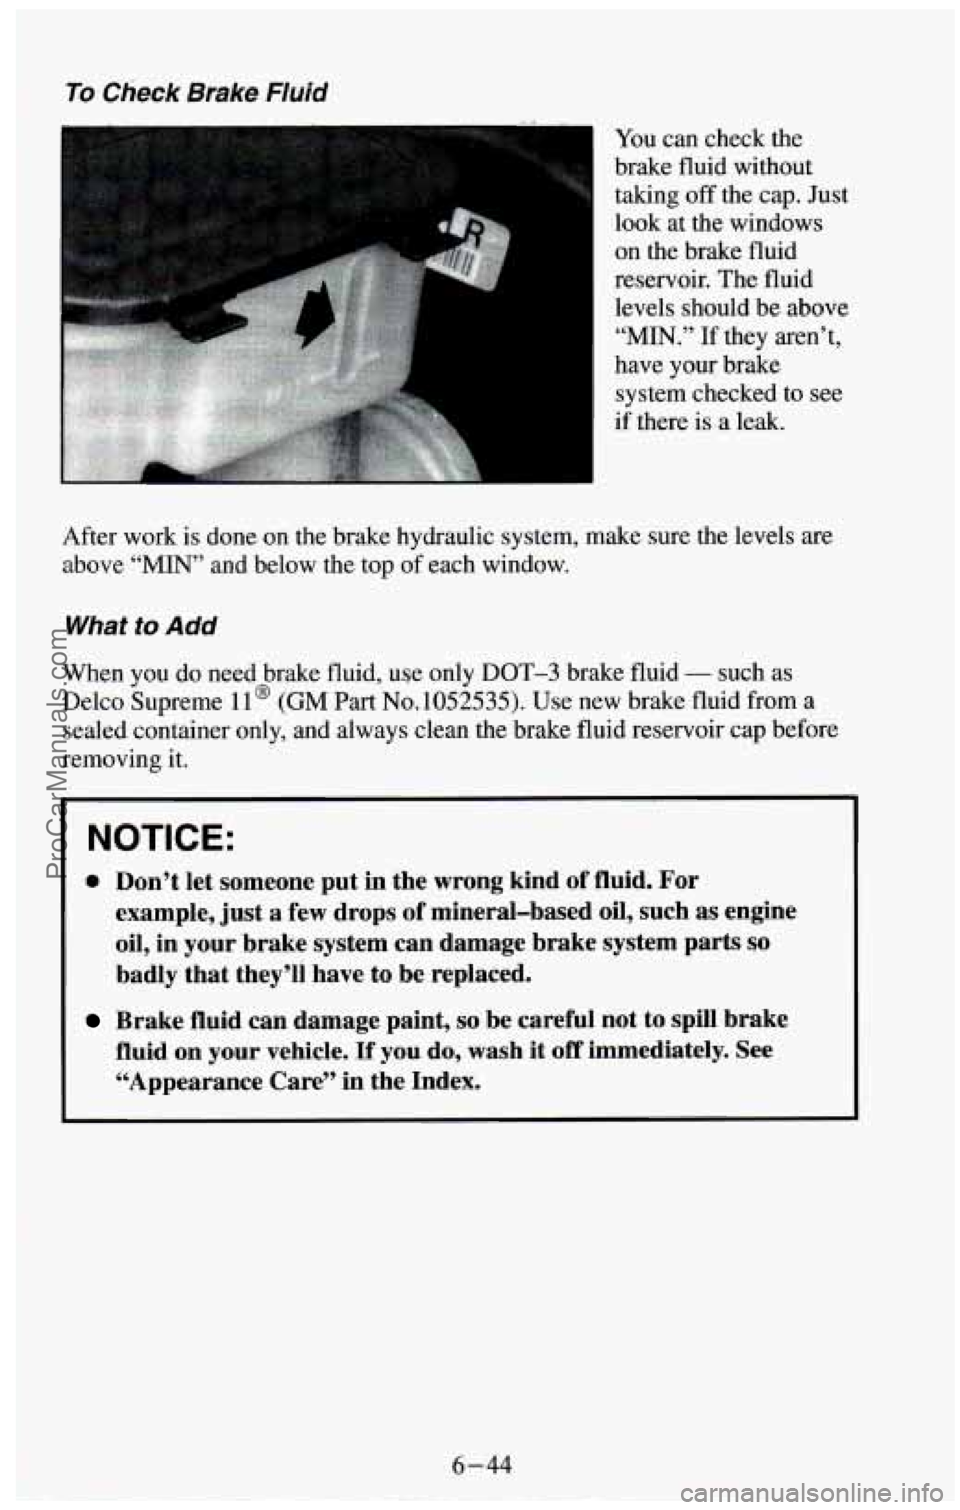
m You can check the
brake fluid without
taking off the cap. Just
look at the windows
on the brake fluid
reservoir. The fluid
levels should be above
ŌĆ£MIN.ŌĆØ If they arenŌĆÖt,
have your brake
system checked to see
if there is a leak.
After work is done on the brake hydraulic system, make sure the levels are
above
ŌĆśŌĆ£INŌĆśŌĆÖ and below the top of each window.
What to Add
When you do need brake fluid, use only DOT-3 brake fluid - such as
Delco Supreme
ll@ (GM Part No.1052535). Use new brake fluid from a
sealed container only, and always clean the brake fluid reservoir cap before
removing it.
0 DonŌĆÖt let someone put in the wrong kind of fluid. For
example, just
a few drops of mineral-based oil, such as engine
oil, in your brake system can damage brake system parts
so
badly that theyŌĆÖli have to be replaced.
Brake fluid can damage paint, so be careful not to spill brake
fluid
on your vehicle. If you do, wash it off immediately. See
ŌĆ£Appearance CareŌĆØ
in the Index.
ProCarManuals.com
Page 291 of 385
Replacing Brake System Parts
The braking system on a modern vehicle is complex. Its many parts have to
be of top quality and work well together if the vehicle is to have really good
braking. Vehicles we design and test have top-quality
GM brake parts in
them, as your vehicle does when it is new. When you replace parts of your
braking system
- for example, when your brake linings wear down and
you have to have new ones put
in - be sure you get new genuine GM
replacement parts. If you donŌĆÖt, your brakes may no longer work properly.
For example, if someone puts
in brake linings that are wrong for your
vehicle, the balance between your front and rear brakes can change, for the
worse. The braking performance youŌĆÖve come to expect can change
in many
other ways
if someone puts in the wrong replacement brake parts.
Other Maintenance Items
Front Suspension and Steering Linkage
Your maintenance schedule will tell you how often to lubricate the fittings.
See ŌĆ£Recommended Fluids and LubricantsŌĆØ in the Index for the proper
lubricant to use.
Front Wheel Bearing
Your vehicle has front wheel bearings that must be cleaned and repacked.
Your maintenance schedule will tell you how often this must be done.
Front Shock Absorbers
The front shock absorbers of your vehicle do many things. They help the
vehicle ride smoothly and also control the travel of the suspension system.
When the shock absorbers are serviced, any replacement shock absorbers
must be the same as the original equipment shock absorbers
in both
extended length
and strength.
I NOTICE:
If you use shock absorbers that are not the same as the original
shock absorbers, the shock absorbers or suspension system
could be damaged.
6-46
ProCarManuals.com
Page 351 of 385
Explanation Of Scheduled Maintenance Services
Below are explanations of the services listed in the maintenance charts.
The proper fluids and lubricants to
use are listed in this section. Make sure
whoever services your vehicle uses these.
All parts should be replaced and
all necessary repairs done before you or anyone else drives the vehicle.
1. ENGINE OIL AND OIL FILTER CHANGE* -ALWAYS USE SH
ENERGY CONSERVIJTG TI (GASOLINE ENGINE) OR CF-4/SH
(DIESEL ENGINE) QUALITY OILS OF THE PROPER VISCOSITY.
To determine the preferred viscosity oil for your vehicleŌĆÖs engine
(e.g.
SAE 5W-30 or low-30), see ŌĆ£Engine OilŌĆØ in the Index.
2. CHASSIS LUBRICATION - Lubricate the front suspension, king
pin bushings, steering linkage, transmission, and transfer case shift
linkage, parking brake cable guides, rear driveline center splines and
front axle propshaft splines, brake pedal springs, and clutch pedal
springs at the intervals specified.
Ball joints and king pin bushings should not be lubricated unless their
temperature is
10┬░F (-12ŌĆØC), or higher. When the weather is cold, let
them warm up before lubrication or they could be damaged.
Also, be sure to check all the vehicle fluid levels at this time.
3. CLUTCH FORK BALL STUD LUBRICATION (5-SPEED
MANUAL TRANSMISSION
WITH DEEP LOW ) - Not
applicable to utility or wagon models.
4. COOLING SYSTEM SERVICE*? - Drain, flush and refill system
with new coolant. See ŌĆ£Engine CoolantŌĆÖŌĆÖ
in the Index for the proper
coolant and mixture to use
in your vehicle.
Also inspect the hoses and replace them
if they are cracked, swollen, or
deteriorated. Tighten all
hose clamps (except constant tension clamps).
Remove debris and clean
the outside of the radiator and air
conditioning condenser. Wash the radiator
neck. To ensure proper
operation, pressure test the radiator and cap.
5. AIR CLEANER FILTER REPLACEMENT* - Replace at every
30,000 miles (50 000 km) or more often under dusty conditions. Ask
your dealer for the proper replacement intervals
for your driving
conditions.
6. FRONT WHEEL BEARING REPACK (2-WHEEL DRIVE
ONLY)
- Clean and repack the front wheel bearings at each brake
relining, or at the specified interval, whichever comes first.
4ŌĆÖ An Emission Control Service
*A fluid loss in these systems may indicate a problem. Have them
inspected and repaired at once.
7- 18
ProCarManuals.com