lights CHEVROLET SUBURBAN 2003 9.G Owners Manual
[x] Cancel search | Manufacturer: CHEVROLET, Model Year: 2003, Model line: SUBURBAN, Model: CHEVROLET SUBURBAN 2003 9.GPages: 552, PDF Size: 3.44 MB
Page 1 of 552

Seats and Restraint Systems........................... 1-1
Front Seats
............................................... 1-3
Rear Seats
............................................... 1-9
Safety Belts
.............................................1-24
Child Restraints
.......................................1-47
Air Bag Systems
......................................1-73
Restraint System Check
............................1-88
Features and Controls..................................... 2-1
Keys
........................................................ 2-3
Doors and Locks
....................................... 2-8
Windows
.................................................2-16
Theft-Deterrent Systems
............................2-18
Starting and Operating Your Vehicle
...........2-21
Mirrors
....................................................2-45
OnStar
žSystem
......................................2-55
HomeLinkžTransmitter
.............................2-57
Storage Areas
.........................................2-61
Sunroof
..................................................2-65
Vehicle Personalization
.............................2-66
Instrument Panel............................................. 3-1
Instrument Panel Overview
.......................... 3-4
Climate Controls
......................................3-20
Warning Lights, Gages and Indicators
.........3-36
Driver Information Center (DIC)
..................3-53
Audio System(s)
.......................................3-72Driving Your Vehicle....................................... 4-1
Your Driving, the Road, and Your Vehicle
..... 4-2
Towing
...................................................4-59
Service and Appearance Care.......................... 5-1
Service
..................................................... 5-3
Fuel
......................................................... 5-4
Checking Things Under the Hood
...............5-12
All-Wheel Drive
........................................5-55
Rear Axle
...............................................5-56
Four-Wheel Drive
.....................................5-57
Front Axle
...............................................5-58
Bulb Replacement
....................................5-59
Windshield Wiper Blade Replacement
.........5-66
Tires
......................................................5-67
Appearance Care
.....................................5-99
Vehicle Identi®cation
...............................5-107
Electrical System
....................................5-108
Capacities and Speci®cations
...................5-118
Normal Maintenance Replacement Parts
....5-121
Maintenance Schedule..................................... 6-1
Maintenance Schedule
................................ 6-2
Customer Assistance Information.................... 7-1
Customer Assistance Information
.................. 7-2
Reporting Safety Defects
...........................7-10
Index.................................................................1
2003 Chevrolet Tahoe/SuburbanM
Page 4 of 552

Vehicle Damage Warnings
Also, in this book you will ®nd these notices:
Notice:These mean there is something that could
damage your vehicle.
A notice will tell you about something that can damage
your vehicle. Many times, this damage would not be
covered by your warranty, and it could be costly. But the
notice will tell you what to do to help avoid the
damage.
When you read other manuals, you might see CAUTION
and NOTICE warnings in different colors or in
different words.
You'll also see warning labels on your vehicle. They use
the same words, CAUTION or NOTICE.
Vehicle Symbols
Your vehicle has components and labels that use
symbols instead of text. Symbols, used on your vehicle,
are shown along with the text describing the operation
or information relating to a speci®c component, control,
message, gage or indicator.
If you need help ®guring out a speci®c name of a
component, gage or indicator, reference the following
topics:
·Seats and Restraint Systems in Section 1
·Features and Controls in Section 2
·Instrument Panel Overview in Section 3
·Climate Controls in Section 3
·Warning Lights, Gages and Indicators in Section 3
·Audio System(s) in Section 3
·Engine Compartment Overview in Section 5
iv
Page 101 of 552

At times you may notice a decrease in range. This is
normal for any remote keyless entry system. If the
transmitter does not work or if you have to stand closer
to your vehicle for the transmitter to work, try this:
·Check the distance. You may be too far from your
vehicle. You may need to stand closer during
rainy or snowy weather.
·Check the location. Other vehicles or objects may
be blocking the signal. Take a few steps to the
left or right, hold the transmitter higher, and
try again.
·Check to determine if battery replacement is
necessary. See ªBattery Replacementº under
Remote Keyless Entry System Operation on
page 2-5.
·If you are still having trouble, see your dealer or a
quali®ed technician for service.
Remote Keyless Entry System
Operation
If your vehicle has this feature, you can lock and unlock
your doors from about 3 feet (1 m) up to 30 feet
(9 m) away using the remote keyless entry transmitter
supplied with your vehicle.
UNLOCK:Pressing this button once will unlock the
driver's door. The parking lamps will ¯ash and the
interior lights will come on. The ground illumination
lamps will come on. Pressing UNLOCK again within
three seconds will cause the remaining doors to unlock.
The parking lamps will ¯ash and the interior lights will
come on.
LOCK:Pressing this button once will lock all of the
doors. Wait one second, then press LOCK again and the
horn will chirp.
Operating the keyless entry transmitter may interact with
the theft-deterrent system. See
Content Theft-Deterrent
on page 2-18.
2-5
Page 127 of 552

G(4HI):Use the 4HI position when you need extra
traction, such as on snowy or icy roads or in most
off-road situations. This setting also engages your front
axle to help drive your vehicle. This is the best setting
to use when plowing snow.
5(4LO):This setting also engages your front axle
and delivers extra torque. You may never need this
setting. It sends maximum power to all four wheels. You
might choose 4LO if you are driving off-road in deep
sand, deep mud, deep snow and climbing or descending
steep hills.
{CAUTION:
Shifting the transfer case to NEUTRAL can
cause your vehicle to roll even if the
transmission is in PARK (P). You or someone
else could be seriously injured. Be sure to set
the parking brake before placing the transfer
case in NEUTRAL. See
Parking Brake on
page 2-38
.NEUTRAL:Shift the vehicle's transfer case to
NEUTRAL only when towing your vehicle. See
Recreational Vehicle Towing on page 4-59orTowing
Your Vehicle on page 4-59for more information.
Indicator lights in the switches show which setting you
are in. The indicator lights will come on brie¯y when you
turn on the ignition and one will stay on. If the lights
do not come on, you should take your vehicle to your
dealer for service. An indicator light will ¯ash while
shifting the transfer case. It will remain illuminated when
the shift is complete. If for some reason the transfer
case cannot make a requested shift, it will return to the
last chosen setting.
If the SERVICE 4WD message stays on, you should
take your vehicle to your dealer for service. See²Service
4WD message²under
Driver Information Center (DIC)
on page 3-53.
2-31
Page 131 of 552

You can choose among three driving settings:
d(Stabilitrakž):This button is used with the
Stabilitrakžsystem and is also used to shift the transfer
case into Neutral. For more information on using
Stabilitrak
žseeStabilitrakžSystem on page 4-12.
f(All-Wheel Drive):This setting delivers power to
all four wheels as needed depending on road and driving
conditions.
g(4LO):This setting delivers extra torque. You may
never need this setting. It sends maximum power to
all four wheels. You might choose 4LO if you are driving
off-road in deep sand, deep mud, deep snow and
climbing or descending steep hills.
{CAUTION:
Shifting the transfer case to NEUTRAL can
cause your vehicle to roll even if the
transmission is in PARK (P). You or someone
else could be seriously injured. Be sure to set
the parking brake before placing the transfer
case in NEUTRAL. See
Parking Brake on
page 2-38
.NEUTRAL:Shift the vehicle's transfer case to
NEUTRAL only when towing your vehicle. See
Recreational Vehicle Towing on page 4-59orTowing
Your Vehicle on page 4-59for more information.
Indicator lights in the switches show which setting you are
in. The indicator lights will come on brie¯y when you turn
on the ignition and one will stay on. If the lights do not
come on, you should take your vehicle to your dealer for
service. An indicator light will ¯ash while shifting the
transfer case. It will remain illuminated when the shift is
complete. If for some reason the transfer case cannot
make a requested shift, it will return to the last chosen
setting.
If the SERVICE 4WD message stays on, you should
take your vehicle to your dealer for service. See
SERVICE 4WD under
Driver Information Center (DIC)
on page 3-53.
2-35
Page 141 of 552

{CAUTION:
Four-wheel drive vehicles with the transfer
case in NEUTRAL will allow the vehicle to roll,
even if your shift lever is in PARK (P). So, be
sure the transfer case is in a drive gear Ð not
in NEUTRAL. Always set your parking brake.
Follow the proper steps to be sure your vehicle will not
move. See
Shifting Into Park (P) on page 2-39.
If you are pulling a trailer, see
Towing a Trailer on
page 4-65.
Mirrors
Manual Rearview Mirror
Pull the tab under the mirror toward you to reduce glare
from headlamps behind you after dark. Push the tab
away from you for normal daytime operation.
Automatic Dimming Rearview Mirror
with OnStar
ž, Compass and
Temperature Display
Your vehicle may have this feature. When on, an
electrochromic mirror automatically dims to the proper
level to minimize glare from lights behind you after dark.
The mirror also includes a duel display in the upper
right corner of the mirror face. The compass reading and
the outside temperature will both appear in the display
at the same time.
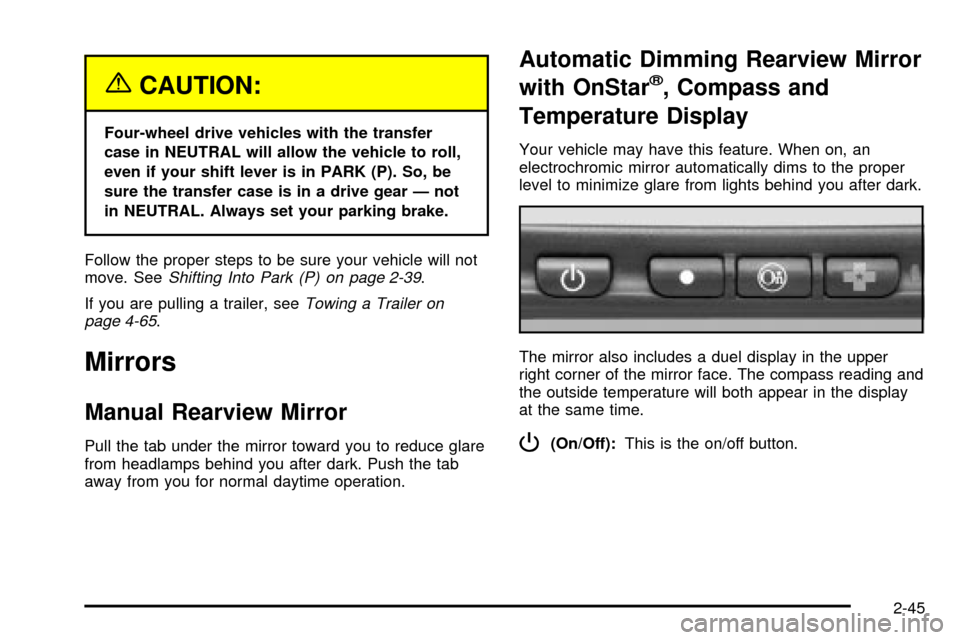
P(On/Off):This is the on/off button.
2-45
Page 145 of 552

Automatic Dimming Rearview Mirror
with Compass and Temperature
Display
If your vehicle is equipped with an electrochromic mirror,
it will, when on, automatically dim to the proper level to
minimize glare from lights behind you after dark.
The mirror also includes a display in the upper right
corner of the mirror face. The compass reading and the
outside temperature will both appear in the display at the
same time. The dual display can be turned on or off by
brie¯y pressing either the TEMP or the COMP button.
Temperature Display
The temperature can be displayed by pressing the TEMP
button. Pressing the TEMP button once brie¯y, will toggle
the temperature reading on and off. To alternate the
temperature reading between Fahrenheit and Celsius,
press and hold the TEMP button for approximately four
seconds until the display blinks ÉF and ÉC. Press and
release the TEMP button to toggle between the
Fahrenheit and Celsius readings. After approximately
four seconds of inactivity, the display will stop blinking
and display the last selection made.
Press and release the TEMP button to toggle the
temperature display between Fahrenheit or Celsius.If an abnormal reading is displayed, for an extended
period of time, please consult your dealer. Under certain
circumstances, a delay in updating the temperature is
normal.
Electrochromic Mirror Operation
The time period you need to press and hold the TEMP
button to turn the electrochromic feature on or off is
approximately eight seconds. The indicator light to the
left of the TEMP button will still turn on or off to
show you when the electrochromic feature is activated.
Once the mirror is turned off, it will remain off until it
is turned back on, or until the vehicle is restarted.
Compass Operation
Press the COMP button once brie¯y to turn the compass
on or off.
When the ignition and the compass feature are on, the
compass will show two character boxes for
approximately two seconds. After two seconds, the
mirror will display the compass heading.
When cleaning the mirror, use a paper towel or similar
material dampened with glass cleaner. Do not spray
glass cleaner directly on the mirror as that may cause
the liquid cleaner to enter the mirror housing.
2-49
Page 165 of 552

Instrument Panel Overview...............................3-4
Hazard Warning Flashers................................3-6
Other Warning Devices...................................3-6
Horn.............................................................3-7
Tilt Wheel.....................................................3-7
Turn Signal/Multifunction Lever.........................3-7
Exterior Lamps.............................................3-14
Interior Lamps..............................................3-17
Accessory Power Outlets...............................3-19
Ashtrays and Cigarette Lighter........................3-20
Climate Controls............................................3-20
Climate Control System.................................3-20
Dual Climate Control System..........................3-21
Dual Automatic Climate Control System...........3-25
Rear Air Conditioning System.........................3-31
Rear Air Conditioning and Heating System.......3-32
Rear Air Conditioning and Heating System and
Electronic Climate Controls.........................3-34
Warning Lights, Gages and Indicators.............3-36
Instrument Panel Cluster................................3-37
Speedometer and Odometer...........................3-38
Tachometer.................................................3-38Safety Belt Reminder Light.............................3-38
Air Bag Readiness Light................................3-39
Passenger Air Bag Status Indicator.................3-39
Battery Warning Light....................................3-41
Voltmeter Gage............................................3-42
Brake System Warning Light..........................3-42
Anti-Lock Brake System Warning Light.............3-44
Traction Off Light..........................................3-44
Engine Coolant Temperature Gage..................3-45
Transmission Temperature Gage.....................3-46
Malfunction Indicator Lamp.............................3-47
Oil Pressure Gage........................................3-50
Cruise Control Light......................................3-51
Four-Wheel-Drive Light..................................3-51
Tow/Haul Mode Light....................................3-52
Fuel Gage...................................................3-52
Low Fuel Warning Light.................................3-53
Driver Information Center (DIC).......................3-53
DIC Operation and Displays...........................3-54
DIC Warnings and Messages.........................3-64
Section 3 Instrument Panel
3-1
Page 178 of 552

Exterior Lamps
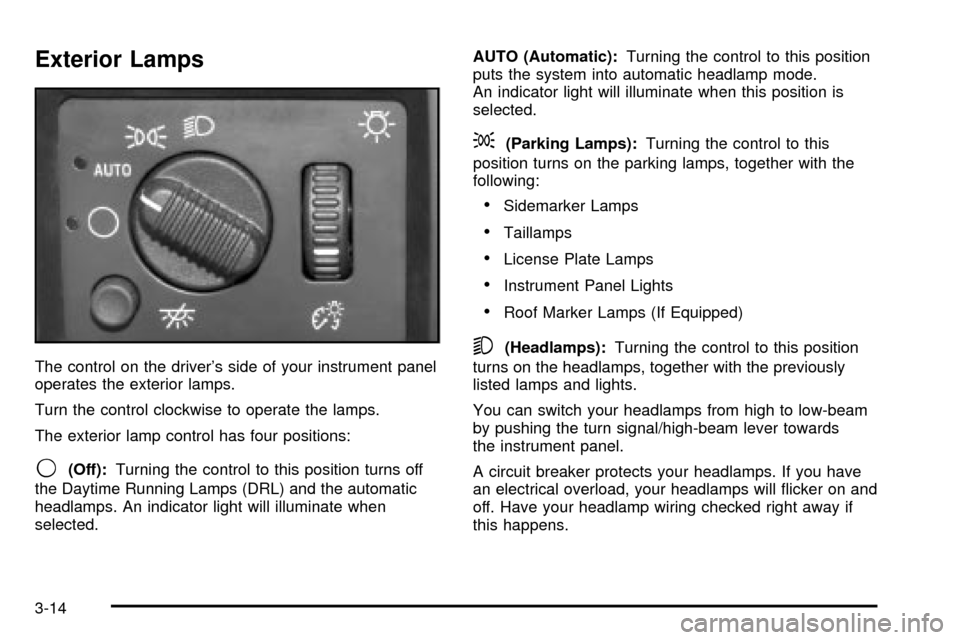
The control on the driver's side of your instrument panel
operates the exterior lamps.
Turn the control clockwise to operate the lamps.
The exterior lamp control has four positions:
9(Off):Turning the control to this position turns off
the Daytime Running Lamps (DRL) and the automatic
headlamps. An indicator light will illuminate when
selected.AUTO (Automatic):Turning the control to this position
puts the system into automatic headlamp mode.
An indicator light will illuminate when this position is
selected.
;(Parking Lamps):Turning the control to this
position turns on the parking lamps, together with the
following:
·Sidemarker Lamps
·Taillamps
·License Plate Lamps
·Instrument Panel Lights
·Roof Marker Lamps (If Equipped)
5(Headlamps):Turning the control to this position
turns on the headlamps, together with the previously
listed lamps and lights.
You can switch your headlamps from high to low-beam
by pushing the turn signal/high-beam lever towards
the instrument panel.
A circuit breaker protects your headlamps. If you have
an electrical overload, your headlamps will ¯icker on and
off. Have your headlamp wiring checked right away if
this happens.
3-14
Page 179 of 552

Automatic Headlamp System
When it is dark enough outside, your automatic
headlamp system will turn on your headlamps at the
normal brightness along with other lamps such as
the taillamps, sidemarker, parking lamps and the
instrument panel lights. The radio lights will also be dim.
Your vehicle is equipped with a light sensor located
on the top of the instrument panel in the defroster grille.
Be sure it is not covered, or the system will be on
whenever the ignition is on.
The system may also turn on your headlamps when
driving through a parking garage, heavy overcast
weather or a tunnel. This is normal.
There is a delay in the transition between the daytime
and nighttime operation of the Daytime Running
Lamps (DRL) and the automatic headlamp systems so
that driving under bridges or bright overhead street
lights does not affect the system. The DRL and
automatic headlamp system will only be affected when
the light sensor sees a change in lighting lasting
longer than the delay.
If you start your vehicle in a dark garage, the automatic
headlamp system will come on immediately. Once
you leave the garage, it will take approximately
one minute for the automatic headlamp system to
change to DRL if it is bright enough outside. During that
delay, your instrument panel cluster may not be asbright as usual. Make sure your instrument panel
brightness control is in the full bright position. See
ªInstrument Panel Brightness Controlº underInterior
Lamps on page 3-17.
To idle your vehicle with the automatic headlamp
system off, turn the control to the off position.
You may be able to turn off your Automatic Headlamp
System. See²Daytime Running Lamps (DRL)²later
in this section for more information.
Your headlamps will also stay on after you exit the
vehicle. You can program this feature using the Driver
Information Center. See
Driver Information Center (DIC)
on page 3-53.
As with any vehicle, you should turn on the regular
headlamp system when you need them.
Lamps On Reminder
A reminder chime will sound when your headlamps or
parking lamps are manually turned on and your ignition is
off, in LOCK, ACCESSORY, or your door is open.
To disable the chime, turn the light off then back on.
Daytime Running Lamps
Daytime Running Lamps (DRL) can make it easier for
others to see the front of your vehicle during the
day. DRL can be helpful in many different driving
conditions, but they can be especially helpful in the short
3-15