lock CHEVROLET SUBURBAN 2003 9.G Owners Manual
[x] Cancel search | Manufacturer: CHEVROLET, Model Year: 2003, Model line: SUBURBAN, Model: CHEVROLET SUBURBAN 2003 9.GPages: 552, PDF Size: 3.44 MB
Page 1 of 552

Seats and Restraint Systems........................... 1-1
Front Seats
............................................... 1-3
Rear Seats
............................................... 1-9
Safety Belts
.............................................1-24
Child Restraints
.......................................1-47
Air Bag Systems
......................................1-73
Restraint System Check
............................1-88
Features and Controls..................................... 2-1
Keys
........................................................ 2-3
Doors and Locks
....................................... 2-8
Windows
.................................................2-16
Theft-Deterrent Systems
............................2-18
Starting and Operating Your Vehicle
...........2-21
Mirrors
....................................................2-45
OnStar
žSystem
......................................2-55
HomeLinkžTransmitter
.............................2-57
Storage Areas
.........................................2-61
Sunroof
..................................................2-65
Vehicle Personalization
.............................2-66
Instrument Panel............................................. 3-1
Instrument Panel Overview
.......................... 3-4
Climate Controls
......................................3-20
Warning Lights, Gages and Indicators
.........3-36
Driver Information Center (DIC)
..................3-53
Audio System(s)
.......................................3-72Driving Your Vehicle....................................... 4-1
Your Driving, the Road, and Your Vehicle
..... 4-2
Towing
...................................................4-59
Service and Appearance Care.......................... 5-1
Service
..................................................... 5-3
Fuel
......................................................... 5-4
Checking Things Under the Hood
...............5-12
All-Wheel Drive
........................................5-55
Rear Axle
...............................................5-56
Four-Wheel Drive
.....................................5-57
Front Axle
...............................................5-58
Bulb Replacement
....................................5-59
Windshield Wiper Blade Replacement
.........5-66
Tires
......................................................5-67
Appearance Care
.....................................5-99
Vehicle Identi®cation
...............................5-107
Electrical System
....................................5-108
Capacities and Speci®cations
...................5-118
Normal Maintenance Replacement Parts
....5-121
Maintenance Schedule..................................... 6-1
Maintenance Schedule
................................ 6-2
Customer Assistance Information.................... 7-1
Customer Assistance Information
.................. 7-2
Reporting Safety Defects
...........................7-10
Index.................................................................1
2003 Chevrolet Tahoe/SuburbanM
Page 9 of 552
Front Seats
Manual Seats
{CAUTION:
You can lose control of the vehicle if you try to
adjust a manual driver's seat while the vehicle
is moving. The sudden movement could startle
and confuse you, or make you push a pedal
when you don't want to. Adjust the driver's
seat only when the vehicle is not moving.
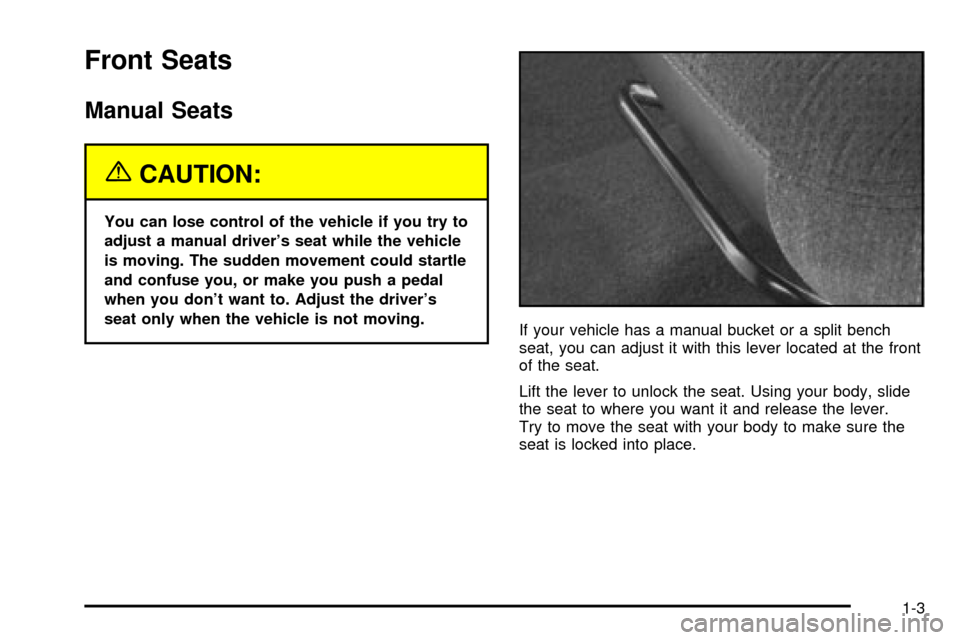
If your vehicle has a manual bucket or a split bench
seat, you can adjust it with this lever located at the front
of the seat.
Lift the lever to unlock the seat. Using your body, slide
the seat to where you want it and release the lever.
Try to move the seat with your body to make sure the
seat is locked into place.
1-3
Page 12 of 552
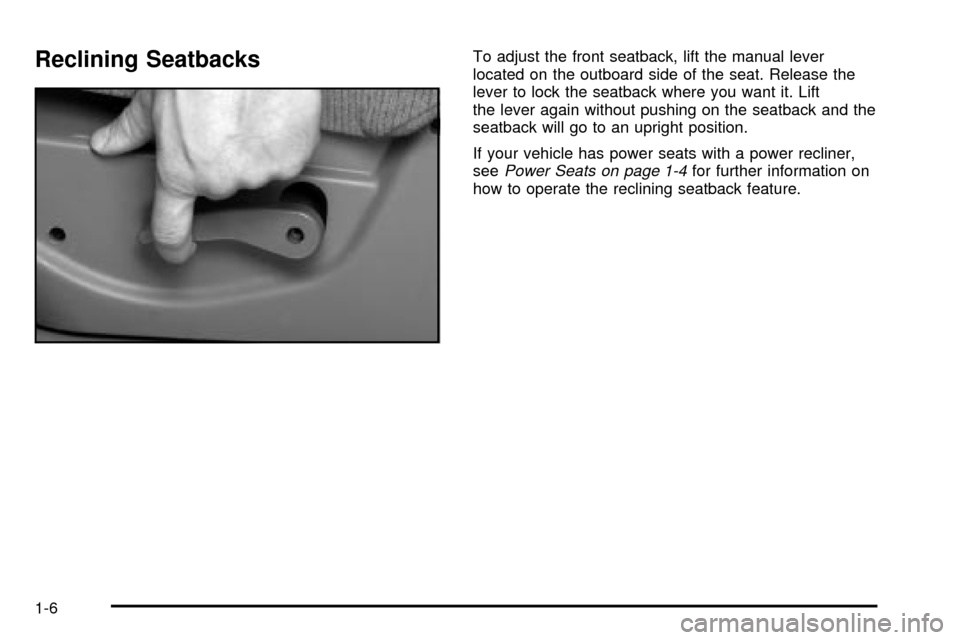
Reclining SeatbacksTo adjust the front seatback, lift the manual lever
located on the outboard side of the seat. Release the
lever to lock the seatback where you want it. Lift
the lever again without pushing on the seatback and the
seatback will go to an upright position.
If your vehicle has power seats with a power recliner,
see
Power Seats on page 1-4for further information on
how to operate the reclining seatback feature.
1-6
Page 15 of 552
Rear Seats
Rear Seat Operation
Entering or Exiting the Third Row
Seats
{CAUTION:
If the seatback isn't locked, it could move
forward in a sudden stop or crash. That could
cause injury to the person sitting there. Always
press rearward on the seatback to be sure it is
locked.
Extended models:The passenger's side of the second
row 60/40 or rear bucket seats has an easy entry
feature. This makes it easy to get in and out of the third
seat, if your vehicle has one.To operate the easy entry seat turn the release lever,
located on the back of the seat upward.
Tilt the seatback toward the front of the vehicle by
pulling the top of the seat forward. When you do the seat
bottom will release. Pull the seat forward until it stops.
Be sure to return the seat to the passenger position
when ®nished. Push and pull on the seat to make sure
it is locked in place.
60/40 Split Bench Seat
Regular models:The rear seat may have a 60/40 split
seat which may be folded down to give you more
cargo space.
Extended models:The second row rear seat of
Suburban/Yukon XL models may have a 60/40 split
seat. Either side of the rear seat my be folded down to
provide more cargo space.
1-9
Page 16 of 552
Folding the Seatbacks
{CAUTION:
If the seatback isn't locked, it could move
forward in a sudden stop or crash. That could
cause injury to the person sitting there. Always
press rearward on the seatback to be sure it is
locked.
Make sure that nothing is under or in front of the seat
and that the head restraints are completely lowered.
On regular models the rear seatbacks may be equipped
with rearward folding head restraints. When the
seatback is being folded down, the head restraint will
automatically fold rearward to allow a ¯at load ¯oor
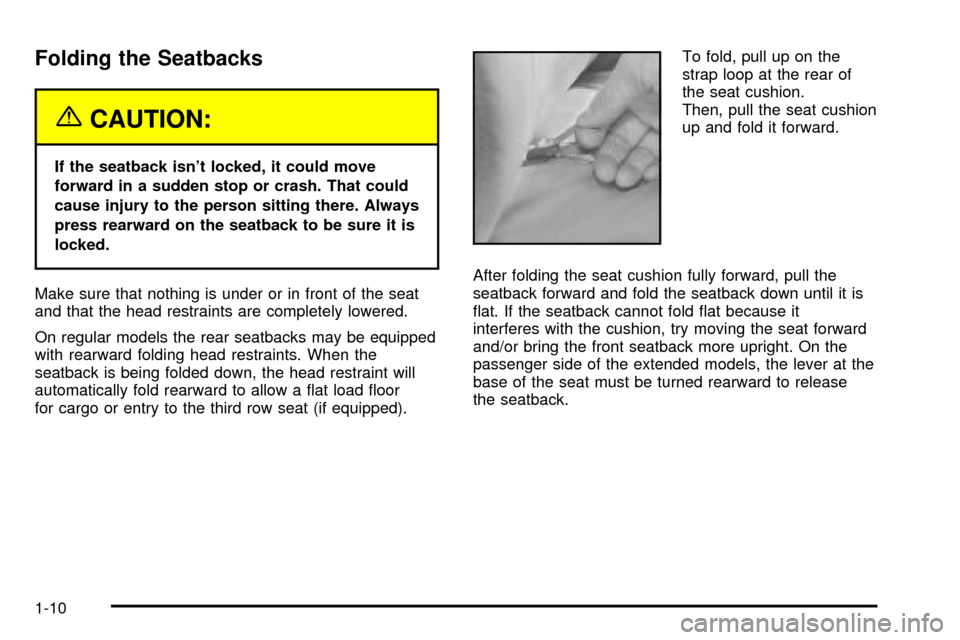
for cargo or entry to the third row seat (if equipped).To fold, pull up on the
strap loop at the rear of
the seat cushion.
Then, pull the seat cushion
up and fold it forward.
After folding the seat cushion fully forward, pull the
seatback forward and fold the seatback down until it is
¯at. If the seatback cannot fold ¯at because it
interferes with the cushion, try moving the seat forward
and/or bring the front seatback more upright. On the
passenger side of the extended models, the lever at the
base of the seat must be turned rearward to release
the seatback.
1-10
Page 18 of 552
50/50 Split Bench Seat
If your vehicle has a 50/50 split bench, the seatback(s)
can be folded and the entire seat(s) tilted or removed
from the vehicles.
Folding the Seatbacks
{CAUTION:
If the seatback isn't locked, it could move
forward in a sudden stop or crash. That could
cause injury to the person sitting there. Always
press rearward on the seatback to be sure it is
locked.
To fold the seatbacks do the following:
·Pull up on the release lever, labeled 1, located on
the rear of the seatback, and push the seatback
forward.
·To return the seat to the passenger position, pull up
on the release lever labeled 1 and then pull up on
the seatback until the seatback locks into the upright
position.
Push forward on the seatback to make sure it is locked
into position.
Tilting the 50/50 Split Bench Seat
{CAUTION:
If the seatback isn't locked, it could move
forward in a sudden stop or crash. That could
cause injury to the person sitting there. Always
press rearward on the seatback to be sure it is
locked.
{CAUTION:
If the support rod isn't properly engaged, the
folded third row seat could come loose in a
sudden stop or crash. That could cause injury
to people and damage to your vehicle. Always
be sure the support rod is properly engaged
when the third row seat is folded forward.
1-12
Page 19 of 552

Once the third seatback has been folded down, the
entire seat can be tilted forward to create a ¯at
load ¯oor. To do this, do the following:
1. Enter the rear cargo area of the vehicle.
2. Make sure the head restraints have been lowered
completely.
3. With the seat folded, unlatch the seat from the ¯oor
by pulling up on the lever located under the
carrying handle at the rear of the seat labeled 2.
4. Lift the rear of the seat up, off the ¯oor. You will not
be able to unlatch the seat from the ¯oor unless the
seatback is folded down.
5. Tilt the seat fully forward and secure it in place
using the support rod located on the underside
of the seat on the passenger's side. Make sure the
rod pin is fully engaged in the lock.
6. Push and pull on the seat. Make sure the support
rod is holding it ®rmly in place. Use the seat in this
position only when necessary for additional
cargo space.To return the seat to the seating position do the
following:
1. Push forward on the seat and release the support
lock rod.
2. Secure the support rod in its stored position on the
underside of the seat.
3. Lower the seat to the ¯oor and let the seat drop
into place.
4. Lift up on the carrying handle to make sure the seat
is locked in place.
5. Return the seatback to the upright position by
pulling up on the release lever labeled 1 before
the back can be folded upright.
6. Pull the seatback forward to make sure it is locked
in place.
1-13
Page 21 of 552
Replacing the 50/50 Split Bench Seat
{CAUTION:
If the seatback isn't locked, it could move
forward in a sudden stop or crash. That could
cause injury to the person sitting there. Always
press rearward on the seatback to be sure it is
locked.
{CAUTION:
A seat that isn't locked into place properly can
move around in a collision or sudden stop.
People in the vehicle could be injured. Be sure
to lock the seat into place properly when
installing it.
{CAUTION:
A safety belt that is improperly routed, not
properly attached, or twisted won't provide the
protection needed in a crash. The person
wearing the belt could be seriously injured.
After raising the rear seatback, always check
to be sure that the safety belts are properly
routed and attached, and are not twisted.
To reinstall the 50/50 split bench, do the following:
1. While holding the rear of the seat up, slide the front
wheels into the slots on the ¯oor. The front latches
should lock into place. If the latches do not lock,
try tilting the rear of the seats upwards.
2. Once the latches are engaged, let the seat drop
into place. Release the lever labeled 1 to return
the seat to its upright position.
3. Push and pull on the seat to make sure it is locked
into place. The seatback cannot be raised to the
upright position unless the seat is secured to
the ¯oor.
1-15
Page 22 of 552
Bench Seat
If your vehicle has a full bench seat, the seatback can
be folded and the seat can be tilted or removed from the
vehicle.
Folding the Seatback
{CAUTION:
If the seatback isn't locked, it could move
forward in a sudden stop or crash. That could
cause injury to the person sitting there. Always
press rearward on the seatback to be sure it is
locked.To fold the seatback on the bench seat, do the following:
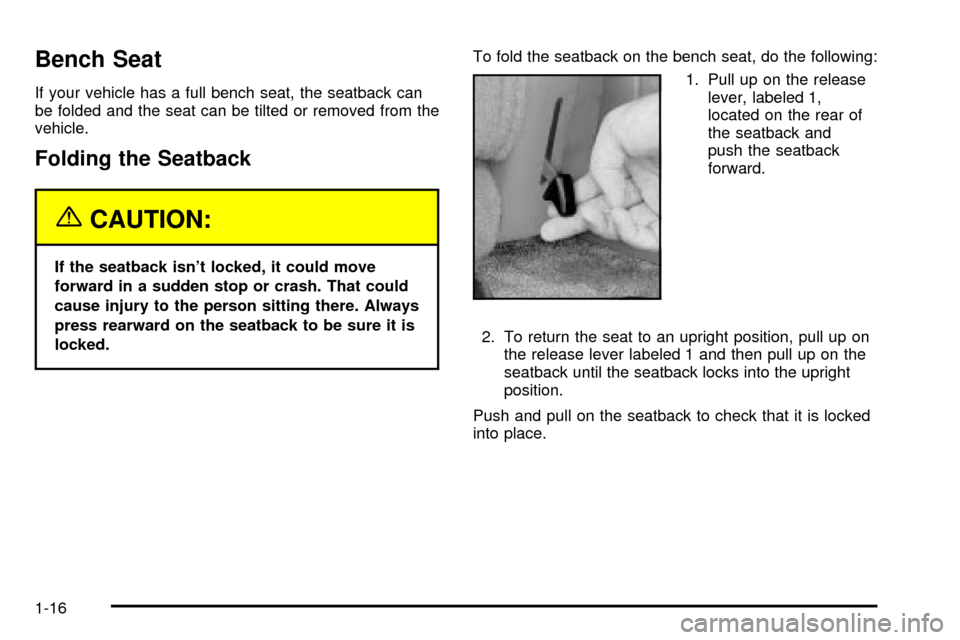
1. Pull up on the release
lever, labeled 1,
located on the rear of
the seatback and
push the seatback
forward.
2. To return the seat to an upright position, pull up on
the release lever labeled 1 and then pull up on the
seatback until the seatback locks into the upright
position.
Push and pull on the seatback to check that it is locked
into place.
1-16
Page 23 of 552
Tilting the Bench Seat
{CAUTION:
If the seatback isn't locked, it could move
forward in a sudden stop or crash. That could
cause injury to the person sitting there. Always
press rearward on the seatback to be sure it is
locked.
{CAUTION:
If the support rod isn't properly engaged, the
folded third row seat could come loose in a
sudden stop or crash. That could cause injury
to people and damage to your vehicle. Always
be sure the support rod is properly engaged
when the third row seat is folded forward.Once the third seatback has been folded down, the
entire seat can be tilted forward to create a ¯at
load ¯oor. To do this, do the following:
1. Enter the rear cargo area of the vehicle.
2. Make sure the head restraints have been lowered
completely.
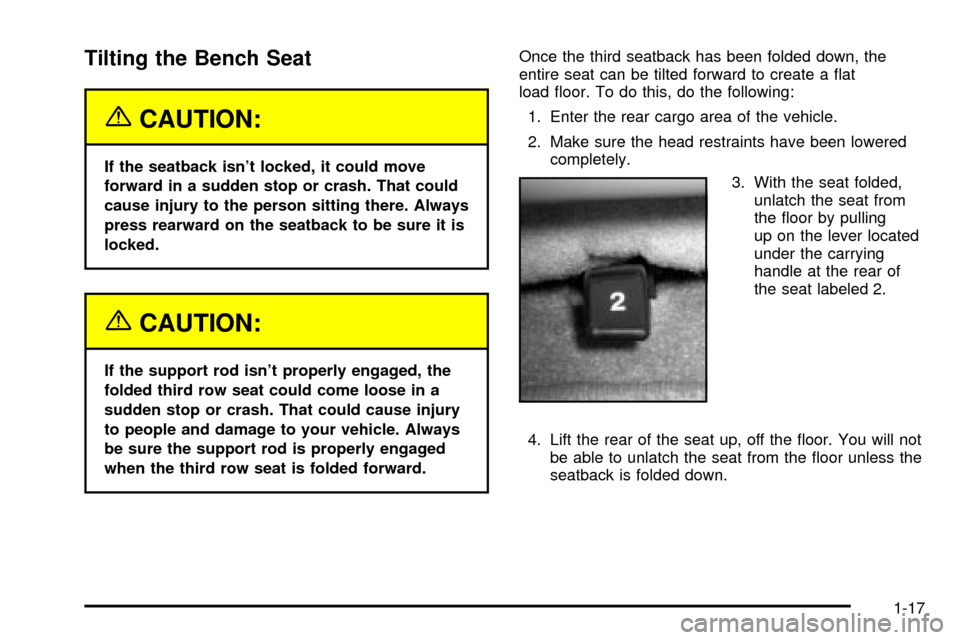
3. With the seat folded,
unlatch the seat from
the ¯oor by pulling
up on the lever located
under the carrying
handle at the rear of
the seat labeled 2.
4. Lift the rear of the seat up, off the ¯oor. You will not
be able to unlatch the seat from the ¯oor unless the
seatback is folded down.
1-17