park assist CHEVROLET SUBURBAN 2006 9.G Owners Manual
[x] Cancel search | Manufacturer: CHEVROLET, Model Year: 2006, Model line: SUBURBAN, Model: CHEVROLET SUBURBAN 2006 9.GPages: 540, PDF Size: 3.06 MB
Page 114 of 540
Retained Accessory Power (RAP)
Your vehicle may have a Retained Accessory Power
(RAP) feature which will allow certain features on your
vehicle to continue to work up to 10 minutes after
the ignition key is turned to LOCK.
The radio, power windows, and if the vehicle has these
features, the sunroof and OnStar
®System, will work
when the ignition key is in RUN or ACCESSORY. Once
the key is turned from RUN to LOCK, these features will
continue to work for up to 10 minutes or until a door is
opened.
Starting the Engine
Your vehicle has a Starter Motor Control. This feature
assists in starting the engine and protects the electrical
system. It may cause the engine to crank even after
the ignition key is not in START.
Move your shift lever to PARK (P) or NEUTRAL (N).
Your engine will not start in any other position — that is
a safety feature. To restart when you are already
moving, use NEUTRAL (N) only.Notice:Do not try to shift to PARK (P) if your
vehicle is moving. If you do, you could damage the
transmission. Shift to PARK (P) only when your
vehicle is stopped.
1. With your foot off the accelerator pedal, turn the
ignition key to START. When the engine starts,
let go of the key. The idle speed will go down as
your engine gets warm.
Notice:Holding your key in START for longer than
15 seconds at a time will disengage the starter
motor, cause your battery to be drained much
sooner, and add excessive heat that can damage
your starter motor. Try not to hold the key in START
for longer than 15 seconds and wait about
15 seconds between each try to help avoid draining
your battery or damaging your starter.
2. If the engine does not start within 10 seconds, push
the accelerator pedal all the way to the �oor, while
you hold the ignition key in START. When the
engine starts, let go of the key and let up on the
accelerator pedal. Wait about 15 seconds between
each try.
2-20
Page 143 of 540
Outside Curb View Assist Mirrors
If the vehicle has the memory package, the outside
mirrors are able to perform the curb view assist mirror
function. This feature will cause the passenger’s
and/or driver’s mirror to tilt to a preselected position
when the vehicle is in REVERSE (R). This feature may
be useful in allowing the driver to view the curb when
parallel parking. When the vehicle is shifted out of
REVERSE (R) and a short delay has occurred,
the passenger’s and/or driver’s mirror will return to its
original position.
To change the preselected tilt position, adjust the
mirrors to the desired position while the vehicle is in
REVERSE (R). When the vehicle is shifted out of
REVERSE (R), this new position is saved in memory
as the tilt position.
This feature can be turned on or off through the Driver
Information Center (DIC). SeeDriver Information
Center (DIC) on page 3-51for more information.
Outside Convex Mirror
Your passenger’s side mirror is convex. A convex
mirror’s surface is curved so you can see more from
the driver’s seat.
{CAUTION:
A convex mirror can make things (like other
vehicles) look farther away than they really are.
If you cut too sharply into the right lane, you
could hit a vehicle on your right. Check your
inside mirror or glance over your shoulder
before changing lanes.
Outside Heated Mirrors
The vehicle may have outside heated mirrors which
help clear them of condensation, snow, and ice.
When the rear window defogger button is pressed, the
heated mirrors are also turned on. See “Rear Window
Defogger” underDual Automatic Climate Control System
on page 3-25orDual Climate Control System on
page 3-22for more information.
2-49
Page 147 of 540
See “Erasing Universal Home Remote Buttons” later in
this section or, for assistance, seeCustomer Assistance
Offices on page 7-4.
Be sure that people and objects are clear of the garage
door or gate operator you are programming. When
programming a garage door, it is advised to park outside
of the garage.
It is recommended that a new battery be installed in
your hand-held transmitter for quicker and more
accurate transmission of the radio-frequency signal.
Programming Universal Home Remote
Follow these steps to program up to three channels:
1. Press and hold down the two outside Universal
Home Remote buttons, releasing only when the
Universal Home Remote indicator light begins
to �ash, after 20 seconds. Do not hold down the
buttons for longer than 30 seconds and do not
repeat this step to program a second and/or
third hand-held transmitter to the remaining
two Universal Home Remote buttons.
2. Position the end of your hand-held transmitter
about 1 to 3 inches (3 to 8 cm) away from the
Universal Home Remote buttons while keeping
the indicator light in view.3. Simultaneously press and hold both the desired
Universal Home Remote button and the hand-held
transmitter button. Do not release the buttons
until Step 4 has been completed.
Some entry gates and garage door openers may
require you to substitute Step 3 with the procedure
noted in “Gate Operator and Canadian
Programming” later in this section.
4. The indicator light will �ash slowly at �rst and then
rapidly after Universal Home Remote successfully
receives the frequency signal from the hand-held
transmitter. Release both buttons.
5. Press and hold the newly-trained Universal Home
Remote button and observe the indicator light.
If the indicator light stays on constantly,
programming is complete and your device should
activate when the Universal Home Remote button
is pressed and released.
To program the remaining two Universal Home
Remote buttons, begin with Step 2 under
“Programming Universal Home Remote.” Do not
repeat Step 1 as this will erase all of the
programmed channels.
If the indicator light blinks rapidly for two seconds
and then turns to a constant light, continue with
Steps 6 through 8 following to complete the
programming of a rolling-code equipped device,
most commonly, a garage door opener.
2-53
Page 199 of 540
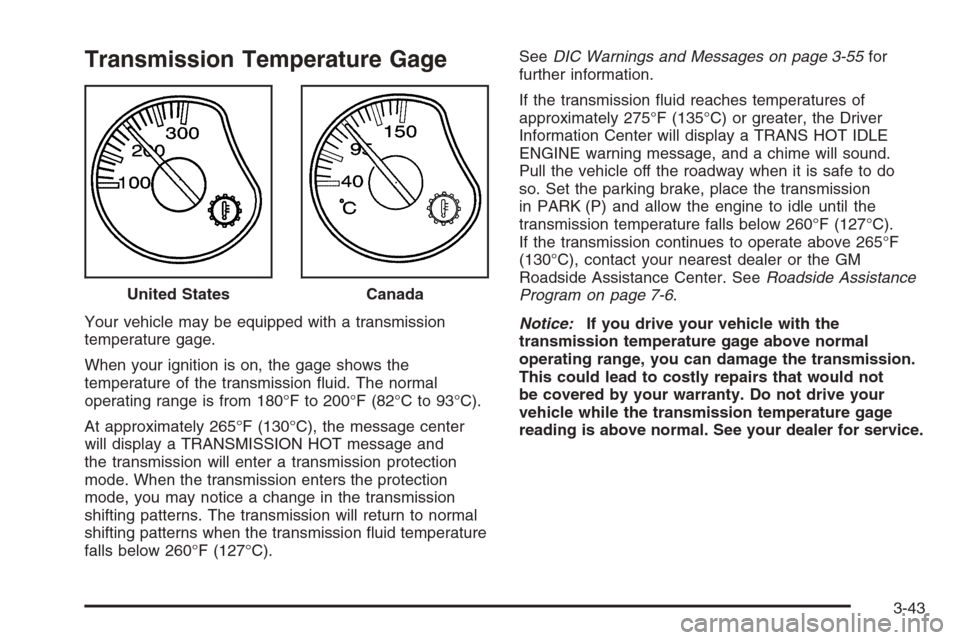
Transmission Temperature Gage
Your vehicle may be equipped with a transmission
temperature gage.
When your ignition is on, the gage shows the
temperature of the transmission �uid. The normal
operating range is from 180°F to 200°F (82°C to 93°C).
At approximately 265°F (130°C), the message center
will display a TRANSMISSION HOT message and
the transmission will enter a transmission protection
mode. When the transmission enters the protection
mode, you may notice a change in the transmission
shifting patterns. The transmission will return to normal
shifting patterns when the transmission �uid temperature
falls below 260°F (127°C).SeeDIC Warnings and Messages on page 3-55for
further information.
If the transmission �uid reaches temperatures of
approximately 275°F (135°C) or greater, the Driver
Information Center will display a TRANS HOT IDLE
ENGINE warning message, and a chime will sound.
Pull the vehicle off the roadway when it is safe to do
so. Set the parking brake, place the transmission
in PARK (P) and allow the engine to idle until the
transmission temperature falls below 260°F (127°C).
If the transmission continues to operate above 265°F
(130°C), contact your nearest dealer or the GM
Roadside Assistance Center. SeeRoadside Assistance
Program on page 7-6.
Notice:If you drive your vehicle with the
transmission temperature gage above normal
operating range, you can damage the transmission.
This could lead to costly repairs that would not
be covered by your warranty. Do not drive your
vehicle while the transmission temperature gage
reading is above normal. See your dealer for service. United States
Canada
3-43
Page 354 of 540
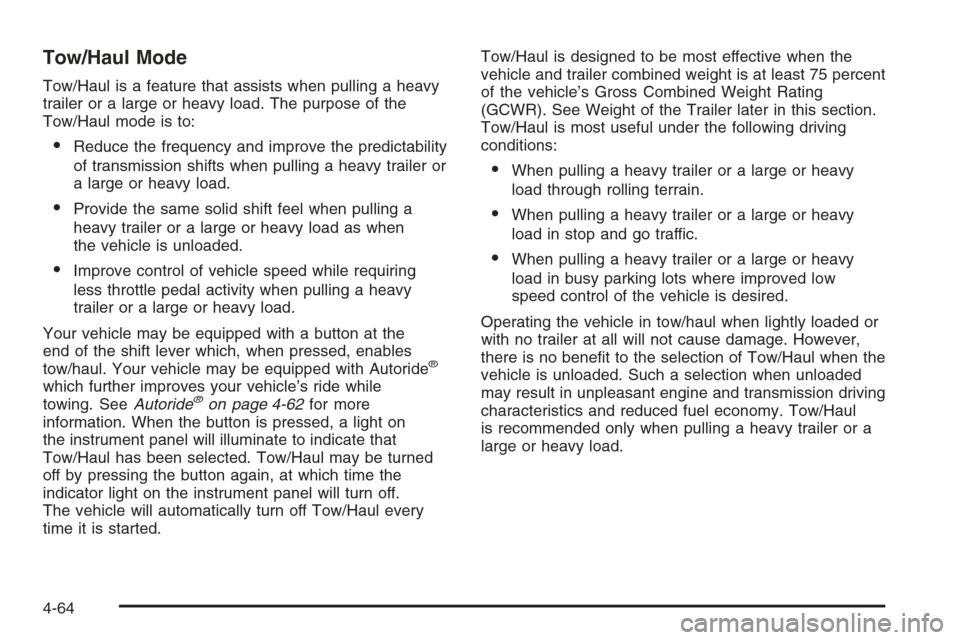
Tow/Haul Mode
Tow/Haul is a feature that assists when pulling a heavy
trailer or a large or heavy load. The purpose of the
Tow/Haul mode is to:
Reduce the frequency and improve the predictability
of transmission shifts when pulling a heavy trailer or
a large or heavy load.
Provide the same solid shift feel when pulling a
heavy trailer or a large or heavy load as when
the vehicle is unloaded.
Improve control of vehicle speed while requiring
less throttle pedal activity when pulling a heavy
trailer or a large or heavy load.
Your vehicle may be equipped with a button at the
end of the shift lever which, when pressed, enables
tow/haul. Your vehicle may be equipped with Autoride
®
which further improves your vehicle’s ride while
towing. SeeAutoride®on page 4-62for more
information. When the button is pressed, a light on
the instrument panel will illuminate to indicate that
Tow/Haul has been selected. Tow/Haul may be turned
off by pressing the button again, at which time the
indicator light on the instrument panel will turn off.
The vehicle will automatically turn off Tow/Haul every
time it is started.Tow/Haul is designed to be most effective when the
vehicle and trailer combined weight is at least 75 percent
of the vehicle’s Gross Combined Weight Rating
(GCWR). See Weight of the Trailer later in this section.
Tow/Haul is most useful under the following driving
conditions:
When pulling a heavy trailer or a large or heavy
load through rolling terrain.
When pulling a heavy trailer or a large or heavy
load in stop and go traffic.
When pulling a heavy trailer or a large or heavy
load in busy parking lots where improved low
speed control of the vehicle is desired.
Operating the vehicle in tow/haul when lightly loaded or
with no trailer at all will not cause damage. However,
there is no bene�t to the selection of Tow/Haul when the
vehicle is unloaded. Such a selection when unloaded
may result in unpleasant engine and transmission driving
characteristics and reduced fuel economy. Tow/Haul
is recommended only when pulling a heavy trailer or a
large or heavy load.
4-64
Page 536 of 540
Rear Air Conditioning and Heating System.........3-31
Rear Air Conditioning and Heating System
and Electronic Climate Controls.....................3-32
Rear Axle......................................................5-47
Locking........................................................ 4-8
Rear Door Security Locks................................2-12
Rear Outside Passenger Positions,
Safety Belts................................................1-43
Rear Safety Belt Comfort Guides......................1-45
Rear Seat Audio (RSA)..................................3-128
Rear Seat Entertainment System.....................3-117
Rear Seat Operation......................................... 1-9
Rear Storage Area..........................................2-57
Rear Windshield Washer/Wiper.........................3-10
Rearview Mirror, Automatic Dimming with
Compass....................................................2-42
Rearview Mirror, Automatic Dimming with
Compass and Temperature Display................2-43
Rearview Mirror, Automatic Dimming with
OnStar
®and Compass.................................2-37
Rearview Mirror, Automatic Dimming with
OnStar
®, Compass and Temperature Display.....2-39
Rearview Mirrors.............................................2-37
Reclining Seatbacks.......................................... 1-5Recommended Fluids and Lubricants.................6-12
Recovery Hooks.............................................4-47
Recreational Vehicle Towing.............................4-58
Remote Keyless Entry System............................ 2-4
Remote Keyless Entry System, Operation............ 2-5
Removing the Flat Tire and Installing the
Spare Tire..................................................5-84
Removing the Spare Tire and Tools...................5-80
Replacement Bulbs.........................................5-57
Reporting Safety Defects
Canadian Government..................................7-14
General Motors...........................................7-15
United States Government............................7-14
Restraint System Check
Checking the Restraint Systems....................1-87
Replacing Restraint System Parts
After a Crash..........................................1-88
Retained Accessory Power (RAP)......................2-20
Right Front Passenger Position, Safety Belts......1-41
Roadside
Assistance Program....................................... 7-6
Rocking Your Vehicle to Get it Out....................4-46
Routing, Engine Drive Belt...............................6-15
Running the Engine While Parked.....................2-36
12