clock CHEVROLET SUBURBAN 2007 10.G Owner's Manual
[x] Cancel search | Manufacturer: CHEVROLET, Model Year: 2007, Model line: SUBURBAN, Model: CHEVROLET SUBURBAN 2007 10.GPages: 634, PDF Size: 3.18 MB
Page 381 of 634
Q:What should I do if my vehicle stalls, or
is about to stall, and I cannot make it up
the hill?
A:If this happens, there are some things you
should do, and there are some things you
must not do. First, here is what youshoulddo:
Push the brake pedal to stop the vehicle
and keep it from rolling backwards. Also, apply
the parking brake.
If your engine is still running, shift the
transmission to REVERSE (R), release the
parking brake, and slowly back down the hill in
REVERSE (R).
If your engine has stopped running, you will
need to restart it. With the brake pedal
pressed and the parking brake still applied,
shift the transmission to PARK (P) and restart
the engine. Then, shift to REVERSE (R),
release the parking brake, and slowly back
down the hill as straight as possible in
REVERSE (R).
As you are backing down the hill, put your left
hand on the steering wheel at the 12 o’clock
position. This way, you will be able to tell
if your wheels are straight and maneuver as
you back down. It is best that you back
down the hill with your wheels straight rather
than in the left or right direction. Turning
the wheel too far to the left or right will
increase the possibility of a rollover.
381
Page 452 of 634
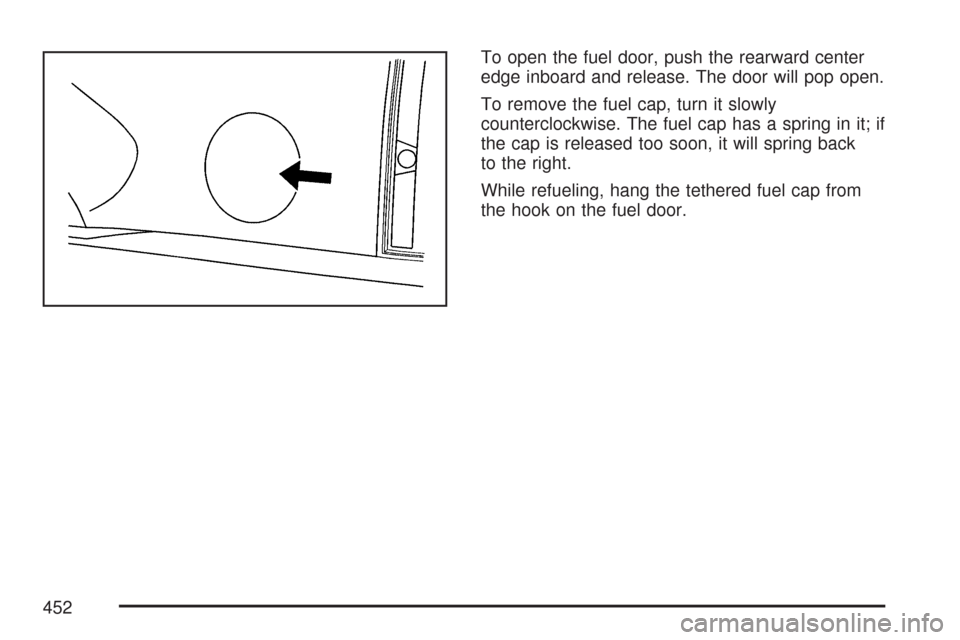
To open the fuel door, push the rearward center
edge inboard and release. The door will pop open.
To remove the fuel cap, turn it slowly
counterclockwise. The fuel cap has a spring in it; if
the cap is released too soon, it will spring back
to the right.
While refueling, hang the tethered fuel cap from
the hook on the fuel door.
452
Page 453 of 634
{CAUTION:
If you spill fuel and then something
ignites it, you could be badly burned. Fuel
can spray out on you if you open the fuel
cap too quickly. This spray can happen if
your tank is nearly full, and is more likely
in hot weather. Open the fuel cap slowly
and wait for any hiss noise to stop. Then
unscrew the cap all the way.Be careful not to spill fuel. Do not top off or over�ll
the tank and wait a few seconds after you have
�nished pumping before removing the nozzle.
Clean fuel from painted surfaces as soon
as possible. SeeWashing Your Vehicle on
page 557.
When replacing the fuel cap, turn it clockwise until
it clicks. Make sure the cap is fully installed.
The diagnostic system can determine if the fuel
cap has been left off or improperly installed.
This would allow fuel to evaporate into the
atmosphere. SeeMalfunction Indicator Lamp on
page 253.
453
Page 481 of 634
Notice:In cold weather, water can freeze and
crack the engine, radiator, heater core and
other parts. Use the recommended coolant and
the proper coolant mixture.
{CAUTION:
You can be burned if you spill coolant on
hot engine parts. Coolant contains
ethylene glycol and it will burn if the
engine parts are hot enough. Do not spill
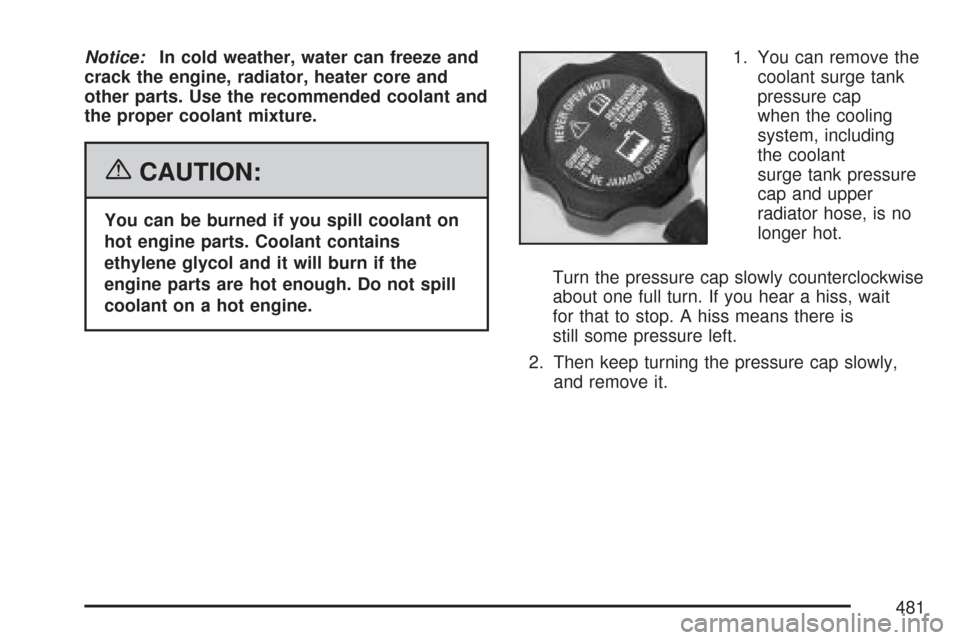
coolant on a hot engine.1. You can remove the
coolant surge tank
pressure cap
when the cooling
system, including
the coolant
surge tank pressure
cap and upper
radiator hose, is no
longer hot.
Turn the pressure cap slowly counterclockwise
about one full turn. If you hear a hiss, wait
for that to stop. A hiss means there is
still some pressure left.
2. Then keep turning the pressure cap slowly,
and remove it.
481
Page 501 of 634
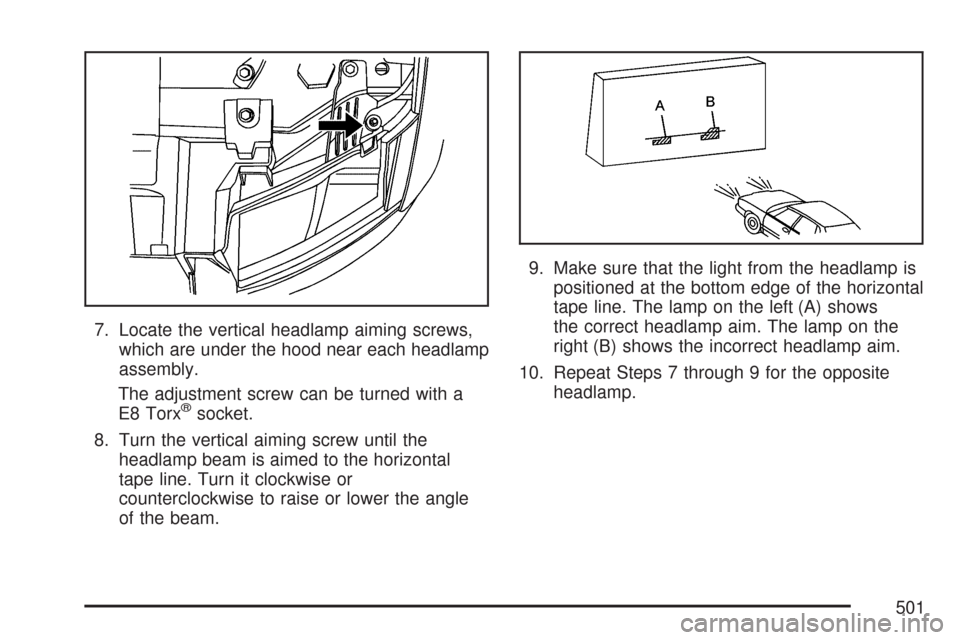
7. Locate the vertical headlamp aiming screws,
which are under the hood near each headlamp
assembly.
The adjustment screw can be turned with a
E8 Torx
®socket.
8. Turn the vertical aiming screw until the
headlamp beam is aimed to the horizontal
tape line. Turn it clockwise or
counterclockwise to raise or lower the angle
of the beam.9. Make sure that the light from the headlamp is
positioned at the bottom edge of the horizontal
tape line. The lamp on the left (A) shows
the correct headlamp aim. The lamp on the
right (B) shows the incorrect headlamp aim.
10. Repeat Steps 7 through 9 for the opposite
headlamp.
501
Page 503 of 634
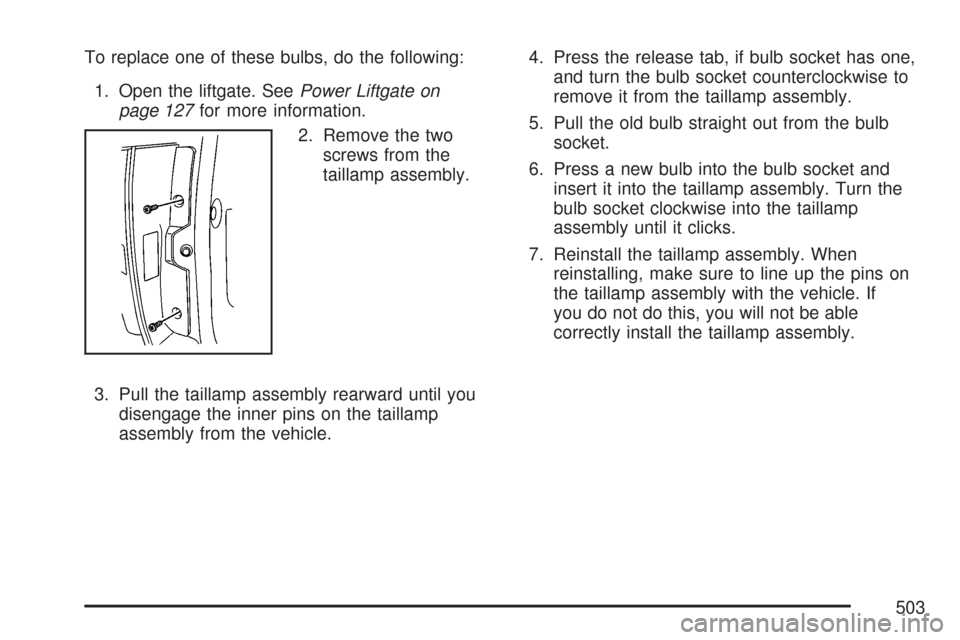
To replace one of these bulbs, do the following:
1. Open the liftgate. SeePower Liftgate on
page 127for more information.
2. Remove the two
screws from the
taillamp assembly.
3. Pull the taillamp assembly rearward until you
disengage the inner pins on the taillamp
assembly from the vehicle.4. Press the release tab, if bulb socket has one,
and turn the bulb socket counterclockwise to
remove it from the taillamp assembly.
5. Pull the old bulb straight out from the bulb
socket.
6. Press a new bulb into the bulb socket and
insert it into the taillamp assembly. Turn the
bulb socket clockwise into the taillamp
assembly until it clicks.
7. Reinstall the taillamp assembly. When
reinstalling, make sure to line up the pins on
the taillamp assembly with the vehicle. If
you do not do this, you will not be able
correctly install the taillamp assembly.
503
Page 504 of 634
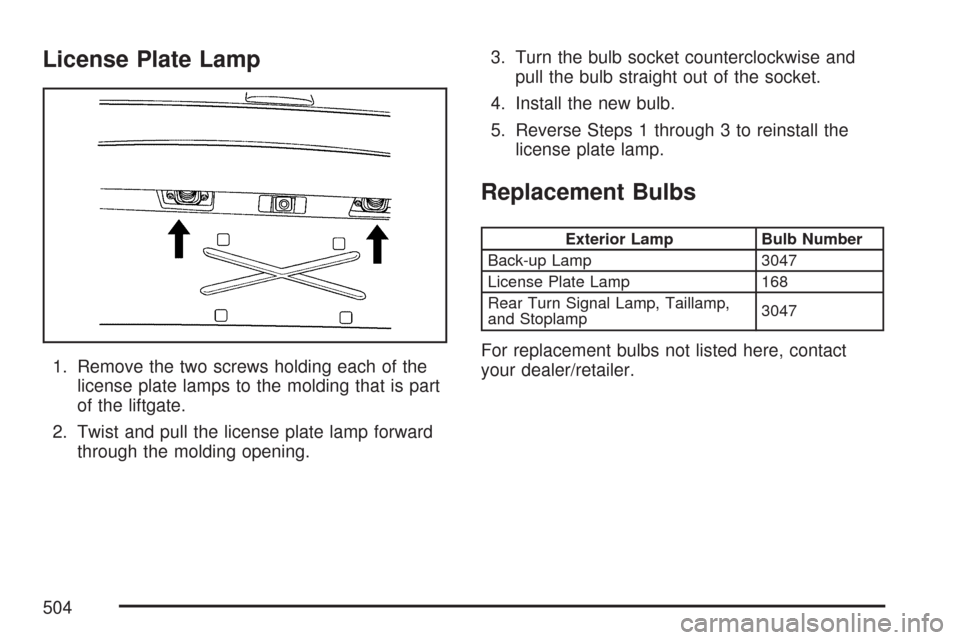
License Plate Lamp
1. Remove the two screws holding each of the
license plate lamps to the molding that is part
of the liftgate.
2. Twist and pull the license plate lamp forward
through the molding opening.3. Turn the bulb socket counterclockwise and
pull the bulb straight out of the socket.
4. Install the new bulb.
5. Reverse Steps 1 through 3 to reinstall the
license plate lamp.
Replacement Bulbs
Exterior Lamp Bulb Number
Back-up Lamp 3047
License Plate Lamp 168
Rear Turn Signal Lamp, Taillamp,
and Stoplamp3047
For replacement bulbs not listed here, contact
your dealer/retailer.
504
Page 534 of 634
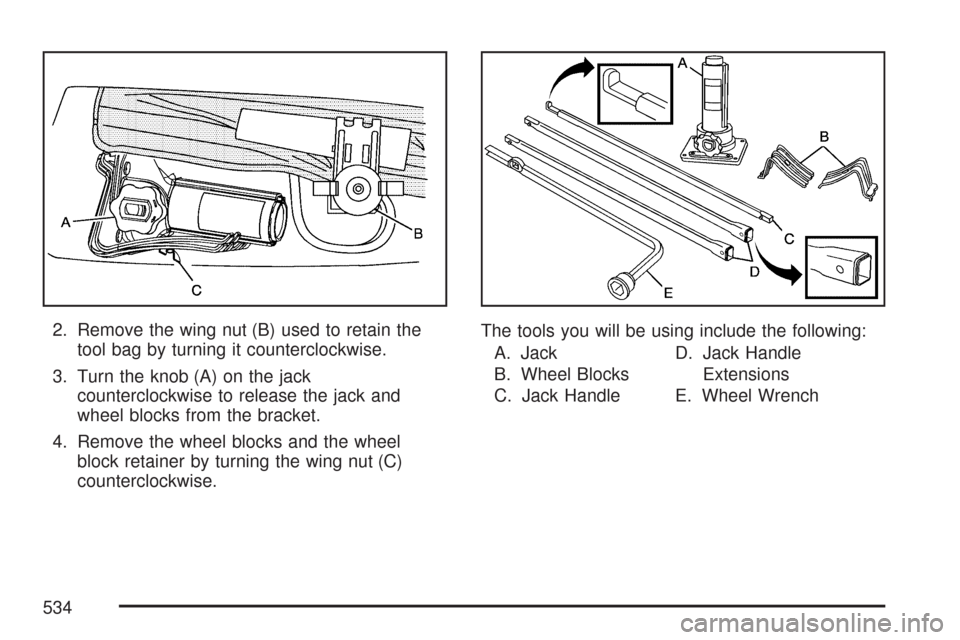
2. Remove the wing nut (B) used to retain the
tool bag by turning it counterclockwise.
3. Turn the knob (A) on the jack
counterclockwise to release the jack and
wheel blocks from the bracket.
4. Remove the wheel blocks and the wheel
block retainer by turning the wing nut (C)
counterclockwise.The tools you will be using include the following:
A. Jack
B. Wheel Blocks
C. Jack HandleD. Jack Handle
Extensions
E. Wheel Wrench
534
Page 535 of 634
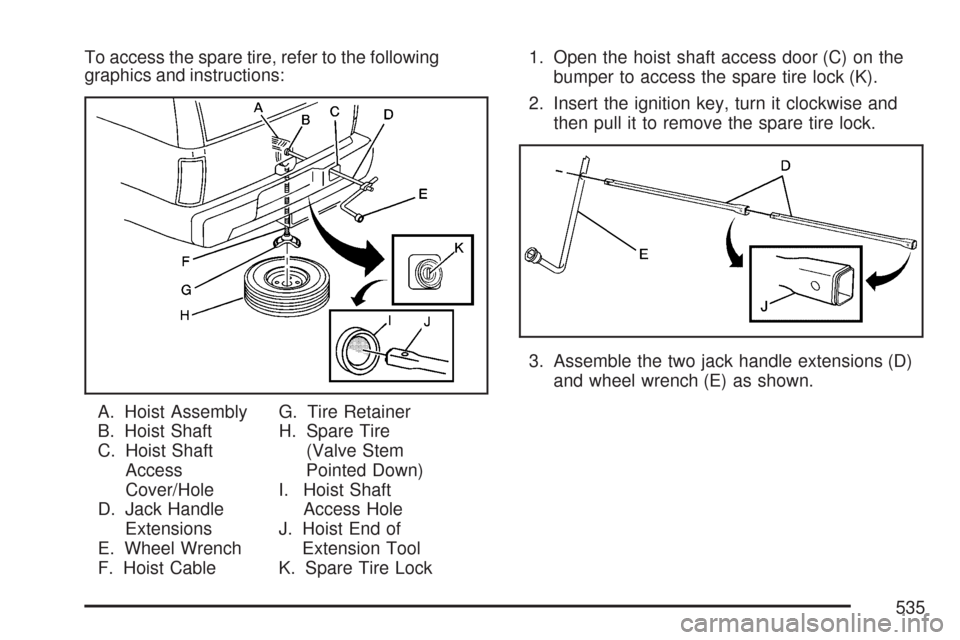
To access the spare tire, refer to the following
graphics and instructions:
A. Hoist Assembly
B. Hoist Shaft
C. Hoist Shaft
Access
Cover/Hole
D. Jack Handle
Extensions
E. Wheel Wrench
F. Hoist CableG. Tire Retainer
H. Spare Tire
(Valve Stem
Pointed Down)
I. Hoist Shaft
Access Hole
J. Hoist End of
Extension Tool
K. Spare Tire Lock1. Open the hoist shaft access door (C) on the
bumper to access the spare tire lock (K).
2. Insert the ignition key, turn it clockwise and
then pull it to remove the spare tire lock.
3. Assemble the two jack handle extensions (D)
and wheel wrench (E) as shown.
535
Page 536 of 634
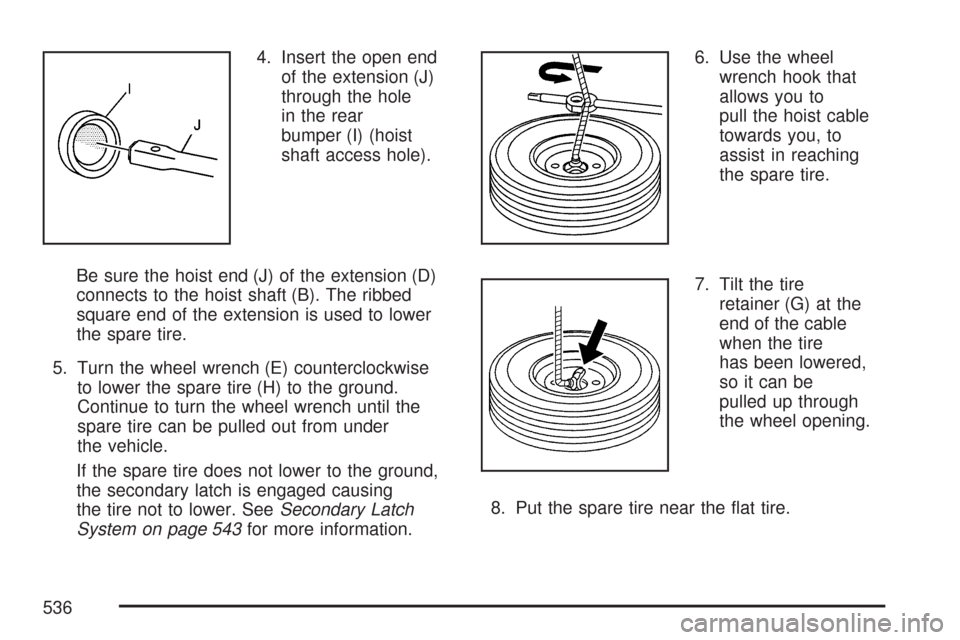
4. Insert the open end
of the extension (J)
through the hole
in the rear
bumper (I) (hoist
shaft access hole).
Be sure the hoist end (J) of the extension (D)
connects to the hoist shaft (B). The ribbed
square end of the extension is used to lower
the spare tire.
5. Turn the wheel wrench (E) counterclockwise
to lower the spare tire (H) to the ground.
Continue to turn the wheel wrench until the
spare tire can be pulled out from under
the vehicle.
If the spare tire does not lower to the ground,
the secondary latch is engaged causing
the tire not to lower. SeeSecondary Latch
System on page 543for more information.6. Use the wheel
wrench hook that
allows you to
pull the hoist cable
towards you, to
assist in reaching
the spare tire.
7. Tilt the tire
retainer (G) at the
end of the cable
when the tire
has been lowered,
so it can be
pulled up through
the wheel opening.
8. Put the spare tire near the �at tire.
536