clock setting CHEVROLET SUBURBAN 2007 10.G Owners Manual
[x] Cancel search | Manufacturer: CHEVROLET, Model Year: 2007, Model line: SUBURBAN, Model: CHEVROLET SUBURBAN 2007 10.GPages: 634, PDF Size: 3.18 MB
Page 228 of 634
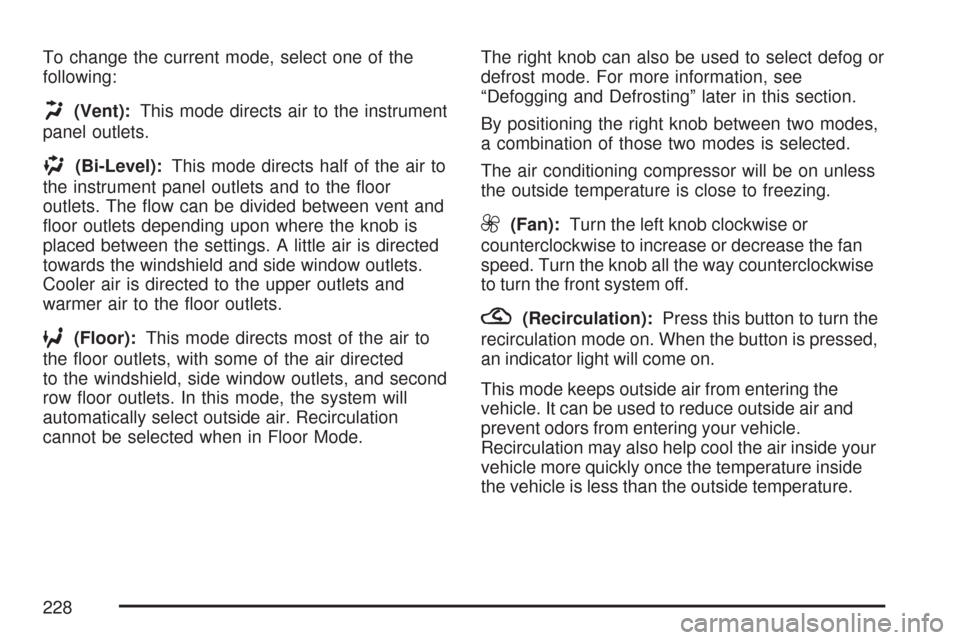
To change the current mode, select one of the
following:
H(Vent):This mode directs air to the instrument
panel outlets.
)(Bi-Level):This mode directs half of the air to
the instrument panel outlets and to the �oor
outlets. The �ow can be divided between vent and
�oor outlets depending upon where the knob is
placed between the settings. A little air is directed
towards the windshield and side window outlets.
Cooler air is directed to the upper outlets and
warmer air to the �oor outlets.
6(Floor):This mode directs most of the air to
the �oor outlets, with some of the air directed
to the windshield, side window outlets, and second
row �oor outlets. In this mode, the system will
automatically select outside air. Recirculation
cannot be selected when in Floor Mode.The right knob can also be used to select defog or
defrost mode. For more information, see
“Defogging and Defrosting” later in this section.
By positioning the right knob between two modes,
a combination of those two modes is selected.
The air conditioning compressor will be on unless
the outside temperature is close to freezing.
9(Fan):Turn the left knob clockwise or
counterclockwise to increase or decrease the fan
speed. Turn the knob all the way counterclockwise
to turn the front system off.
?(Recirculation):Press this button to turn the
recirculation mode on. When the button is pressed,
an indicator light will come on.
This mode keeps outside air from entering the
vehicle. It can be used to reduce outside air and
prevent odors from entering your vehicle.
Recirculation may also help cool the air inside your
vehicle more quickly once the temperature inside
the vehicle is less than the outside temperature.
228
Page 239 of 634
Rear Air Conditioning and Heating
System
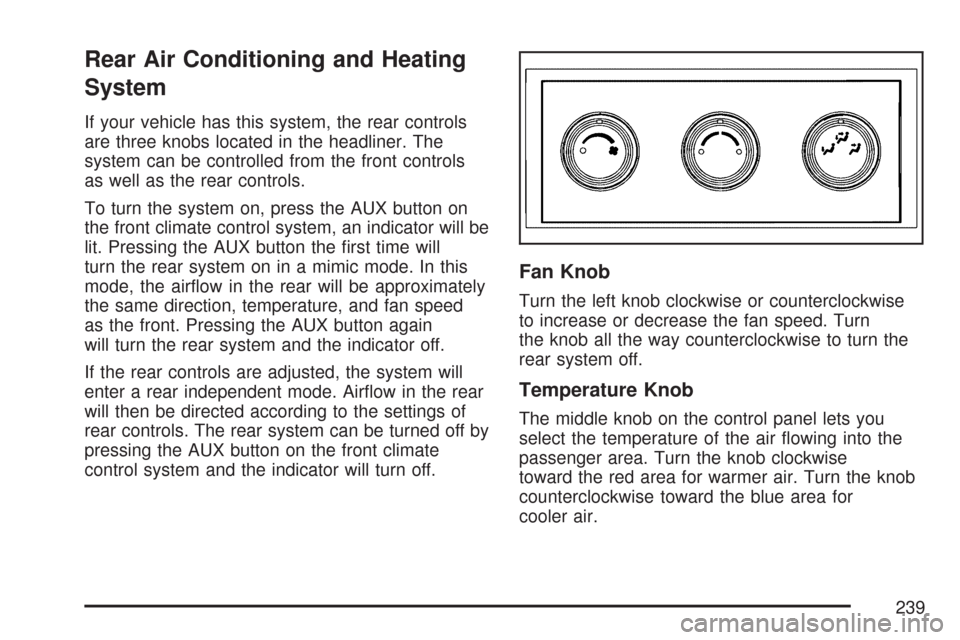
If your vehicle has this system, the rear controls
are three knobs located in the headliner. The
system can be controlled from the front controls
as well as the rear controls.
To turn the system on, press the AUX button on
the front climate control system, an indicator will be
lit. Pressing the AUX button the �rst time will
turn the rear system on in a mimic mode. In this
mode, the air�ow in the rear will be approximately
the same direction, temperature, and fan speed
as the front. Pressing the AUX button again
will turn the rear system and the indicator off.
If the rear controls are adjusted, the system will
enter a rear independent mode. Air�ow in the rear
will then be directed according to the settings of
rear controls. The rear system can be turned off by
pressing the AUX button on the front climate
control system and the indicator will turn off.
Fan Knob
Turn the left knob clockwise or counterclockwise
to increase or decrease the fan speed. Turn
the knob all the way counterclockwise to turn the
rear system off.
Temperature Knob
The middle knob on the control panel lets you
select the temperature of the air �owing into the
passenger area. Turn the knob clockwise
toward the red area for warmer air. Turn the knob
counterclockwise toward the blue area for
cooler air.
239
Page 291 of 634
While your vehicle is parked:
Familiarize yourself with all of its controls.
Familiarize yourself with its operation.
Set up your audio system by presetting your
favorite radio stations, setting the tone, and
adjusting the speakers. Then, when driving
conditions permit, you can tune to your favorite
radio stations using the presets and steering
wheel controls if the vehicle has them.
Notice:Before adding any sound equipment to
your vehicle, such as an audio system, CD
player, CB radio, mobile telephone, or two-way
radio, make sure that it can be added by
checking with your dealer/retailer. Also, check
federal rules covering mobile radio and
telephone units. If sound equipment can be
added, it is very important to do it properly.
Added sound equipment can interfere with the
operation of your vehicle’s engine, radio, or
other systems, and even damage them. Your
vehicle’s systems can interfere with the
operation of sound equipment that has been
added.Your vehicle has a feature called Retained
Accessory Power (RAP). With RAP, the audio
system can be played even after the ignition
is turned off. SeeRetained Accessory Power
(RAP) on page 141for more information.
Setting the Time (MP3 Radio with a
Single CD Player)
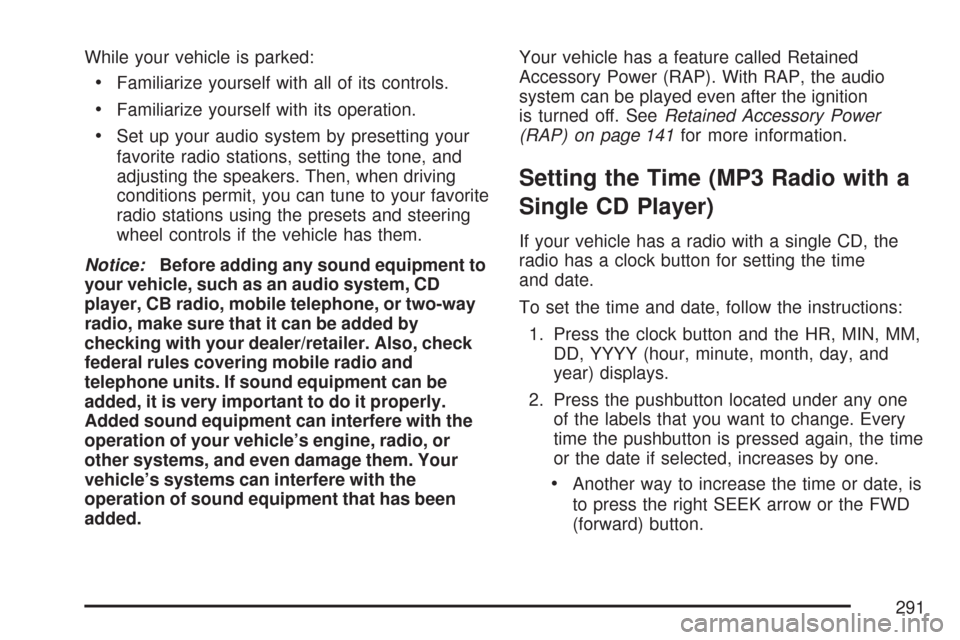
If your vehicle has a radio with a single CD, the
radio has a clock button for setting the time
and date.
To set the time and date, follow the instructions:
1. Press the clock button and the HR, MIN, MM,
DD, YYYY (hour, minute, month, day, and
year) displays.
2. Press the pushbutton located under any one
of the labels that you want to change. Every
time the pushbutton is pressed again, the time
or the date if selected, increases by one.
Another way to increase the time or date, is
to press the right SEEK arrow or the FWD
(forward) button.
291
Page 292 of 634
3. To decrease the time or date, press the left
SEEK arrow or the REV (reverse) button.
You can also turn the tune knob, located on
the upper right side of the radio, to adjust
the selected setting.
Changing the Time and Date Default
Settings
You can change the time default setting from
12 hours to 24 hours or change the date default
setting from month/day/year to day/month/year.
To change the time or date default settings, follow
these instructions:
1. Press the clock button and then the
pushbutton located under the forward arrow
that is currently displayed on the radio screen
until the time 12H (hour) and 24H (hour),
and the date MM/DD (month and day)
and DD/MM (day and month) displays.
2. Press the pushbutton located under the
desired option.
3. Press the clock button again to apply the
selected default, or let the screen time out.
Setting the Time (MP3 Radio with a
CD and DVD Player)
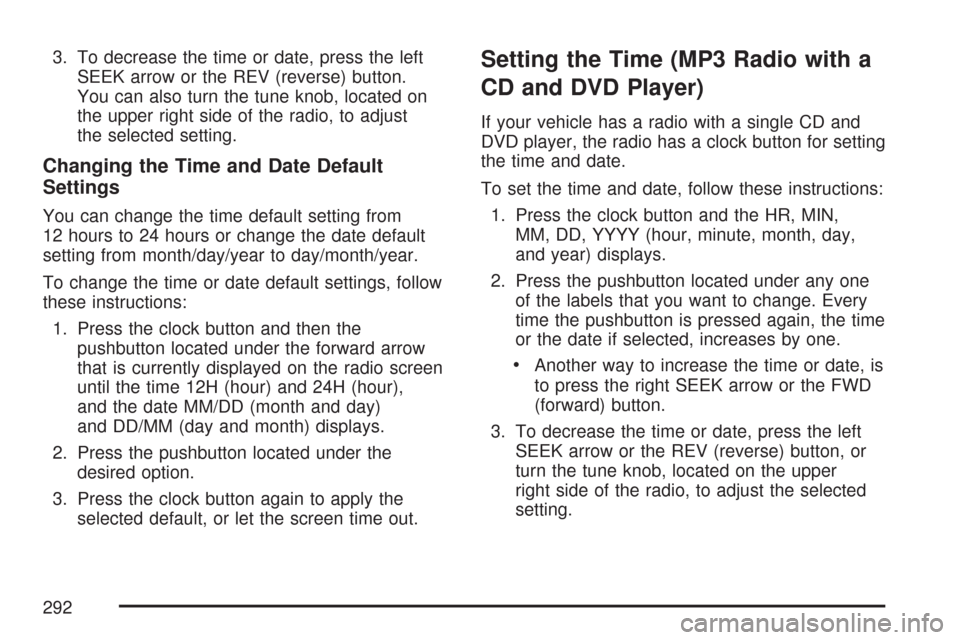
If your vehicle has a radio with a single CD and
DVD player, the radio has a clock button for setting
the time and date.
To set the time and date, follow these instructions:
1. Press the clock button and the HR, MIN,
MM, DD, YYYY (hour, minute, month, day,
and year) displays.
2. Press the pushbutton located under any one
of the labels that you want to change. Every
time the pushbutton is pressed again, the time
or the date if selected, increases by one.
Another way to increase the time or date, is
to press the right SEEK arrow or the FWD
(forward) button.
3. To decrease the time or date, press the left
SEEK arrow or the REV (reverse) button, or
turn the tune knob, located on the upper
right side of the radio, to adjust the selected
setting.
292
Page 293 of 634
Changing the Time and Date Default
Settings
You can change the time default setting from
12 hours to 24 hours or change the date default
setting from month/day/year to day/month/year.
To change the time or date default settings, follow
these instructions:
1. Press the clock button and then the
pushbutton located under the forward arrow
that is currently displayed on the radio screen
until the time 12H (hour) and 24H (hour),
and the date MM/DD (month and day)
and DD/MM (day and month) displays.
2. Press the pushbutton located under the
desired option.
3. Press the clock button again to apply the
selected default, or let the screen time out.
Setting the Time (MP3 Radio with a
Six-Disc CD Player)
If your vehicle has a radio with a six-disc CD
player, the radio has a MENU button instead of
the clock button to set the time and date.
To set the time and date, follow these instructions:
1. Press the MENU button. Once the clock
option displays, press the pushbutton
located under that label. The HR, MIN, MM,
DD, YYYY (hour, minute, month, day,
and year) displays.
2. Press the pushbutton located under any one
of the time or date setting labels that you
want to change. Every time the pushbutton is
pressed again, the time or the date if
selected, increases by one.
Another way to increase the time or date, is
to press the right SEEK arrow or the FWD
(forward) button.
3. To decrease the time or date, press the left
SEEK arrow or the REV (reverse) button.
You can also turn the tune knob, located on
the upper right side of the radio, to adjust
the selected setting.
293
Page 294 of 634
Changing the Time and Date Default
Settings
You can change the time default setting from
12 hours to 24 hours or change the date default
setting from month/day/year to day/month/year.
To change the time or date default settings, follow
these instructions:
1. Press the MENU button. Once the clock
option displays, press the pushbutton
located under the forward arrow that is
currently displayed on the radio screen until
the 12H (hour) and 24H (hour), and the
date MM/DD (month and day) and DD/MM
(day and month) displays.
2. Press the pushbutton located under the
desired option.
3. Press the MENU button again to apply the
selected default, or let the screen time out.
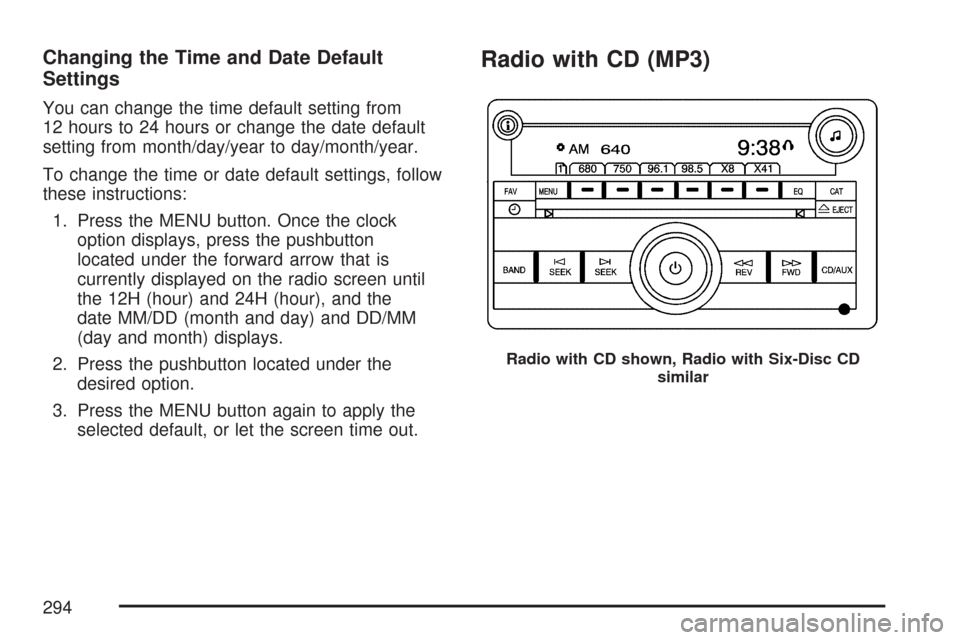
Radio with CD (MP3)
Radio with CD shown, Radio with Six-Disc CD
similar
294
Page 295 of 634
Radio Data System (RDS)
The audio system has a Radio Data System (RDS).
The RDS feature is available for use only on FM
stations that broadcast RDS information. This
system relies upon receiving speci�c information
from these stations and only works when the
information is available. While the radio is tuned to
an FM-RDS station, the station name or call letters
display. In rare cases, a radio station could
broadcast incorrect information that causes the
radio features to work improperly. If this happens,
contact the radio station.
XM™ Satellite Radio Service
XM™ is a satellite radio service that is based in the
48 contiguous United States and Canada. XM™
offers a large variety of coast-to-coast channels
including music, news, sports, talk, traffic/weather
(U.S. subscribers), and children’s programming.
XM™ provides digital quality audio and text
information that includes song title and artist name.
A service fee is required in order to receive the
XM™ service. For more information, contact XM™;
In the U.S. at www.xmradio.com or call
1-800-852-XMXM (9696) or in Canada at
www.xmradio.ca or call 1-877-GET-XMSR
(438-9677).
Playing the Radio
O
(Power/Volume):Press this knob to turn the
system on and off.
Turn this knob clockwise or counterclockwise to
increase or decrease the volume.
Speed Compensated Volume (SCV):The radio
has Speed Compensated Volume (SCV). While
SCV is on, the radio volume automatically adjusts
to compensate for road and wind noise as driving
speed changes. That way, the volume level should
sound about the same as you drive.
To activate SCV:
1. Set the radio volume to the desired level.
2. Press the MENU button to display the radio
setup menu.
3. Press the pushbutton under the AUTO
VOLUM (volume) label on the radio display.
4. Press the pushbutton under the desired Speed
Compensated Volume setting (OFF, Low, Med
(medium), or High) to select the level of radio
volume compensation. The display times out
after approximately 10 seconds. Each higher
setting allows for more radio volume
compensation at faster vehicle speeds.
295
Page 298 of 634
Setting the Tone
(Bass/Midrange/Treble)
BASS/MID/TREB (Bass, Midrange, or
Treble):To adjust bass, midrange, or treble,
press the tune knob until the tone control labels
display. Continue pressing to highlight the desired
label, or press the pushbutton positioned under
the desired label. Turn the tune knob clockwise or
counterclockwise to adjust the highlighted
setting. The highlighted setting can also be
adjusted by pressing either the SEEK, FWD
(forward), or REV (reverse) button until the desired
levels are obtained. If a station’s frequency is
weak or if there is static, decrease the treble.
To quickly adjust bass, midrange, or treble to the
middle position, press the pushbutton positioned
under the BASS, MID, or TREB label for more than
two seconds. A beep sounds and the level
adjusts to the middle position.
To quickly adjust all tone and speaker controls to
the middle position, press the tune knob for
more than two seconds until a beep sounds.EQ (Equalization):Press this button to choose
bass and treble equalization settings designed for
different types of music. The choices are pop,
rock, country, talk, jazz, and classical. Selecting
MANUAL or changing bass or treble, returns
the EQ to the manual bass and treble settings.
Unique EQ settings can be saved for each source.
If the radio has a Bose
®audio system, the EQ
settings are either MANUAL or TALK.
Adjusting the Speakers (Balance/Fade)
BAL/FADE (Balance/Fade):To adjust balance
or fade, press the tune knob until the speaker
control labels display. Continue pressing to
highlight the desired label, or press the pushbutton
positioned under the desired label. Turn the
tune knob clockwise or counterclockwise to adjust
the highlighted setting. The highlighted setting
can also be adjusted by pressing either the SEEK,
FWD (forward), or REV (reverse) button until
the desired levels are obtained.
298
Page 306 of 634
XM™ Satellite Radio Service
XM™ is a satellite radio service that is based in
the 48 contiguous United States and Canada.
XM™ offers a large variety of coast-to-coast
channels including music, news, sports, talk,
traffic/weather (U.S. subscribers), and children’s
programming. XM™ provides digital quality
audio and text information that includes song title
and artist name. A service fee is required in
order to receive the XM™ service. For more
information, contact XM™; In the U.S. at
www.xmradio.com or call 1-800-852-XMXM (9696)
or in Canada at www.xmradio.ca or call
1-877-GET-XMSR (438-9677).
Playing the Radio
O
(Power/Volume):Press this knob to turn the
system on and off.
Turn this knob clockwise or counterclockwise to
increase or decrease the volume.Speed Compensated Volume (SCV):The radio
has Speed Compensated Volume (SCV). While
SCV is on, the radio volume automatically adjusts
to compensate for road and wind noise as
driving speed changes. That way, the volume level
should sound about the same as you drive. To
activate SCV:
1. Set the radio volume to the desired level.
2. Press the MENU button to display the radio
setup menu.
3. Press the pushbutton under the AUTO
VOLUM (volume) label on the radio display.
4. Press the pushbutton under the desired SCV
setting (OFF, Low, Med (medium), or High) to
select the level of radio volume compensation.
The display times out after approximately
10 seconds. Each higher setting allows
for more radio volume compensation at faster
vehicle speeds.
306
Page 308 of 634
Each page of favorites can contain any
combination of AM, FM, or XM™ (if equipped)
stations. To store a station as a favorite, perform
the following steps:
1. Tune to the desired radio station.
2. Press the FAV button to display the page
where you want the station stored.
3. Press and hold one of the six pushbuttons
until a beep sounds. Whenever that
pushbutton is pressed and released, the
station that was set, returns.
4. Repeat the steps for each pushbutton radio
station you want stored as a favorite.
The number of favorites pages can be setup using
the MENU button. To setup the number of
favorites pages, perform the following steps:
1. Press the MENU button to display the radio
setup menu.
2. Press the pushbutton located below the
FAV 1-6 label.
3. Select the desired number of favorites pages
by pressing the pushbutton located below the
displayed page numbers.4. Press the FAV button, or let the menu time
out, to return to the original main radio
screen showing the radio station frequency
labels and to begin the process of
programming your favorites for the chosen
amount of numbered pages.
Setting the Tone
(Bass/Midrange/Treble)
BASS/MID/TREB (Bass, Midrange, or Treble):To
adjust bass, midrange, or treble, press the tune
knob until the tone control labels display. Continue
pressing to highlight the desired label, or press the
pushbutton positioned under the desired label. Turn
the tune knob clockwise or counterclockwise to
adjust the highlighted setting. If a station’s
frequency is weak or if there is static, decrease the
treble.
To quickly adjust bass, midrange, or treble to the
middle position, press the pushbutton positioned
under the BASS, MID, or TREB label for more than
two seconds. A beep sounds and the level adjusts
to the middle position.
To quickly adjust all tone and speaker controls to
the middle position, press the tune knob for more
than two seconds until a beep sounds.
308