radio CHEVROLET SUBURBAN 2007 10.G Owners Manual
[x] Cancel search | Manufacturer: CHEVROLET, Model Year: 2007, Model line: SUBURBAN, Model: CHEVROLET SUBURBAN 2007 10.GPages: 634, PDF Size: 3.18 MB
Page 114 of 634
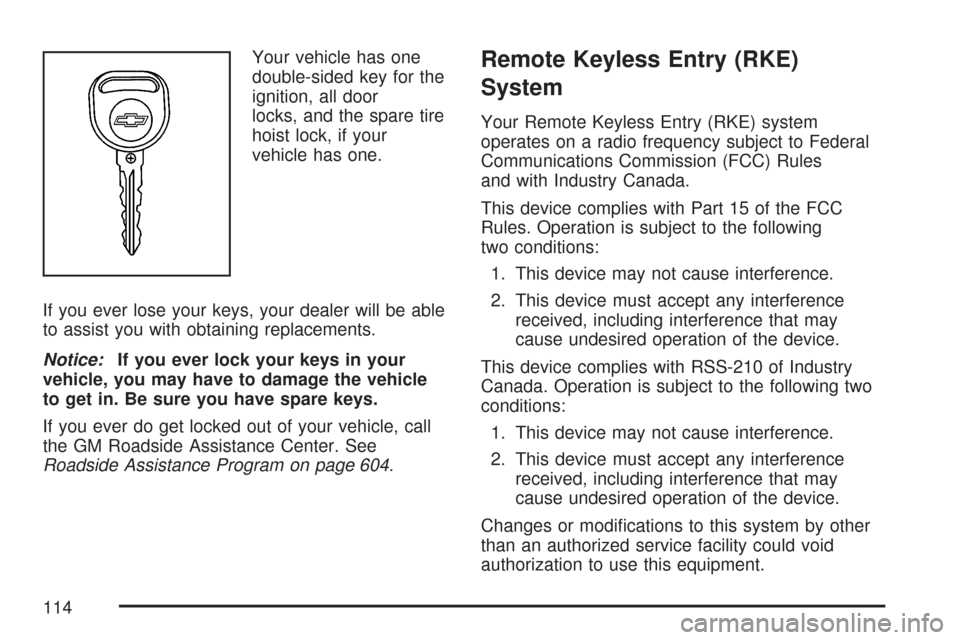
Your vehicle has one
double-sided key for the
ignition, all door
locks, and the spare tire
hoist lock, if your
vehicle has one.
If you ever lose your keys, your dealer will be able
to assist you with obtaining replacements.
Notice:If you ever lock your keys in your
vehicle, you may have to damage the vehicle
to get in. Be sure you have spare keys.
If you ever do get locked out of your vehicle, call
the GM Roadside Assistance Center. See
Roadside Assistance Program on page 604.Remote Keyless Entry (RKE)
System
Your Remote Keyless Entry (RKE) system
operates on a radio frequency subject to Federal
Communications Commission (FCC) Rules
and with Industry Canada.
This device complies with Part 15 of the FCC
Rules. Operation is subject to the following
two conditions:
1. This device may not cause interference.
2. This device must accept any interference
received, including interference that may
cause undesired operation of the device.
This device complies with RSS-210 of Industry
Canada. Operation is subject to the following two
conditions:
1. This device may not cause interference.
2. This device must accept any interference
received, including interference that may
cause undesired operation of the device.
Changes or modi�cations to this system by other
than an authorized service facility could void
authorization to use this equipment.
114
Page 137 of 634
PASS-Key®III+
The PASS-Key®III+ system operates on a radio
frequency subject to Federal Communications
Commission (FCC) Rules and with Industry
Canada.
This device complies with Part 15 of the FCC
Rules. Operation is subject to the following
two conditions:
1. This device may not cause harmful
interference.
2. This device must accept any interference
received, including interference that may cause
undesired operation.
This device complies with RSS-210 of Industry
Canada. Operation is subject to the following
two conditions:
1. This device may not cause interference.
2. This device must accept any interference
received, including interference that may cause
undesired operation of the device.
Changes or modi�cations to this system by other
than an authorized service facility could void
authorization to use this equipment.PASS-Key
®III+ uses a radio frequency
transponder in the key that matches a decoder in
your vehicle.
PASS-Key®III+ Operation
Your vehicle has PASS-Key®III+ (Personalized
Automotive Security System) theft-deterrent
system. PASS-Key
®III+ is a passive
theft-deterrent system. This means you do not
have to do anything special to arm or disarm the
system. It works when you transition the key
to RUN, ACCESSORY or START from the OFF
position.
When the PASS-Key
®III+ system senses that
someone is using the wrong key, it prevents the
vehicle from starting. Anyone using a
trial-and-error method to start the vehicle will be
discouraged because of the high number of
electrical key codes.
If the engine does not start and the security light
on the instrument panel cluster comes on
when trying to start the vehicle, the key may have
a damaged transponder. Turn the ignition off
and try again.
137
Page 140 of 634
Ignition Positions
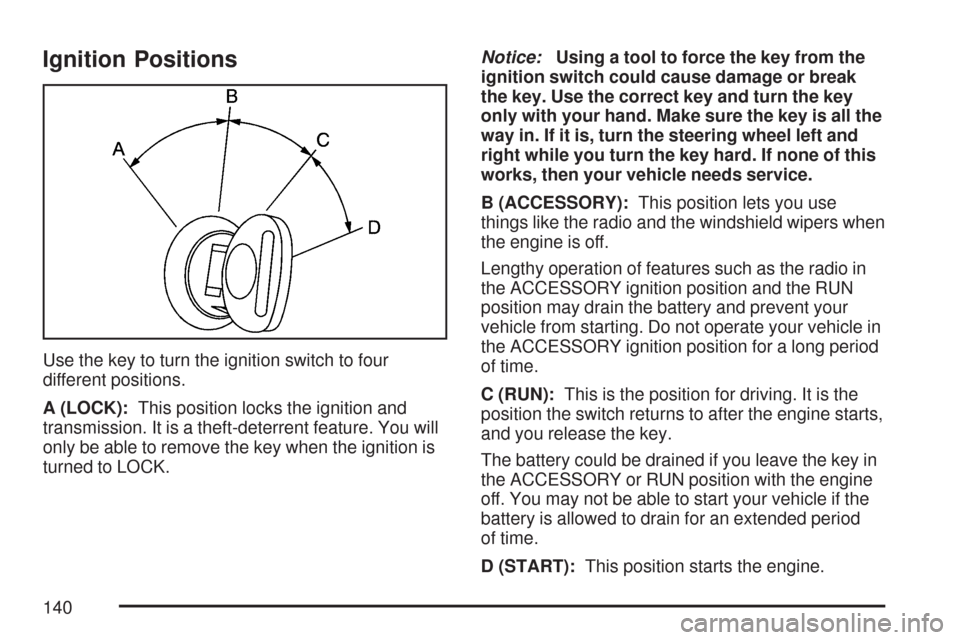
Use the key to turn the ignition switch to four
different positions.
A (LOCK):This position locks the ignition and
transmission. It is a theft-deterrent feature. You will
only be able to remove the key when the ignition is
turned to LOCK.Notice:Using a tool to force the key from the
ignition switch could cause damage or break
the key. Use the correct key and turn the key
only with your hand. Make sure the key is all the
way in. If it is, turn the steering wheel left and
right while you turn the key hard. If none of this
works, then your vehicle needs service.
B (ACCESSORY):This position lets you use
things like the radio and the windshield wipers when
the engine is off.
Lengthy operation of features such as the radio in
the ACCESSORY ignition position and the RUN
position may drain the battery and prevent your
vehicle from starting. Do not operate your vehicle in
the ACCESSORY ignition position for a long period
of time.
C (RUN):This is the position for driving. It is the
position the switch returns to after the engine starts,
and you release the key.
The battery could be drained if you leave the key in
the ACCESSORY or RUN position with the engine
off. You may not be able to start your vehicle if the
battery is allowed to drain for an extended period
of time.
D (START):This position starts the engine.
140
Page 141 of 634
Key In the Ignition
Never leave your vehicle with the keys inside, as it
is an easy target for joy riders or thieves. If you
leave the key in the ignition and park your vehicle, a
chime will sound, when you open the driver’s door.
Always remember to remove your key from the
ignition and take it with you. This will lock your
ignition and transmission. Also, always remember
to lock the doors.
The battery could be drained if you leave the key in
the ignition while your vehicle is parked. You may
not be able to start your vehicle after it has been
parked for an extended period of time.
Retained Accessory Power (RAP)
Your vehicle has a Retained Accessory Power
(RAP) feature which will allow certain features on
your vehicle to continue to work up to 10 minutes
after the ignition key is turned to LOCK.
The radio, power windows, and if the vehicle has a
sunroof and the OnStar
®System, will work when
the ignition key is in RUN or ACCESSORY. Once
the key is turned from RUN to LOCK, the windows
and sunroof will continue to work until a door is
opened. The radio will continue to work for up to
10 minutes or until the driver’s door is opened.
Starting the Engine
To place the transmission in the proper gear:
Move your shift lever to PARK (P) or
NEUTRAL (N). Your engine will not start in
any other position -- this is a safety feature. To
restart when you are already moving, use
NEUTRAL (N) only.
Starting Procedure
1. With your foot off the accelerator pedal, turn
the ignition key to START. When the engine
starts, let go of the key. The idle speed will go
down as your engine gets warm. Do not
race the engine immediately after starting it.
Operate the engine and transmission gently to
allow the oil to warm up and lubricate all
moving parts.
Your vehicle has a Computer-Controlled
Cranking System. This feature assists
in starting the engine and protects
components. If the ignition key is turned to the
START position, and then released when
the engine begins cranking, the engine
will continue cranking for a few seconds or
until the vehicle starts.
141
Page 176 of 634
How OnStar®Service Works
In order to provide you with OnStar®services, your
vehicle’s OnStar®system has the capability of
recording and transmitting vehicle information. This
information is automatically sent to an OnStar
®Call
Center at the time of an OnStar®button press,
Emergency button press or if your airbags or AACN
system deploys. The vehicle information usually
includes your GPS location and, in the event of a
crash, additional information regarding the accident
that your vehicle has been involved in (e.g. the
direction from which your vehicle was hit). When
you use the Virtual Advisor feature of OnStar
®
Hands-Free Calling, your vehicle also sends
OnStar®your GPS location so that we can provide
you with location-based services.
OnStar
®service cannot work unless your vehicle is
in a place where OnStar®has an agreement with a
wireless service provider for service in that area.
OnStar
®service also cannot work unless you are in
a place where the wireless service provider
OnStar
®has hired for that area has coverage,
network capacity and reception when the service is
needed, and technology that is compatible with the
OnStar
®service.Not all services are available everywhere,
particularly in remote or enclosed areas, or at
all times.
OnStar
®service that involves location information
about your vehicle cannot work unless GPS
satellite signals are unobstructed and available in
that place as well.
Your vehicle must have a working electrical system
(including adequate battery power) for the OnStar
®
equipment to operate. There are other problems
OnStar®cannot control that may prevent OnStar®
from providing OnStar®service to you at any
particular time or place. Some examples are
damage to important parts of your vehicle in an
accident, hills, tall buildings, tunnels, weather or
wireless phone network congestion.
Your Responsibility
You may need to increase the volume of your radio
to hear the OnStar®advisor. If the light next to the
OnStar®buttons is red, this means that your system
is not functioning properly and should be checked
by your dealer/retailer. If the light appears clear (no
light is appearing), your OnStar
®subscription has
expired. You can always press the OnStar®button
to con�rm that your OnStar®equipment is active.
176
Page 178 of 634
Universal Home Remote System
The Universal Home Remote System provides a
way to replace up to three hand-held
Radio-Frequency (RF) transmitters used to
activate devices such as garage door openers,
security systems, and home lighting.
This device complies with Part 15 of the FCC
Rules. Operation is subject to the following
two conditions:
1. This device may not cause harmful
interference.
2. This device must accept any interference
received, including interference that may
cause undesired operation.
This device complies with RSS-210 of Industry
Canada. Operation is subject to the following
two conditions:
1. This device may not cause interference.
2. This device must accept any interference
received, including interference that may
cause undesired operation of the device.
Changes or modi�cations to this system by other
than an authorized service facility could void
authorization to use this equipment.
Universal Home Remote System
Operation (With One Triangular LED)
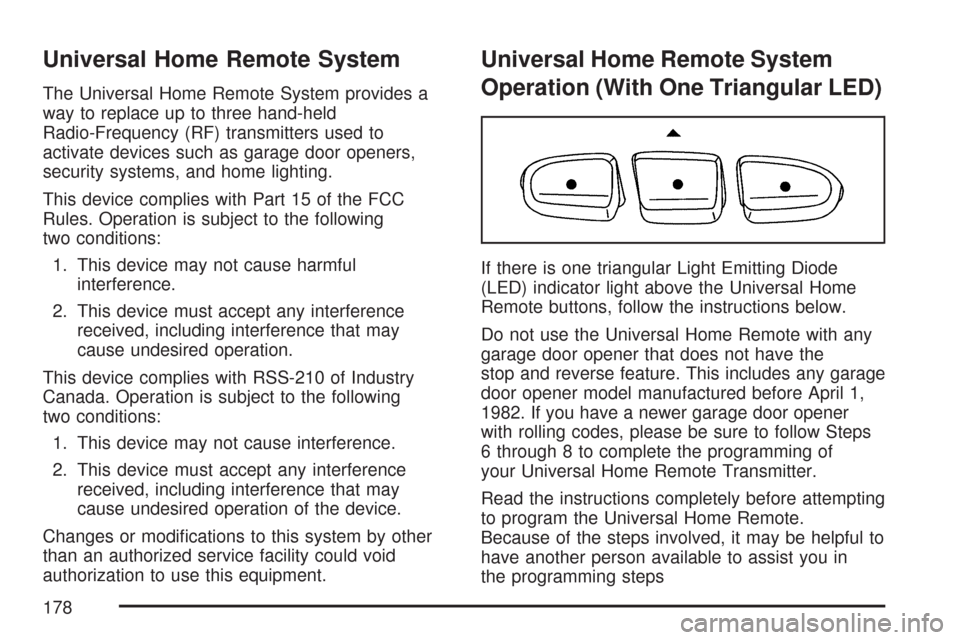
If there is one triangular Light Emitting Diode
(LED) indicator light above the Universal Home
Remote buttons, follow the instructions below.
Do not use the Universal Home Remote with any
garage door opener that does not have the
stop and reverse feature. This includes any garage
door opener model manufactured before April 1,
1982. If you have a newer garage door opener
with rolling codes, please be sure to follow Steps
6 through 8 to complete the programming of
your Universal Home Remote Transmitter.
Read the instructions completely before attempting
to program the Universal Home Remote.
Because of the steps involved, it may be helpful to
have another person available to assist you in
the programming steps
178
Page 179 of 634
Keep the original hand-held transmitter for use in
other vehicles as well as for future Universal
Home Remote programming. It is also
recommended that upon the sale of the vehicle,
the programmed Universal Home Remote buttons
should be erased for security purposes. See
“Erasing Universal Home Remote Buttons” later in
section.
When programming a garage door, it is advised to
park outside of the garage. Be sure that people
and objects are clear of the garage door or
gate operator you are programming.
It is recommended that a new battery be installed
in your hand-held transmitter for quicker and
more accurate transmission of the radio-frequency
signal.Programming the Universal Home
Remote System
Follow these steps to program up to three devices:
1. Press and hold down the two outside Universal
Home Remote buttons, releasing only when
the Universal Home Remote indicator light
begins to �ash, after 20 seconds. Do not hold
down the buttons for longer than 30 seconds
and do not repeat this step to program a
second and/or third hand-held transmitter to
the remaining two Universal Home Remote
buttons.
2. Hold the end of your hand-held transmitter
about 1 to 3 inches (3 to 8 cm) away from the
Universal Home Remote buttons while keeping
the indicator light in view.
3. At the same time, press and hold both the
desired Universal Home Remote button and
the hand-held transmitter button. Do not
release the buttons until Step 4 has been
completed.
Some entry gates and garage door openers
may require you to substitute Step 3 with
the procedure noted in “Gate Operator and
Canadian Programming” later in this section.
179
Page 181 of 634
Gate Operator and Canadian
Programming
Canadian radio-frequency laws require transmitter
signals to time out or quit after several seconds
of transmission. This may not be long enough
for Universal Home Remote to pick up the signal
during programming. Similarly, some U.S. gate
operators are manufactured to time out in
the same manner.
If you live in Canada, or you are having difficulty
programming a gate operator or garage door
opener by using the “Programming Universal
Home Remote” procedures, regardless of where
you live, replace Step 3 under “Programming
Universal Home Remote” with the following:
Continue to press and hold the Universal Home
Remote button while you press and release every
two seconds (cycle) the hand-held transmitter
button until the frequency signal has been
successfully accepted by the Universal Home
Remote. The Universal Home Remote indicator
light will �ash slowly at �rst and then rapidly.
Proceed with Step 4 under “Programming
Universal Home Remote” to complete.
Using Universal Home Remote
Press and hold the appropriate Universal Home
Remote button for at least half of a second.
The indicator light will come on while the signal is
being transmitted.
Erasing Universal Home Remote
Buttons
To erase programming from the three Universal
Home Remote buttons do the following:
1. Press and hold down the two outside buttons
until the indicator light begins to �ash, after
20 seconds. Do not hold the two outside
buttons for longer than 30 seconds.
2. Release both buttons.
The Universal Home Remote is now in the training
(learning) mode and can be programmed at any
time beginning with Step 2 under “Programming
Universal Home Remote” shown earlier in
this section.
Individual buttons cannot be erased, but they can
be reprogrammed. See “Reprogramming a
Single Universal Home Remote Button” following
this section.
181
Page 201 of 634
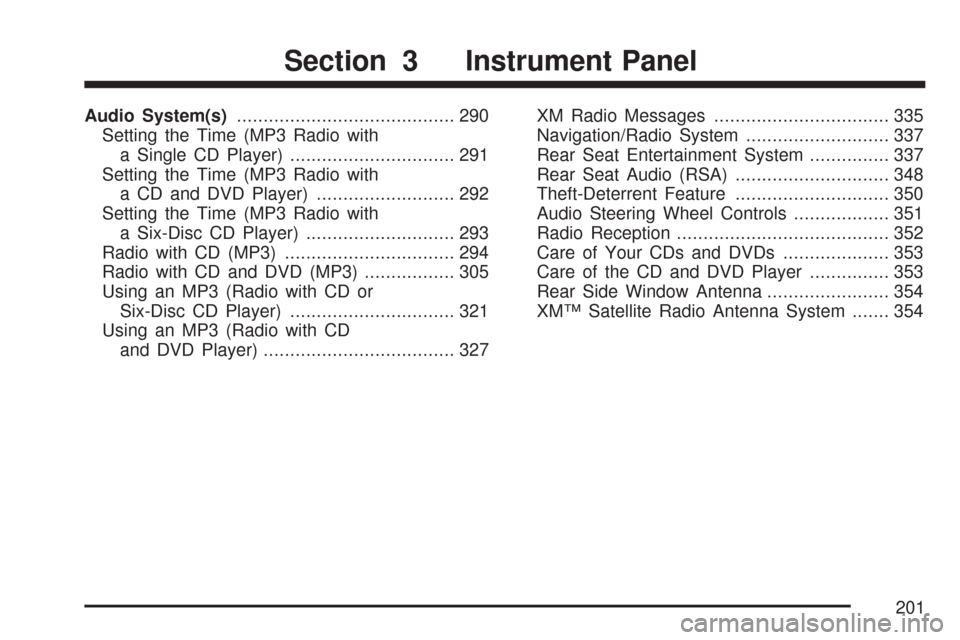
Audio System(s)......................................... 290
Setting the Time (MP3 Radio with
a Single CD Player)............................... 291
Setting the Time (MP3 Radio with
a CD and DVD Player).......................... 292
Setting the Time (MP3 Radio with
a Six-Disc CD Player)............................ 293
Radio with CD (MP3)................................ 294
Radio with CD and DVD (MP3)................. 305
Using an MP3 (Radio with CD or
Six-Disc CD Player)............................... 321
Using an MP3 (Radio with CD
and DVD Player).................................... 327XM Radio Messages ................................. 335
Navigation/Radio System........................... 337
Rear Seat Entertainment System............... 337
Rear Seat Audio (RSA)............................. 348
Theft-Deterrent Feature............................. 350
Audio Steering Wheel Controls.................. 351
Radio Reception........................................ 352
Care of Your CDs and DVDs.................... 353
Care of the CD and DVD Player............... 353
Rear Side Window Antenna....................... 354
XM™ Satellite Radio Antenna System....... 354
Section 3 Instrument Panel
201
Page 217 of 634
Automatic Headlamp System
When it is dark enough outside, the automatic
headlamp system will turn on the headlamps at the
normal brightness, along with the taillamps,
sidemarker, parking lamps, and the instrument
panel lights. The radio lights will also be dim.
To turn off the automatic headlamp system, turn
the exterior lamps switch to the off position
and then release. For vehicles �rst sold in Canada,
the transaxle must be in the PARK (P) position,
before the automatic headlamp system can
be turned off.
The vehicle has a light sensor located on the top
of the instrument panel in the defroster grille
that regulates when the automatic headlamps turn
on. Be sure it is not covered, or the headlamps
will come on whenever the ignition is on.
The system may also turn on the headlamps when
driving through a parking garage, heavy overcast
weather, or a tunnel. This is normal.There is a delay in the transition between the
daytime and nighttime operation of the Daytime
Running Lamps (DRL) and the automatic headlamp
systems so that driving under bridges or bright
overhead street lights does not affect the system.
The DRL and automatic headlamp system will only
be affected when the light sensor detects a change
in lighting lasting longer than the delay.
If you start your vehicle in a dark garage, the
automatic headlamp system will come on
immediately. Once you leave the garage, it will
take approximately one minute for the automatic
headlamp system to change to DRL if it is
bright enough outside. During that delay, your
instrument panel cluster may not be as bright as
usual. Make sure your instrument panel brightness
control is in the full bright position. SeeInstrument
Panel Brightness on page 219.
Your headlamps will also stay on after you exit the
vehicle. You can program this feature using the
Driver Information Center (DIC). SeeDIC Vehicle
Customization (With DIC Buttons) on page 280.
As with any vehicle, you should turn on the regular
headlamp system when needed.
217