seat memory CHEVROLET SUBURBAN 2008 10.G Owners Manual
[x] Cancel search | Manufacturer: CHEVROLET, Model Year: 2008, Model line: SUBURBAN, Model: CHEVROLET SUBURBAN 2008 10.GPages: 538, PDF Size: 2.86 MB
Page 7 of 538
Front Seats......................................................1-2
Manual Seats................................................1-2
Power Seats..................................................1-3
Manual Lumbar..............................................1-4
Power Lumbar ...............................................1-4
Heated Seats.................................................1-5
Memory Seat, Mirrors, and Pedals....................1-6
Reclining Seatbacks........................................1-8
Head Restraints............................................1-10
Center Seat.................................................1-11
Rear Seats.....................................................1-12
Heated Seats...............................................1-12
60/40 Split Bench Seat (Second Row).............1-12
Bucket Seats (Second Row)...........................1-18
Third Row Seat............................................1-25
Safety Belts...................................................1-29
Safety Belts: They Are for Everyone................1-29
How to Wear Safety Belts Properly.................1-34
Lap-Shoulder Belt.........................................1-42
Safety Belt Use During Pregnancy..................1-48
Lap Belt......................................................1-48
Safety Belt Extender.....................................1-50
Child Restraints.............................................1-50
Older Children..............................................1-50
Infants and Young Children............................1-54Child Restraint Systems.................................1-57
Where to Put the Restraint.............................1-59
Lower Anchors and Tethers for
Children (LATCH)......................................1-61
Securing a Child Restraint in a
Rear Seat Position....................................1-69
Securing a Child Restraint in the
Center Front Seat Position..........................1-72
Securing a Child Restraint in the
Right Front Seat Position............................1-72
Airbag System...............................................1-76
Where Are the Airbags?................................1-78
When Should an Airbag In�ate?.....................1-81
What Makes an Airbag In�ate?.......................1-83
How Does an Airbag Restrain?.......................1-83
What Will You See After an
Airbag In�ates?.........................................1-84
Passenger Sensing System............................1-85
Servicing Your Airbag-Equipped Vehicle............1-90
Adding Equipment to Your
Airbag-Equipped Vehicle.............................1-90
Restraint System Check..................................1-92
Checking the Restraint Systems......................1-92
Replacing Restraint System Parts
After a Crash............................................1-93
Section 1 Seats and Restraint Systems
1-1
Page 9 of 538
Power Seats
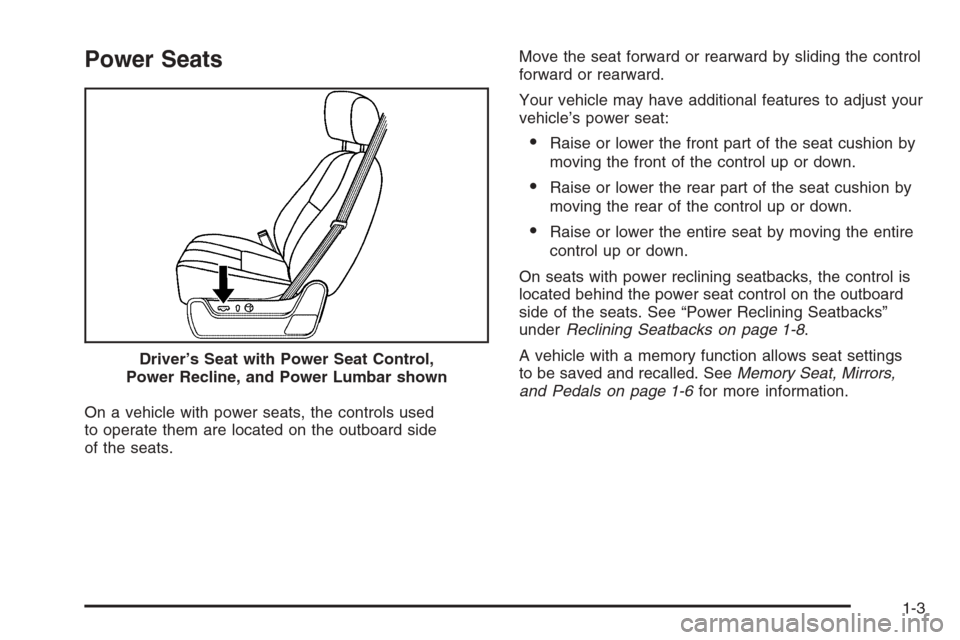
On a vehicle with power seats, the controls used
to operate them are located on the outboard side
of the seats.Move the seat forward or rearward by sliding the control
forward or rearward.
Your vehicle may have additional features to adjust your
vehicle’s power seat:
Raise or lower the front part of the seat cushion by
moving the front of the control up or down.
Raise or lower the rear part of the seat cushion by
moving the rear of the control up or down.
Raise or lower the entire seat by moving the entire
control up or down.
On seats with power reclining seatbacks, the control is
located behind the power seat control on the outboard
side of the seats. See “Power Reclining Seatbacks”
underReclining Seatbacks on page 1-8.
A vehicle with a memory function allows seat settings
to be saved and recalled. SeeMemory Seat, Mirrors,
and Pedals on page 1-6for more information. Driver’s Seat with Power Seat Control,
Power Recline, and Power Lumbar shown
1-3
Page 11 of 538
To raise the height of the lumbar support,
press and hold the top of the control.
To lower the height of the lumbar support,
press and hold the bottom of the control.
Release the control when the lower seatback reaches
the desired level of lumbar support.
Your vehicle may have a memory function which
allows seat settings to be saved and recalled.
SeeMemory Seat, Mirrors, and Pedals on page 1-6
for more information.
Keep in mind that as your seating position changes,
as it may during long trips, so should the position of
your lumbar support. Adjust the seat as needed.
Heated Seats
On vehicles with heated front seats, the controls are
located on the driver’s and passenger’s doors.
I(Heated Seatback):Press to turn on the heated
seatback.
J(Heated Seat and Seatback):Press to turn on
the heated seat and seatback.
The light on the button will come on to indicate that
the feature is working. Press the button to cycle through
the temperature settings of high, medium, and low
and to turn the heat to the seat off. Indicator lights
will show the level of heat selected: three for high,
two for medium, and one for low.
The heated seats will be canceled ten seconds after
the ignition is turned off. To use the heated seat feature
after restarting your vehicle, press the heated seat or
seatback button again.
1-5
Page 12 of 538
Memory Seat, Mirrors, and Pedals
Your vehicle may have the memory package.
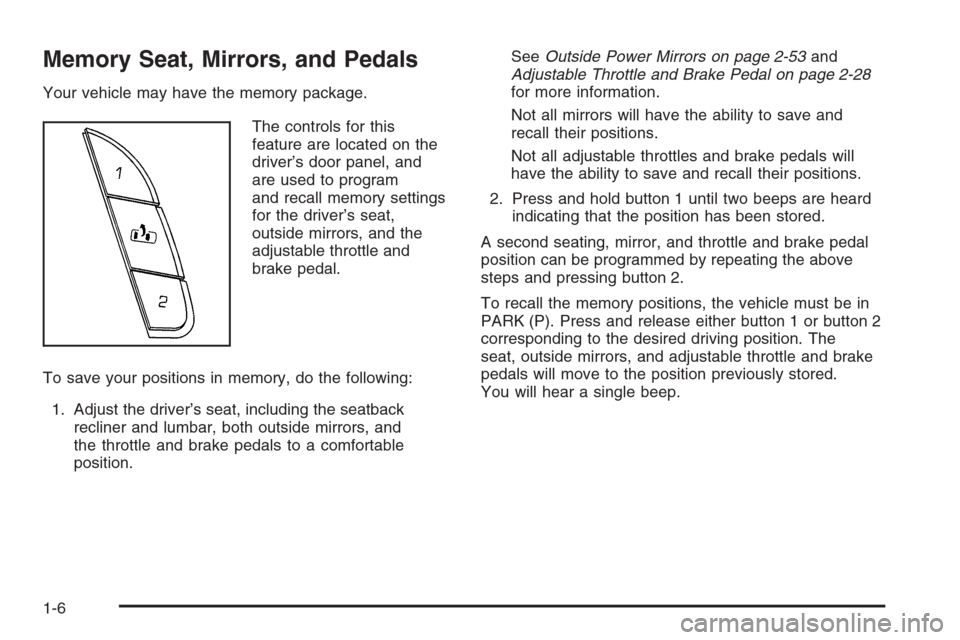
The controls for this
feature are located on the
driver’s door panel, and
are used to program
and recall memory settings
for the driver’s seat,
outside mirrors, and the
adjustable throttle and
brake pedal.
To save your positions in memory, do the following:
1. Adjust the driver’s seat, including the seatback
recliner and lumbar, both outside mirrors, and
the throttle and brake pedals to a comfortable
position.SeeOutside Power Mirrors on page 2-53and
Adjustable Throttle and Brake Pedal on page 2-28
for more information.
Not all mirrors will have the ability to save and
recall their positions.
Not all adjustable throttles and brake pedals will
have the ability to save and recall their positions.
2. Press and hold button 1 until two beeps are heard
indicating that the position has been stored.
A second seating, mirror, and throttle and brake pedal
position can be programmed by repeating the above
steps and pressing button 2.
To recall the memory positions, the vehicle must be in
PARK (P). Press and release either button 1 or button 2
corresponding to the desired driving position. The
seat, outside mirrors, and adjustable throttle and brake
pedals will move to the position previously stored.
You will hear a single beep.
1-6
Page 13 of 538
If you use the remote keyless entry transmitter to enter
your vehicle and the remote recall memory feature
is on, automatic seat, adjustable mirror, and adjustable
pedal movements will occur. See “MEMORY SEAT
RECALL” underDIC Vehicle Customization (With DIC
Buttons) on page 3-67for more information.
To stop recall movement of the memory function at
any time, press one of the power seat controls,
memory buttons, power mirror buttons, or adjustable
pedal switch.
If something has blocked the driver’s seat and/or the
adjustable pedals while recalling a memory position,
the driver’s seat and/or the adjustable pedals recall may
stop working. If this happens, remove the obstruction
and press the appropriate control for the area that
is not responding for two seconds. Try recalling
the memory position again by pressing the appropriate
memory button. If the memory position is still not
recalling, see your dealer for service.Easy Exit Seat
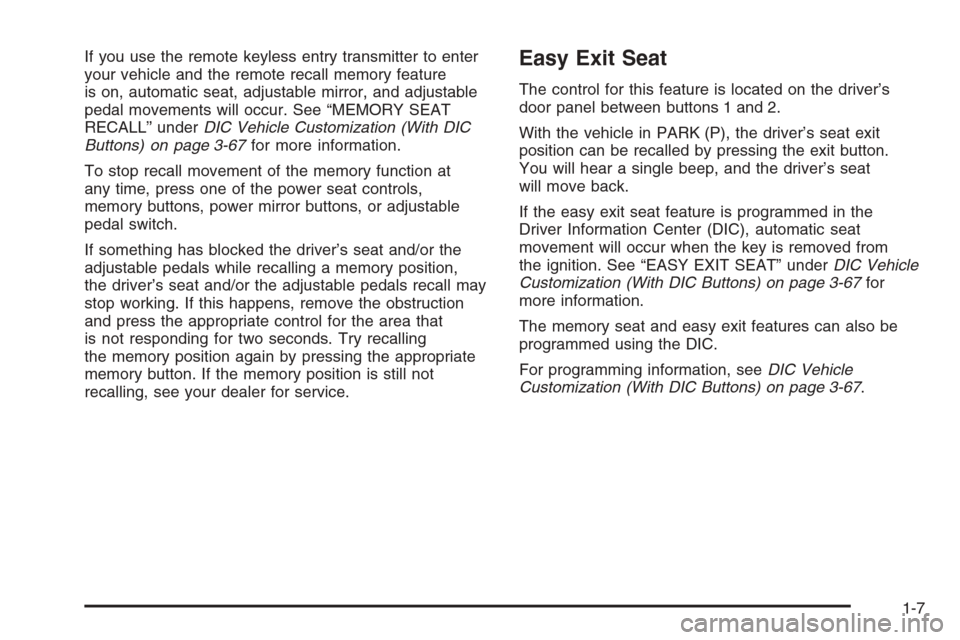
The control for this feature is located on the driver’s
door panel between buttons 1 and 2.
With the vehicle in PARK (P), the driver’s seat exit
position can be recalled by pressing the exit button.
You will hear a single beep, and the driver’s seat
will move back.
If the easy exit seat feature is programmed in the
Driver Information Center (DIC), automatic seat
movement will occur when the key is removed from
the ignition. See “EASY EXIT SEAT” underDIC Vehicle
Customization (With DIC Buttons) on page 3-67for
more information.
The memory seat and easy exit features can also be
programmed using the DIC.
For programming information, seeDIC Vehicle
Customization (With DIC Buttons) on page 3-67.
1-7
Page 128 of 538
Adjustable Throttle and Brake Pedal
On vehicles with this feature, you can change the
position of the throttle and brake pedals.
This feature is designed for shorter drivers, since the
pedals cannot move farther away from the standard
position, but can move toward the driver for better
pedal reach.
No adjustment to the pedals can be made when
the vehicle is in REVERSE (R) or while using the
cruise control.
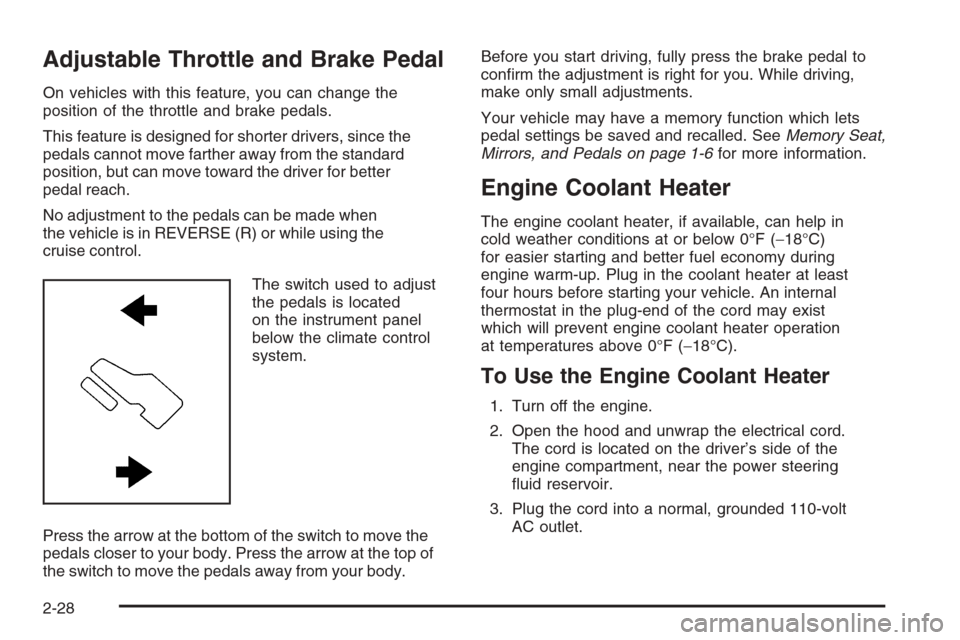
The switch used to adjust
the pedals is located
on the instrument panel
below the climate control
system.
Press the arrow at the bottom of the switch to move the
pedals closer to your body. Press the arrow at the top of
the switch to move the pedals away from your body.Before you start driving, fully press the brake pedal to
con�rm the adjustment is right for you. While driving,
make only small adjustments.
Your vehicle may have a memory function which lets
pedal settings be saved and recalled. SeeMemory Seat,
Mirrors, and Pedals on page 1-6for more information.
Engine Coolant Heater
The engine coolant heater, if available, can help in
cold weather conditions at or below 0°F (−18°C)
for easier starting and better fuel economy during
engine warm-up. Plug in the coolant heater at least
four hours before starting your vehicle. An internal
thermostat in the plug-end of the cord may exist
which will prevent engine coolant heater operation
at temperatures above 0°F (−18°C).
To Use the Engine Coolant Heater
1. Turn off the engine.
2. Open the hood and unwrap the electrical cord.
The cord is located on the driver’s side of the
engine compartment, near the power steering
�uid reservoir.
3. Plug the cord into a normal, grounded 110-volt
AC outlet.
2-28
Page 153 of 538
The vehicle may have outside heated mirrors which
help clear them of condensation, snow, and ice.
<(Rear Window Defogger):Press to turn the heated
mirrors on or off. Only the upper glass of the mirror is
heated. The lower convex part of the mirror is not
heated. Depending on the vehicle’s features, see “Rear
Window Defogger” under,Climate Control System
on page 3-22orDual Automatic Climate Control System
on page 3-24for more information.
The mirror may also have a turn signal arrow that
�ashes in the direction of the turn or lane change.
Outside Power Mirrors
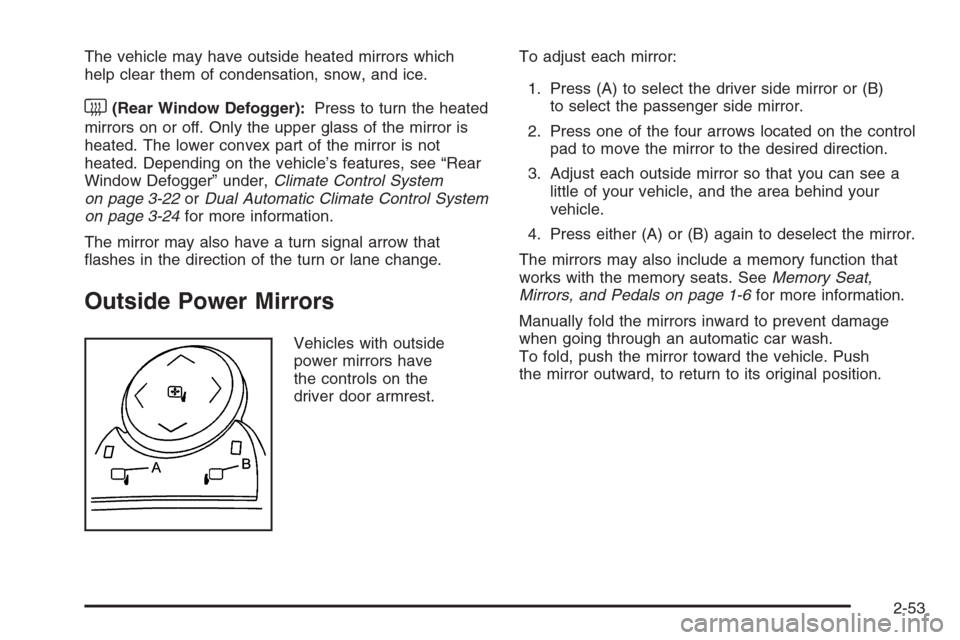
Vehicles with outside
power mirrors have
the controls on the
driver door armrest.To adjust each mirror:
1. Press (A) to select the driver side mirror or (B)
to select the passenger side mirror.
2. Press one of the four arrows located on the control
pad to move the mirror to the desired direction.
3. Adjust each outside mirror so that you can see a
little of your vehicle, and the area behind your
vehicle.
4. Press either (A) or (B) again to deselect the mirror.
The mirrors may also include a memory function that
works with the memory seats. SeeMemory Seat,
Mirrors, and Pedals on page 1-6for more information.
Manually fold the mirrors inward to prevent damage
when going through an automatic car wash.
To fold, push the mirror toward the vehicle. Push
the mirror outward, to return to its original position.
2-53
Page 155 of 538
Ground Illumination Lamps
The mirrors may also include ground illumination lamps
in the base of the mirror. These lamps help to see
the area near the base of the front doors when it is
dark out.
Outside Automatic Dimming Mirror
If your vehicle has this feature, the driver’s outside mirror
will adjust for the glare of headlamps behind you. This
feature is controlled by the on and off settings found
on the electrochromic inside mirror. SeeAutomatic
Dimming Rearview Mirror with OnStar
®, Compass and
Temperature Display on page 2-47orAutomatic
Dimming Rearview Mirror with Compass and
Temperature Display on page 2-49for more information.
Park Tilt Mirrors
Vehicles with the memory package have a passenger
and/or driver mirror that will tilt to a preselected position
when the vehicle is in REVERSE (R). This feature
lets the driver view the curb when parallel parking.
The mirror(s) return to the original position when the
vehicle is shifted out of REVERSE (R), or the ignition
is turned off.Turn this feature on or off through the Driver Information
Center (DIC). SeeDIC Vehicle Customization (With
DIC Buttons) on page 3-67for more information.
Outside Convex Mirror
{CAUTION:
A convex mirror can make things (like other
vehicles) look farther away than they really are.
If you cut too sharply into the right lane, you
could hit a vehicle on your right. Check your
inside mirror or glance over your shoulder
before changing lanes.
The passenger side mirror may have convex glass.
A convex mirror’s surface is curved so more can
be seen from the driver seat.
2-55
Page 230 of 538
If the tire pressure display shows dashes instead of a
value, there may be a problem with your vehicle. If this
consistently occurs, see your dealer/retailer for service.
Engine Hours
Press the vehicle information button until ENGINE
HOURS displays. This display shows the total number
of hours the engine has run.
Relearn Remote Key
This display allows you to match Remote Keyless
Entry (RKE) transmitters to your vehicle. To match
an RKE transmitter to your vehicle:
1. Press the vehicle information button until
PRESS
VTO RELEARN REMOTE KEY displays.
2. Press the set/reset button until REMOTE KEY
LEARNING ACTIVE is displayed.
3. Press and hold the lock and unlock buttons on
the �rst transmitter at the same time for about
15 seconds.
On vehicles with memory recall seats, the
�rst transmitter learned will match driver 1 and the
second will match driver 2.
A chime will sound indicating that the transmitter
is matched.4. To match additional transmitters at this time,
repeat Step 3.
Each vehicle can have a maximum of eight
transmitters matched to it.
5. To exit the programming mode, you must cycle
the key to LOCK/OFF.
Blank Display
This display shows no information.
DIC Operation and Displays
(Without DIC Buttons)
If your vehicle does not have DIC buttons, the
information below explains the operation of this system.
The DIC has different displays which can be accessed
by pressing the trip odometer reset stem located on the
instrument panel cluster. Pressing the trip odometer
reset stem will also turn off, or acknowledge, DIC
messages.
The DIC displays trip and vehicle system information,
and warning messages if a system problem is detected.
If your vehicle does not have DIC buttons, you can
use the trip odometer reset stem to view the following
displays: odometer, engine hours, trip odometer, oil life,
Remote Keyless Entry (RKE) transmitter programming,
and display language.
3-56
Page 232 of 538
Oil Life
To access this display, the vehicle must be in PARK (P).
Press the trip odometer reset stem until OIL LIFE
REMAINING displays. This display shows an estimate
of the oil’s remaining useful life. If you see 99% OIL LIFE
REMAINING on the display, that means 99% of the
current oil life remains. The engine oil life system
will alert you to change the oil on a schedule consistent
with your driving conditions.
When the remaining oil life is low, the CHANGE
ENGINE OIL SOON message will appear on the display.
See “CHANGE ENGINE OIL SOON” underDIC
Warnings and Messages on page 3-59. You should
change the oil as soon as you can. SeeEngine Oil on
page 5-17. In addition to the engine oil life system
monitoring the oil life, additional maintenance is
recommended in the Maintenance Schedule in this
manual. SeeScheduled Maintenance on page 6-4for
more information.
Remember, you must reset the OIL LIFE display
yourself after each oil change. It will not reset itself.
Also, be careful not to reset the OIL LIFE display
accidentally at any time other than when the oil has just
been changed. It cannot be reset accurately until the
next oil change. To reset the engine oil life system,
seeEngine Oil Life System on page 5-20.
Relearn Remote Key
To access this display, the vehicle must be in PARK (P).
This display allows you to match Remote Keyless
Entry (RKE) transmitters to your vehicle. To match an
RKE transmitter to your vehicle:
1. Press the trip odometer reset stem until RELEARN
REMOTE KEY displays.
2. Press and hold the trip odometer reset stem for
three seconds.
The message REMOTE KEY LEARNING ACTIVE
will display.
3. Press and hold the lock and unlock buttons on
the �rst transmitter at the same time for about
15 seconds.
On vehicles with memory recall seats, the �rst
transmitter learned will match driver 1 and
the second will match driver 2.
A chime will sound indicating that the transmitter
is matched.
4. To match additional transmitters at this time,
repeat Step 3.
Each vehicle can have a maximum of eight
transmitters matched to it.
5. To exit the programming mode, you must cycle
the key to LOCK/OFF.
3-58