lock CHEVROLET SUBURBAN 2009 Owners Manual
[x] Cancel search | Manufacturer: CHEVROLET, Model Year: 2009, Model line: SUBURBAN, Model: CHEVROLET SUBURBAN 2009Pages: 578, PDF Size: 3.04 MB
Page 1 of 578
Seats and Restraint System............................. 1-1
Head Restraints
......................................... 1-2
Front Seats
............................................... 1-4
Rear Seats
..............................................1-14
Safety Belts
.............................................1-32
Child Restraints
.......................................1-54
Airbag System
.........................................1-81
Restraint System Check
............................1-98
Features and Controls..................................... 2-1
Keys
........................................................ 2-3
Doors and Locks
......................................2-10
Windows
.................................................2-19
Theft-Deterrent Systems
............................2-22
Starting and Operating Your Vehicle
...........2-26
Mirrors
....................................................2-52
Object Detection Systems
..........................2-56
OnStar
®System
......................................2-68
Universal Home Remote System
................2-71
Storage Areas
.........................................2-78
Sunroof
..................................................2-81Instrument Panel............................................. 3-1
Instrument Panel Overview
.......................... 3-4
Climate Controls
......................................3-22
Warning Lights, Gages, and Indicators
........3-34
Driver Information Center (DIC)
..................3-51
Audio System(s)
.......................................3-83
Driving Your Vehicle....................................... 4-1
Your Driving, the Road, and the Vehicle
....... 4-2
Towing
...................................................4-43
Service and Appearance Care.......................... 5-1
Service
..................................................... 5-3
Fuel
......................................................... 5-5
Checking Things Under the Hood
...............5-12
Rear Axle
...............................................5-49
Four-Wheel Drive
.....................................5-51
Front Axle
...............................................5-52
Headlamp Aiming
.....................................5-53
Bulb Replacement
....................................5-56
Windshield Wiper Blade Replacement
.........5-59
Tires
......................................................5-61
2009 Chevrolet Tahoe, Suburban Owner ManualM
Page 5 of 578
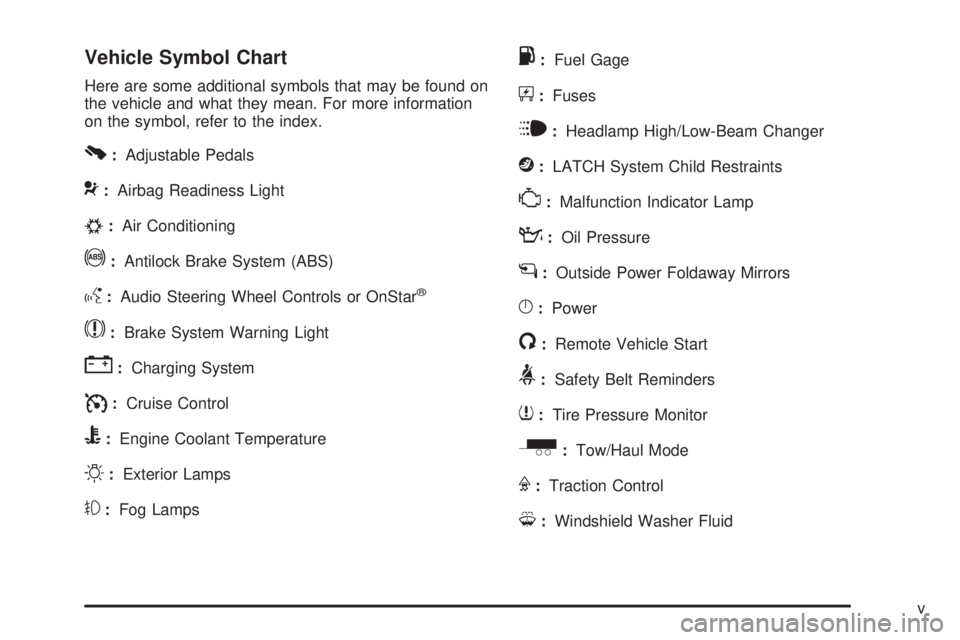
Vehicle Symbol Chart
Here are some additional symbols that may be found on
the vehicle and what they mean. For more information
on the symbol, refer to the index.
0:Adjustable Pedals
9:Airbag Readiness Light
#:Air Conditioning
!:Antilock Brake System (ABS)
g:Audio Steering Wheel Controls or OnStar®
$:Brake System Warning Light
":Charging System
I:Cruise Control
B:Engine Coolant Temperature
O:Exterior Lamps
#:Fog Lamps
.:Fuel Gage
+:Fuses
i:Headlamp High/Low-Beam Changer
j:LATCH System Child Restraints
*:Malfunction Indicator Lamp
::Oil Pressure
g:Outside Power Foldaway Mirrors
}:Power
/:Remote Vehicle Start
>:Safety Belt Reminders
7:Tire Pressure Monitor
_:Tow/Haul Mode
F:Traction Control
M:Windshield Washer Fluid
v
Page 9 of 578
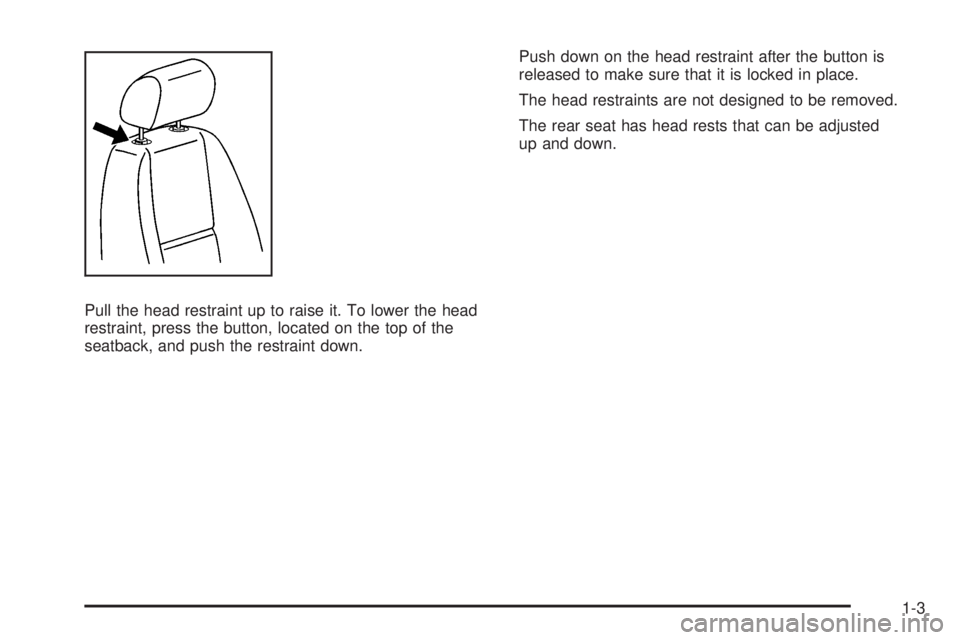
Pull the head restraint up to raise it. To lower the head
restraint, press the button, located on the top of the
seatback, and push the restraint down.Push down on the head restraint after the button is
released to make sure that it is locked in place.
The head restraints are not designed to be removed.
The rear seat has head rests that can be adjusted
up and down.
1-3
Page 10 of 578
Front Seats
Manual Seats
{CAUTION:
You can lose control of the vehicle if you try to
adjust a manual driver’s seat while the vehicle is
moving. The sudden movement could startle and
confuse you, or make you push a pedal when you
do not want to. Adjust the driver’s seat only when
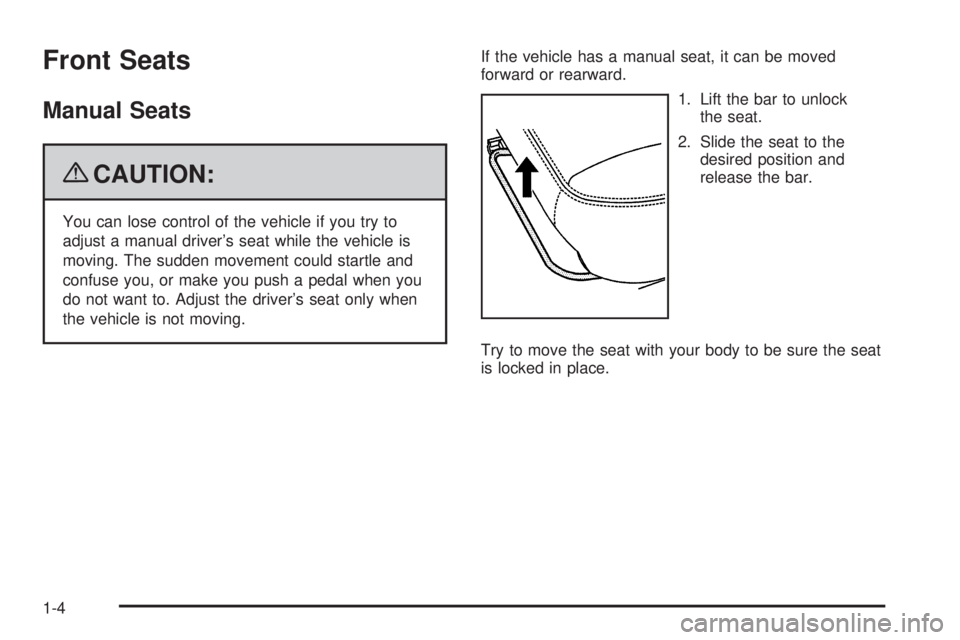
the vehicle is not moving.If the vehicle has a manual seat, it can be moved
forward or rearward.
1. Lift the bar to unlock
the seat.
2. Slide the seat to the
desired position and
release the bar.
Try to move the seat with your body to be sure the seat
is locked in place.
1-4
Page 15 of 578
To save seating positions in memory:
1. Adjust the driver’s seat, including the seatback
recliner and lumbar, both outside mirrors, and
the throttle and brake pedals to a comfortable
position.
SeeOutside Power Mirrors on page 2-53and
Adjustable Throttle and Brake Pedal on page 2-30
for more information.
Not all mirrors, adjustable throttles and brake
pedals, or power lumbar will have the ability to save
and recall their positions.
2. Press and hold button 1 until two beeps sound to
indicate that the position has been stored.
A second seating, lumbar, mirror, and throttle and brake
pedal position can be programmed by repeating the
above steps and pressing button 2.
To recall the memory positions, the vehicle must be in
PARK (P). Press and release either button 1 or button 2
corresponding to the desired driving position. The
seat, outside mirrors, and adjustable throttle and brake
pedals will move to the position previously stored.
You will hear a single beep.If you use the remote keyless entry transmitter to enter
your vehicle and the remote recall memory feature
is on, automatic seat, adjustable mirror, and adjustable
pedal movements will occur. See “MEMORY SEAT
RECALL” underDIC Vehicle Customization (With DIC
Buttons) on page 3-74for more information.
To stop recall movement of the memory function at any
time, press one of the power seat controls, memory
buttons, power mirror buttons, or adjustable pedal
switch.
If something has blocked the driver’s seat and/or the
adjustable pedals while recalling a memory position, the
driver’s seat and/or the adjustable pedals recall may
stop working. If this happens, remove the obstruction
and press the appropriate control for the area that is not
responding for two seconds. Try recalling the memory
position again by pressing the appropriate memory
button. If the memory position is still not recalling, see
your dealer for service.
1-9
Page 16 of 578
Easy Exit Seat
The control for this feature is located on the driver’s
door panel between buttons 1 and 2.
With the vehicle in PARK (P), the driver’s seat exit
position can be recalled by pressing the exit button. You
will hear a single beep, and the driver’s seat will
move back.
If the easy exit seat feature is programmed in the Driver
Information Center (DIC), automatic seat movement
will occur when the key is removed from the ignition.
See “EASY EXIT SEAT” underDIC Vehicle
Customization (With DIC Buttons) on page 3-74for
more information.
The memory seat and easy exit features can also be
programmed using the DIC.
For programming information, seeDIC Vehicle
Customization (With DIC Buttons) on page 3-74.
Reclining Seatbacks
{CAUTION:
You can lose control of the vehicle if you try to
adjust a manual driver’s seat while the vehicle is
moving. The sudden movement could startle and
confuse you, or make you push a pedal when you
do not want to. Adjust the driver’s seat only when
the vehicle is not moving.
{CAUTION:
If either seatback is not locked, it could move
forward in a sudden stop or crash. That could
cause injury to the person sitting there. Always
push and pull on the seatbacks to be sure they
are locked.
1-10
Page 18 of 578
Manual Reclining Seatbacks
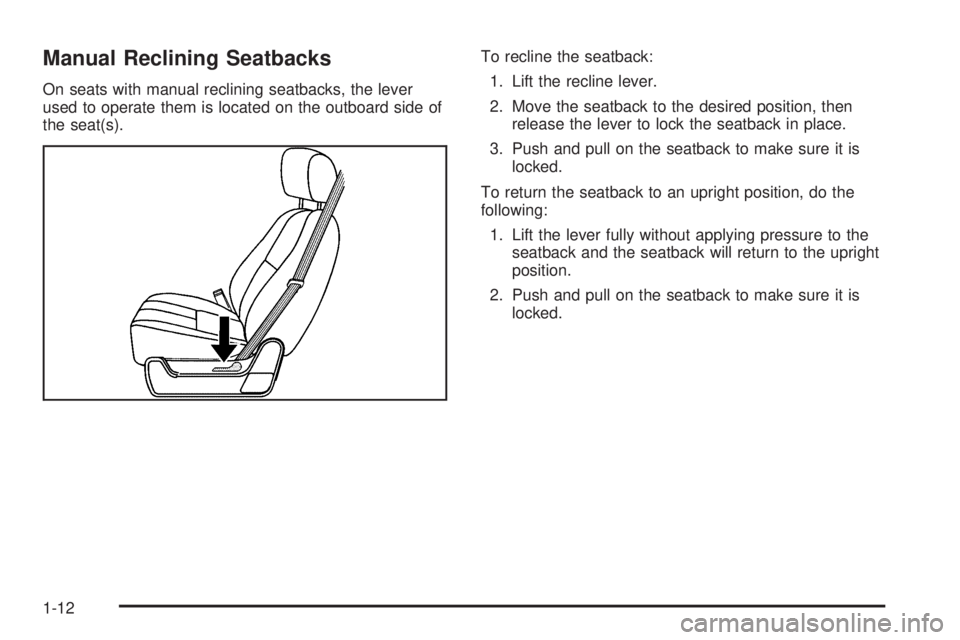
On seats with manual reclining seatbacks, the lever
used to operate them is located on the outboard side of
the seat(s).To recline the seatback:
1. Lift the recline lever.
2. Move the seatback to the desired position, then
release the lever to lock the seatback in place.
3. Push and pull on the seatback to make sure it is
locked.
To return the seatback to an upright position, do the
following:
1. Lift the lever fully without applying pressure to the
seatback and the seatback will return to the upright
position.
2. Push and pull on the seatback to make sure it is
locked.
1-12
Page 22 of 578
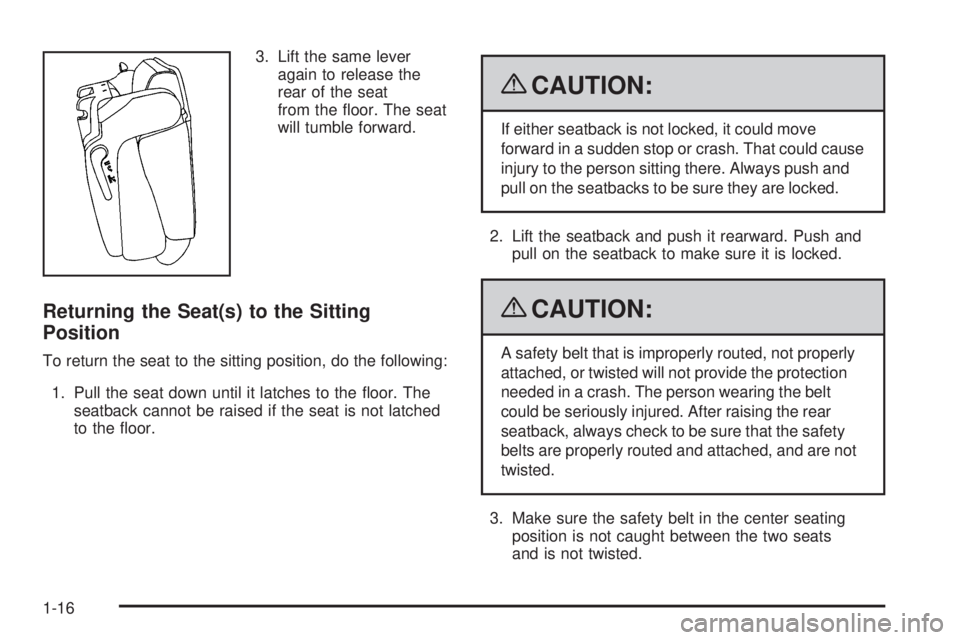
3. Lift the same lever
again to release the
rear of the seat
from the �oor. The seat
will tumble forward.
Returning the Seat(s) to the Sitting
Position
To return the seat to the sitting position, do the following:
1. Pull the seat down until it latches to the �oor. The
seatback cannot be raised if the seat is not latched
to the �oor.
{CAUTION:
If either seatback is not locked, it could move
forward in a sudden stop or crash. That could cause
injury to the person sitting there. Always push and
pull on the seatbacks to be sure they are locked.
2. Lift the seatback and push it rearward. Push and
pull on the seatback to make sure it is locked.
{CAUTION:
A safety belt that is improperly routed, not properly
attached, or twisted will not provide the protection
needed in a crash. The person wearing the belt
could be seriously injured. After raising the rear
seatback, always check to be sure that the safety
belts are properly routed and attached, and are not
twisted.
3. Make sure the safety belt in the center seating
position is not caught between the two seats
and is not twisted.
1-16
Page 23 of 578
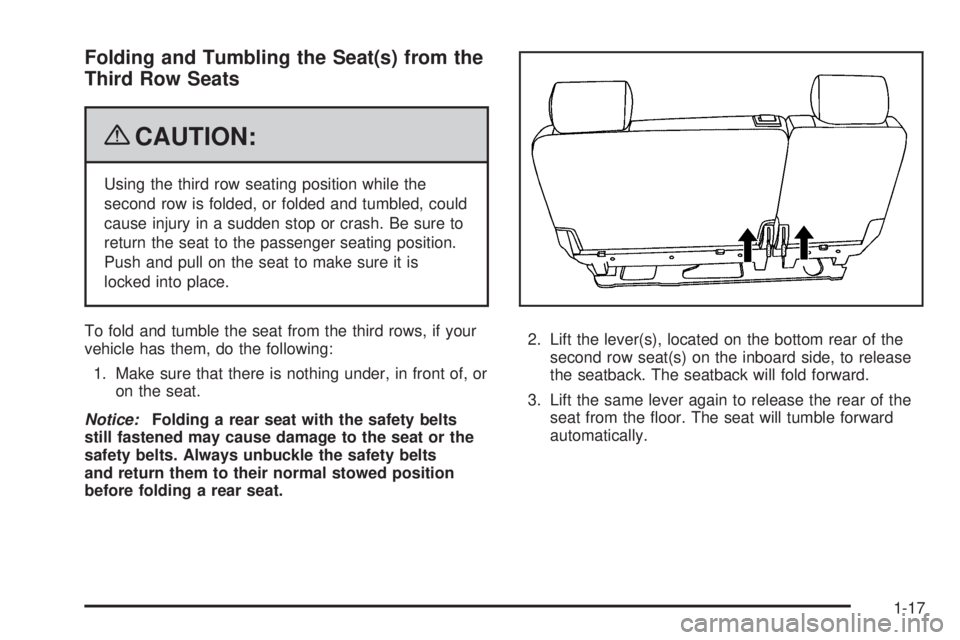
Folding and Tumbling the Seat(s) from the
Third Row Seats
{CAUTION:
Using the third row seating position while the
second row is folded, or folded and tumbled, could
cause injury in a sudden stop or crash. Be sure to
return the seat to the passenger seating position.
Push and pull on the seat to make sure it is
locked into place.
To fold and tumble the seat from the third rows, if your
vehicle has them, do the following:
1. Make sure that there is nothing under, in front of, or
on the seat.
Notice:Folding a rear seat with the safety belts
still fastened may cause damage to the seat or the
safety belts. Always unbuckle the safety belts
and return them to their normal stowed position
before folding a rear seat.2. Lift the lever(s), located on the bottom rear of the
second row seat(s) on the inboard side, to release
the seatback. The seatback will fold forward.
3. Lift the same lever again to release the rear of the
seat from the �oor. The seat will tumble forward
automatically.
1-17
Page 25 of 578
Returning the Seat(s) to the Sitting
Position
To return the seat to the sitting position, do the following:
1. Pull the seat down until it latches to the �oor. The
seatback cannot be raised if the seat is not latched
to the �oor.
{CAUTION:
If either seatback is not locked, it could move
forward in a sudden stop or crash. That could
cause injury to the person sitting there. Always
push and pull on the seatbacks to be sure they
are locked.
2. Lift the seatback and push it rearward. Push and
pull on the seatback to make sure it is locked.
{CAUTION:
A safety belt that is improperly routed, not properly
attached, or twisted will not provide the protection
needed in a crash. The person wearing the belt
could be seriously injured. After raising the rear
seatback, always check to be sure that the safety
belts are properly routed and attached, and are
not twisted.
3. Make sure that the safety belt in the center seating
position is not caught between the two seats and is
not twisted.
1-19