spare tire CHEVROLET SUBURBAN 2009 Owners Manual
[x] Cancel search | Manufacturer: CHEVROLET, Model Year: 2009, Model line: SUBURBAN, Model: CHEVROLET SUBURBAN 2009Pages: 578, PDF Size: 3.04 MB
Page 341 of 578
Off-Road Driving
Vehicles with four-wheel drive can be used for off-road
driving. Vehicles without four-wheel drive and vehicles
with 20-inch tire/wheel assemblies should not be driven
off-road except on a level, solid surface.
The airbag system is designed to work properly under
a wide range of conditions, including off-road usage.
Always wear your safety belt and observe safe driving
speeds, especially on rough terrain.
Drinking and driving can be very dangerous on any road
and this is certainly true for off-road driving. At the very
time you need special alertness and driving skills, your
re�exes, perceptions, and judgment can be affected by
even a small amount of alcohol. You could have a serious
— or even fatal — accident if you drink and drive or ride
with a driver who has been drinking.
Off-roading can be great fun but has some de�nite
hazards. The greatest of these is the terrain itself.
When off-road driving, traffic lanes are not marked,
curves are not banked, and there are no road signs.
Surfaces can be slippery, rough, uphill, or downhill.
Avoid sharp turns and abrupt maneuvers. Failure
to operate the vehicle correctly off-road could result
in loss of vehicle control or vehicle rollover.Off-roading involves some new skills. That is why it is
very important that you read these driving tips and
suggestions to help make off-road driving safer
and more enjoyable.
Before You Go Off-Roading
Have all necessary maintenance and service
work done.
Make sure there is enough fuel, that �uid levels are
where they should be, and that the spare tire, if the
vehicle has one, is fully in�ated.
Be sure to read all the information about
four-wheel-drive vehicles in this manual.
Make sure all underbody shields, if the vehicle has
them, are properly attached.
Know the local laws that apply to off-roading where
you will be driving or check with law enforcement
people in the area.
Be sure to get the necessary permission if you will
be on private land.
If you think you will need some more ground clearance
at the front of your vehicle, you can remove the front
fascia lower air dam. The air dam is held in place by
two bolts and 10 snaps accessible from underneath
the front fascia.
4-13
Page 402 of 578
Tire Pressure Monitor Operation.....................5-73
Tire Inspection and Rotation...........................5-76
When It Is Time for New Tires.......................5-77
Buying New Tires.........................................5-78
Different Size Tires and Wheels......................5-80
Uniform Tire Quality Grading..........................5-81
Wheel Alignment and Tire Balance..................5-82
Wheel Replacement......................................5-82
Tire Chains..................................................5-84
If a Tire Goes Flat........................................5-85
Changing a Flat Tire.....................................5-86
Removing the Spare Tire and Tools................5-87
Removing the Flat Tire and Installing the
Spare Tire................................................5-92
Secondary Latch System...............................5-99
Storing a Flat or Spare Tire and Tools...........5-102
Spare Tire.................................................5-106
Appearance Care..........................................5-106
Interior Cleaning.........................................5-106
Fabric/Carpet..............................................5-108
Leather......................................................5-108
Instrument Panel, Vinyl, and Other Plastic
Surfaces.................................................5-109
Care of Safety Belts....................................5-109
Weatherstrips.............................................5-109Washing Your Vehicle..................................5-110
Cleaning Exterior Lamps/Lenses....................5-110
Finish Care................................................5-110
Windshield, Backglass, and Wiper Blades.......5-111
Aluminum or Chrome-Plated Wheels
and Trim................................................5-112
Tires.........................................................5-112
Sheet Metal Damage...................................5-113
Finish Damage...........................................5-113
Underbody Maintenance...............................5-113
Chemical Paint Spotting..............................
.5-113
Vehicle Identi�cation.....................................5-114
Vehicle Identi�cation Number (VIN)................5-114
Service Parts Identi�cation Label...................5-114
Electrical System..........................................5-114
Add-On Electrical Equipment.........................5-114
Windshield Wiper Fuses...............................5-115
Power Windows and Other Power Options......5-115
Fuses and Circuit Breakers..........................5-115
Instrument Panel Fuse Block........................5-116
Center Instrument Panel Fuse Block..............5-118
Underhood Fuse Block................................5-119
Capacities and Speci�cations........................5-122
Section 5 Service and Appearance Care
5-2
Page 454 of 578
The vehicle should:
Be placed so the headlamps are 25 ft. (7.6 m) from
a light colored wall.
Have all four tires on a level surface which is level
all the way to the wall.
Be placed so it is perpendicular to the wall.
Not have any snow, ice, or mud on it.
Be fully assembled and all other work stopped while
headlamp aiming is being performed.
Be normally loaded with a full tank of fuel and one
person or 160 lbs (75 kg) sitting on the driver seat.
Have tires properly in�ated.
Have the spare tire is in its proper location in the
vehicle.
Headlamp aiming is done with the vehicle’s low-beam
headlamps. The high-beam headlamps will be correctly
aimed if the low-beam headlamps are aimed properly.To adjust the vertical aim:
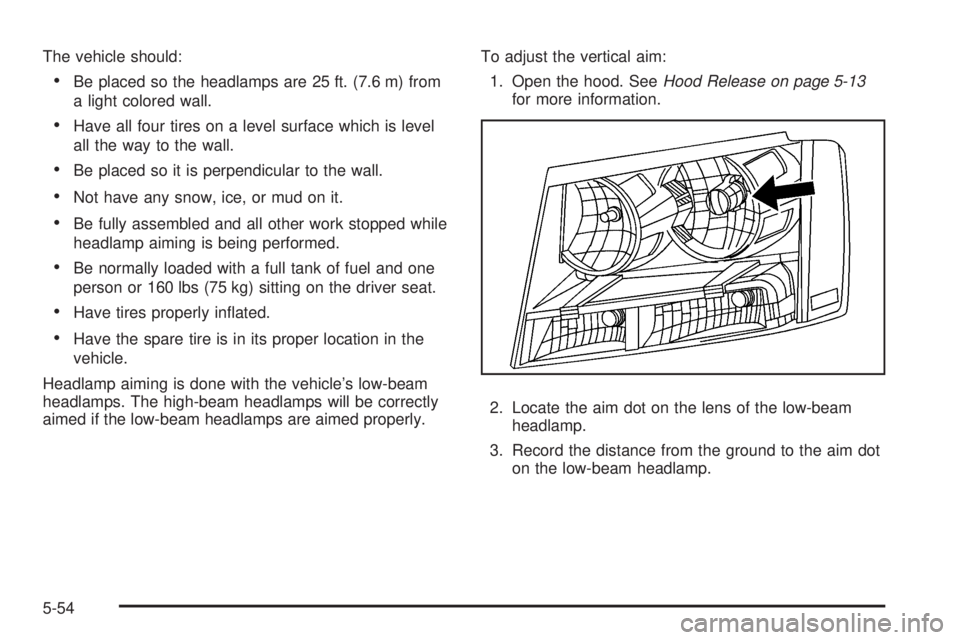
1. Open the hood. SeeHood Release on page 5-13
for more information.
2. Locate the aim dot on the lens of the low-beam
headlamp.
3. Record the distance from the ground to the aim dot
on the low-beam headlamp.
5-54
Page 470 of 578
In�ation - Tire Pressure
If your vehicle is a Two-mode Hybrid, see the
Two-mode Hybrid manual for more information.
Tires need the correct amount of air pressure
to operate effectively.
Notice:Do not let anyone tell you that
under-in�ation or over-in�ation is all right. It is
not. If your tires do not have enough air
(under-in�ation), you can get the following:
Too much �exing
Too much heat
Tire overloading
Premature or irregular wear
Poor handling
Reduced fuel economy
If your tires have too much air (over-in�ation),
you can get the following:
Unusual wear
Poor handling
Rough ride
Needless damage from road hazardsA vehicle speci�c Tire and Loading Information
label is attached to your vehicle. This label shows
your vehicle’s original equipment tires and the
correct in�ation pressures for your tires when they
are cold. The recommended cold tire in�ation
pressure, shown on the label, is the minimum
amount of air pressure needed to support your
vehicle’s maximum load carrying capacity.
For additional information regarding how much
weight your vehicle can carry, and an example of
the Tire and Loading Information label, seeLoading
the Vehicle on page 4-33. How you load your
vehicle affects vehicle handling and ride comfort.
Never load your vehicle with more weight than it
was designed to carry.
When to Check
Check your tires once a month or more.
Do not forget to check the pressure of the spare
tire. SeeSpare Tire on page 5-106for additional
information.
5-70
Page 471 of 578
How to Check
Use a good quality pocket-type gage to check tire
pressure. You cannot tell if your tires are properly
in�ated simply by looking at them. Radial tires
may look properly in�ated even when they are
underin�ated. Check the tire’s in�ation pressure
when the tires are cold. Cold means your vehicle
has been sitting for at least three hours or driven
no more than 1 mile (1.6 km).
Remove the valve cap from the tire valve stem.
Press the tire gage �rmly onto the valve to
get a pressure measurement. If the cold tire
in�ation pressure matches the recommended
pressure on the Tire and Loading Information
label, no further adjustment is necessary. If the
pressure is low, add air until you reach the
recommended amount.
If you over�ll the tire, release air by pushing on
the metal stem in the center of the tire valve.
Recheck the tire pressure with the tire gage.
Be sure to put the valve caps back on the valve
stems. They help prevent leaks by keeping out dirt
and moisture.
Tire Pressure Monitor System
The Tire Pressure Monitor System (TPMS) uses radio
and sensor technology to check tire pressure levels. The
TPMS sensors monitor the air pressure in your vehicle’s
tires and transmit tire pressure readings to a receiver
located in the vehicle.
Each tire, including the spare (if provided), should be
checked monthly when cold and in�ated to the in�ation
pressure recommended by the vehicle manufacturer on
the vehicle placard or tire in�ation pressure label. (If your
vehicle has tires of a different size than the size indicated
on the vehicle placard or tire in�ation pressure label, you
should determine the proper tire in�ation pressure for
those tires.)
As an added safety feature, your vehicle has been
equipped with a tire pressure monitoring system (TPMS)
that illuminates a low tire pressure telltale when one
or more of your tires is signi�cantly under-in�ated.
Accordingly, when the low tire pressure telltale
illuminates, you should stop and check your tires as
soon as possible, and in�ate them to the proper
pressure. Driving on a signi�cantly under-in�ated tire
causes the tire to overheat and can lead to tire failure.
Under-in�ation also reduces fuel efficiency and tire
tread life, and may affect the vehicle’s handling
and stopping ability.
5-71
Page 473 of 578
Tire Pressure Monitor Operation
If your vehicle is a Two-mode Hybrid, see the Two-mode
Hybrid manual for more information.
This vehicle may have a Tire Pressure Monitor System
(TPMS). The TPMS is designed to warn the driver when
a low tire pressure condition exists. TPMS sensors are
mounted onto each tire and wheel assembly, excluding
the spare tire and wheel assembly. The TPMS sensors
monitor the air pressure in the vehicle’s tires and transmit
the tire pressure readings to a receiver located in the
vehicle.
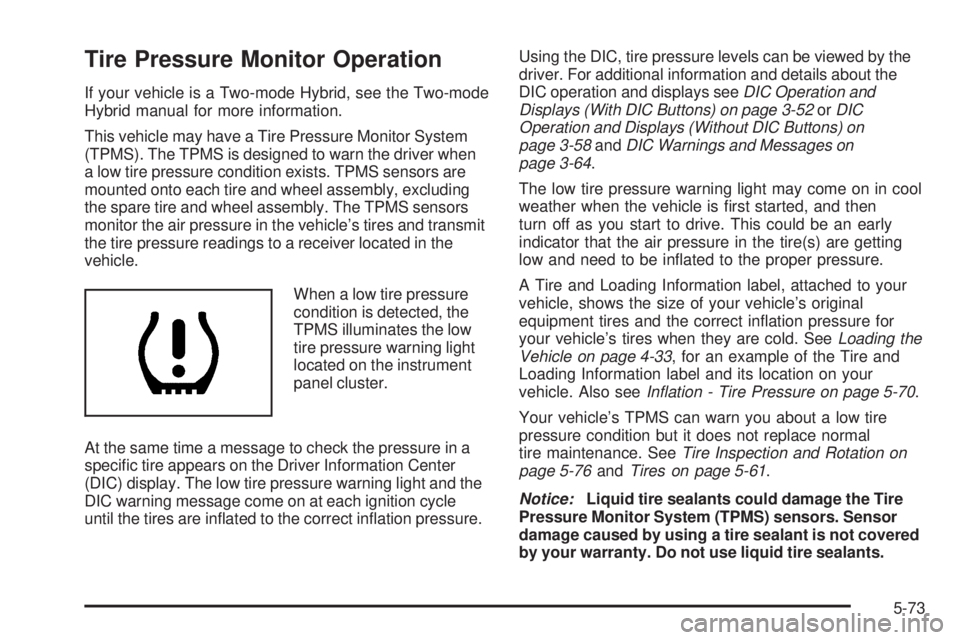
When a low tire pressure
condition is detected, the
TPMS illuminates the low
tire pressure warning light
located on the instrument
panel cluster.
At the same time a message to check the pressure in a
speci�c tire appears on the Driver Information Center
(DIC) display. The low tire pressure warning light and the
DIC warning message come on at each ignition cycle
until the tires are in�ated to the correct in�ation pressure.Using the DIC, tire pressure levels can be viewed by the
driver. For additional information and details about the
DIC operation and displays seeDIC Operation and
Displays (With DIC Buttons) on page 3-52orDIC
Operation and Displays (Without DIC Buttons) on
page 3-58andDIC Warnings and Messages on
page 3-64.
The low tire pressure warning light may come on in cool
weather when the vehicle is �rst started, and then
turn off as you start to drive. This could be an early
indicator that the air pressure in the tire(s) are getting
low and need to be in�ated to the proper pressure.
A Tire and Loading Information label, attached to your
vehicle, shows the size of your vehicle’s original
equipment tires and the correct in�ation pressure for
your vehicle’s tires when they are cold. SeeLoading the
Vehicle on page 4-33, for an example of the Tire and
Loading Information label and its location on your
vehicle. Also seeInflation - Tire Pressure on page 5-70.
Your vehicle’s TPMS can warn you about a low tire
pressure condition but it does not replace normal
tire maintenance. SeeTire Inspection and Rotation on
page 5-76andTires on page 5-61.
Notice:Liquid tire sealants could damage the Tire
Pressure Monitor System (TPMS) sensors. Sensor
damage caused by using a tire sealant is not covered
by your warranty. Do not use liquid tire sealants.
5-73
Page 474 of 578
TPMS Malfunction Light and Message
The TPMS will not function properly if one or more of the
TPMS sensors are missing or inoperable. When the
system detects a malfunction, the low tire warning light
�ashes for about one minute and then stays on for the
remainder of the ignition cycle. A DIC warning message
is also displayed. The low tire warning light and DIC
warning message come on at each ignition cycle until the
problem is corrected. Some of the conditions that can
cause the malfunction light and DIC message to come
on are:
One of the road tires has been replaced with the
spare tire. The spare tire does not have a TPMS
sensor. The TPMS malfunction light and DIC
message should go off once you re-install the road
tire containing the TPMS sensor.
The TPMS sensor matching process was started but
not completed or not completed successfully after
rotating the vehicle’s tires. The DIC message and
TPMS malfunction light should go off once the TPMS
sensor matching process is performed successfully.
See “TPMS Sensor Matching Process” later in this
section.
One or more TPMS sensors are missing or
damaged. The DIC message and the TPMS
malfunction light should go off when the TPMS
sensors are installed and the sensor matching
process is performed successfully. See your dealer/
retailer for service.
Replacement tires or wheels do not match your
vehicle’s original equipment tires or wheels. Tires
and wheels other than those recommended for your
vehicle could prevent the TPMS from functioning
properly. SeeBuying New Tires on page 5-78.
Operating electronic devices or being near facilities
using radio wave frequencies similar to the TPMS
could cause the TPMS sensors to malfunction.
If the TPMS is not functioning it cannot detect or signal a
low tire condition. See your dealer/retailer for service if
the TPMS malfunction light and DIC message comes on
and stays on.
5-74
Page 476 of 578
8. Proceed to the driver side rear tire, and repeat the
procedure in Step 5. The horn sounds two times to
indicate the sensor identi�cation code has been
matched to the driver side rear tire, and the TPMS
sensor matching process is no longer active.
The TIRE LEARNING ACTIVE message on the DIC
display screen goes off.
9. Turn the ignition switch to LOCK/OFF.
10. Set all four tires to the recommended air pressure
level as indicated on the Tire and Loading
Information label.
11. Put the valve caps back on the valve stems.
Tire Inspection and Rotation
We recommend that you regularly inspect your
vehicle’s tires, including the spare tire, for signs of
wear or damage. SeeWhen It Is Time for New
Tires on page 5-77for more information.
Tires should be rotated every 5,000 to 8,000 miles
(8 000 to 13 000 km). SeeScheduled Maintenance
on page 6-4.
The purpose of a regular tire rotation is to achieve
a uniform wear for all tires on the vehicle. This
will ensure that your vehicle continues to perform
most like it did when the tires were new.Any time you notice unusual wear, rotate your
tires as soon as possible and check wheel
alignment. Also check for damaged tires or wheels.
SeeWhen It Is Time for New Tires on page 5-77
andWheel Replacement on page 5-82.
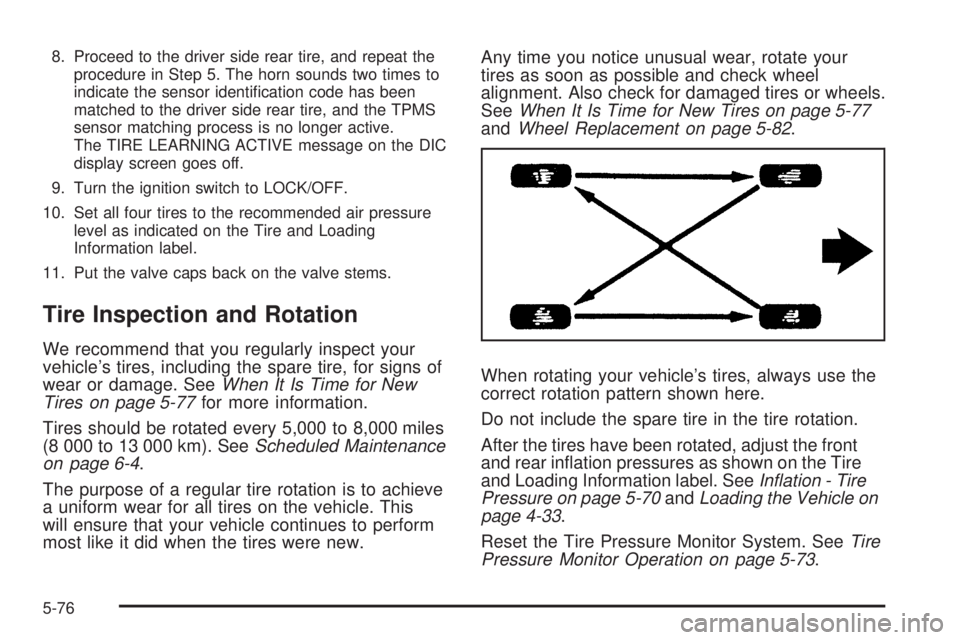
When rotating your vehicle’s tires, always use the
correct rotation pattern shown here.
Do not include the spare tire in the tire rotation.
After the tires have been rotated, adjust the front
and rear in�ation pressures as shown on the Tire
and Loading Information label. SeeInflation - Tire
Pressure on page 5-70andLoading the Vehicle on
page 4-33.
Reset the Tire Pressure Monitor System. SeeTire
Pressure Monitor Operation on page 5-73.
5-76
Page 477 of 578
Make certain that all wheel nuts are properly
tightened. See “Wheel Nut Torque” under
Capacities and Specifications on page 5-122.
{CAUTION:
Rust or dirt on a wheel, or on the parts to
which it is fastened, can make wheel nuts
become loose after time. The wheel could
come off and cause an accident. When you
change a wheel, remove any rust or dirt from
places where the wheel attaches to the
vehicle. In an emergency, you can use a
cloth or a paper towel to do this; but be sure
to use a scraper or wire brush later, if
needed, to get all the rust or dirt off. See
Changing a Flat Tire on page 5-86.
Make sure the spare tire is stored securely. Push,
pull, and then try to rotate or turn the tire. If it
moves, tighten the cable. SeeStoring a Flat or
Spare Tire and Tools on page 5-102.
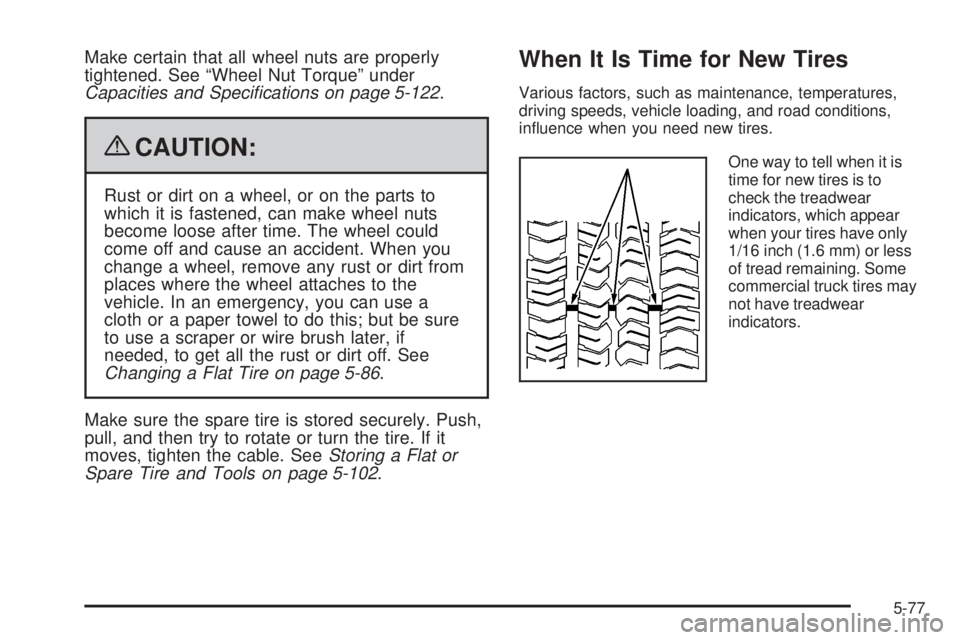
When It Is Time for New Tires
Various factors, such as maintenance, temperatures,
driving speeds, vehicle loading, and road conditions,
in�uence when you need new tires.
One way to tell when it is
time for new tires is to
check the treadwear
indicators, which appear
when your tires have only
1/16 inch (1.6 mm) or less
of tread remaining. Some
commercial truck tires may
not have treadwear
indicators.
5-77
Page 478 of 578
You need new tires if any of the following statements
are true:
You can see the indicators at three or more places
around the tire.
You can see cord or fabric showing through the
tire’s rubber.
The tread or sidewall is cracked, cut, or snagged
deep enough to show cord or fabric.
The tire has a bump, bulge, or split.
The tire has a puncture, cut, or other damage that
cannot be repaired well because of the size or
location of the damage.
The rubber in tires degrades over time, even if they are
not being used. This is also true for the spare tire, if
your vehicle has one. Multiple conditions affect how fast
this aging takes place, including temperatures, loading
conditions, and in�ation pressure maintenance. With
proper care and maintenance tires will typically wear out
before they degrade due to age. If you are unsure
about the need to replace your tires as they get older,
consult the tire manufacturer for more information.
Buying New Tires
GM has developed and matched speci�c tires for your
vehicle. The original equipment tires installed on your
vehicle, when it was new, were designed to meet General
Motors Tire Performance Criteria Speci�cation (TPC
spec) system rating. If you need replacement tires,
GM strongly recommends that you get tires with the
same TPC Spec rating. This way, your vehicle will
continue to have tires that are designed to give the
same performance and vehicle safety, during normal use,
as the original tires.
GM’s exclusive TPC Spec system considers over a
dozen critical speci�cations that impact the overall
performance of your vehicle, including brake system
performance, ride and handling, traction control, and tire
pressure monitoring performance. GM’s TPC Spec
number is molded onto the tire’s sidewall near the tire
size. If the tires have an all-season tread design, the TPC
spec number will be followed by an MS for mud and
snow. SeeTire Sidewall Labeling on page 5-62for
additional information.
GM recommends replacing tires in sets of four. This is
because uniform tread depth on all tires will help keep
your vehicle performing most like it did when the tires
were new. Replacing less than a full set of tires can affect
the braking and handling performance of your vehicle.
SeeTire Inspection and Rotation on page 5-76for
information on proper tire rotation.
5-78