lights CHEVROLET SUBURBAN 2016 11.G Owners Manual
[x] Cancel search | Manufacturer: CHEVROLET, Model Year: 2016, Model line: SUBURBAN, Model: CHEVROLET SUBURBAN 2016 11.GPages: 453, PDF Size: 6.23 MB
Page 20 of 453
Chevrolet Tahoe/Suburban Owner Manual (GMNA-Localizing-U.S./Canada/
Mexico-9159366) - 2016 - crc - 5/19/15
In Brief 19
The exterior lamp control is on the
instrument panel to the left of the
steering wheel.
There are four positions.
O:Turns off the automatic
headlamps and Daytime Running
Lamps (DRL). Turn the headlamp
control to the off position again to
turn the automatic headlamps or
DRL back on.
For vehicles first sold in Canada,
the off position will only work when
the vehicle is shifted into P (Park).
AUTO : Automatically turns on the
headlamps, parking lamps,
taillamps, instrument panel lights,
roof marker lamps (if equipped), and
license plate lamps.
;: Turns on the parking lamps
including all lamps, except the
headlamps.
5: Turns on the headlamps with
the parking lamps and instrument
panel lights.
See:
. Exterior Lamp Controls 0183
. Fog Lamps 0188
Windshield Wiper/Washer
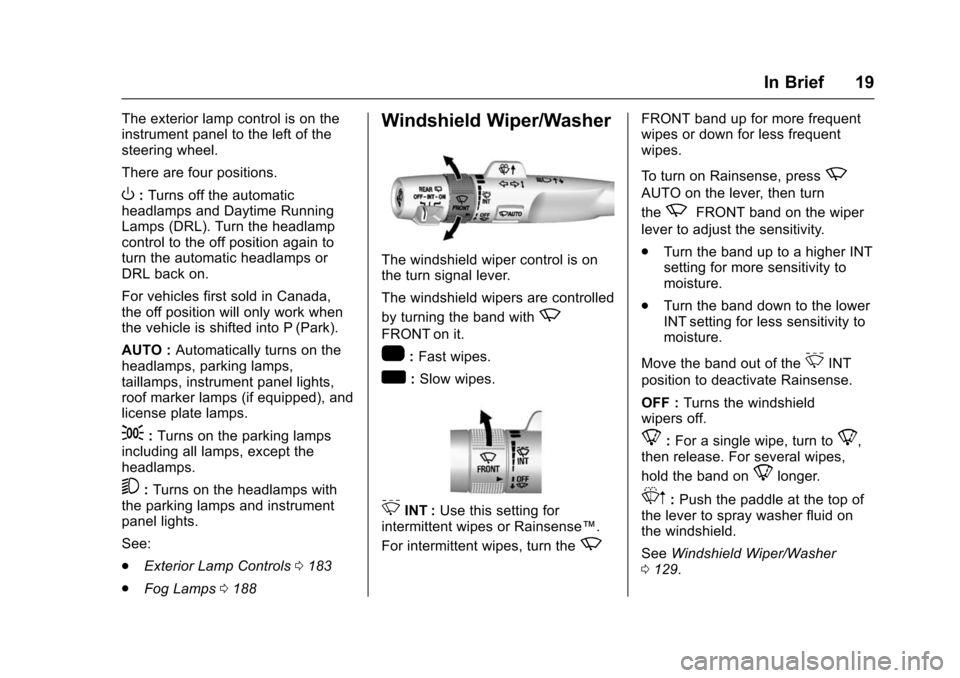
The windshield wiper control is on
the turn signal lever.
The windshield wipers are controlled
by turning the band with
z
FRONT on it.
1:Fast wipes.
w:Slow wipes.
3INT : Use this setting for
intermittent wipes or Rainsense™.
For intermittent wipes, turn the
z
FRONT band up for more frequent
wipes or down for less frequent
wipes.
To turn on Rainsense, press
z
AUTO on the lever, then turn
the
zFRONT band on the wiper
lever to adjust the sensitivity.
. Turn the band up to a higher INT
setting for more sensitivity to
moisture.
. Turn the band down to the lower
INT setting for less sensitivity to
moisture.
Move the band out of the
3INT
position to deactivate Rainsense.
OFF : Turns the windshield
wipers off.
8: For a single wipe, turn to8,
then release. For several wipes,
hold the band on
8longer.
Lm: Push the paddle at the top of
the lever to spray washer fluid on
the windshield.
See Windshield Wiper/Washer
0 129.
Page 52 of 453
Chevrolet Tahoe/Suburban Owner Manual (GMNA-Localizing-U.S./Canada/
Mexico-9159366) - 2016 - crc - 5/19/15
Keys, Doors, and Windows 51
Caution
Splashing water may cause the
liftgate to open. Keep the RKE
transmitter away from the rear
bumper detection area or turn the
liftgate mode to OFF when
cleaning or working near the rear
bumper to avoid accidental
opening.
. Do not sweep your foot side
to side.
. Do not keep your foot under the
bumper; the liftgate will not
activate.
. Do not touch the liftgate until it
has stopped moving.
. This feature may be temporarily
disabled under some conditions.
If the liftgate does not respond to
the kick, open or close the
liftgate by another method or
start the vehicle. The feature will
be re-enabled. When closing the liftgate using this
feature, there will be a short delay.
The rear lights will flash and a
chime will sound. Step away from
the gate before it starts moving.
Power Assist Steps
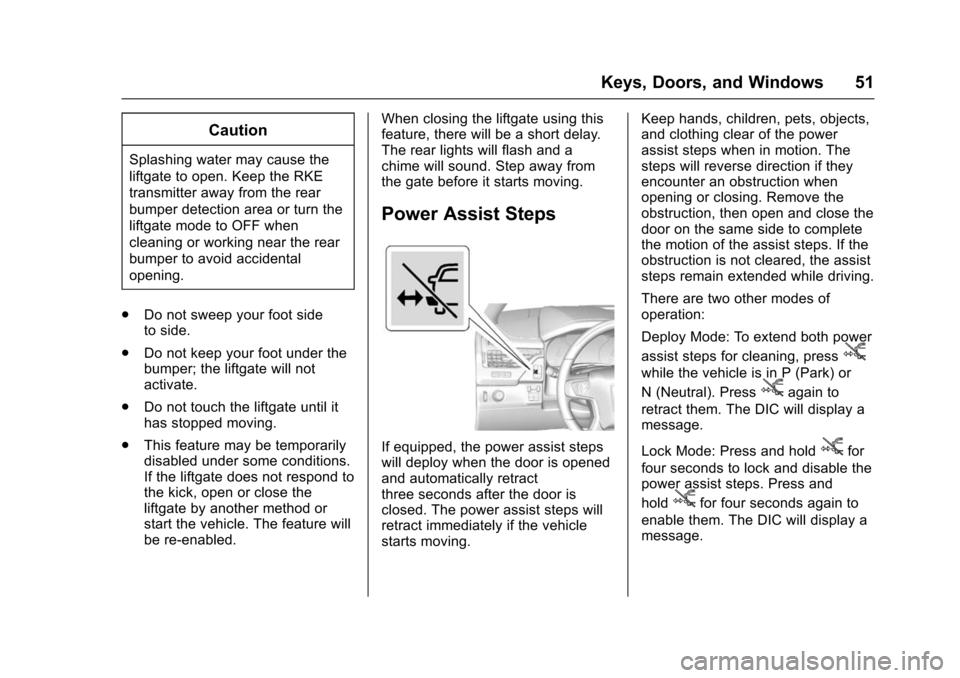
If equipped, the power assist steps
will deploy when the door is opened
and automatically retract
three seconds after the door is
closed. The power assist steps will
retract immediately if the vehicle
starts moving. Keep hands, children, pets, objects,
and clothing clear of the power
assist steps when in motion. The
steps will reverse direction if they
encounter an obstruction when
opening or closing. Remove the
obstruction, then open and close the
door on the same side to complete
the motion of the assist steps. If the
obstruction is not cleared, the assist
steps remain extended while driving.
There are two other modes of
operation:
Deploy Mode: To extend both power
assist steps for cleaning, press
j
while the vehicle is in P (Park) or
N (Neutral). Press
jagain to
retract them. The DIC will display a
message.
Lock Mode: Press and hold
jfor
four seconds to lock and disable the
power assist steps. Press and
hold
jfor four seconds again to
enable them. The DIC will display a
message.
Page 53 of 453
Chevrolet Tahoe/Suburban Owner Manual (GMNA-Localizing-U.S./Canada/
Mexico-9159366) - 2016 - crc - 5/19/15
52 Keys, Doors, and Windows
Vehicle Security
This vehicle has theft-deterrent
features; however, they do not make
the vehicle impossible to steal.
Vehicle Alarm System
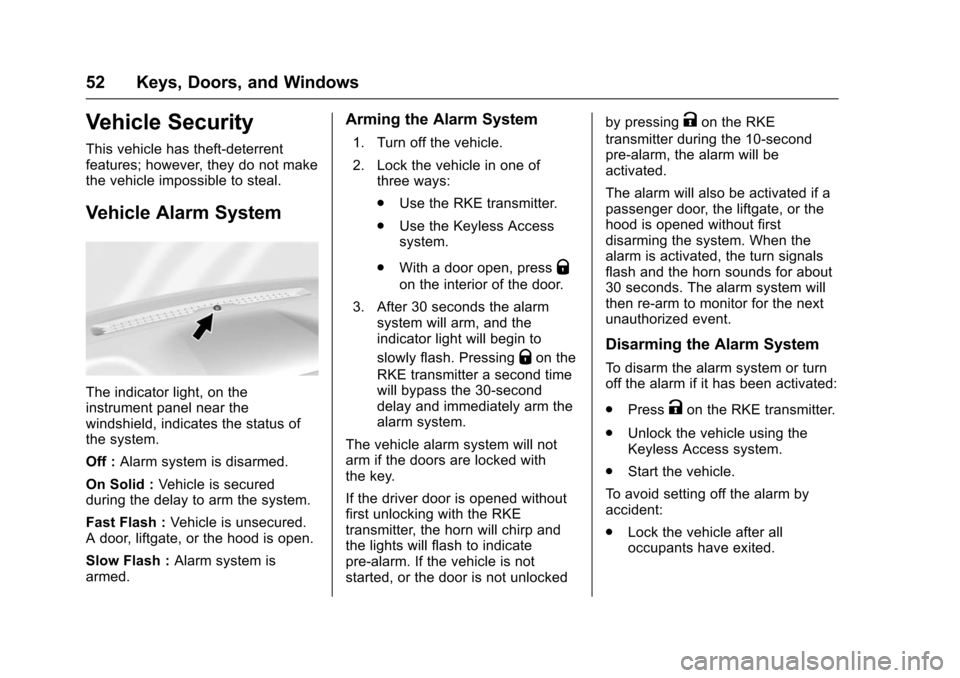
The indicator light, on the
instrument panel near the
windshield, indicates the status of
the system.
Off :Alarm system is disarmed.
On Solid : Vehicle is secured
during the delay to arm the system.
Fast Flash : Vehicle is unsecured.
A door, liftgate, or the hood is open.
Slow Flash : Alarm system is
armed.
Arming the Alarm System
1. Turn off the vehicle.
2. Lock the vehicle in one of three ways:
.Use the RKE transmitter.
. Use the Keyless Access
system.
. With a door open, press
Q
on the interior of the door.
3. After 30 seconds the alarm system will arm, and the
indicator light will begin to
slowly flash. Pressing
Qon the
RKE transmitter a second time
will bypass the 30-second
delay and immediately arm the
alarm system.
The vehicle alarm system will not
arm if the doors are locked with
the key.
If the driver door is opened without
first unlocking with the RKE
transmitter, the horn will chirp and
the lights will flash to indicate
pre-alarm. If the vehicle is not
started, or the door is not unlocked by pressing
Kon the RKE
transmitter during the 10-second
pre-alarm, the alarm will be
activated.
The alarm will also be activated if a
passenger door, the liftgate, or the
hood is opened without first
disarming the system. When the
alarm is activated, the turn signals
flash and the horn sounds for about
30 seconds. The alarm system will
then re-arm to monitor for the next
unauthorized event.
Disarming the Alarm System
To disarm the alarm system or turn
off the alarm if it has been activated:
. Press
Kon the RKE transmitter.
. Unlock the vehicle using the
Keyless Access system.
. Start the vehicle.
To avoid setting off the alarm by
accident:
. Lock the vehicle after all
occupants have exited.
Page 72 of 453
Chevrolet Tahoe/Suburban Owner Manual (GMNA-Localizing-U.S./Canada/
Mexico-9159366) - 2016 - crc - 5/19/15
Seats and Restraints 71
Press the button once for the
highest setting. With each press of
the button, the seat will change to
the next lower setting, and then to
the off setting. The indicator lights
next to the buttons indicate three for
the highest setting and one for the
lowest. If the heated seats are on
high for an extended time, their level
may automatically be lowered.
The passenger seat may take
longer to heat up.
Remote Start Auto Heated and
Cooled Seats
During a remote start, the heated or
cooled seats can be turned on
automatically. When it is cold
outside, the heated seats turn on,
and when it is hot outside the
cooled seats turn on. The heated or
cooled seats are canceled when the
ignition is turned on. Press the
heated or cooled seat button to use
the heated or cooled seats after the
vehicle is started.The heated or cooled seat indicator
lights do not turn on during a remote
start.
The temperature performance of an
unoccupied seat may be reduced.
This is normal.
The heated or cooled seats will not
turn on during a remote start unless
they are enabled in the vehicle
personalization menu. See
Remote
Vehicle Start 043 and Vehicle
Personalization 0173.Rear Seats
Heated Rear Seats
{Warning
If you cannot feel temperature
change or pain to the skin, the
seat heater may cause burns.
See the Warning under Heated
and Cooled Front Seats 070.
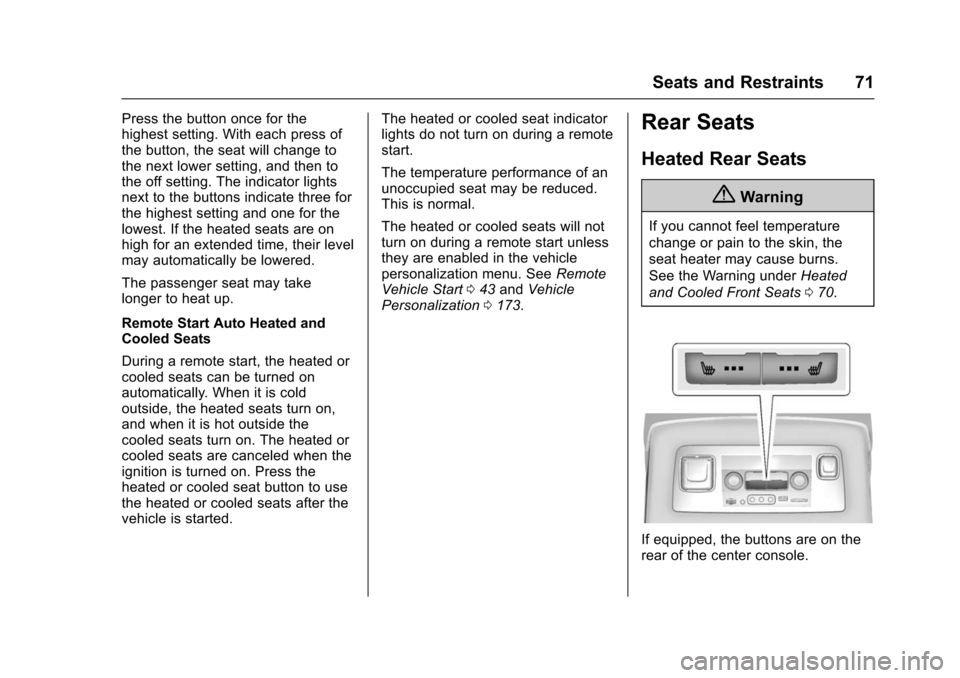
If equipped, the buttons are on the
rear of the center console.
Page 73 of 453
Chevrolet Tahoe/Suburban Owner Manual (GMNA-Localizing-U.S./Canada/
Mexico-9159366) - 2016 - crc - 5/19/15
72 Seats and Restraints
PressMorLto heat the left
outboard or right outboard seat
cushion.
Press the button once for the
highest setting. With each press of
the button, the heated seat changes
to the next lower setting, and then
the off setting. Indicator lights on the
button show the setting: three for
high, two for medium, and one
for low.
If heated seats are on high for an
extended time, their level may
automatically be lowered.
Second Row Seats
Reclining Seatbacks
To recline the seatback:
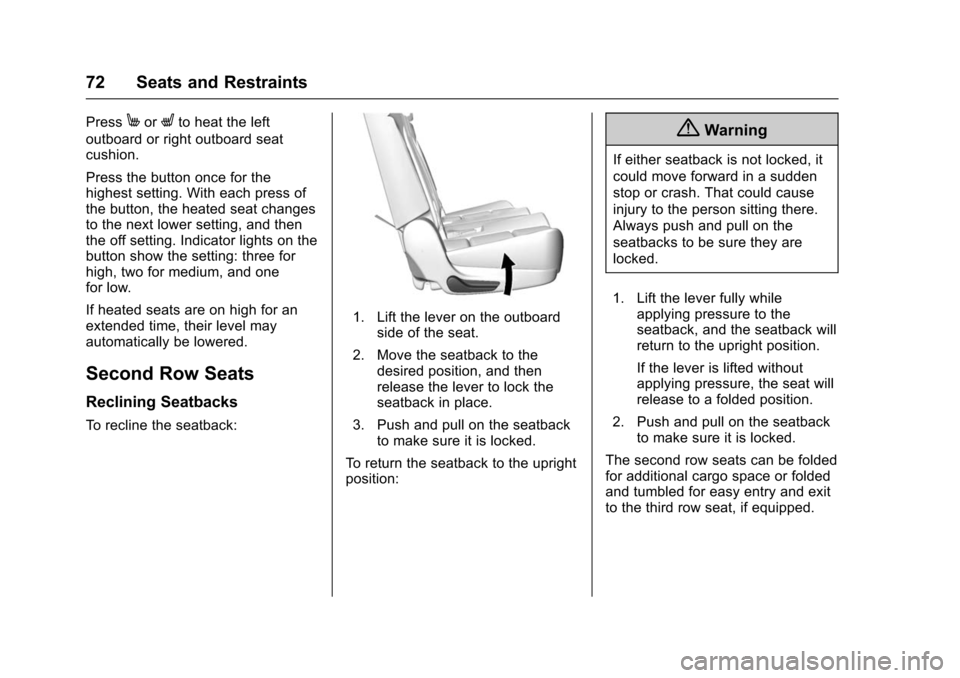
1. Lift the lever on the outboard side of the seat.
2. Move the seatback to the desired position, and then
release the lever to lock the
seatback in place.
3. Push and pull on the seatback to make sure it is locked.
To return the seatback to the upright
position:
{Warning
If either seatback is not locked, it
could move forward in a sudden
stop or crash. That could cause
injury to the person sitting there.
Always push and pull on the
seatbacks to be sure they are
locked.
1. Lift the lever fully while applying pressure to the
seatback, and the seatback will
return to the upright position.
If the lever is lifted without
applying pressure, the seat will
release to a folded position.
2. Push and pull on the seatback to make sure it is locked.
The second row seats can be folded
for additional cargo space or folded
and tumbled for easy entry and exit
to the third row seat, if equipped.
Page 127 of 453
Chevrolet Tahoe/Suburban Owner Manual (GMNA-Localizing-U.S./Canada/
Mexico-9159366) - 2016 - crc - 5/20/15
126 Instruments and Controls
Instruments and
Controls
Controls
Steering Wheel Adjustment . . . 127
Steering Wheel Controls . . . . . . 128
Heated Steering Wheel . . . . . . . 129
Horn . . . . . . . . . . . . . . . . . . . . . . . . . . 129
Windshield Wiper/Washer . . . . 129
Rear Window Wiper/Washer . . . . . . . . . . . . . . . . . . . . . 131
Compass . . . . . . . . . . . . . . . . . . . . . 132
Clock . . . . . . . . . . . . . . . . . . . . . . . . . 132
Power Outlets . . . . . . . . . . . . . . . . 133
Wireless Charging . . . . . . . . . . . . 135
Warning Lights, Gauges, and
Indicators
Warning Lights, Gauges, and Indicators . . . . . . . . . . . . . . . . . . . 136
Instrument Cluster . . . . . . . . . . . . 137
Speedometer . . . . . . . . . . . . . . . . . 140
Odometer . . . . . . . . . . . . . . . . . . . . . 140
Trip Odometer . . . . . . . . . . . . . . . . 140
Tachometer . . . . . . . . . . . . . . . . . . . 140
Fuel Gauge . . . . . . . . . . . . . . . . . . . 140
Engine Oil Pressure
Gauge . . . . . . . . . . . . . . . . . . . . . . 141 Engine Coolant Temperature
Gauge . . . . . . . . . . . . . . . . . . . . . . 142
Voltmeter Gauge . . . . . . . . . . . . . 143
Safety Belt Reminders . . . . . . . . 144
Airbag Readiness Light . . . . . . . 144
Passenger Airbag Status Indicator . . . . . . . . . . . . . . . . . . . . 145
Charging System Light . . . . . . . 146
Malfunction Indicator Lamp (Check Engine Light) . . . . . . . . 146
Brake System Warning Light . . . . . . . . . . . . . . . . . . . . . . . . 148
Antilock Brake System (ABS) Warning Light . . . . . . . . . . . . . . . 149
Tow/Haul Mode Light . . . . . . . . . 149
Lane Keep Assist (LKA) Light . . . . . . . . . . . . . . . . . . . . . . . . 149
Vehicle Ahead Indicator . . . . . . 150
Traction Off Light . . . . . . . . . . . . . 150
StabiliTrak
®OFF Light . . . . . . . . 150
Traction Control System (TCS)/ StabiliTrak
®Light . . . . . . . . . . . 150
Tire Pressure Light . . . . . . . . . . . 151
Low Fuel Warning Light . . . . . . 151
Security Light . . . . . . . . . . . . . . . . . 151
High-Beam On Light . . . . . . . . . . 152
Front Fog Lamp Light . . . . . . . . . 152
Lamps On Reminder . . . . . . . . . 152
Cruise Control Light . . . . . . . . . . 152
Information Displays
Driver Information Center (DIC) (Base Level) . . . . . . . . . . . . . . . . 153
Driver Information Center (DIC) (Uplevel) . . . . . . . . . . . . . . . . . . . . 155
Head-Up Display (HUD) . . . . . . 157
Vehicle Messages
Vehicle Messages . . . . . . . . . . . . 161
Battery Voltage and Charging
Messages . . . . . . . . . . . . . . . . . . . 161
Brake System Messages . . . . . 162
Compass Messages . . . . . . . . . . 162
Cruise Control Messages . . . . . 162
Door Ajar Messages . . . . . . . . . . 163
Engine Cooling System Messages . . . . . . . . . . . . . . . . . . . 163
Engine Oil Messages . . . . . . . . . 164
Engine Power Messages . . . . . 164
Fuel System Messages . . . . . . . 165
Key and Lock Messages . . . . . 165
Lamp Messages . . . . . . . . . . . . . . 165
Object Detection System
Messages . . . . . . . . . . . . . . . . . . . 166
Ride Control System Messages . . . . . . . . . . . . . . . . . . . 167
Airbag System Messages . . . . 169
Security Messages . . . . . . . . . . . 169
Steering System Messages . . . . . . . . . . . . . . . . . . . 169
Page 137 of 453
Chevrolet Tahoe/Suburban Owner Manual (GMNA-Localizing-U.S./Canada/
Mexico-9159366) - 2016 - crc - 5/20/15
136 Instruments and Controls
Warning (Continued)
such as coins, keys, rings,
or paper clips, between the phone
and charging pad will become
very hot. On the rare occasion
that the charging system does not
detect a metal object, and the
object gets wedged between the
phone and charger, remove the
phone and allow the metallic
object to cool before removing it
from the charging pad, to prevent
burns.
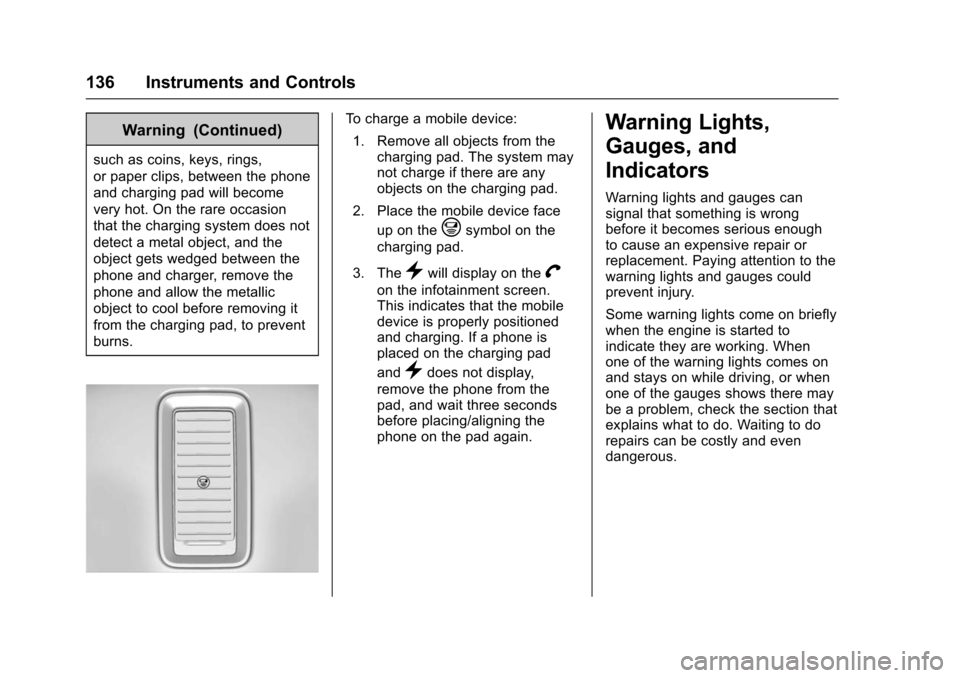
To charge a mobile device:1. Remove all objects from the charging pad. The system may
not charge if there are any
objects on the charging pad.
2. Place the mobile device face up on the
@symbol on the
charging pad.
3. The
}will display on theV
on the infotainment screen.
This indicates that the mobile
device is properly positioned
and charging. If a phone is
placed on the charging pad
and
}does not display,
remove the phone from the
pad, and wait three seconds
before placing/aligning the
phone on the pad again.
Warning Lights,
Gauges, and
Indicators
Warning lights and gauges can
signal that something is wrong
before it becomes serious enough
to cause an expensive repair or
replacement. Paying attention to the
warning lights and gauges could
prevent injury.
Some warning lights come on briefly
when the engine is started to
indicate they are working. When
one of the warning lights comes on
and stays on while driving, or when
one of the gauges shows there may
be a problem, check the section that
explains what to do. Waiting to do
repairs can be costly and even
dangerous.
Page 146 of 453
Chevrolet Tahoe/Suburban Owner Manual (GMNA-Localizing-U.S./Canada/
Mexico-9159366) - 2016 - crc - 5/20/15
Instruments and Controls 145
The airbag readiness light comes on
for several seconds when the
vehicle is started. If the light does
not come on then, have it fixed
immediately.
{Warning
If the airbag readiness light stays
on after the vehicle is started or
comes on while driving, it means
the airbag system might not be
working properly. The airbags in
the vehicle might not inflate in a
crash, or they could even inflate
without a crash. To help avoid
injury, have the vehicle serviced
right away.
If there is a problem with the airbag
system, a Driver Information Center
(DIC) message may also come on.
See Airbag System Messages
0 169.
Passenger Airbag Status
Indicator
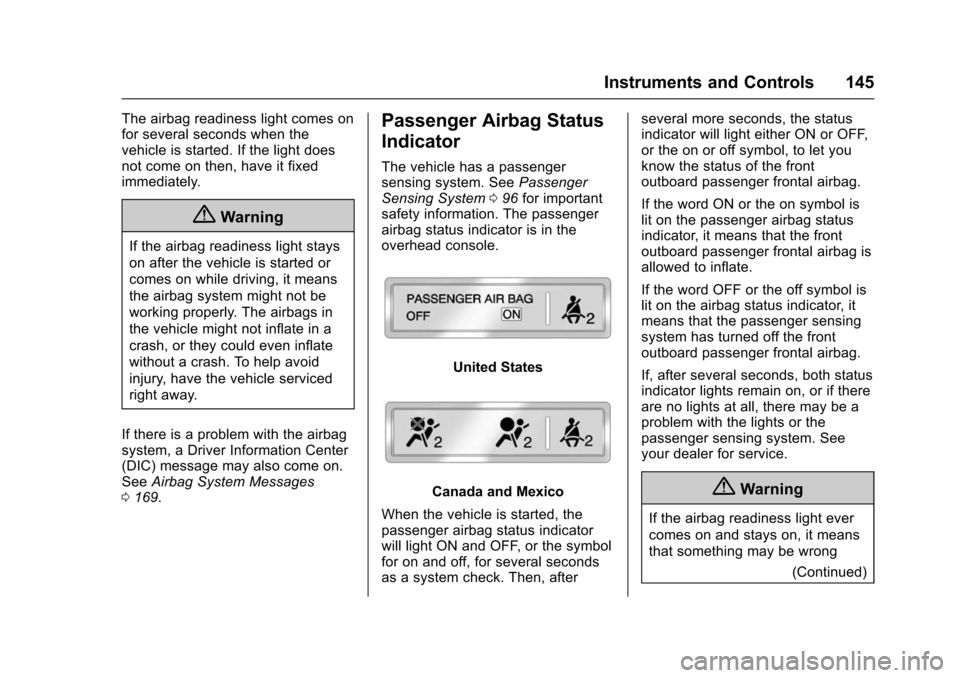
The vehicle has a passenger
sensing system. See Passenger
Sensing System 096 for important
safety information. The passenger
airbag status indicator is in the
overhead console.
United States
Canada and Mexico
When the vehicle is started, the
passenger airbag status indicator
will light ON and OFF, or the symbol
for on and off, for several seconds
as a system check. Then, after several more seconds, the status
indicator will light either ON or OFF,
or the on or off symbol, to let you
know the status of the front
outboard passenger frontal airbag.
If the word ON or the on symbol is
lit on the passenger airbag status
indicator, it means that the front
outboard passenger frontal airbag is
allowed to inflate.
If the word OFF or the off symbol is
lit on the airbag status indicator, it
means that the passenger sensing
system has turned off the front
outboard passenger frontal airbag.
If, after several seconds, both status
indicator lights remain on, or if there
are no lights at all, there may be a
problem with the lights or the
passenger sensing system. See
your dealer for service.{Warning
If the airbag readiness light ever
comes on and stays on, it means
that something may be wrong
(Continued)
Page 177 of 453
Chevrolet Tahoe/Suburban Owner Manual (GMNA-Localizing-U.S./Canada/
Mexico-9159366) - 2016 - crc - 5/20/15
176 Instruments and Controls
.Auto Memory Recall
. Easy Exit Options
. Chime Volume
. Reverse Tilt Mirror
. Auto Mirror Folding
. Auto Wipe in Reverse Gear
Auto Memory Recall
This allows the feature to be turned
on or off. See Memory Seats 068.
Select On or Off.
Easy Exit Options
This allows the feature to be turned
on or off. See Memory Seats 068.
Select On or Off.
Chime Volume
This allows the selection of the
chime volume level.
Press + or −to adjust the volume. Reverse Tilt Mirror
When on, the driver and/or
passenger mirrors will tilt downward
when the vehicle is shifted to
R (Reverse) to improve visibility of
the ground near the rear wheels.
Select Off, On - Driver and
Passenger, On - Driver, or On -
Passenger.
Auto Mirror Folding
When on, the outside rearview
mirrors will automatically fold or
unfold when the Remote Keyless
Entry (RKE) transmitter
QorKis
pressed and held.
Select Off or On.
Auto Wipe in Reverse Gear
When on and the front wiper is on
and wiping, the rear wiper will
automatically activate when the
vehicle is shifted to R (Reverse).
Select Off or On.
Lighting
Select the Lighting menu and the
following may display: .
Vehicle Locator Lights
. Exit Lighting
Vehicle Locator Lights
This feature will flash the exterior
lamps and allows some of the
exterior lamps and most of the
interior lamps to turn on briefly when
Kon the Remote Keyless Entry
(RKE) transmitter is pressed to
locate the vehicle.
Select On or Off.
Exit Lighting
This allows the selection of how
long the exterior lamps stay on
when leaving the vehicle when it is
dark outside.
Select Off, 30 Seconds, 60
Seconds, or 120 Seconds.
Power Door Locks
Select Power Door Locks and the
following display:
. Unlocked Door Anti-Lockout
. Auto Door Unlock
. Delayed Door Lock
Page 178 of 453
Chevrolet Tahoe/Suburban Owner Manual (GMNA-Localizing-U.S./Canada/
Mexico-9159366) - 2016 - crc - 5/20/15
Instruments and Controls 177
Unlocked Door Anti-Lockout
When on, this feature will keep the
driver door from locking when the
vehicle is off, the driver door is
open, and locking is requested.
If Off is selected, the Delayed Door
Lock menu will be available.
Select On or Off.
Auto Door Unlock
This allows selection of which of the
doors will automatically unlock when
the vehicle is shifted into P (Park).
Select Off, All Doors, or Driver Door.
Delayed Door Lock
When on, this feature will delay the
locking of the doors. To override the
delay, press the power door lock
switch on the door.
Select On or Off.
Remote Lock, Unlock, Start
Select Remote Lock, Unlock, Start
and the following may display:
.Remote Unlock Light Feedback
. Remote Lock Feedback
. Remote Door Unlock .
Remote Start Auto Cooled Seats
. Remote Start Auto Heat Seats
. Passive Door Unlock
. Passive Door Lock
. Remote Left in Vehicle Alert
Remote Unlock Light Feedback
When on, the exterior lamps will
flash when unlocking the vehicle
with the RKE transmitter.
Select Off or Flash Lights.
Remote Lock Feedback
This allows selection of what type of
feedback is given when locking the
vehicle with the RKE transmitter.
Select Off, Lights and Horn, Lights
Only, or Horn Only.
Remote Door Unlock
This allows selection of which doors
will unlock when pressing
Kon the
RKE transmitter.
Select All Doors or Driver
Door Only. Remote Start Auto Cooled Seats
If equipped and turned on, this
feature will turn the cooled seats on
when using remote start on
warm days.
Select Off or On.
Remote Start Auto Heat Seats
If equipped and turned on, this
feature will turn the heated seats on
when using remote start on
cold days.
Select Off or On.
Passive Door Unlock
This allows the selection of what
doors will unlock when using the
button on the driver door to unlock
the vehicle.
Select All Doors or Driver Door.
Passive Door Lock
This allows passive locking to be
turned on or off and selects
feedback. See
Remote Keyless
Entry (RKE) System Operation (Key
Access) 035 orRemote Keyless
Entry (RKE) System Operation
(Keyless Access) 037.