automatic transmission CHEVROLET TAHOE 2009 3.G Owners Manual
[x] Cancel search | Manufacturer: CHEVROLET, Model Year: 2009, Model line: TAHOE, Model: CHEVROLET TAHOE 2009 3.GPages: 574, PDF Size: 3.06 MB
Page 24 of 574
Power Release Fold and Tumble
Feature
The transmission must be in (P) Park for this feature
to work.
Folding and Tumbling the Seat(s)
{CAUTION:
Automatically folding and tumbling the seat when
someone is sitting in the seat, could cause injury
to the person sitting there. Always make sure
there is no one sitting in the seat before pressing
the automatic seat release button.
To fold and tumble the seat, do the following:
1. Make sure that there is nothing under, in front of, or
on the seat.
Notice:Folding a rear seat with the safety belts still
fastened may cause damage to the seat or the safety
belts. Always unbuckle the safety belts and return
them to their normal stowed position before folding a
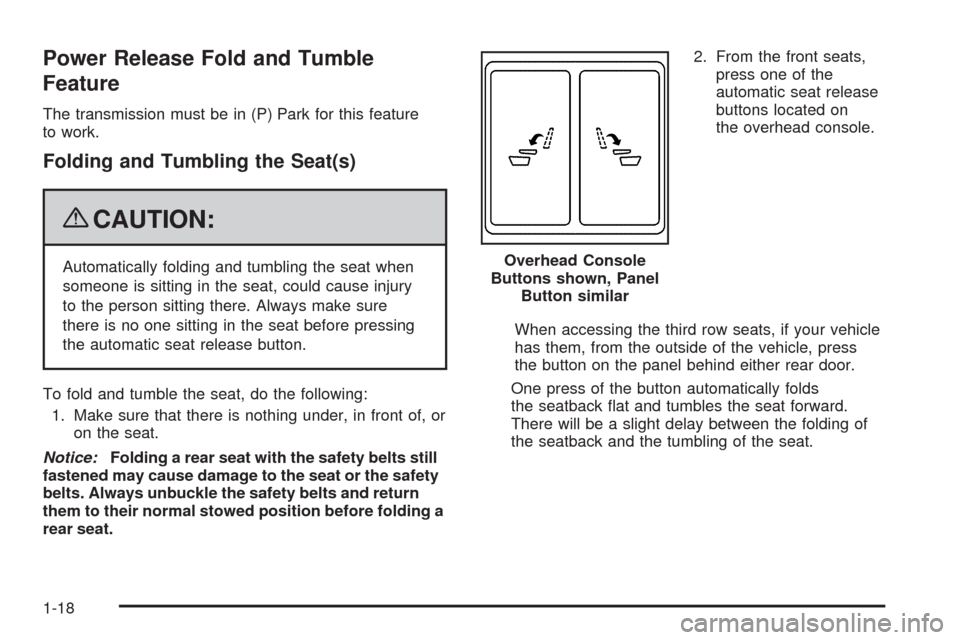
rear seat.2. From the front seats,
press one of the
automatic seat release
buttons located on
the overhead console.
When accessing the third row seats, if your vehicle
has them, from the outside of the vehicle, press
the button on the panel behind either rear door.
One press of the button automatically folds
the seatback �at and tumbles the seat forward.
There will be a slight delay between the folding of
the seatback and the tumbling of the seat. Overhead Console
Buttons shown, Panel
Button similar
1-18
Page 31 of 574
Power Release Fold and Tumble
Feature
The transmission must be in (P) Park for this feature
to work.
Folding and Tumbling the Seat(s)
{CAUTION:
Automatically folding and tumbling the seat when
someone is sitting in the seat, could cause injury
to the person sitting there. Always make sure
there is no one sitting in the seat before pressing
the automatic seat release button.
To fold and tumble the seat, do the following:
1. Make sure that there is nothing under, in front of, or
on the seat.
Notice:Folding a rear seat with the safety belts
still fastened may cause damage to the seat or the
safety belts. Always unbuckle the safety belts
and return them to their normal stowed position
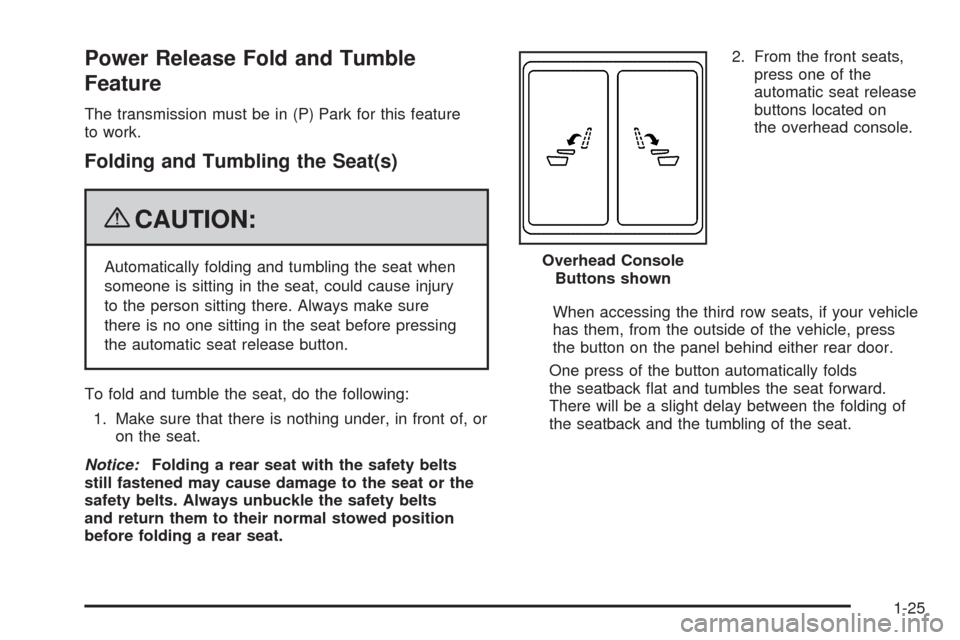
before folding a rear seat.2. From the front seats,
press one of the
automatic seat release
buttons located on
the overhead console.
When accessing the third row seats, if your vehicle
has them, from the outside of the vehicle, press
the button on the panel behind either rear door.
One press of the button automatically folds
the seatback �at and tumbles the seat forward.
There will be a slight delay between the folding of
the seatback and the tumbling of the seat. Overhead Console
Buttons shown
1-25
Page 107 of 574
Keys...............................................................2-3
Remote Keyless Entry (RKE) System................2-4
Remote Keyless Entry (RKE) System
Operation...................................................2-4
Remote Vehicle Start......................................2-7
Doors and Locks............................................2-10
Door Locks..................................................2-10
Power Door Locks........................................2-10
Delayed Locking...........................................2-11
Programmable Automatic Door Locks..............2-11
Rear Door Security Locks..............................2-11
Lockout Protection........................................2-12
Liftgate/Liftglass............................................2-13
Power Liftgate..............................................2-15
Power Assist Steps.......................................2-18
Windows........................................................2-19
Power Windows............................................2-20
Sun Visors...................................................2-21
Theft-Deterrent Systems..................................2-22
Content Theft-Deterrent.................................2-22
PASS-Key
®III+ Electronic Immobilizer.............2-24
PASS-Key®III+ Electronic Immobilizer
Operation.................................................2-24Starting and Operating Your Vehicle................2-26
New Vehicle Break-In....................................2-26
Ignition Positions..........................................2-26
Retained Accessory Power (RAP)...................2-28
Starting the Engine.......................................2-28
Adjustable Throttle and Brake Pedal................2-30
Engine Coolant Heater..................................2-30
Active Fuel Management™.............................2-31
Automatic Transmission Operation...................2-32
Tow/Haul Mode............................................2-38
Four-Wheel Drive..........................................2-40
Parking Brake..............................................2-45
Shifting Into Park..........................................2-47
Shifting Out of Park......................................2-49
Parking Over Things That Burn.......................2-49
Engine Exhaust............................................2-50
Running the Vehicle While Parked..................2-51
Mirrors...........................................................2-52
Manual Rearview Mirror.................................2-52
Automatic Dimming Rearview Mirror................2-52
Outside Manual Mirrors..................................2-52
Outside Towing Mirrors..................................2-53
Outside Power Mirrors...................................2-53
Outside Power Foldaway Mirrors.....................2-54
Section 2 Features and Controls
2-1
Page 123 of 574
The power liftgate may be temporarily disabled under
extreme temperatures, or under low battery conditions. If
this occurs, the liftgate can still be operated manually.
If you shift the transmission out of PARK (P) while
the power function is in progress, the liftgate power
function will continue to completion. If you shift the
transmission out of PARK (P) and accelerate before the
power liftgate latches closed, the liftgate may reverse
to the open position. Cargo could fall out of the vehicle.
Always make sure the power liftgate is closed and
latched before you drive away.
If you power open the liftgate and the liftgate support
struts have lost pressure, the lights will �ash and a
chime will sound. The liftgate will stay open temporarily,
then slowly close. See your dealer/retailer for service
before using the liftgate.Obstacle Detection Features
If the liftgate encounters an obstacle during a power
open or close cycle, a warning chime will sound and the
liftgate will automatically reverse direction to the full
closed or open position. After removing the obstruction,
the power liftgate operation can be used again. If the
liftgate encounters multiple obstacles on the same power
cycle, the power function will deactivate, and you
must manually open or close the liftgate. The REAR
ACCESS OPEN warning message in the Driver
Information Center (DIC) will indicate that the liftgate is
open. After removing the obstructions, manually
open the liftgate to the full open position or close the
liftgate to the fully closed and latched position. The
liftgate will now resume normal power operation.
Your vehicle has pinch sensors located on the side
edges of the liftgate. If an object is caught between
the liftgate and the body and presses against this
sensor, the liftgate will reverse direction and open fully.
The liftgate will remain open until it is activated again
or closed manually. Do not force the liftgate open
or closed during a power cycle.
2-17
Page 133 of 574
A (LOCK/OFF):This position locks the ignition. It also
locks the transmission on automatic transmission
vehicles. The key can be removed in LOCK/OFF.
On vehicles with an automatic transmission, the shift
lever must be in P (Park) to turn the ignition switch
to LOCK/OFF.
The steering can bind with the wheels turned off center.
If this happens, move the steering wheel from right to
left while turning the key to ACC/ACCESSORY. If
this doesn’t work, then the vehicle needs service.
Notice:Using a tool to force the key to turn in the
ignition could cause damage to the switch or break
the key. Use the correct key, make sure it is all the
way in, and turn it only with your hand. If the key
cannot be turned by hand, see your dealer/retailer.
B (ACC/ACCESSORY):This position lets things like the
radio and the windshield wipers operate while the
engine is off. Use this position if the vehicle must be
pushed or towed.C (ON/RUN):This position can be used to operate the
electrical accessories and to display some instrument
panel cluster warning and indicator lights. The
switch stays in this position when the engine is running.
The transmission is also unlocked in this position on
automatic transmission vehicles.
If you leave the key in the ACC/ACCESSORY or
ON/RUN position with the engine off, the battery could
be drained. You may not be able to start the vehicle
if the battery is allowed to drain for an extended period
of time.
D (START):This is the position that starts the engine.
When the engine starts, release the key. The ignition
switch returns to ON/RUN for driving.
A warning tone will sound when the driver door is
opened, the ignition is in ACC/ACCESSORY or
LOCK/OFF and the key is in the ignition.
2-27
Page 138 of 574
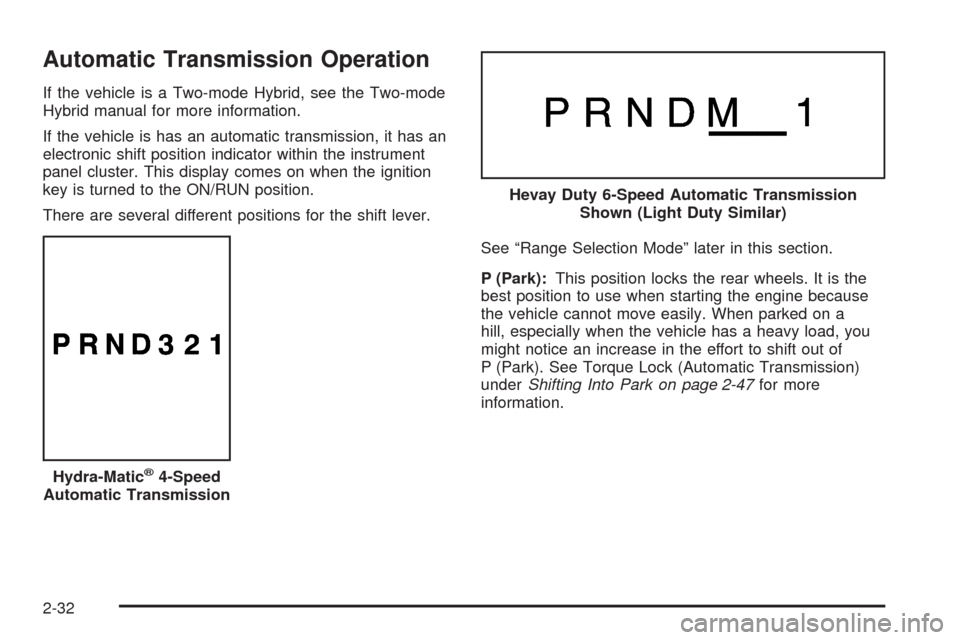
Automatic Transmission Operation
If the vehicle is a Two-mode Hybrid, see the Two-mode
Hybrid manual for more information.
If the vehicle is has an automatic transmission, it has an
electronic shift position indicator within the instrument
panel cluster. This display comes on when the ignition
key is turned to the ON/RUN position.
There are several different positions for the shift lever.
See “Range Selection Mode” later in this section.
P (Park):This position locks the rear wheels. It is the
best position to use when starting the engine because
the vehicle cannot move easily. When parked on a
hill, especially when the vehicle has a heavy load, you
might notice an increase in the effort to shift out of
P (Park). See Torque Lock (Automatic Transmission)
underShifting Into Park on page 2-47for more
information.
Hydra-Matic
®4-Speed
Automatic Transmission
Hevay Duty 6-Speed Automatic Transmission
Shown (Light Duty Similar)
2-32
Page 141 of 574
The vehicle has a shift stabilization feature that adjusts
the transmission shifting to the current driving conditions
in order to reduce rapid upshifts and downshifts. This shift
stabilization feature is designed to determine, before
making an upshift, if the engine is able to maintain vehicle
speed by analyzing things such as vehicle speed, throttle
position, and vehicle load. If the shift stabilization feature
determines that a current vehicle speed cannot be
maintained, the transmission does not upshift and instead
holds the current gear. In some cases, this could appear
to be a delayed shift, however the transmission is
operating normally.
The vehicle’s transmission uses adaptive shift controls.
Adaptive shift controls continually compares key
shift parameters to pre-programmed ideal shifts stored
in the transmissions computer. The transmission
constantly makes adjustments to improve vehicle
performance according to how the vehicle is being used,
such as with a heavy load or when the temperature
changes. During this adaptive shift control process,
shifting might feel different as the transmission
determines the best settings.
When temperatures are very cold, the Hydra-Matic
®
6-Speed transmission’s gear shifting could be delayed
providing more stable shifts until the engine warms
up. Shifts could be more noticeable with a cold
transmission. This difference in shifting is normal.M (Manual Mode):This position is available on
vehicles with the Hydra-Matic
®6-Speed transmission. It
lets drivers select the range of gears appropriate for
current driving conditions. If the vehicle has this feature,
see Range Select Mode (Hydra-Matic
®6-Speed
transmission) later in this section.
3 (Third):This position is also used for normal driving.
It reduces vehicle speed more than D (Drive) without
using the brakes. You might choose 3 (Third) instead of
D (Drive) when driving on hilly, winding roads, when
towing a trailer, so there is less shifting between gears
and when going down a steep hill.
2 (Second):This position reduces vehicle speed even
more than 3 (Third) without using the brakes. You
can use 2 (Second) on hills. It can help control vehicle
speed as you go down steep mountain roads, but
then you would also want to use the brakes off and on.
If you manually select 2 (Second) in an automatic
transmission, the transmission will start in second gear.
You can use this feature for reducing the speed of
the rear wheels when you are trying to start the vehicle
from a stop on slippery road surfaces.
2-35
Page 143 of 574
To use this feature, do the following:
1. Move the shift lever to M (Manual Mode).
2. Press the plus/minus buttons, located on the
steering column shift lever, to select the desired
range of gears for the current driving conditions.
When M (Manual Mode) is selected a number displays
next to the M, indicating the current gear.
This number is the highest gear that can be used.
However, the vehicle can automatically shift to lower
gears as it adjusts to driving conditions. This means
that all gears below that number are available. When
5 (Fifth) is selected, 1 (First) through 5 (Fifth) gears
are automatically shifted by the vehicle, but 6 (Sixth)
cannot be used until the plus/minus button located
on the steering column lever is used to change to
the gear.
Grade Braking is not available when Range Selection
Mode is active. SeeTow/Haul Mode on page 2-38.While using Range Selection Mode, cruise control and
the Tow/Haul mode can be used.
Notice:Spinning the tires or holding the vehicle
in one place on a hill using only the accelerator
pedal may damage the transmission. The repair
will not be covered by the vehicle warranty. If you
are stuck, do not spin the tires. When stopping on a
hill, use the brakes to hold the vehicle in place.
Low Traction Mode
If the vehicle has the Hydra-Matic®6-Speed Automatic
Transmission, it has a Low Traction Mode that assists
in vehicle acceleration when road conditions are
slippery, such as with ice or snow. While the vehicle is
at a stop, select the second gear range using Range
Selection Mode. This will limit torque to the wheels after
it detects wheel slip, preventing the tires from spinning.
2-37
Page 145 of 574
Grade Braking (Hydra-Matic®6-Speed
Automatic Transmission)
The Grade Braking shift modes can be activated by
pressing the button on the end of the shift control lever.
While in Range Selection Mode, Grade Braking is
deactivated allowing the driver to select a desired range
of gears.
Grade Braking is only active while the Tow/Haul Mode
is selected and you are not in the Range Selection
Mode. See “Tow/Haul Mode listed previously and
Automatic Transmission Operation on page 2-32for
more information on the Range Selection Mode. Grade
Braking assists in maintaining desired vehicle speeds
when driving on downhill grades by automatically
implementing a shift schedule that utilizes the engine
and transmission to slow the vehicle. This reduces wear
on the braking system and increases control of the
vehicle. Grade Braking monitors vehicle speed,
acceleration, engine torque and brake pedal usage.
Using this information, it detects when the truck is on a
downhill grade and the driver desires to slow the
vehicle by pressing the brake.
Also seeTowing a Trailer on page 4-50for more
information.
Cruise Grade Braking (Hydra-Matic®
6-Speed Automatic Transmission)
Cruise Grade Braking assists when driving on a
downhill grade. It maintains vehicle speed by
automatically implementing a shift schedule that uses
the engine and the transmission to slow the vehicle.
Cruise Grade Braking operates while Cruise Control is
engaged in Tow/Haul mode to assist in maintaining
vehicle speed under loaded vehicle conditions. It utilizes
vehicle acceleration and deviation from desired speed
to determine the correct gear for the operating condition.
If vehicle speed is above the desired speed the
transmission will downshift to slow the vehicle. If vehicle
speed is near or below desired speed the trans will
upshift, allowing vehicle speed to increase.
While in the Range Select Mode (RSM) mode, Cruise
Grade Braking is not available.
SeeAutomatic Transmission Operation on page 2-32.
2-39
Page 147 of 574
2m(Two-Wheel Drive High):This setting is used for
driving in most street and highway situations. The
front axle is not engaged in two-wheel drive. This setting
also provides the best fuel economy.
AUTO (Automatic Four-Wheel Drive):This setting is
ideal for use when road surface traction conditions
are variable. When driving your vehicle in AUTO, the
front axle is engaged, but the vehicle’s power is primarily
sent to the rear wheels. When the vehicle’s software
determines a need for more traction, the system
will transfer more power to the front wheels. Driving in
this mode results in slightly lower fuel economy than
Two-Wheel Drive High.
4
m(Four-Wheel Drive High):Use the four-wheel high
position when you need extra traction, such as on snowy
or icy roads or in most off-road situations. This setting
also engages your front axle to help drive the vehicle.
This is the best setting to use when plowing snow.
4
n(Four-Wheel Drive Low):This setting also
engages the front axle and delivers extra torque. You
may never need this setting. It sends maximum power to
all four wheels. You might choose Four-Wheel Drive Low
if you are driving off-road in deep sand, deep mud, deep
snow, and while climbing or descending steep hills.The vehicle has StabiliTrak
®. Shifting into
Four-Wheel-Drive Low will turn Traction Control and
StabiliTrak
®off. SeeStabiliTrak®System on page 4-6.
{CAUTION:
Shifting the transfer case to N (Neutral) can cause
the vehicle to roll even if the transmission is in
P (Park). You or someone else could be seriously
injured. Be sure to set the parking brake before
placing the transfer case in N (Neutral). See
Parking Brake on page 2-45.
N (Neutral):Shift the vehicle’s transfer case to
N (Neutral) only when towing the vehicle. See
Recreational Vehicle Towing on page 4-44orTowing
Your Vehicle on page 4-43for more information.
If the SERVICE 4 WHEEL DRIVE message stays on,
you should take the vehicle to your dealer/retailer
for service. See “SERVICE 4 WHEEL DRIVE message”
underDIC Warnings and Messages on page 3-64.
2-41