buttons CHEVROLET TAHOE 2010 3.G User Guide
[x] Cancel search | Manufacturer: CHEVROLET, Model Year: 2010, Model line: TAHOE, Model: CHEVROLET TAHOE 2010 3.GPages: 608, PDF Size: 6.53 MB
Page 145 of 608
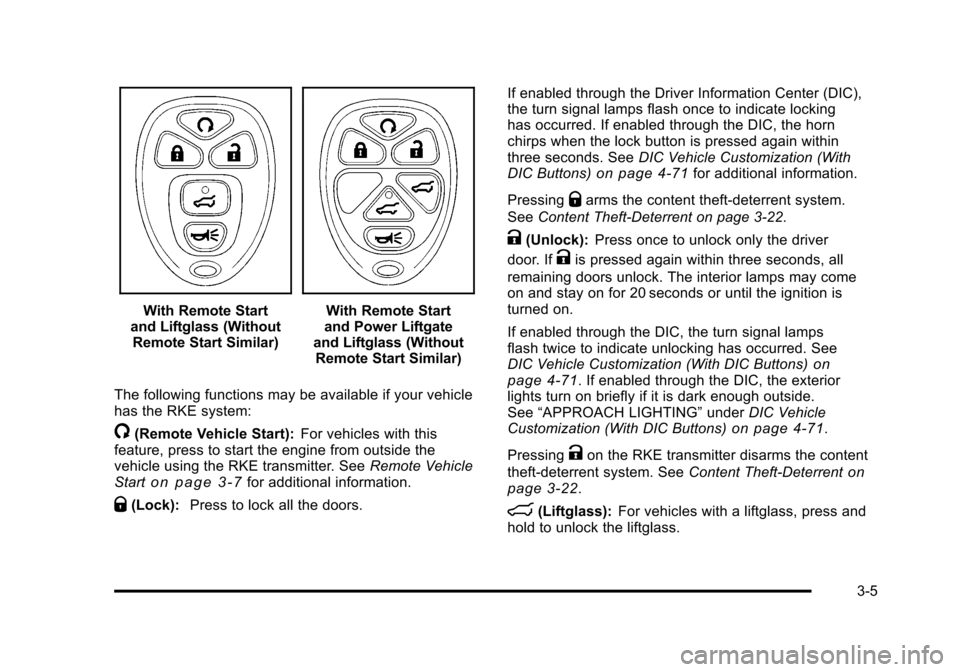
With Remote Start
and Liftglass (Without Remote Start Similar)With Remote Start
and Power Liftgate
and Liftglass (Without Remote Start Similar)
The following functions may be available if your vehicle
has the RKE system:
/(Remote Vehicle Start): For vehicles with this
feature, press to start the engine from outside the
vehicle using the RKE transmitter. See Remote Vehicle
Start
on page 3‑7for additional information.
Q(Lock): Press to lock all the doors. If enabled through the Driver Information Center (DIC),
the turn signal lamps flash once to indicate locking
has occurred. If enabled through the DIC, the horn
chirps when the lock button is pressed again within
three seconds. See
DIC Vehicle Customization (With
DIC Buttons)
on page 4‑71for additional information.
Pressing
Qarms the content theft‐deterrent system.
See Content Theft-Deterrent on page 3‑22.
K(Unlock): Press once to unlock only the driver
door. If
Kis pressed again within three seconds, all
remaining doors unlock. The interior lamps may come
on and stay on for 20 seconds or until the ignition is
turned on.
If enabled through the DIC, the turn signal lamps
flash twice to indicate unlocking has occurred. See
DIC Vehicle Customization (With DIC Buttons)
on
page 4‑71. If enabled through the DIC, the exterior
lights turn on briefly if it is dark enough outside.
See “APPROACH LIGHTING” underDIC Vehicle
Customization (With DIC Buttons)
on page 4‑71.
Pressing
Kon the RKE transmitter disarms the content
theft‐deterrent system. See Content Theft-Deterrent
on
page 3‑22.
m(Liftglass): For vehicles with a liftglass, press and
hold to unlock the liftglass.
3-5
Page 146 of 608
&(Power Liftgate):For vehicles with a power
liftgate, press and hold to open and close the liftgate.
The taillamps flash and a chime sounds to indicate
when the liftgate is opening and closing.
L(Vehicle Locator/Panic Alarm): Press and release
to locate the vehicle. The turn signal lamps flash and
the horn sounds three times.
Press and hold
Lfor more than two seconds to
activate the panic alarm. The turn signal lamps flash
and the horn sounds repeatedly for 30 seconds.
The alarm turns off when the ignition is moved to
ON/RUN or
Lis pressed again. The ignition must
be in LOCK/OFF for the panic alarm to work.
The vehicle comes with two transmitters. Each
transmitter will have a number on it, “1”or“2”. These
numbers correspond to the driver of the vehicle. For
example, the memory seat position for driver 1 will
be recalled when using the transmitter labeled “1”,
if enabled through the DIC. See Memory Seat,
Mirrors, and Pedals
on page 2‑10and DIC Vehicle
Customization (With DIC Buttons)on page 4‑71for
more information.
Programming Transmitters to the
Vehicle
Only RKE transmitters programmed to this vehicle will
work. If a transmitter is lost or stolen, a replacement can
be purchased and programmed through your dealer.
When the replacement transmitter is programmed to
this vehicle, all remaining transmitters must also be
reprogrammed. Any lost or stolen transmitters will no
longer work once the new transmitter is programmed.
The vehicle can have a maximum of eight transmitters
programmed to it. See “Relearn Remote Key” under
DIC Operation and Displays (With DIC Buttons)
on
page 4‑47or DIC Operation and Displays (Without DIC
Buttons)on page 4‑55for instructions on how to
program RKE transmitters to the vehicle.
Battery Replacement
Replace the battery if the REPLACE BATTERY IN
REMOTE KEY message displays in the DIC. See
“REPLACE BATTERY IN REMOTE KEY” underDIC
Warnings and Messages
on page 4‑61for additional
information.
Notice: When replacing the battery, do not touch
any of the circuitry on the transmitter. Static from
your body could damage the transmitter.
3-6
Page 149 of 608

The vehicle can be remote started two separate times
between driving sequences. The engine will run for
10 minutes after each remote start.
Or, you can extend the engine run time by another
10 minutes within the first 10 minute remote start time
frame, and before the engine stops.
For example, if the lock button and then the remote start
buttons are pressed again after the vehicle has been
running for five minutes, 10 minutes are added, allowing
the engine to run for 15 minutes.
The additional ten minutes are considered a
second remote vehicle start.
Once two remote starts, or a single remote start with
one time extension has been done, the vehicle must be
started with the key. After the key is removed from the
ignition, the vehicle can be remote started again.
The vehicle cannot be remote started if the key is in
the ignition, the hood is not closed, or if there is an
emission control system malfunction and the check
engine light comes on.Also, the engine will turn off during a remote vehicle
start if the coolant temperature gets too high or if the oil
pressure gets low.
Vehicles that have the remote vehicle start feature
are shipped from the factory with the remote vehicle
start system enabled. The system may be enabled or
disabled through the DIC. See
“REMOTE START”
under DIC Vehicle Customization (With DIC Buttons)
on
page 4‑71for additional information. If your vehicle
does not have DIC buttons, see your dealer to enable
or disable the remote vehicle start system.
Remote Start Ready
If your vehicle does not have the remote vehicle start
feature, it may have the remote start ready feature. This
feature allows your dealer to add the manufacturer's
remote vehicle start feature.
See your dealer if you would like to add the
manufacturer's remote vehicle start feature to your
vehicle.
3-9
Page 151 of 608
Delayed Locking
When locking the doors with the power lock switch
and a door or the liftgate is open, the doors will lock
five seconds after the last door is closed. You will hear
three chimes to signal that the delayed locking feature
is in use.
Pressing the power lock switch twice will override the
delayed locking feature and immediately lock all the
doors.
This feature will not operate if the key is in the ignition.
You can program this feature using the Driver
Information Center (DIC). See DELAY DOOR LOCK
underDIC Vehicle Customization (With DIC Buttons)
on
page 4‑71.
Programmable Automatic Door
Locks
Vehicles with an automatic lock/unlock feature enable
you to program the vehicle's power door locks. You can
program this feature through the Driver Information
Center (DIC). See DIC Vehicle Customization (With DIC
Buttons)
on page 4‑71for more information on DIC
programming.
Rear Door Security Locks
Your vehicle has rear door security locks. These
prevent passengers from opening the rear doors from
the inside.
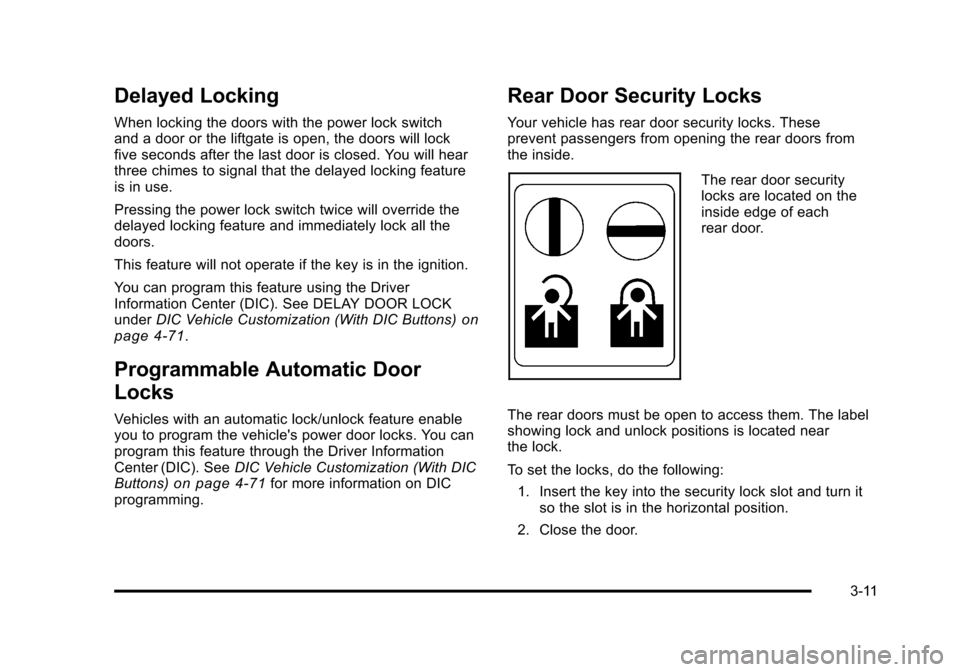
The rear door security
locks are located on the
inside edge of each
rear door.
The rear doors must be open to access them. The label
showing lock and unlock positions is located near
the lock.
To set the locks, do the following: 1. Insert the key into the security lock slot and turn it so the slot is in the horizontal position.
2. Close the door.
3-11
Page 155 of 608
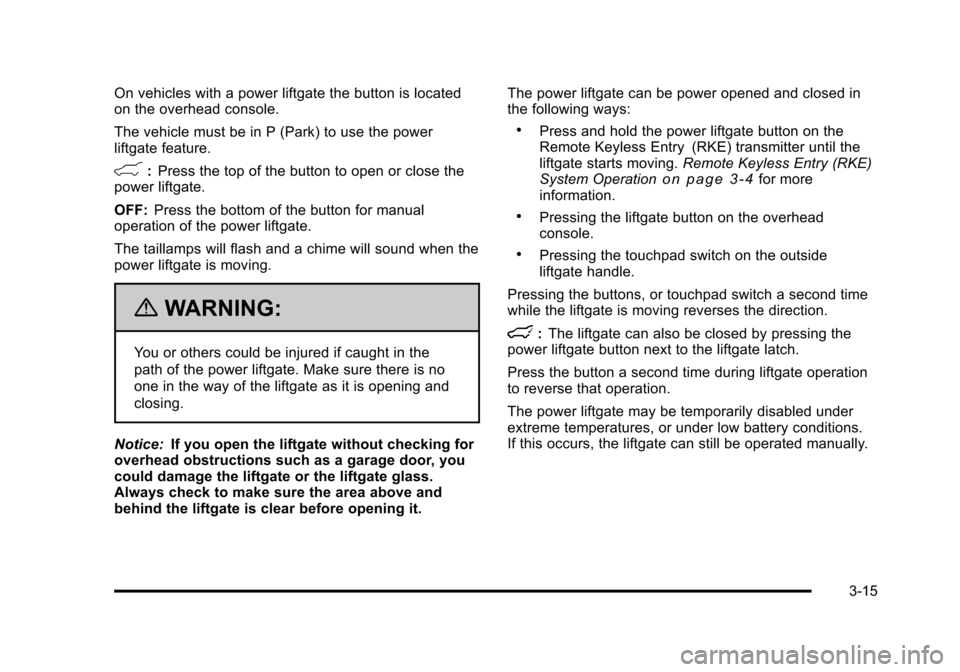
On vehicles with a power liftgate the button is located
on the overhead console.
The vehicle must be in P (Park) to use the power
liftgate feature.
&:Press the top of the button to open or close the
power liftgate.
OFF: Press the bottom of the button for manual
operation of the power liftgate.
The taillamps will flash and a chime will sound when the
power liftgate is moving.
{WARNING:
You or others could be injured if caught in the
path of the power liftgate. Make sure there is no
one in the way of the liftgate as it is opening and
closing.
Notice: If you open the liftgate without checking for
overhead obstructions such as a garage door, you
could damage the liftgate or the liftgate glass.
Always check to make sure the area above and
behind the liftgate is clear before opening it. The power liftgate can be power opened and closed in
the following ways:
.Press and hold the power liftgate button on the
Remote Keyless Entry (RKE) transmitter until the
liftgate starts moving.
Remote Keyless Entry (RKE)
System Operation
on page 3‑4for more
information.
.Pressing the liftgate button on the overhead
console.
.Pressing the touchpad switch on the outside
liftgate handle.
Pressing the buttons, or touchpad switch a second time
while the liftgate is moving reverses the direction.
l: The liftgate can also be closed by pressing the
power liftgate button next to the liftgate latch.
Press the button a second time during liftgate operation
to reverse that operation.
The power liftgate may be temporarily disabled under
extreme temperatures, or under low battery conditions.
If this occurs, the liftgate can still be operated manually.
3-15
Page 161 of 608
Programming the Power Windows
If the battery on the vehicle has been recharged,
disconnected, or is not working, you will need to
reprogram each front power window for the express-up
feature to work. Before reprogramming, replace or
recharge the vehicle's battery.
To program each front window, follow these steps:1. With the ignition in ACC/ACCESSORY, ON/RUN, or when Retained Accessory Power (RAP) is
active, close all doors.
2. Press and hold the power window switch until the window is fully open.
3. Pull the power window switch up until the window is fully closed.
4. Continue holding the switch up for approximately two seconds after the window is completely closed.
The window is now reprogrammed. Repeat the process
for the other windows.
Window Lockout
o (Window Lockout): The rear window lockout button
is located on the driver door near the window switches.
Press the right side of the button to disable the rear
window controls. The light on the button will illuminate,
indicating the feature is in use. The rear windows still
can be raised or lowered using the driver window
switches when the lockout feature is active.
To restore power to the rear windows, press the button
again. The light on the button will go out.
Sun Visors
Swing down the visor to block out glare. It can also be
detached from the center mount and moved to the side
to block glare from that direction.
The driver visor may also have buttons for a built-in
garage door opener. See Universal Home Remote
System
on page 3‑66for more information.
Lighted Visor Vanity Mirror
Pull the visor down and lift the cover to access the
mirror. A light comes on when the cover is lifted and
goes out when it is closed.
3-21
Page 171 of 608
{WARNING:
Plugging the cord into an ungrounded outlet could
cause an electrical shock. Also, the wrong kind of
extension cord could overheat and cause a fire.
You could be seriously injured. Plug the cord into
a properly grounded three-prong 110-volt AC
outlet. If the cord will not reach, use a heavy-duty
three-prong extension cord rated for at least
15 amps.
4. Before starting the engine, be sure to unplug and store the cord as it was before to keep it away from
moving engine parts. If you do not, it could be
damaged.
The length of time the heater should remain plugged in
depends on several factors. Ask a dealer in the area
where you will be parking the vehicle for the best advice
on this.
Active Fuel Management™
Vehicles with V8 engines may have Active Fuel
Management™. This system allows the engine to
operate on either all or half of its cylinders, depending
on the driving conditions.
When less power is required, such as cruising at a
constant vehicle speed, the system will operate in the
half cylinder mode, allowing the vehicle to achieve
better fuel economy. When greater power demands are
required, such as accelerating from a stop, passing,
or merging onto a freeway, the system will maintain
full-cylinder operation.
If the vehicle has an Active Fuel Management™
indicator, see DIC Operation and Displays (With DIC
Buttons)
on page 4‑47or DIC Operation and Displays
(Without DIC Buttons)on page 4‑55for more
information on using this display .
3-31
Page 177 of 608
To use this feature, do the following:1. Move the shift lever to M (Manual Mode).
2. Press the plus/minus buttons, located on the steering column shift lever, to select the desired
range of gears for the current driving conditions.
When M (Manual Mode) is selected a number displays
next to the M, indicating the current gear.
This number is the highest gear that can be used.
However, the vehicle can automatically shift to lower
gears as it adjusts to driving conditions. This means
that all gears below that number are available. When
5 (Fifth) is selected, 1 (First) through 5 (Fifth) gears are
automatically shifted by the vehicle, but 6 (Sixth) cannot
be used until the plus/minus button located on the
steering column lever is used to change to the gear. Grade Braking is not available when Range Selection
Mode is active. See
Tow/Haul Mode on page 3‑38.
While using Range Selection Mode, cruise control and
the Tow/Haul mode can be used.
Notice: Spinning the tires or holding the vehicle in
one place on a hill using only the accelerator pedal
may damage the transmission. The repair will not be
covered by the vehicle warranty. If you are stuck, do
not spin the tires. When stopping on a hill, use the
brakes to hold the vehicle in place.
Low Traction Mode
If the vehicle has the Hydra-Matic®6-Speed Automatic
Transmission, it has a Low Traction Mode that assists in
vehicle acceleration when road conditions are slippery,
such as with ice or snow. While the vehicle is at a stop,
select the second gear range using Range Selection
Mode. This will limit torque to the wheels after it detects
wheel slip, preventing the tires from spinning.
3-37
Page 192 of 608
Mirrors
Manual Rearview Mirror
Hold the inside rearview mirror in the center to move it
for a clearer view behind your vehicle. Adjust the mirror
to avoid glare from the headlamps behind you. Push the
tab forward for daytime use and pull it for nighttime use.
Automatic Dimming Rearview Mirror
The vehicle may have an automatic dimming inside
rearview mirror.
Vehicles with OnStar
®have three additional control
buttons for the OnStar®system. See your dealer for
more information about OnStar®and how to subscribe
to it. See the OnStar®owner's guide for more
information about the services OnStar®provides.
O(On/Off): Press to turn the dimming feature on or off.
The vehicle may also have a Rear Vision Camera
(RVC). See Rear Vision Camera (RVC)
on page 3‑61for more information.
If the vehicle has RVC, the
O(On/Off) button for
turning the automatic dimming feature on or off will not
be available.
Automatic Dimming Mirror Operation
Automatic dimming reduces the glare from the
headlamps of the vehicle behind you. The dimming
feature comes on and the indicator light illuminates
each time the ignition is turned to start.
Cleaning the Mirror
Do not spray glass cleaner directly on the mirror. Use a
soft towel dampened with water.
Outside Manual Mirrors
Adjust the outside mirror for a clearer view.
Manually fold the mirrors inward to prevent damage
when going through an automatic car wash. To fold,
push the mirror toward the vehicle. Push the mirror
outward, to return to its original position.
Using hood-mounted air deflectors and add-on convex
mirror attachments could decrease mirror performance.
3-52
Page 195 of 608

Outside Automatic Dimming Mirror
Vehicles with this feature have a driver outside mirror
that adjusts for the glare of headlamps behind you. See
Automatic Dimming Rearview Mirror
on page 3‑52for
more information.
Park Tilt Mirrors
Vehicles with the memory package have a passenger
and/or driver mirror that tilts to a preselected position
when the vehicle is in R (Reverse). This feature lets the
driver view the curb when parallel parking. The mirror(s)
return to the original position when the vehicle is shifted
out of R (Reverse), or the ignition is turned off.
Turn this feature on or off through the Driver Information
Center (DIC). See DIC Vehicle Customization (With DIC
Buttons)
on page 4‑71for more information.
Outside Convex Mirror
{WARNING:
A convex mirror can make things, like other
vehicles, look farther away than they really are.
If you cut too sharply into the right lane, you could
hit a vehicle on the right. Check the inside mirror
or glance over your shoulder before changing
lanes.
The passenger side mirror is convex shaped. A convex
mirror's surface is curved so more can be seen from the
driver seat.
3-55