ignition CHEVROLET TRACKER 1993 User Guide
[x] Cancel search | Manufacturer: CHEVROLET, Model Year: 1993, Model line: TRACKER, Model: CHEVROLET TRACKER 1993Pages: 339, PDF Size: 15.75 MB
Page 72 of 339
Features & Controls
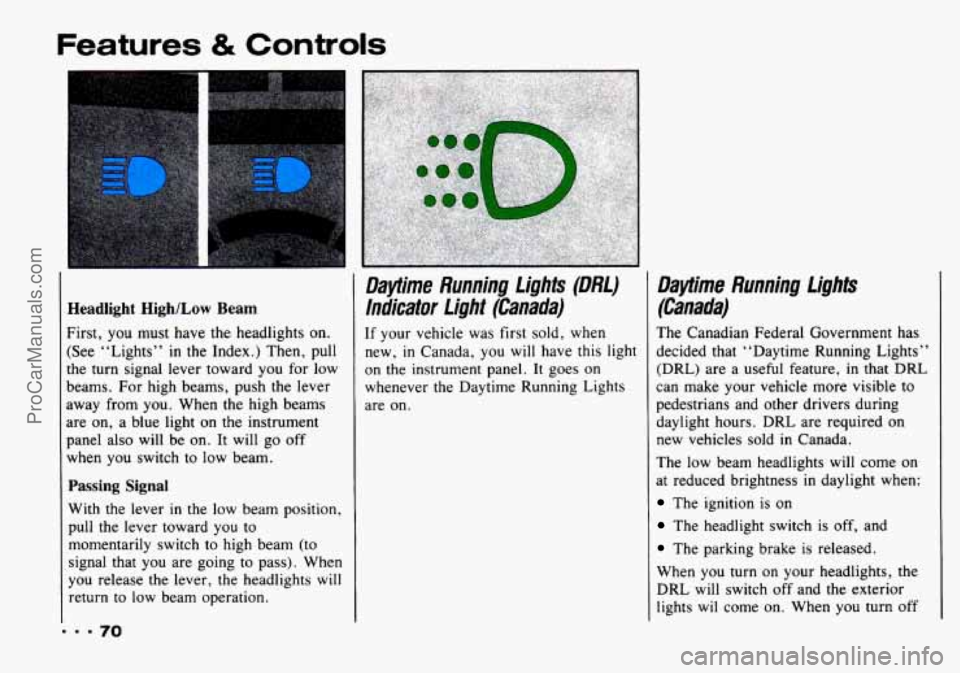
Headlight High/Low Beam
First, you must have the headlights on.
(See “Lights”
in the Index.) Then, pull
the turn signal lever toward you for low
beams. For high beams, push the lever
away from you. When the high beams
are on, a blue light on the instrument
panel also will be on. It will go off
when you switch
to low beam.
Passing Signal
With the lever in the low beam position,
pull the lever toward you to
momentarily switch to high beam (to
signal that you are going to pass). When
you release the lever, the headlights will
return to low beam operation.
Daytime Running fights (DM)
lndicator Light (Canada)
If your vehicle was first sold, when
new,
in Canada, you will have this light
on the instrument panel. It goes on whenever the Daytime Running Lights
are on.
Daytime Running f ights
(Canada)
The Canadian Federal Government has
decided that “Daytime Running Lights”
(DRL) are a useful feature, in that DRL
can make your vehicle more visible to
pedestrians and other drivers during
daylight hours. DRL are required
on
new vehicles sold in Canada.
The low beam headlights will come on
at reduced brightness
in daylight when:
The ignition is on
The headlight switch is off, and
The parking brake is released.
When you turn on your headlights, the
DRL will switch off and the exterior
lights wil come on. When you turn off
ProCarManuals.com
Page 81 of 339
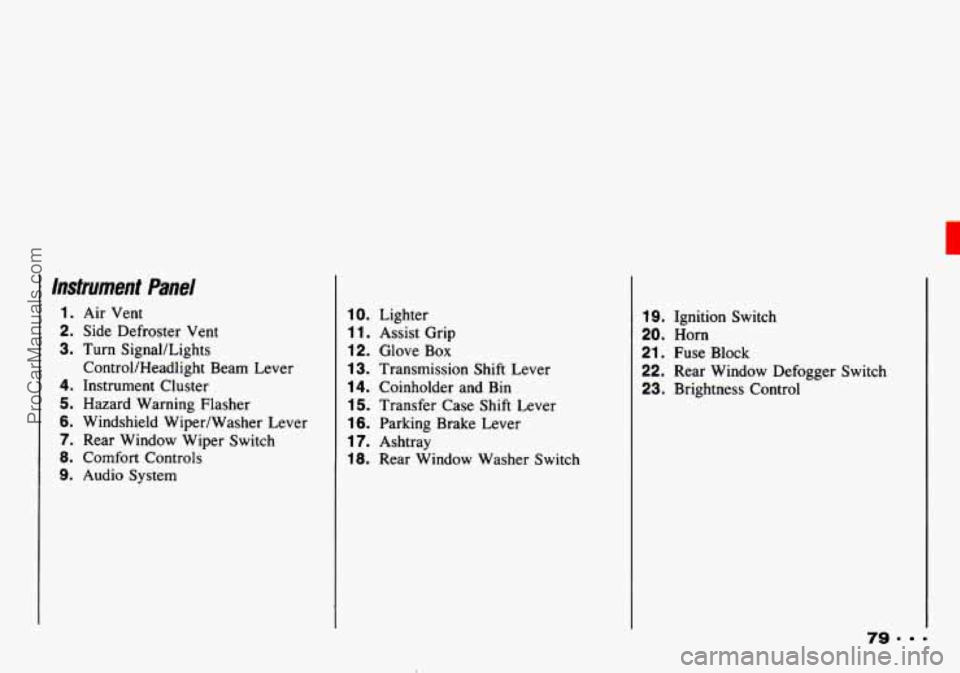
Instrument Panel
1. Air Vent
2. Side Defroster Vent
3. Turn SignaULights
4. Instrument Cluster
5. Hazard Warning Flasher
6. Windshield Wiper/Washer Lever
7. Rear Window Wiper Switch
8. Comfort Controls
9. Audio System ControVHeadlight Beam
Lever
10. Lighter
1 1. Assist Grip
12. Glove Box
13. Transmission Shift Lever
14. Coinholder and Bin
15. Transfer Case Shift Lever
16. Parking Brake Lever
17. Ashtray
18. Rear Window Washer Switch
19. Ignition Switch
20. Horn
21. Fuse Block
22. Rear Window Defogger Switch
23. Brightness Control
79. =
ProCarManuals.com
Page 84 of 339
Features & Conrrols
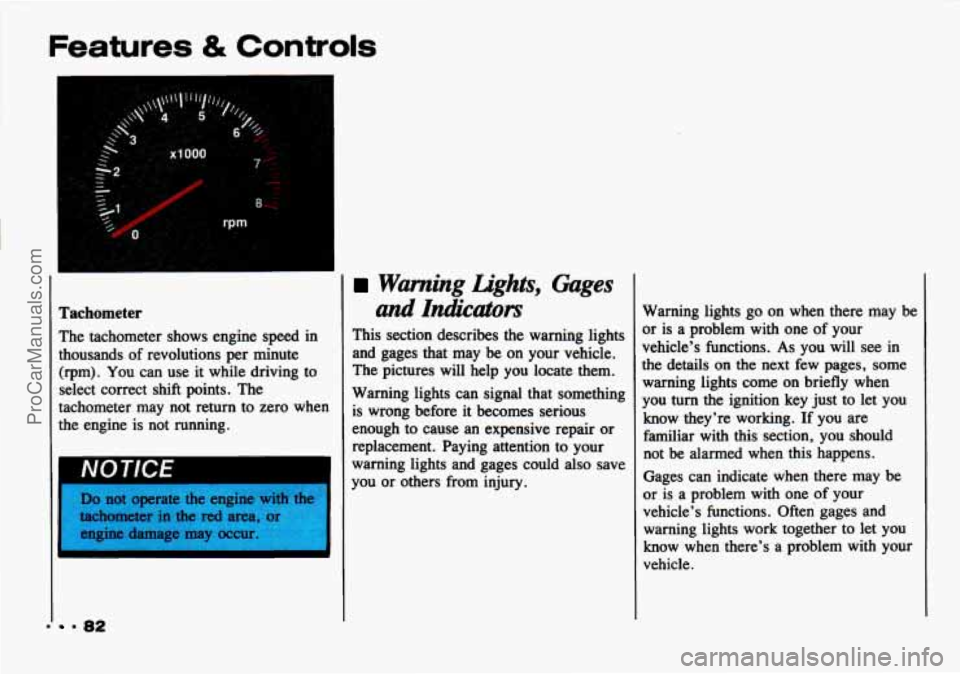
Tachometer
The tachometer shows engine speed in
thousands
of revolutions per minute
(rpm).
You can use it while driving to
select correct shift points. The
tachometer may not return to zero when
the engine is not running.
NOTICE
Do not operate the engine with the
tachometer in the red area
engine damage may occur
9 82
Wanting Lights, Gages
and
Indicators
This section describes the warning lights
and gages that may be on your vehicle.
The pictures will help
you locate them.
Warning lights can signal that something
is wrong before it becomes serious
enough to cause an expensive repair or
replacement. Paying attention to your
warning lights and gages could also save
you or others from injury. Warning
lights go on when there may be
or is a problem with one
of your
vehicle’s functions.
As you will see in
the details on the next few pages, some
warning lights come on briefly when
you turn the ignition key just to let you
know they’re working. If you are
familiar with this section, you should
not be alarmed when this happens.
Gages can indicate when there may be
or is a problem with one of your
vehicle’s functions. Often’ gages
and
warning lights work together to let you
know when there’s a problem with your
vehicle.
ProCarManuals.com
Page 87 of 339
Engine Coolant Temperature Gage
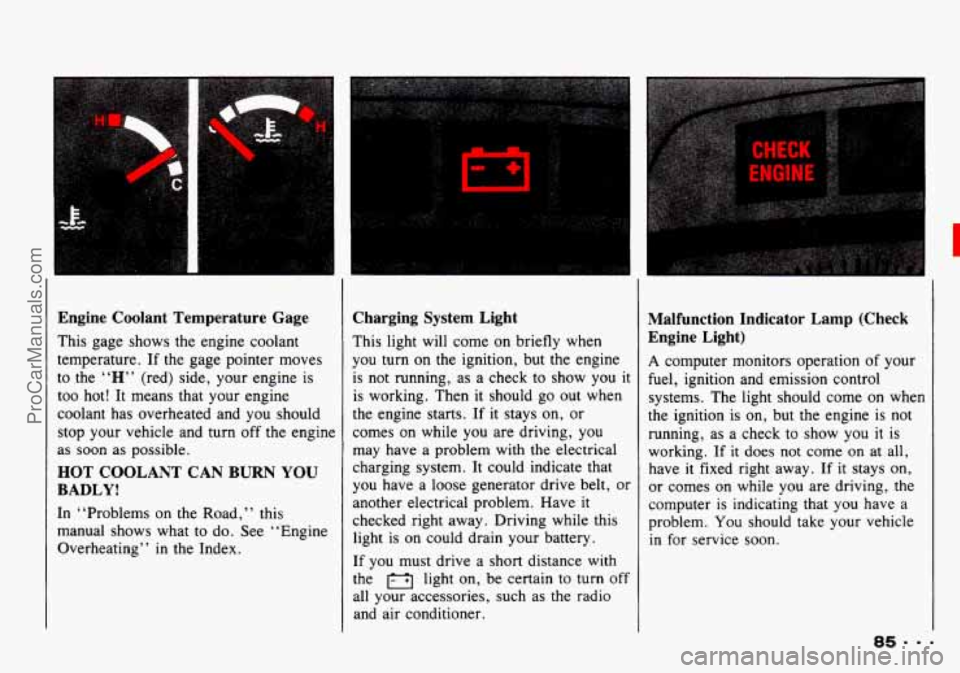
This gage shows the engine coolant
temperature. If the gage pointer moves
to the “H” (red) side, your engine is
too hot! It means that your engine
coolant has overheated and you should
stop your vehicle and turn off the engine
as soon as possible.
HOT
COOLANT CAN BURN YOU
BADLY!
In “Problems on the Road, ” this
manual shows what to do. See “Engine
Overheating’’
in the Index.
-I
I L
Charging System Light
This light will come on briefly when
you turn on
the ignition, but the engine
is not running, as a check to show you it
is working. Then it should go out when
the engine starts. If it stays on, or
comes on while you are driving, you
may
have a problem with the electrical
charging system. It could indicate that
you have a loose generator drive belt, or
another electrical problem. Have
it
checked right away. Driving while this
light
is on could drain your battery.
If you must drive a short distance with
the light
on, be certain to turn off
all your accessories, such as the radio
and air conditioner.
Malfunction Indicator Lamp (Check
Engine Light)
A computer monitors operation of your
fuel, ignition and emission control
systems. The light should come on when
the ignition is on, but the engine is not
running, as a check to show you
it is
working. If
it does not come on at all,
have it fixed right away. If it stays
on,
or comes on while you are driving, the
computer is indicating that you have
a
problem. You should take your vehicle
in for service soon.
85.9.
ProCarManuals.com
Page 88 of 339
If you keep driving your vehicle
with this light on, after a while the
emission controls won’t work as
well, your fuel economy won’t be
as good and your engine may not
run as smoothly. This could lead
to costly repairs not covered by
your warranty.
-8.86
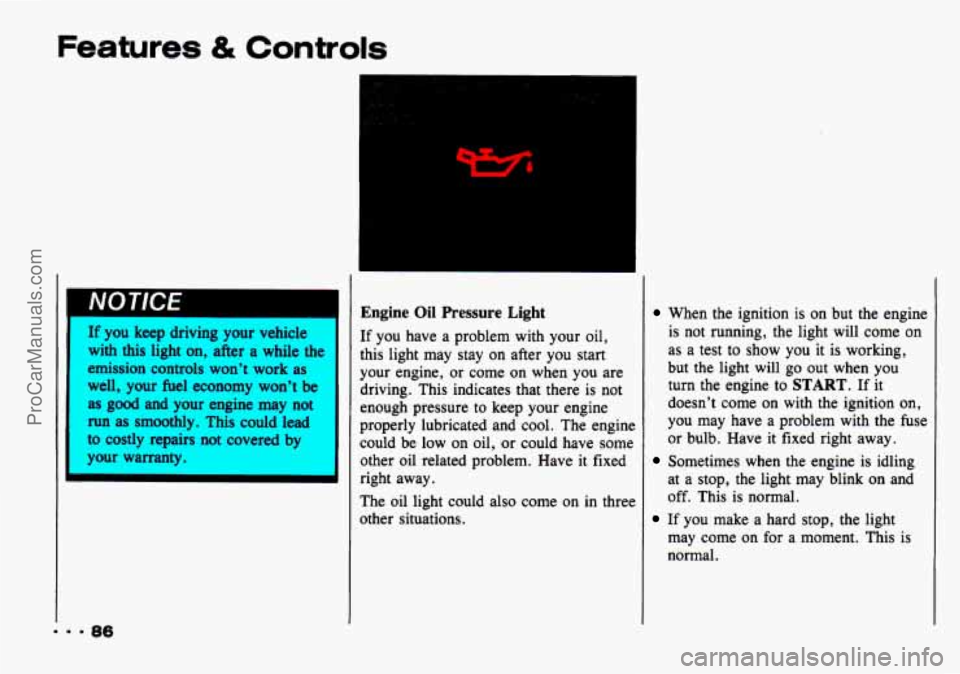
Engine Oil Pressure Light
If you have a problem with your oil,
this light may stay on after you start
your engine, or come on when you are
driving. This indicates that there is not
enough pressure to keep your engine
properly lubricated and cool. The engine
could be low on oil, or could have some
other oil related problem. Have it fixed
right away.
The oil light could also come on in three
other situations.
When the ignition is on but the engine
is not running, the light will come on
as a test to show you it is working,
but the light will
go out when you
turn the engine
to START. If it
doesn’t come on with the ignition on,
you may have a problem with the fuse
or bulb. Have it fixed right away.
Sometimes when the engine is idling
at a stop, the light may blink on and
off. This is normal.
may come on for a moment. This is
normal.
If you make a hard stop, the light
ProCarManuals.com
Page 107 of 339
Dehumidifying
On days when it is raining or the
humidity is high, follow these
dehumidifying steps instead of the
cooling directions. It will help clean
windows that are cloudy with moisture.
1. Push the A/C button.
2. Move the air intake lever tom.
3. Move the airflow lever to .
4. Move the fan control lever toward
5. Adjust the temperature control lever
s-
to a comfortable setting.
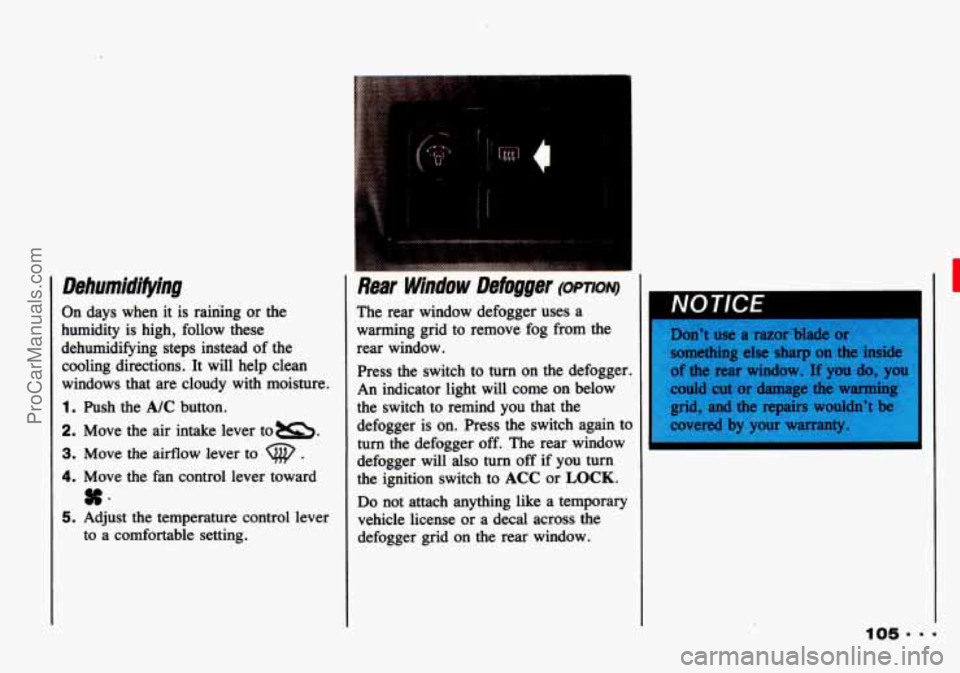
Rear Window Defogger (OPTIO~V) I
Don’t use a razor blade
The
rear window defogger uses a
warming grid to remove fog from the
rear window.
Press the switch to turn on the defogger.
An indicator light will come on below
the switch to remind you that the
defogger is on. Press the switch again to
turn the defogger off. The rear window
defogger will also turn off if you turn
the ignition switch to
ACC or LOCK.
Do not attach anything like a temporary
vehicle license or a decal across the
defogger grid on the rear window. something
else sharp on the
inside
of the
rear window. If you do, yc
could cut or damage
the warming
grid, and the repairs would1 be
covered by your warranty.
ProCarManuals.com
Page 111 of 339
Seek
Press SEEK, or SEEK4 and the
radio will tune to the next higher or
lower station and stay there.
Pushbuttons
The six pushbuttons let you return to
your favorite stations.
To set the
pushbuttons for up to
12 stations (6 AM
and 6 FM), just:
1. Tune in the station.
2. Press and hold one of the
pushbuttons for at least two seconds.
The sound will
go away for a second
and will return when the station is
stored.
Repeat these steps for each pushbutton.
Setting the Tone
Treble:
Turn the TREB knob to the
right to hear more treble.
Bass: Turn the BASS control behind the
TREB knob to the right to hear more
bass.
Adjusting the Speakers
Fade:
Turn the FADE knob to move the
sound between the front and rear
speakers.
Balance: Turn the BAL control behind
the
FADE knob to move the sound
between the
left and right speakers.
Recall
Press RCL to switch the display
between time and frequency. Or, press it
if you want to see the time when the
ignition
is off.
r
ProCarManuals.com
Page 113 of 339

Setting the Tone
Treble:
Turn the TREB knob to the
right to hear more treble.
Bass: Turn the BASS control behind the
TREB knob to the right to hear more
bass.
Loud
To increase the bass tone at low
volumes, press the
LOUD button.
Tone Select
Press TONE SELECT to choose preset
treble and bass equalization settings designed
for
“ROCK,” “NEWS,”
“POP,”
“JAZZ” and “CLASSICAL.”
“ROCK” will appear when you first
press
TONE SELECT. Each time you
press
TONE SELECT another setting
will appear on
the display. Press TONE
SELECT
again after “CLASSICAL”
and control of the tone will be back to
the treble and bass knobs.
Adjusting the Speakers
Fade:
Turn the FADE knob to move the
sound between the front and rear
speakers.
Balance: Turn the BAL control behind
the
FADE knob to move the sound
between the right and left speakers.
Preset Scan
Press the PRESET SCAN button to
hear each of your
FM preset stations for
a
few seconds. When you want to stop
at a chosen station, press
PRESET
SCAN
again.
Recall
Press RCL/PROG to switch the display
between time and frequency. Or, press il
if you want to see the time when the
ignition is off.
To Play a Cassette Tape
Your tape player is built to work best
with tapes that are 30-45 minutes long
on each side. Tapes longer than that are
so thin they may not work well in this
Dlaver.
ProCarManuals.com
Page 115 of 339

EJECT
Press A to remove the tape or stop
the tape and switch to radio.
Radio Monitor
Press the RADIO MNTR button to hear
the radio when you are fast forwarding
or reversing a cassette tape.
You can use
the TUNE, SEEK and PRESET SCAN
buttons while in the radio monitor
mode.
Theft-Deterrent Feature
The theft-deterrent feature for the
AM/FM stereo with cassette tape player
can be used or ignored. If ignored,
the
system plays normally. If it is used,
your system won’t be usable
if it’s ever
l stolen.
Setting Your Security Code
The instructions below tell you how to
enter a security code into the system. If
your
vehicle loses battery power for any
reason, you must enter
the security code
again before the system will turn on.
1. Write down any four-digit number
2. Turn the ignition switch to the ACC
3. Turn the audio system off.
4. Press the 1 and 4 buttons together.
and keep it in
a safe place.
or
ON position.
Hold them down until
“-L” shows
on the display.
You are now ready to enter your
security code. Don’t wait more than
15
seconds between steps.
5. Press 4SEEKb and/or 4TUNEb
and “OOOO” will appear on the
display.
6. Press SEEK4 and hold it until the
first digit of your code appears.
Release the button.
7. Press SEEK, and hold it until the
second digit of your code appears.
Release the button.
8. Press TUNE4 and hold it until the
third digit of your code appears.
Release the button.
113. 9
ProCarManuals.com
Page 116 of 339
Comfort Controls & Audio Systems
9. Press TUNE, and hold it until the
fourth digit
of your code appears.
Release
the button.
checked that
the code you entered
is the one you wrote down. Your
code is not stored and “SEC” will
appear
on the display.
How to Shut Off the Theft-Deterrent
Feature
If your radio is secured (“SEC” shows
on the display) and you wish to disable
it, enter your security code as follows
pausing
no more than 15 seconds
between steps:
1 . Press the 1 and 4 buttons together.
10. Press AM-FM after you have
Hold them down until
“----” shows on the
display.
You are now ready to
enter your security code.
2. Press the SEEK4 button and hold it
until the first digit of your code
appears.
3. Press the SEEK, button and hold it
until the second digit of your code
appears.
4. Press the TUNE4 button and hold it
until the third digit
of your code
appears.
5. Press the TUNE, button and hold it
until the fourth digit of your code
appears.
checked that the code you entered
6. Press AM-FM after you have matches the
one you wrote down.
“ ---- ” should now appear in the
display.
If the code is correct, the radio will
operate. If
the code is wrong, ‘bErr”
will appear in the display.
To Unlock the System after a Power
Loss
If power is disrupted to the radio while
in the “SEC” mode, the unit will not
work and
“LOC” will show on the
display whenever the ignition is on. To
unlock the unit:
1. Press 4SEEKb and/or 4TUNEF
and “00o0” will appear on the
display.
ProCarManuals.com