check transmission fluid CHEVROLET TRACKER 1995 Owners Manual
[x] Cancel search | Manufacturer: CHEVROLET, Model Year: 1995, Model line: TRACKER, Model: CHEVROLET TRACKER 1995Pages: 354, PDF Size: 18.24 MB
Page 160 of 354
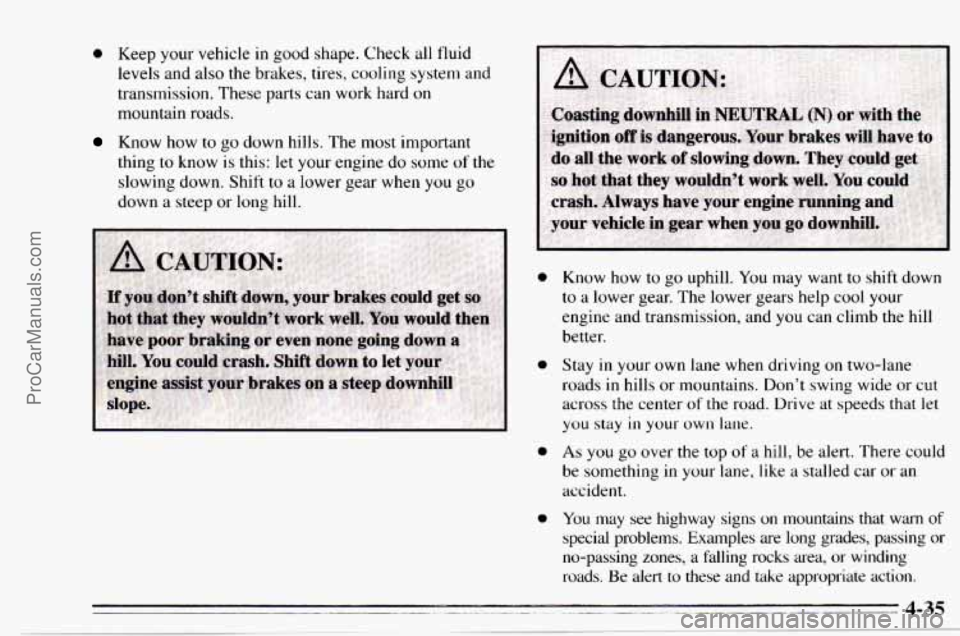
0 Keep your vehicle in good shape. Check all fluid
levels and also the brakes, tires, cooling system and
transmission. These parts can work hard
on
mountain roads.
Know how to go down hills. The most important
thing
to know is this: let your engine do some of the.
slowing down. Shift
to a lower gear when you go
down a steep or long hill.
0
0
0
0
Know how to go uphill. You may want to shift down
to
a lower gear. The lower gears help cool your
engine and transmission, and you can climb the hill
better.
Stay
in your own lane when driving on two-lane
roads
in hills or mountains. Don’t swing wide or cut
across the center
of the road. Drive at speeds that let
you stay in your own lane.
As you go over the top of a hill, be alert. There could
be something in your lane, like a stalled car or an
accident.
You may
see highway signs on mountains that warn of
special problems. Examples are long grades, passing or
no-passing zones, a falling rocks area, or winding
roads. Be
alert to these and take appropriate action.
ProCarManuals.com
Page 176 of 354
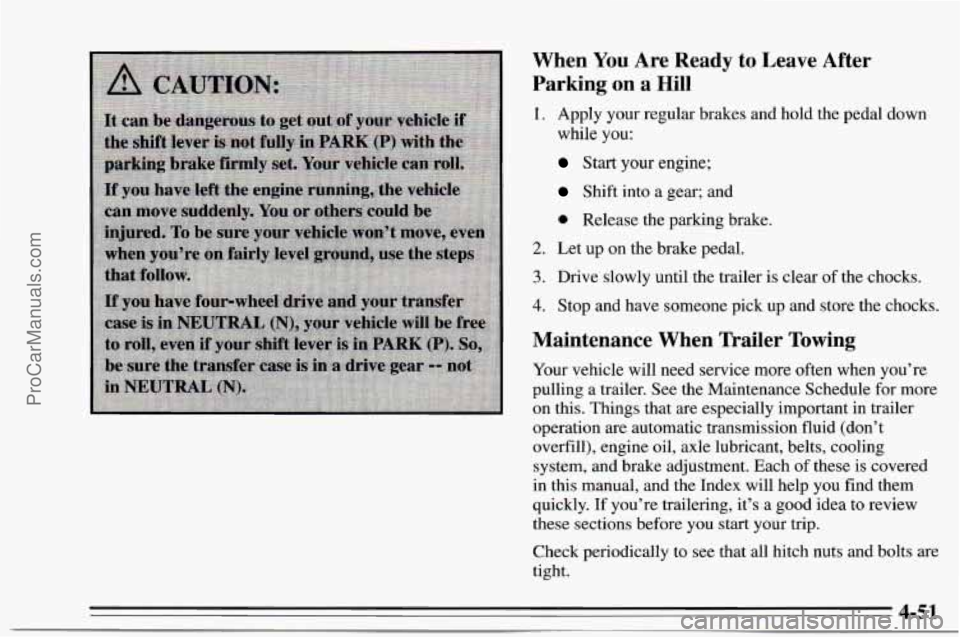
When You Are Ready to Leave After
Parking on a Hill
1. Apply your regular brakes and hold the pedal down
while you:
Start your engine;
Shift into a gear; and
0 Release the parking brake.
2. Let up on the brake pedal.
3. Drive slowly until the trailer is clear of the chocks.
4. Stop and have someone pick up and store the chocks.
Maintenance When Trailer Towing
Your vehicle will need service more often when you’re
pulling a trailer. See the Maintenance Schedule for more
on this. Things that
are especially important in trailer
operation are automatic transmission fluid (don’t
overfill), engine oil, axle lubricant, belts, cooling
system, and brake adjustment. Each of these is covered
in this manual, and the Index will help you find them
quickly. If you’re trailering, it’s a good idea to review
these sections before you start your trip.
Check periodically to see that all hitch nuts and bolts are
tight.
4-51
ProCarManuals.com
Page 230 of 354
Automatic Transmission Fluid
When to Check and Change
A good time to check your automatic transmission fluid
level is when the engine oil is changed. Refer to the
Maintenance Schedule to determine
when to change
your fluid. See “Scheduled Maintenance Services”
in the
Index.
How to Check
Because this operation can be a little difficult, you may
choose to have this done at your Chevrolet/Geo dealer
Service Department.
If you do it yourself, be sure to follow all the
instructions here, or you could get a false reading on the
dipstick.
NOTICE:
Too much or too little fluid can damage your
transmission.
Too much can mean that some of
the fluid could come out and fall on hot engine
parts or exhaust system parts, starting a fire. Be sure to get an accurate reading if you check your
transmission fluid.
Wait at least 30 minutes before checking the
transmission fluid level if you have been driving:
0 When outside temperatures are above 90°F (32°C).
At high speed for quite a while.
0 In heavy traffic -- especially in hot weather.
0 While pulling a trailer.
To get the right reading, the fluid should be at normal
operating temperature, which is
180” F to 200” F
(82°C to 93°C).
ProCarManuals.com
Page 231 of 354
To check transmission fluid hot: Get the vehicle
warmed up by driving about 15 miles
(24 km) when
outside temperatures are above
50°F (10°C). If it's
colder than
50°F ( 10°C), drive the vehicle in
DRIVE (D) until the engine temperature gage moves
and then remains steady for ten minutes. Then follow
the hot check procedures.
To check transmission fluid cold: A cold check is
made after the vehicle has been sitting for eight hours or
more with the engine
off and is used only as a reference.
Let the engine run at idle for five minutes if outside
temperatures are
50 OF ( 10 " C) or more. If it's colder
than
50°F (10°C)' you may have to idle the engine
longer. Should the fluid level
be low during a cold
check,
you must perform a hot check before adding
fluid. This will give you
a more accurate reading of the
fluid
level.
To check the fluid hot or cold:
Park your vehicle on a level place. Keep the engine
With the parking brake applied, place the shift lever
With your foot on the brake pedal, move the shift
lever through each gear range, pausing for about
three seconds in each range. Then, position the shift
lever in
PARK (P).
0 Let the engine run at idle for three minutes or more.
running.
in
PARK (P).
ProCarManuals.com
Page 233 of 354
How to Add Fluid Manual Transmission Fluid
Refer to the Maintenance Schedule to determine what
kind
of transmission fluid to use. See “Recommended
Fluids and Lubricants” in the Index.
Add fluid only after checking the transmission fluid
HOT. (A COLD check is used only as a reference.) If
the fluid level is low, add only enough of the proper
fluid to bring the level up to the
HOT area for a hot
check. It doesn’t take much fluid, generally less than a
pint.
Don ’t ove$ZZ. We recommend you use only fluid
labeled DEXRON@-111, because fluid with that label is
made especially for your automatic transmission.
Damage caused by fluid other than DEXRON@-I11 is
not covered by your new vehicle warranty.
After adding fluid, recheck the fluid level as
described under “How to Check.’’
When the correct fluid level is obtained, push the
dipstick back in all the way.
When to Check and Change
A good time to have it checked is when the engine oil is
changed. Refer to the Maintenance Schedule to
determine when to change
your transmission fluid. See
“Scheduled Maintenance Services” in the Index.
How to Check
Because this operation can be a little difficult, you may
choose
to have this done at your Chevrolet/Geo dealer
Service Department.
If you do it yourself, be sure to follow all the
instructions here, or you could get
a false reading.
ProCarManuals.com
Page 234 of 354
NOTICE:
Too much or too little fluid can damage your
transmission.
Too much can mean that some of
the fluid could come out and
fall on hot engine
parts or exhaust system parts, starting
a fire. Be
sure to get an accurate reading if you check your
transmission fluid.
Check the fluid level only when your engine is off, the
vehicle is parked on a level place and the transmission
is
cool enough for you to rest your fingers on the
transmission case.
Then, follow these steps:
1.
2.
3.
Remove the filler plug.
Check that the lubricant level is up to
the bottom of
the filler plug hole.
If the fluid level
is good, install the plug and be sure
it is fully seated.
If the fluid level is low, add more
fluid as described
in the next steps.
How to Add Fluid
Here’s how to add fluid. Refer to the Maintenance
Schedule to determine what kind
of fluid to use. See
“Recommended Fluids and Lubricants” in the Index.
I. Remove the filler plug.
2. Add fluid at the filler plug hole. Add only enough
fluid to bring the fluid level up to the bottom
of the
filler plug hole.
3. Install the filler plug. Be sure the plug is fully seated.
Clutch Adjustment
The clutch linkage in your vehicle should be checked as
recommended in your Maintenance Schedule.
To check,
push the clutch pedal down with your hand until you
feel some resistance to movement
of the pedal. If the
pedal moves freely up
to an inch (25 mm) or so before
you feel resistance to the travel, adjustment isn’t needed.
If there is
no free travel or very little (less than 5/23 of an
inch
(16 mm)), see your dealer for adjustment.
ProCarManuals.com
Page 277 of 354
Capacities (Approximate) Continued
Front Differential .................... 1.1 qt. (1 .O L)
Fuel Tank .......................... 11.1 gal. (42 L)
Manual Transmission
Four-wheel Drive
................. 1.6 qt. (1.5 L)**
Two-Wheel Drive ................. 1.8 qt. (1.7 L)**
Rear Differential .................... 2.3 qt. (2.2 L)
Transfer Case ....................... 1.8 qt. (1.7 L)
* When changing the oil filter, additional oil may be needed.
Recheck the oil level after filling. See “Engine Oil” in the
Index.
** Recheck fluid level after filling. See “Automatic
Transmission Fluid” or “Manual Transmission Fluid” in the
Index.
Wheel Nuts
Wheel Nut Torque ................. 60 lb- ft (80 Nom)
Vehicle Dimensions
Wheelbase ....................... 86.6” (2 200 mm)
Tread Front
......................... 54.9” (1 395 mm)
Rear
.......................... 55.1” (1 400 mm)
Length
......................... 142.5” (3 620 mm)
Width
........................... 64.2” (1 630 mm)
Height
........................... 65.0” (1 65 1 mm)
Air Conditioning Refrigerants
Not all air conditioning refrigerants are the same. If the air
conditioning system
in your vehicle needs refrigerant, be
sure the proper refrigerant is used. If you’re not sure, ask
your Chevrolet/Geo dealer.
For additional information, see
your “Warranty and Owner Assistance Information” booklet.
ProCarManuals.com
Page 281 of 354
Maintenance Schedule
I Schedule I Definition
Follow Maintenance Schedule I if any one of these is
true for your vehicle:
Most trips are less than 5 to 10 miles (8 to 16 km).
This is particularly important when outside
temperatures are below freezing.
driving
in stop-and-go traffic).
Most trips include extensive idling (such as frequent
0 You frequently tow a trailer or use a carrier on top of
your vehicle.
Schedule
I should also be followed if the vehicle is used
for delivery service, police, taxi, or other commercial
application.
Schedule I Intervals
Every 3,000 Miles (5 000 km) or 3 Months,
Whichever Occurs First
Engine Oil and Filter Change
Free-Wheeling Hubs Inspection (If Equipped)
Every 6,000 Miles (10 000 km) or 6 Months,
Whichever Occurs First
Tire Rotation
Every 15,000 Miles (25 000 km)
Air Cleaner Filter Inspection, if driving in dusty
Front Wheel Bearing Repack (or at each brake
Manual Transmission Fluid Change (or every
Engine Idle Speed Check
Valve Lash (Clearance) Adjustment
Propeller Shafts and U-Joints Inspection (or every conditions
relining, whichever occurs first)
15 months, whichever occurs first)
15 months, whichever occurs first)
ProCarManuals.com
Page 282 of 354
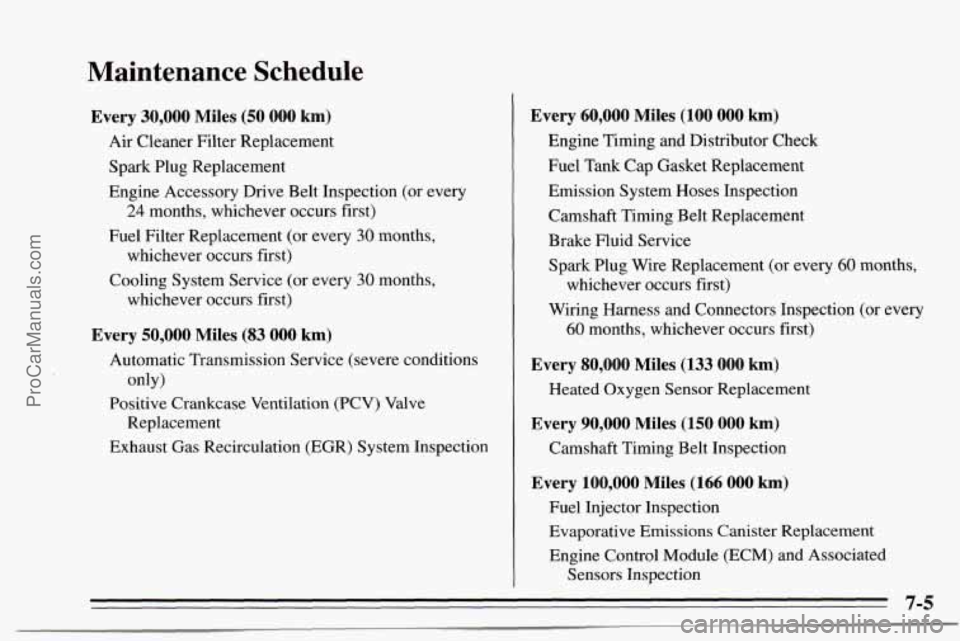
Maintenance Schedule
Every 30,000 Miles (50 000 km)
Air Cleaner Filter Replacement
Spark Plug Replacement
Engine Accessory Drive Belt Inspection (or every
Fuel Filter Replacement (or every
30 months,
Cooling System Service (or every
30 months,
24 months, whichever occurs first)
whichever occurs first) whichever occurs first)
Every 50,000 Miles (83 000 lug)
Automatic Transmission Service (severe conditions
Positive Crankcase Ventilation
(PCV) Valve
Exhaust Gas Recirculation (EGR) System Inspection
only)
Replacement
Every 60,000 Miles (100 000 km)
Engine Timing and Distributor Check
Fuel Tank Cap Gasket Replacement
Emission System Hoses Inspection
Camshaft Timing Belt Replacement
Brake Fluid Service Spark Plug Wire Replacement (or every
60 months,
Wiring Harness and Connectors Inspection (or every
whichever
occurs first)
60 months, whichever occurs first)
Every 80,000 Miles (133 000 km)
Heated Oxygen Sensor Replacement
Every 90,000 Miles (150 000 km)
Camshaft Timing Belt Inspection
Every 100,000 Miles (166 000 km)
Fuel Injector Inspection
Evaporative Emissions Canister Replacement
Engine Control Module (ECM) and Associated
Sensors Inspection
7-5
ProCarManuals.com
Page 284 of 354
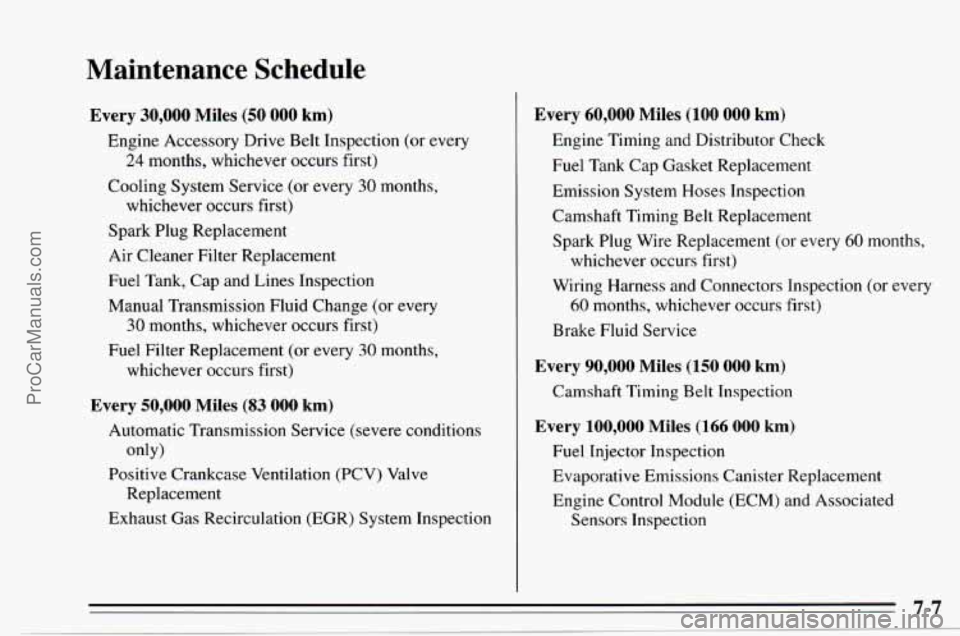
Maintenance Schedule
Every 30,000 Miles (50 000 km)
Engine Accessory Drive Belt Inspection (or every
24 months, whichever occurs first)
Cooling System Service (or every
30 months,
whichever occurs first)
Spark Plug Replacement
Air Cleaner Filter Replacement
Fuel Tank, Cap and Lines Inspection
Manual Transmission Fluid Change (or every
30 months, whichever occurs first)
Fuel Filter Replacement (or every
30 months,
whichever occurs first)
Every 50,000 Miles (83 000 km)
Automatic Transmission Service (severe conditions
Positive Crankcase Ventilation (PCV) Valve
Exhaust Gas Recirculation (EGR) System Inspection
only)
Replacement
Every 60,000 Miles (100 000 km)
Engine Timing and Distributor Check
Fuel Tank Cap Gasket Replacement
Emission System Hoses Inspection
Camshaft Timing Belt Replacement
Spark Plug Wire Replacement (or every
60 months,
Wiring Harness and Connectors Inspection (or every
Brake Fluid Service
whichever occurs first)
60 months, whichever
occurs first)
Every 90,000 Miles (150 000 km)
Camshaft Timing Belt Inspection
Every 100,000 Miles (166 000 km)
Fuel Injector Inspection
Evaporative Emissions Canister Replacement
Engine Control Module (ECM) and Associated
Sensors Inspection
ProCarManuals.com