bulb CHEVROLET TRACKER 1995 Owners Manual
[x] Cancel search | Manufacturer: CHEVROLET, Model Year: 1995, Model line: TRACKER, Model: CHEVROLET TRACKER 1995Pages: 354, PDF Size: 18.24 MB
Page 72 of 354
4
L
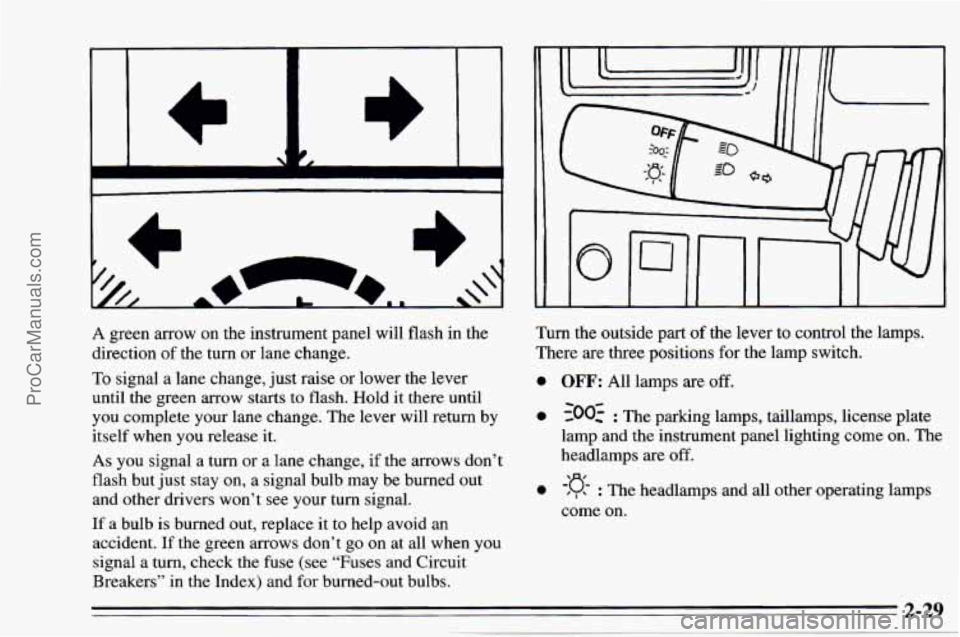
A green arrow on the instrument panel will flash in the
direction of the turn or lane change.
To signal a lane change, just raise or lower the lever
until the green arrow starts
to flash. Hold it there until
you complete your lane change. The lever will return by
itself when you release it.
As you signal a turn or a lane change, if the arrows don’t
flash but just stay on, a signal bulb may be burned out
and other drivers won’t see your turn signal.
If a bulb is burned out, replace it to help avoid an
accident.
If the green arrows don’t go on at all when you
signal
a turn, check the fuse (see “Fuses and Circuit
Breakers’’ in the Index) and
for burned-out bulbs.
0
0
Turn the outside part of the lever to control the lamps.
There are three positions for the lamp switch.
OFF: All lamps are off.
0
-loo: : The parking lamps, taillamps, license plate
lamp and the instrument panel lighting come on. The
headlamps
are off.
-:g- : The headlamps and all other operating lamps
come on.
ProCarManuals.com
Page 90 of 354
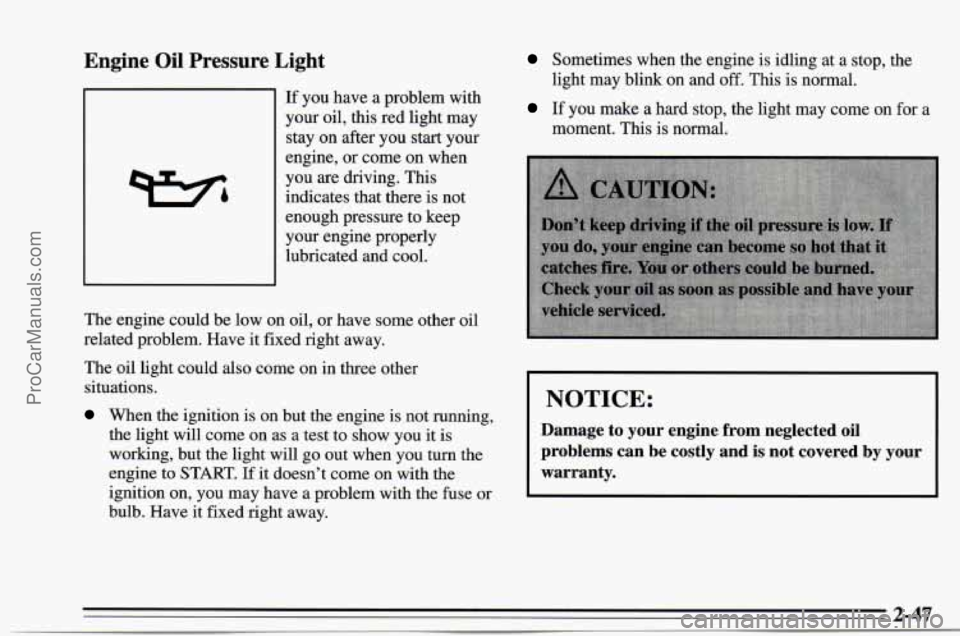
Engine Oil Pressure Light
If you have a problem with
your oil, this red light may
stay on after you start your
engine, or come on when
you are driving. This
indicates that there is not
enough pressure to keep
your engine properly
lubricated and cool.
The engine could be low on oil, or have some other oil
related problem. Have
it fixed right away.
The oil light could also come on in three other
situations.
When the ignition is on but the engine is not running,
the light will come on as a test to show you it is
working, but the light will go out when you turn the
engine to START.
If it doesn’t come on with the
ignition on, you may have a problem with the fuse
or
bulb. Have it fixed right away.
Sometimes when the engine is idling at a stop, the
If you make a hard stop, the light may come on for a
light
may blink on and
off. This is normal.
moment. This is normal.
I NOTICE:
Damage to your engine from neglected oil
problems can be costly and
is not covered by your
warranty.
ProCarManuals.com
Page 175 of 354
When towing a trailer, the green arrows on your
instrument panel will flash for turns even if the bulbs on
the trailer are burned out. Thus, you may think drivers
behind you are seeing your signal when
they are not. It’s
important to check occasionally to be sure the trailer
bulbs are still working.
Driving On Grades
Reduce speed and shift to a lower gear before you start
down a long or steep downgrade.
If you don’t shift
down, you might have to
use your brakes so much that
they would get hot and no longer work well.
On a long uphill grade, shift down and reduce your
speed
to around 45 mph (70 km/h) to reduce the
possibility of engine and transmission overheating.
If you are towing a trailer and you have a manual
transmission with fifth gear, you may prefer not to use
fifth gear. Just drive in fourth gear (or,
as you need to, a
lower gear).
Parking on Hills
You really should not park your vehicle, with a trailer
attached,
on a hill. If something goes wrong, your rig
could start
to move. People can be injured, and both
your vehicle and the trailer can be damaged.
But if you ever have to park your rig on a hill, here’s
how to do it:
1. Apply your regular brakes, but don’t shift into
PARK
(P) yet, or into gear for a manual
transmission.
2. Have someone place chocks under the trailer wheels.
3. When the wheel chocks are in place, release the
regular brakes until the chocks absorb the load.
4. Reapply the regular brakes. Then apply your parking
brake, and then shift to PARK
(P), or REVERSE (R)
for a manual transmission.
5. If you have a four-wheel drive vehicle, be sure
the transfer case is
in a drive gear -- not in
NEUTRAL
(N).
6. Release the regular brakes.
ProCarManuals.com
Page 246 of 354
Halogen Bulbs Headlamps
Bulb Replacement
See “Replacement Bulbs” in the Index to check the size
and type
of bulb you need to use.
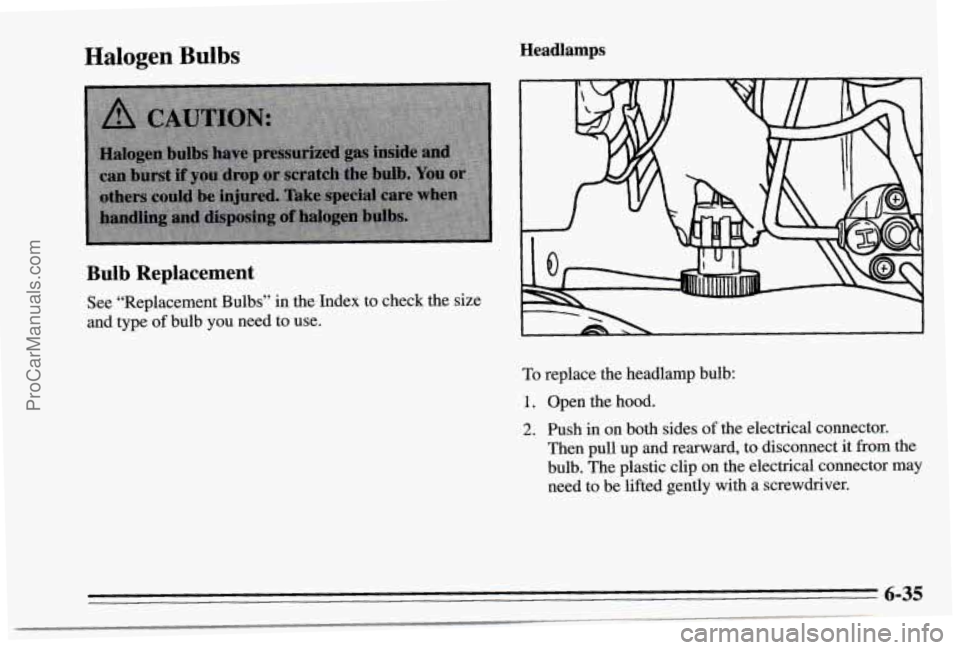
To replace the headlamp bulb:
1. Open the hood.
2. Push in on both sides of the electrical connector.
Then pull up and rearward, to disconnect it from the
bulb. The plastic clip on
the electrical connector may
need to be lifted gently with a screwdriver.
6-35
ProCarManuals.com
Page 247 of 354
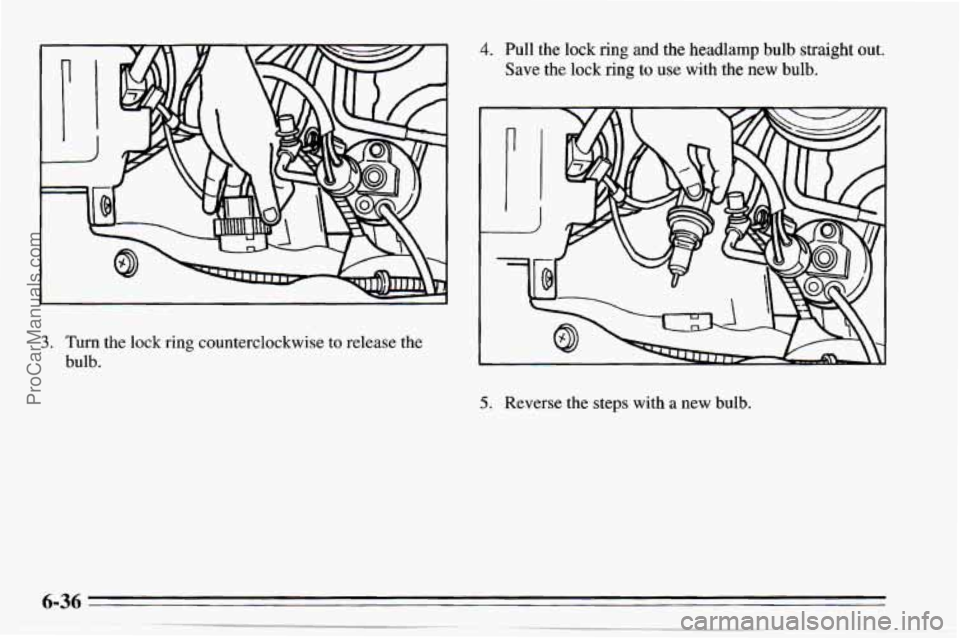
4. Pull the lock ring and the headlamp bulb straight out.
Save the lock
ring to use with the new bulb.
3. Turn the lock ring counterclockwise to release the
bulb.
5. Reverse the steps with a new bulb.
ProCarManuals.com
Page 248 of 354
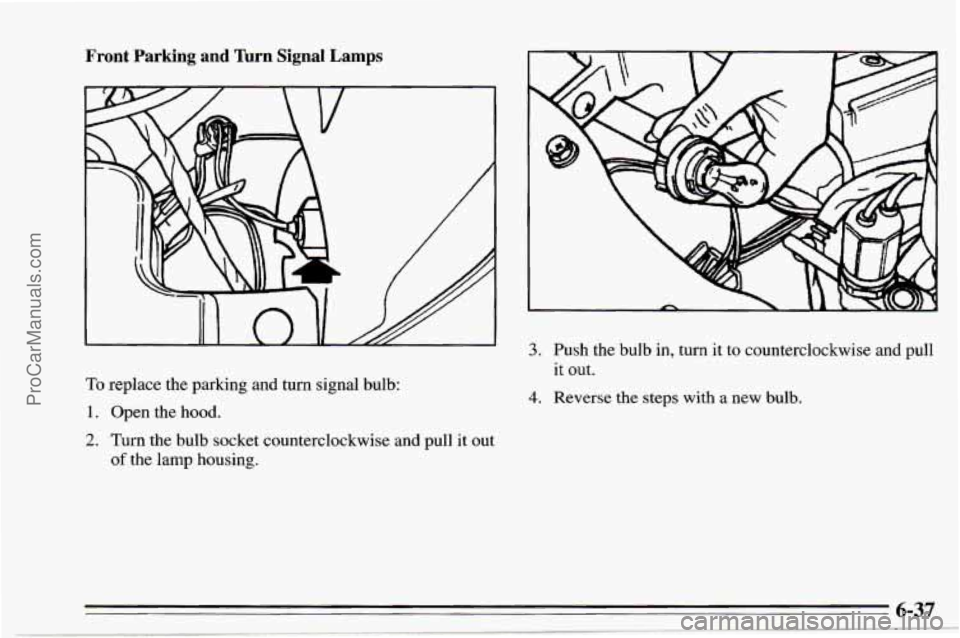
Front Parking and Turn Signal Lamps
To replace the parking and turn signal bulb:
1. Open the hood.
2. Turn the bulb socket counterclockwise and pull it out
of the lamp housing.
3. Push the bulb in, turn it to counterclockwise and pull
it out.
4. Reverse the steps with a new bulb.
6-37
ProCarManuals.com
Page 249 of 354
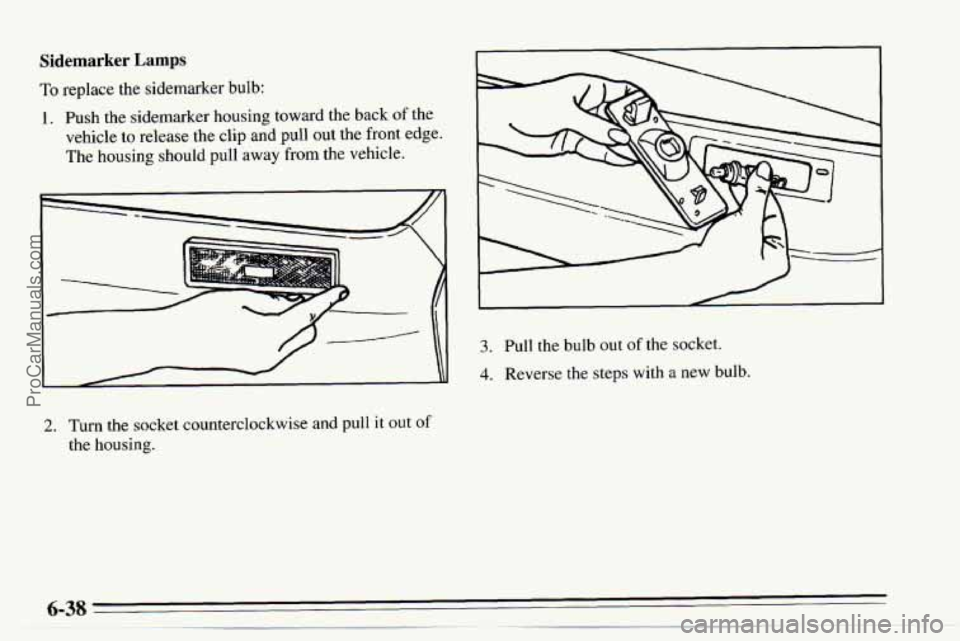
Sidemarker Lamps
To replace the sidemarker bulb:
1. Push the sidemarker housing toward the back of the
vehicle to release the clip and pull out the front edge.
The housing should pull away
from the vehicle.
2. Turn the socket counterclockwise and pull it out of
the housing.
3. Pull the bulb out of the socket.
4. Reverse the steps with a new bulb.
6-38 -
ProCarManuals.com
Page 250 of 354
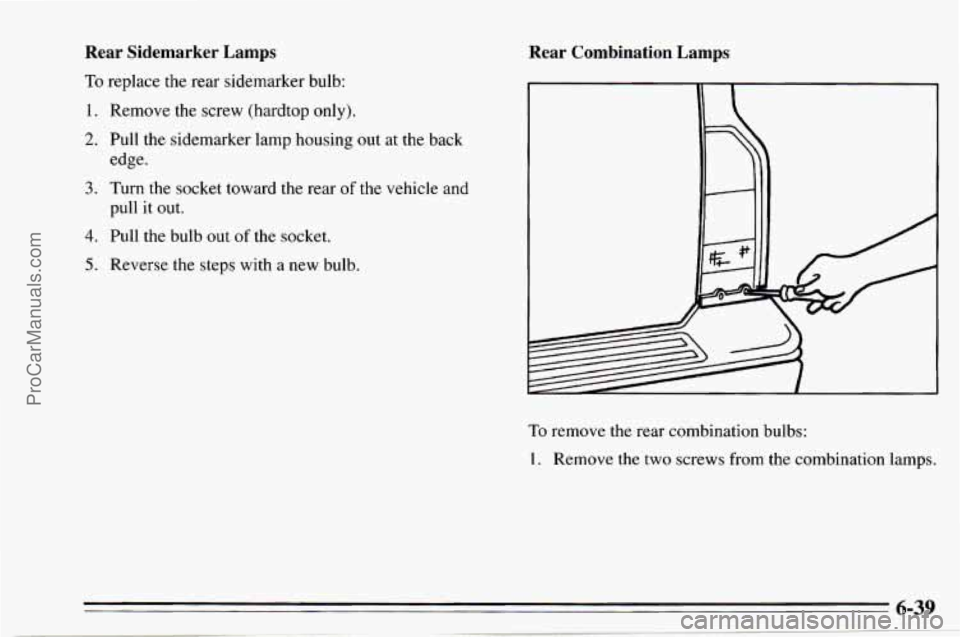
Rear Sidemarker Lamps
To replace the rear sidemarker bulb:
1.
2.
3.
4.
5.
Remove the screw (hardtop only).
Pull the sidemarker lamp housing out at the back
edge.
Turn the socket toward the rear
of the vehicle and
pull it out.
Pull the bulb out
of the socket.
Reverse the steps with a new bulb.
Rear Combination Lamps
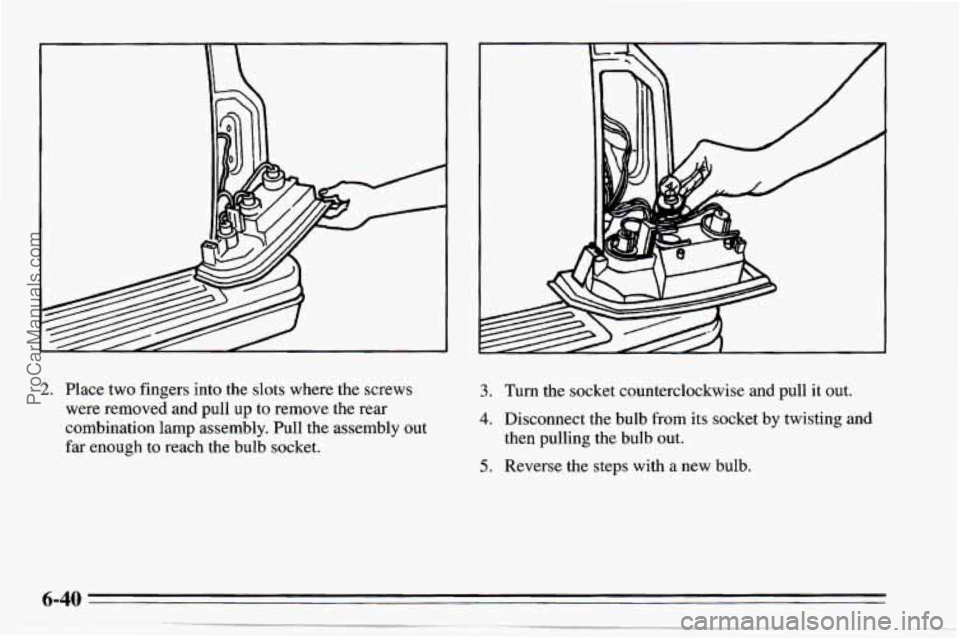
To remove the rear combination bulbs:
1. Remove the two screws from the combination lamps.
ProCarManuals.com
Page 251 of 354
A
2. Place two fingers into the slots where the screws
were removed and pull up to remove the rear
combination lamp assembly. Pull the assembly out
far enough to reach the bulb socket. 3. Turn the socket counterclockwise and pull it out.
4. Disconnect the bulb from its socket by twisting and
then pulling the bulb out.
5. Reverse the steps with a new bulb.
6-40
ProCarManuals.com
Page 274 of 354
7 8
9
10 11
12
13
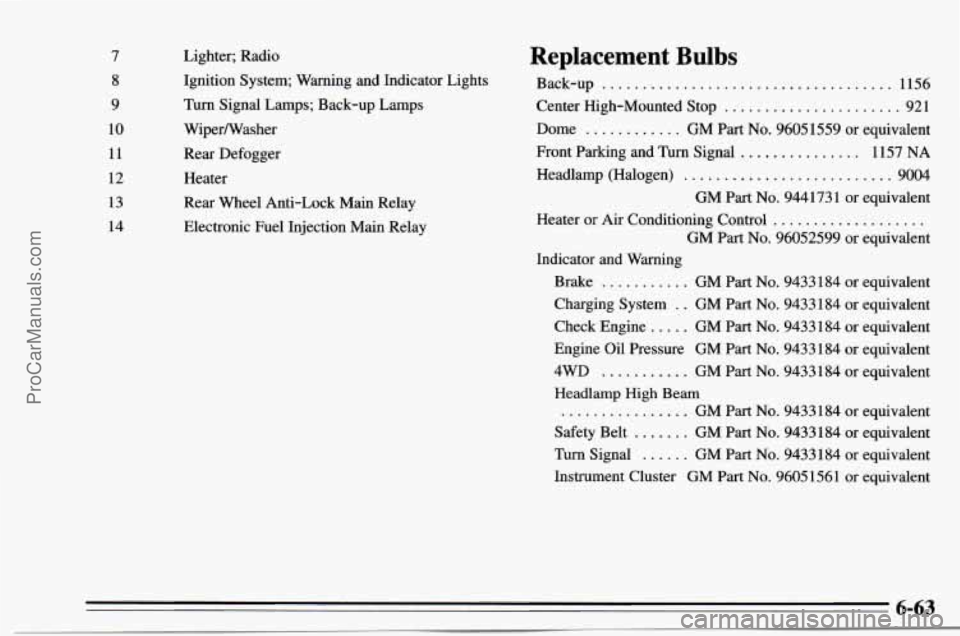
14 Lighter;
Radio
Ignition System; Warning and Indicator Lights
Turn Signal Lamps; Back-up Lamps
WiperNasher
Rear Defogger
Heater
Rear Wheel Anti-Lock Main Relay
Electronic Fuel Injection Main Relay Replacement Bulbs
Back-up .................................... 1156
Center High-Mounted Stop
...................... 921
Dome
............ GM Part No. 9605 1559 or equivalent
Front Parking and Turn Signal
............... 1157 NA
Headlamp (Halogen) .......................... 9004
GM Part
No. 944173 1 or equivalent
GM Part
No. 96052599 or equivalent
Heater
or Air
Conditioning Control ...................
Indicator and Warning
Brake
........... GM Part No. 9433184 or equivalent
Check Engine
..... GM Part No. 9433184 or equivalent
4WD ........... GM Part No. 9433184 or equivalent
................ GM Part No. 9433184 or equivalent
Safety Belt
....... GM Part No. 9433184 or equivalent
Turn Signal
...... GM Part No. 9433 184 or equivalent
Charging System
. . GM Part No. 9433184
or equivalent
Engine Oil Pressure GM Part
No. 9433184 or equivalent
Headlamp High Beam
Instrument Cluster GM Part
No. 9605 1561 or equivalent
6-63
ProCarManuals.com