heating CHEVROLET TRACKER 1995 Owners Manual
[x] Cancel search | Manufacturer: CHEVROLET, Model Year: 1995, Model line: TRACKER, Model: CHEVROLET TRACKER 1995Pages: 354, PDF Size: 18.24 MB
Page 2 of 354

GeGB The 1995 Geo Tracker Owner’s Manual
Seats and Restraint Systems .............................................................. 1-1
This section tells you how to use your seats and safety belts prop\
erly.
Features and Controls .................................................................. 2-1
This section explains how to start and operate your Geo.
Comfort Controls and Audio Systems ..................................................... 3-1
This section tells you how to adjust the ventilation and comfo\
rt controls and how to operate your
audio system. Here you’ll find helpful information and tips about the road\
and how to drive under different conditions.
This section tells you what to do if you have
a problem while driving, such as a flat tire or engine
overheating, etc.
YourDrivingandtheRoad .............................................................. 4-1
Problems on the Road
.................................................................. 5-1
Service and Appearance Care. ........................................................... 6-1
Here the manual tells you how to keep your Geo running properly and looking good.
This section tells you when to perform vehicle maintenance and \
what fluids and lubricants to
use.
This section tells you how to contact Chevrolet/Geo for assista\
nce and how to get service publications. It also
gives you information on “Reporting Safety Defects” on pag\
e
8-4.
Maintenanceschedule .................................................................. 7-1
Customer Assistance Information ........................................................ 8-1
I-Idex ........................................................,...............\
.........9-1
Here’s an alphabetical listing of almost every subject in this manual. You can use it to quickly find
something
you want to read.
ProCarManuals.com
Page 79 of 354
Ashtrays and Lig
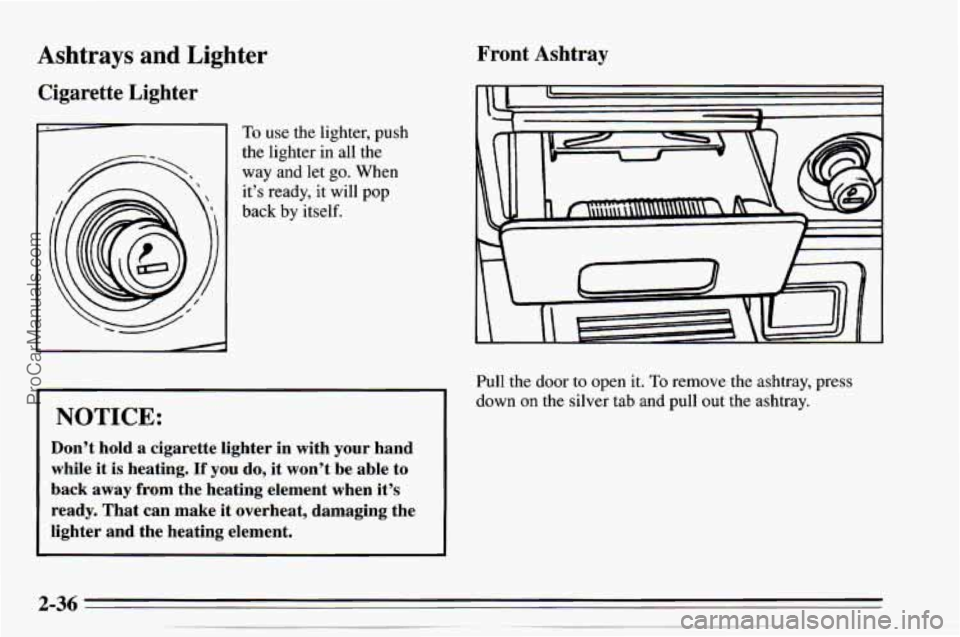
Cigarette Lighter
Iter Front Ashtray
To use the lighter, push
the lighter in all the
way and let
go. When
it’s ready, it will pop
back by itself.
NOTICE:
Don’t hold a cigarette lighter in with your hand
while it is heating.
If you do, it won’t be able to
back away from the heating element when it’s
ready. That can make
it overheat, damaging the
lighter and the heating element.
Pull the door to open it. To remove the ashtray, press
down
on the silver tab and pull out the ashtray.
ProCarManuals.com
Page 89 of 354
Engine Coolant Temperature Gage
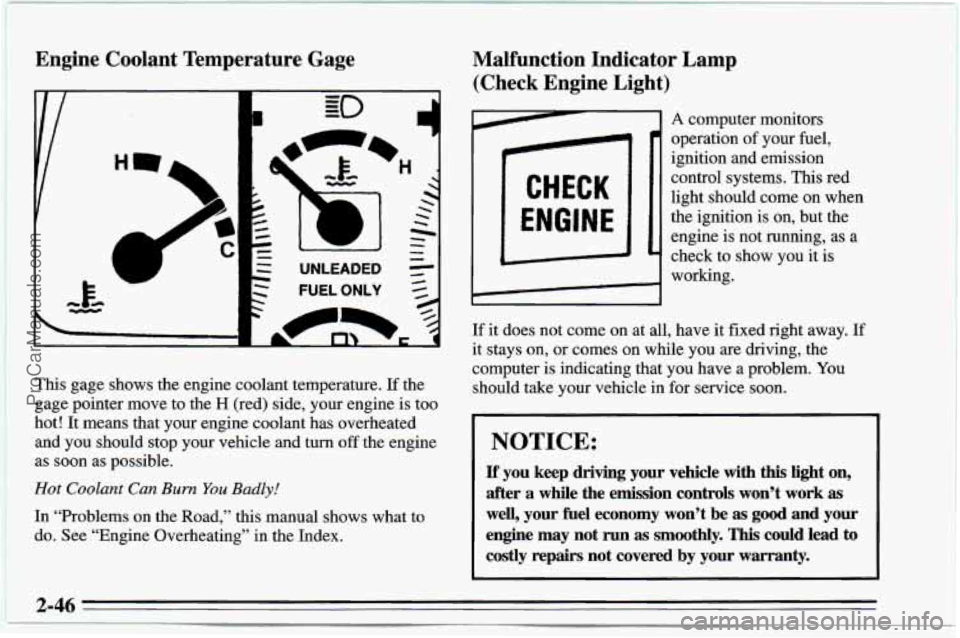
This gage shows the engine coolant temperature. If the
gage pointer move to the
H (red) side, your engine is too
hot! It means that your engine coolant has overheated
and you should stop your vehicle and turn
off the engine
as soon as possible.
Hot Coolant Can Burn You Badly!
In “Problems on the Road,” this manual shows what to
do. See “Engine Overheating”
in the Index.
Malfunction Indicator Lamp
(Check Engine Light)
A computer monitors
operation
of your fuel,
ignition and emission
control systems. This red
light should come
on when
the ignition
is on, but the
engine
is not running, as a
check to show you it is
CHECK
ENGINE
Da i
I
If it does not come on at all, have it fixed right away. If
it stays on, or comes on while you are driving, the
computer is indicating that you have a problem. You
should take your vehicle in
for service soon.
NOTICE:
If’ you keep driving your vehicle with this light on,
after a while the emission controls won’t work
as
well, your fuel economy won’t be as good and your
engine may not
run as smoothly. This could lead to
costly repairs not covered by your warranty.
2-46
I
ProCarManuals.com
Page 106 of 354
Gem Section 3 Comfort Controls and Audio Systems
In this section you’ll find out how to operate the comfort
control systems and audio systems offered
with your
Geo. Be sure to read about the particular system
supplied with your vehicle.
Comfort Controls
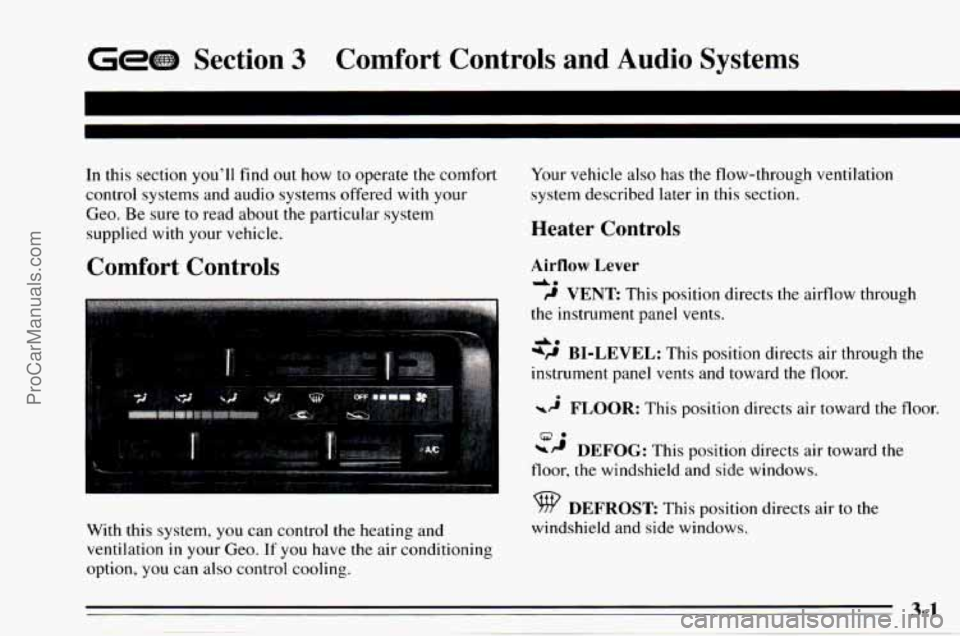
With this system, you can control the heating and
ventilation
in your Geo. If you have the air conditioning
option, you can
also control cooling. Your
vehicle also has the flow-through ventilation
system described later
in this section.
Heater Controls
Airflow Lever
da
9 VENT This position directs the airflow through
the instrument panel vents.
*P BI-LEVEL: This position directs air through the
instrument panel vents and toward
the floor.
-2 FLOOR: This position directs air toward the floor.
DEFOG: This position directs air toward the
A*
9.
floor, the windshield and side windows.
DEFROST This position directs air to the
windshield and side windows.
ProCarManuals.com
Page 107 of 354
Fan Control Lever Bi-Level
Slide the lever away from OFF to turn the heating
system on. Move the lever toward FAN
to increase the
fan’s speed.
Temperature Control Lever
Slide the lever to change the temperature of the air
flowing from the system. Move it to the right for warmer
air and
to the left for cooler air. The air temperature can’t
be less than the outside air temperature.
Air Intake Lever
RECIRCULATE:
Choose this position to
recirculate the inside air through
the comfort control
system.
outside air through the comfort control system.
CIRCULATE: Choose this position to circulate
Heating
For the quickest results, move the air intake lever to
RECIRCULATE. Move the airflow lever to FLOOR, the
temperature control lever toward the right for warmer
air and the fan control lever toward FAN.
You should
switch
to CIRCULATE once in a while to avoid stale air
and cloudy windows.
You may want to use bi-level on cool, but sunny days.
This setting directs outside air toward your body and
warmer air toward your feet.
Move the air intake lever to CIRCULATE and the
airflow lever to
BI-LEVEL. Move the temperature
control lever to the center and the fan control lever
toward FAN.
Ventilation
For mild outside temperatures, when little heating or
cooling is needed, you can still direct outside air through
your vehicle.
Move the air intake lever to CIRCULATE and
the
airflow lever to BI-LEVEL. Adjust the temperature
control lever to a comfortable setting and move the fan
control lever to FAN.
Defogging and Defrosting Windows
Slide the air intake lever to CIRCULATE and the
airflow lever to DEFROST
to direct air to the
windshield vents. Then slide the temperature control
lever toward the right and the fan control lever to FAN.
When the windshield is clear, turn down the fan speed.
ProCarManuals.com
Page 108 of 354
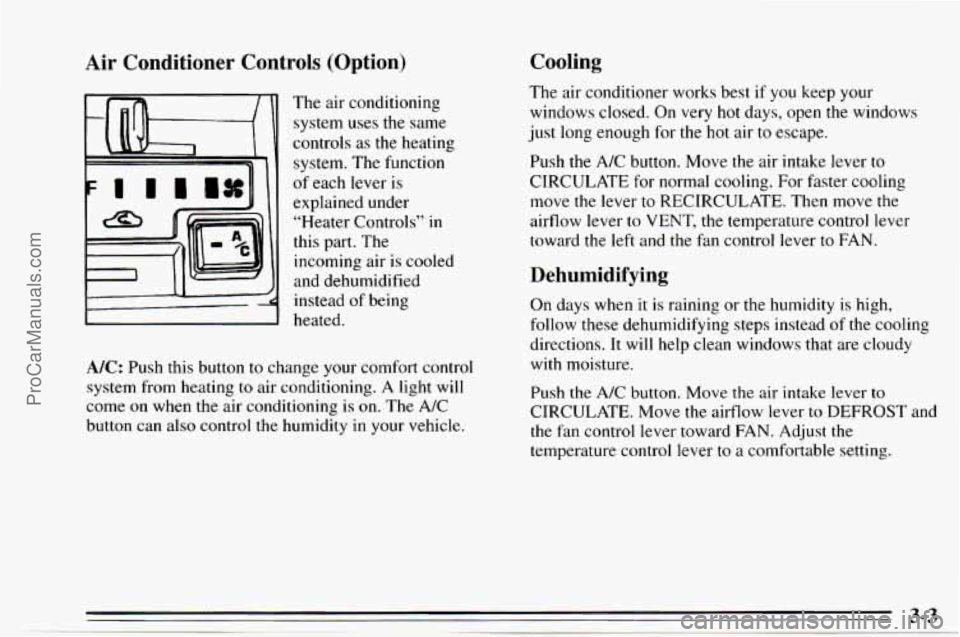
Air Conditioner Controls (Option)
The air conditioning
system uses
the same
controls
as the heating
system. The function
of each lever is
explained under
“Heater Controls”
in
this part. The
incoming air
is cooled
and dehumidified
instead of being
heated.
A/C: Push this button to change your comfort control
system from heating
to air conditioning. A light will
come on when the air conditioning is on. The A/C
button can also control the humidity in your vehicle.
Cooling
The air conditioner works best if you keep your
windows closed. On very hot days, open the windows
just
long enough for the hot air to escape.
Push the
A/C button. Move the air intake lever to
CIRCULATE for normal cooling. For faster cooling
move the lever to RECIRCULATE, Then move the
airflow lever to VENT, the temperature control lever
toward the left and the
fan control lever to FAN.
Dehumidifying
On days when it is raining or the humidity is high,
follow these dehumidifying steps instead
of the cooling
directions.
It will help clean windows that are cloudy
with moisture.
Push
the A/C button. Move the air intake lever to
CIRCULATE. Move the airflow lever to DEFROST and
the
fan control lever toward FAN. Adjust the
temperature control lever to a comfortable setting.
ProCarManuals.com
Page 175 of 354
When towing a trailer, the green arrows on your
instrument panel will flash for turns even if the bulbs on
the trailer are burned out. Thus, you may think drivers
behind you are seeing your signal when
they are not. It’s
important to check occasionally to be sure the trailer
bulbs are still working.
Driving On Grades
Reduce speed and shift to a lower gear before you start
down a long or steep downgrade.
If you don’t shift
down, you might have to
use your brakes so much that
they would get hot and no longer work well.
On a long uphill grade, shift down and reduce your
speed
to around 45 mph (70 km/h) to reduce the
possibility of engine and transmission overheating.
If you are towing a trailer and you have a manual
transmission with fifth gear, you may prefer not to use
fifth gear. Just drive in fourth gear (or,
as you need to, a
lower gear).
Parking on Hills
You really should not park your vehicle, with a trailer
attached,
on a hill. If something goes wrong, your rig
could start
to move. People can be injured, and both
your vehicle and the trailer can be damaged.
But if you ever have to park your rig on a hill, here’s
how to do it:
1. Apply your regular brakes, but don’t shift into
PARK
(P) yet, or into gear for a manual
transmission.
2. Have someone place chocks under the trailer wheels.
3. When the wheel chocks are in place, release the
regular brakes until the chocks absorb the load.
4. Reapply the regular brakes. Then apply your parking
brake, and then shift to PARK
(P), or REVERSE (R)
for a manual transmission.
5. If you have a four-wheel drive vehicle, be sure
the transfer case is
in a drive gear -- not in
NEUTRAL
(N).
6. Release the regular brakes.
ProCarManuals.com
Page 188 of 354
c
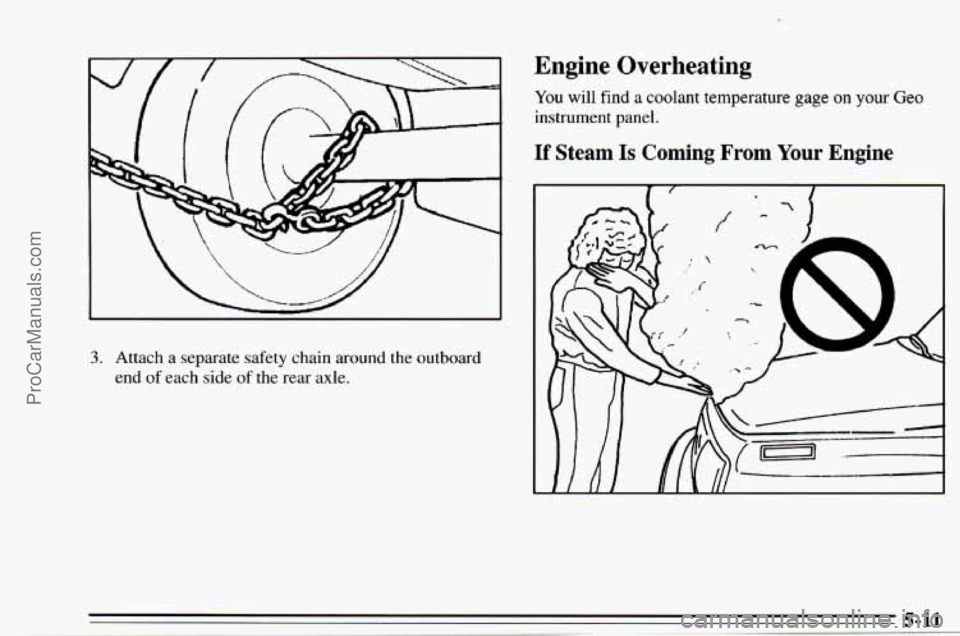
3. Attach a separate safety chain around the outboard
end
of each side of the rear axle.
Engine Overheating
You will find a coolant temperature gage on your Geo
instrument panel.
If Steam Is Coming From Your Engine
ProCarManuals.com
Page 192 of 354
NOTICE:
Engine damage from running your engine
without coolant isn’t covered by
your warranty.
If there seems to be no leak, with the engine on check to
see if the electric engine fan is running. If the engine is
overheating, the fan should be running.
If it isn’t, your
vehicle needs service.
How to Add Coolant to the Coolant
Recovery Tank
If you haven’t found a problem yet, but the coolant level
isn’t at
or above the FULL mark, add a 50 mixture of
clean water (preferably distilled) and a proper antifreeze
at the coolant recovery tank. (See “Engine Coolant”
in
the Index for more information about the proper coolant
mix.)
ProCarManuals.com
Page 236 of 354
Front Axle Engine Coolant
When to Check and Change Lubricant
Refer to the Maintenance Schedule to determine how
often to check the lubricant and when to change it. See
“Periodic Maintenance Inspections” and “Scheduled
Maintenance Services” in the Index.
How to Check Lubricant
If the level is below the bottom of the filler plug hole,
you’ll need to add some lubricant.
If the differential is at operating temperature (warm),
add enough lubricant to raise the level to the bottom of
the filler plug hole.
If the differential is cold, add enough lubricant to raise
the level to 1/2 inch (12 mm) below the filler plug hole.
What to Use
Refer to the Maintenance Schedule to determine what
kind of lubricant to use. See “Recommended Fluids and
Lubricants” in the Index. The following explains
your cooling
system and how to
add coolant when it is low. If you have a problem with
engine overheating, see “Engine Overheating’’ in the
Index.
The proper coolant for your Geo will:
0 Give freezing protection down to -33°F (-36°C).
Give boiling protection up to 258°F (125°C).
Protect against rust and corrosion.
Help keep the proper engine temperature.
Let the warning lights work as they should.
What to Use
Use a mixture of one-half clean water (preferably
distilled) and one-half antifreeze that meets
“GM
Specification 1825M,” which won’t damage aluminum
parts. You can also use a recycled coolant conforming to
GM Specification 1825M with a complete coolant flush
and refill. If you use this mixture, you don’t need to add
anything else.
ProCarManuals.com