CHEVROLET TRACKER 2004 2.G Owners Manual
Manufacturer: CHEVROLET, Model Year: 2004, Model line: TRACKER, Model: CHEVROLET TRACKER 2004 2.GPages: 374, PDF Size: 2.57 MB
Page 101 of 374
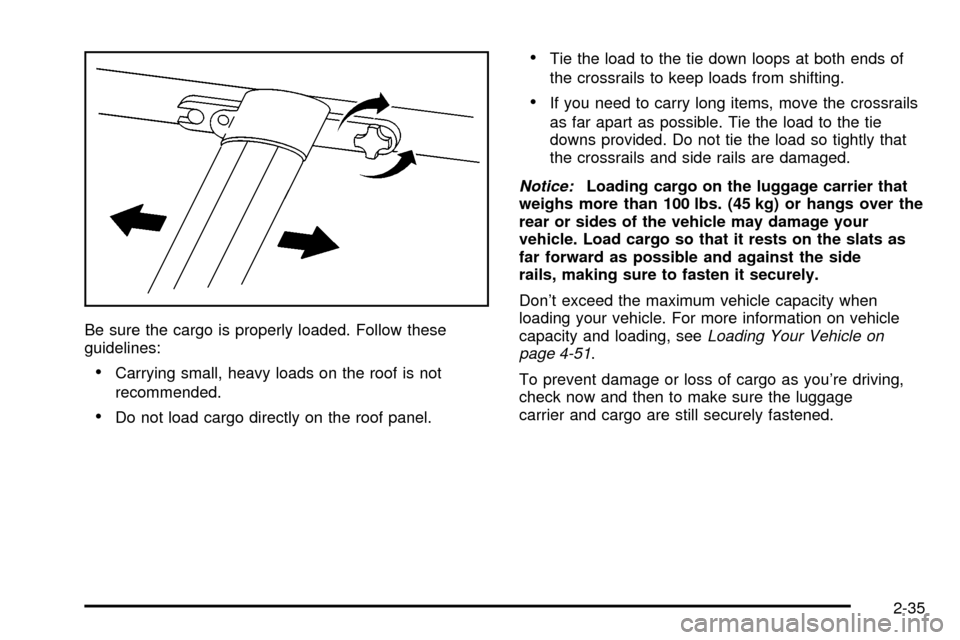
Be sure the cargo is properly loaded. Follow these
guidelines:
·Carrying small, heavy loads on the roof is not
recommended.
·Do not load cargo directly on the roof panel.
·Tie the load to the tie down loops at both ends of
the crossrails to keep loads from shifting.
·If you need to carry long items, move the crossrails
as far apart as possible. Tie the load to the tie
downs provided. Do not tie the load so tightly that
the crossrails and side rails are damaged.
Notice:Loading cargo on the luggage carrier that
weighs more than 100 lbs. (45 kg) or hangs over the
rear or sides of the vehicle may damage your
vehicle. Load cargo so that it rests on the slats as
far forward as possible and against the side
rails, making sure to fasten it securely.
Don't exceed the maximum vehicle capacity when
loading your vehicle. For more information on vehicle
capacity and loading, see
Loading Your Vehicle on
page 4-51.
To prevent damage or loss of cargo as you're driving,
check now and then to make sure the luggage
carrier and cargo are still securely fastened.
2-35
Page 102 of 374
Convenience Net
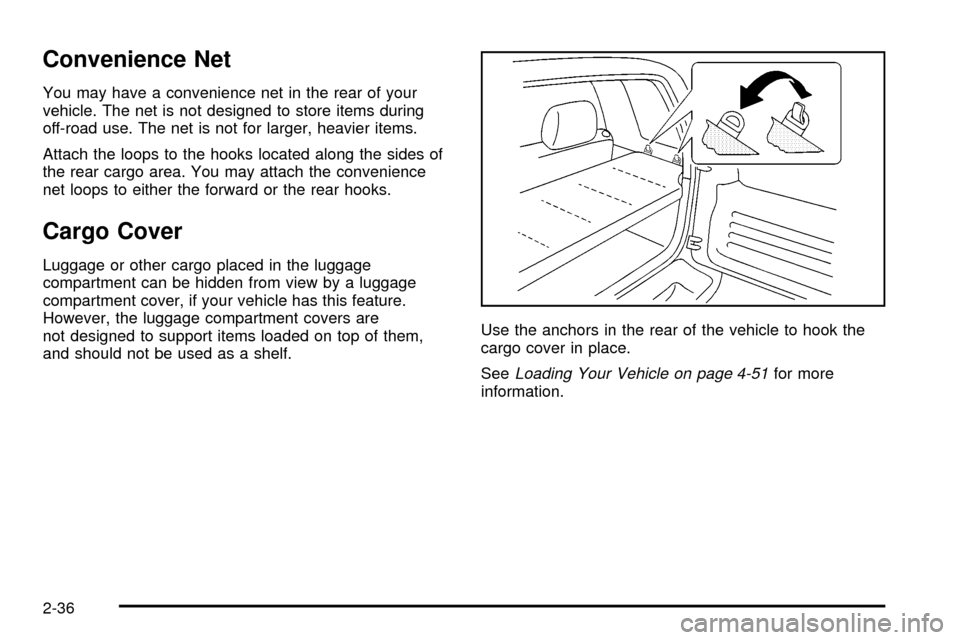
You may have a convenience net in the rear of your
vehicle. The net is not designed to store items during
off-road use. The net is not for larger, heavier items.
Attach the loops to the hooks located along the sides of
the rear cargo area. You may attach the convenience
net loops to either the forward or the rear hooks.
Cargo Cover
Luggage or other cargo placed in the luggage
compartment can be hidden from view by a luggage
compartment cover, if your vehicle has this feature.
However, the luggage compartment covers are
not designed to support items loaded on top of them,
and should not be used as a shelf.Use the anchors in the rear of the vehicle to hook the
cargo cover in place.
See
Loading Your Vehicle on page 4-51for more
information.
2-36
Page 103 of 374
Instrument Panel Overview...............................3-2
Hazard Warning Flashers................................3-4
Other Warning Devices...................................3-5
Horn.............................................................3-5
Tilt Wheel.....................................................3-5
Turn Signal/Multifunction Lever.........................3-6
Exterior Lamps.............................................3-13
Interior Lamps..............................................3-16
Accessory Power Outlets...............................3-18
Ashtrays and Cigarette Lighter........................3-19
Climate Controls............................................3-19
Climate Control System.................................3-19
Outlet Adjustment.........................................3-22
Passenger Compartment Air Filter...................3-23
Warning Lights, Gages and Indicators.............3-26
Warning Lights, Gages, and Indicators.............3-26
Instrument Panel Cluster................................3-27
Speedometer and Odometer...........................3-28
Tachometer.................................................3-28Safety Belt Reminder Light.............................3-28
Air Bag Readiness Light................................3-29
Charging System Light..................................3-30
Brake System Warning Light..........................3-30
Anti-Lock Brake System Warning Light.............3-31
Engine Coolant Temperature Gage..................3-32
Malfunction Indicator Lamp.............................3-33
Oil Pressure Light.........................................3-36
Overdrive Off Light........................................3-37
Four-Wheel-Drive Light..................................3-37
Power Indicator Light.....................................3-37
Fuel Gage...................................................3-38
Audio System(s).............................................3-39
Setting the Time...........................................3-39
Radio with CD..............................................3-40
Radio Reception...........................................3-45
Care of Your CDs.........................................3-45
Care of Your CD Player................................3-45
Fixed Mast Antenna......................................3-45
Section 3 Instrument Panel
3-1
Page 104 of 374
Instrument Panel Overview
3-2
Page 105 of 374
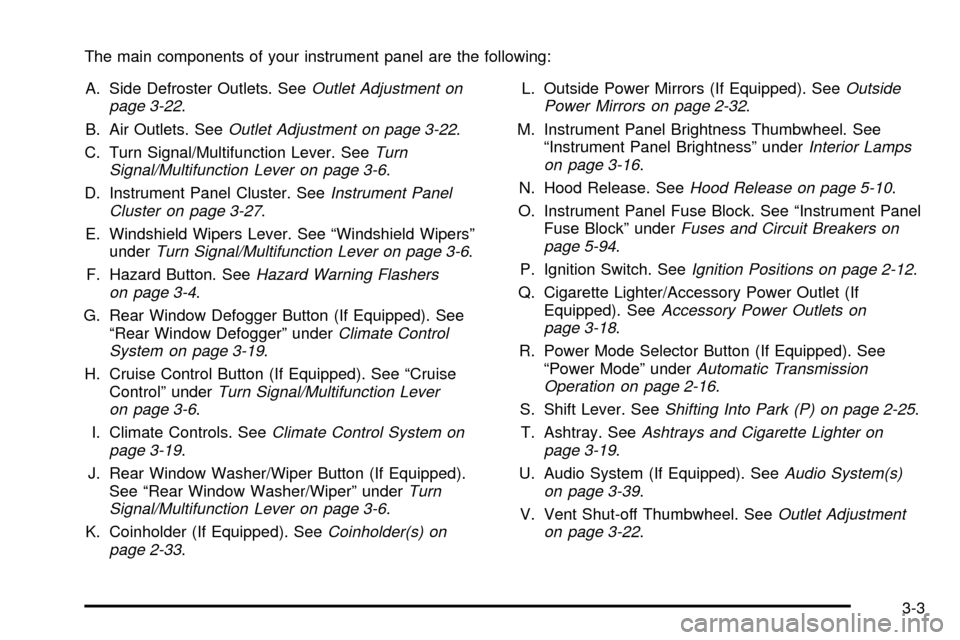
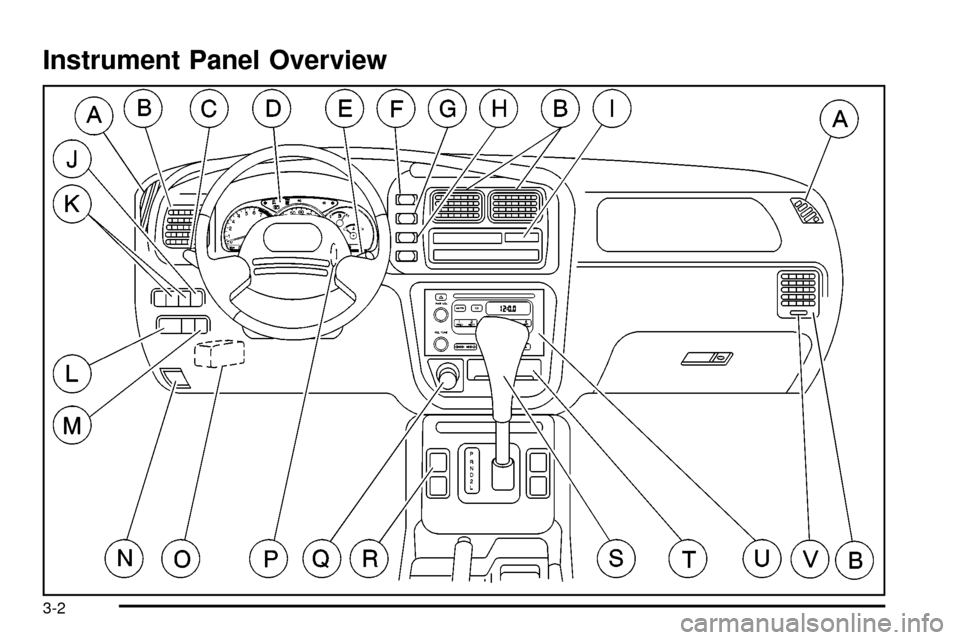
The main components of your instrument panel are the following:
A. Side Defroster Outlets. See
Outlet Adjustment on
page 3-22.
B. Air Outlets. See
Outlet Adjustment on page 3-22.
C. Turn Signal/Multifunction Lever. See
Turn
Signal/Multifunction Lever on page 3-6.
D. Instrument Panel Cluster. See
Instrument Panel
Cluster on page 3-27.
E. Windshield Wipers Lever. See ªWindshield Wipersº
under
Turn Signal/Multifunction Lever on page 3-6.
F. Hazard Button. See
Hazard Warning Flashers
on page 3-4.
G. Rear Window Defogger Button (If Equipped). See
ªRear Window Defoggerº under
Climate Control
System on page 3-19.
H. Cruise Control Button (If Equipped). See ªCruise
Controlº under
Turn Signal/Multifunction Lever
on page 3-6.
I. Climate Controls. See
Climate Control System on
page 3-19.
J. Rear Window Washer/Wiper Button (If Equipped).
See ªRear Window Washer/Wiperº under
Turn
Signal/Multifunction Lever on page 3-6.
K. Coinholder (If Equipped). See
Coinholder(s) on
page 2-33.L. Outside Power Mirrors (If Equipped). See
Outside
Power Mirrors on page 2-32.
M. Instrument Panel Brightness Thumbwheel. See
ªInstrument Panel Brightnessº under
Interior Lamps
on page 3-16.
N. Hood Release. See
Hood Release on page 5-10.
O. Instrument Panel Fuse Block. See ªInstrument Panel
Fuse Blockº under
Fuses and Circuit Breakers on
page 5-94.
P. Ignition Switch. See
Ignition Positions on page 2-12.
Q. Cigarette Lighter/Accessory Power Outlet (If
Equipped). See
Accessory Power Outlets on
page 3-18.
R. Power Mode Selector Button (If Equipped). See
ªPower Modeº under
Automatic Transmission
Operation on page 2-16.
S. Shift Lever. See
Shifting Into Park (P) on page 2-25.
T. Ashtray. See
Ashtrays and Cigarette Lighter on
page 3-19.
U. Audio System (If Equipped). See
Audio System(s)
on page 3-39.
V. Vent Shut-off Thumbwheel. See
Outlet Adjustment
on page 3-22.
3-3
Page 106 of 374
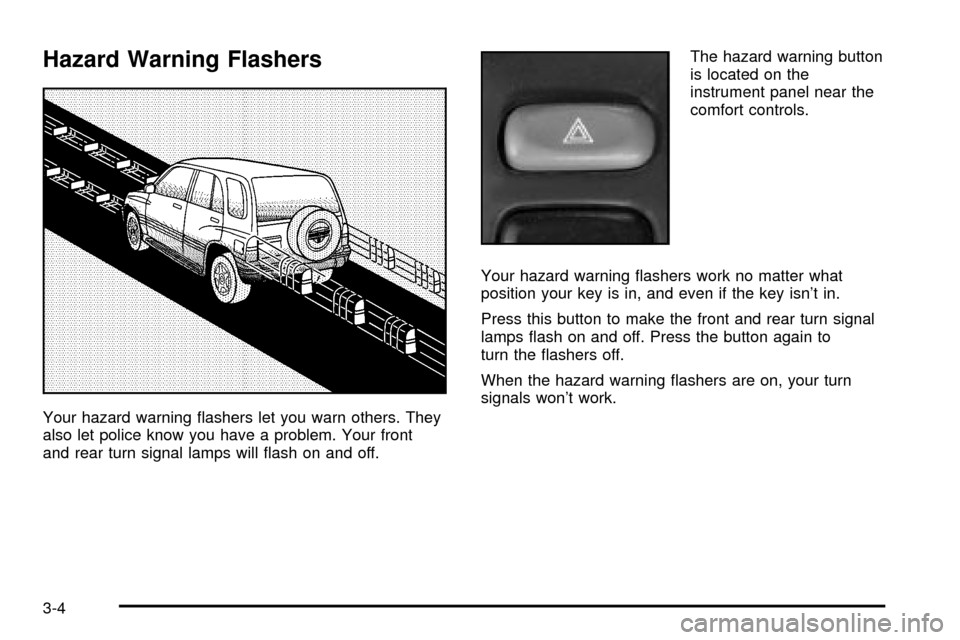
Hazard Warning Flashers
Your hazard warning ¯ashers let you warn others. They
also let police know you have a problem. Your front
and rear turn signal lamps will ¯ash on and off.The hazard warning button
is located on the
instrument panel near the
comfort controls.
Your hazard warning ¯ashers work no matter what
position your key is in, and even if the key isn't in.
Press this button to make the front and rear turn signal
lamps ¯ash on and off. Press the button again to
turn the ¯ashers off.
When the hazard warning ¯ashers are on, your turn
signals won't work.
3-4
Page 107 of 374
Other Warning Devices
If you carry re¯ective triangles, you can set one up at
the side of the road about 300 feet (100 m) behind your
vehicle.
Horn
To sound the horn, press the portion of your steering
wheel marked with the horn symbol.
Tilt Wheel
If your vehicle has a tilt wheel, you can adjust the
steering wheel before you drive. You can raise it to the
highest level to give your legs more room when you
exit and enter your vehicle.
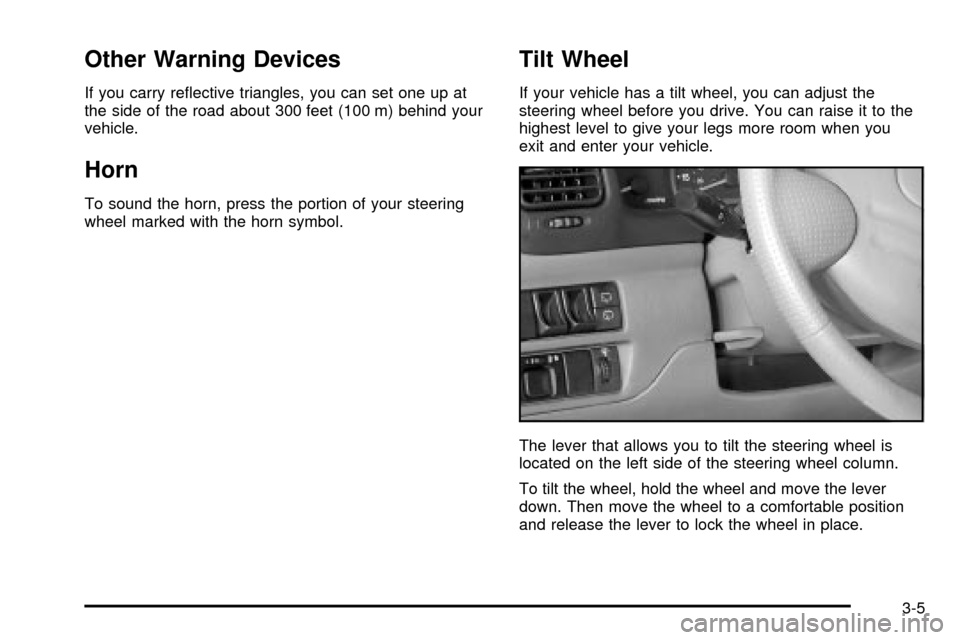
The lever that allows you to tilt the steering wheel is
located on the left side of the steering wheel column.
To tilt the wheel, hold the wheel and move the lever
down. Then move the wheel to a comfortable position
and release the lever to lock the wheel in place.
3-5
Page 108 of 374
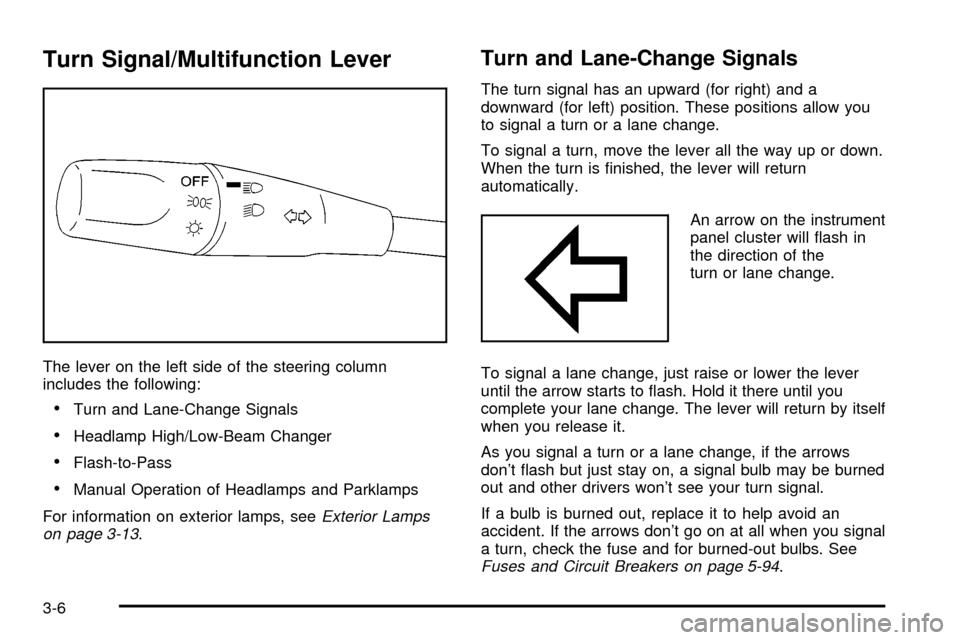
Turn Signal/Multifunction Lever
The lever on the left side of the steering column
includes the following:
·Turn and Lane-Change Signals
·Headlamp High/Low-Beam Changer
·Flash-to-Pass
·Manual Operation of Headlamps and Parklamps
For information on exterior lamps, see
Exterior Lamps
on page 3-13.
Turn and Lane-Change Signals
The turn signal has an upward (for right) and a
downward (for left) position. These positions allow you
to signal a turn or a lane change.
To signal a turn, move the lever all the way up or down.
When the turn is ®nished, the lever will return
automatically.
An arrow on the instrument
panel cluster will ¯ash in
the direction of the
turn or lane change.
To signal a lane change, just raise or lower the lever
until the arrow starts to ¯ash. Hold it there until you
complete your lane change. The lever will return by itself
when you release it.
As you signal a turn or a lane change, if the arrows
don't ¯ash but just stay on, a signal bulb may be burned
out and other drivers won't see your turn signal.
If a bulb is burned out, replace it to help avoid an
accident. If the arrows don't go on at all when you signal
a turn, check the fuse and for burned-out bulbs. See
Fuses and Circuit Breakers on page 5-94.
3-6
Page 109 of 374
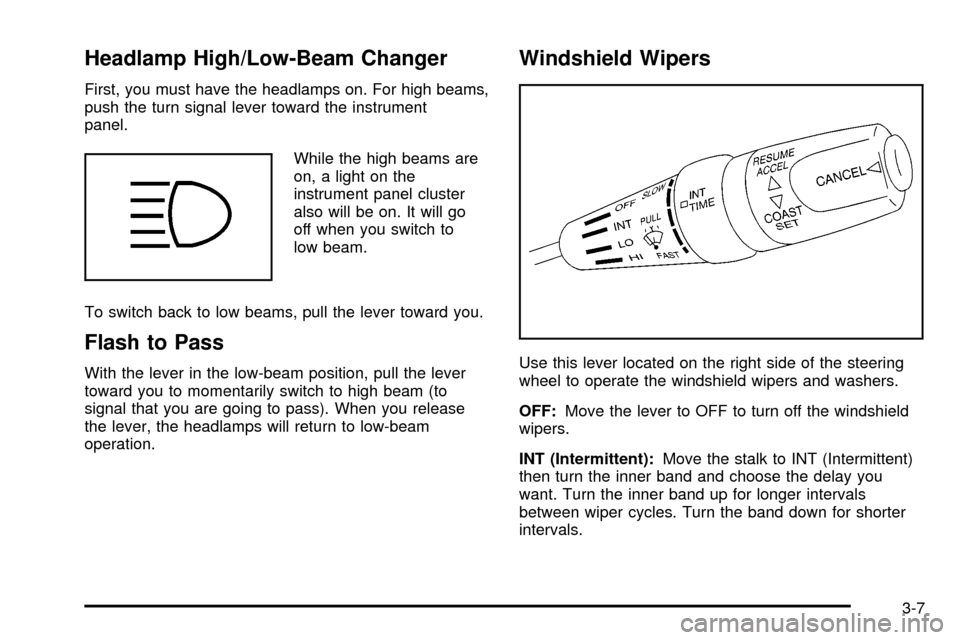
Headlamp High/Low-Beam Changer
First, you must have the headlamps on. For high beams,
push the turn signal lever toward the instrument
panel.
While the high beams are
on, a light on the
instrument panel cluster
also will be on. It will go
off when you switch to
low beam.
To switch back to low beams, pull the lever toward you.
Flash to Pass
With the lever in the low-beam position, pull the lever
toward you to momentarily switch to high beam (to
signal that you are going to pass). When you release
the lever, the headlamps will return to low-beam
operation.
Windshield Wipers
Use this lever located on the right side of the steering
wheel to operate the windshield wipers and washers.
OFF:Move the lever to OFF to turn off the windshield
wipers.
INT (Intermittent):Move the stalk to INT (Intermittent)
then turn the inner band and choose the delay you
want. Turn the inner band up for longer intervals
between wiper cycles. Turn the band down for shorter
intervals.
3-7
Page 110 of 374
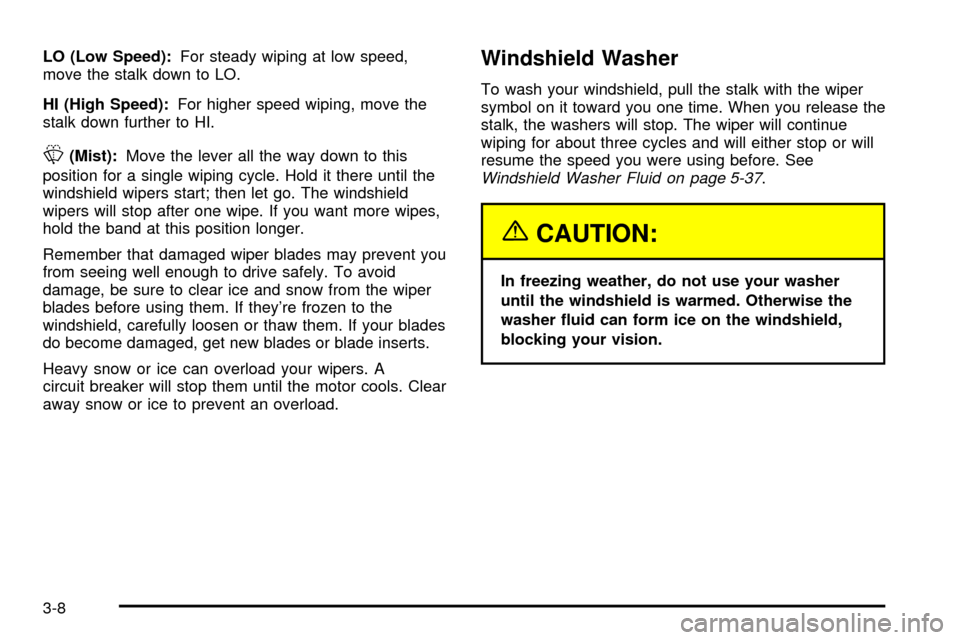
LO (Low Speed):For steady wiping at low speed,
move the stalk down to LO.
HI (High Speed):For higher speed wiping, move the
stalk down further to HI.
L(Mist):Move the lever all the way down to this
position for a single wiping cycle. Hold it there until the
windshield wipers start; then let go. The windshield
wipers will stop after one wipe. If you want more wipes,
hold the band at this position longer.
Remember that damaged wiper blades may prevent you
from seeing well enough to drive safely. To avoid
damage, be sure to clear ice and snow from the wiper
blades before using them. If they're frozen to the
windshield, carefully loosen or thaw them. If your blades
do become damaged, get new blades or blade inserts.
Heavy snow or ice can overload your wipers. A
circuit breaker will stop them until the motor cools. Clear
away snow or ice to prevent an overload.
Windshield Washer
To wash your windshield, pull the stalk with the wiper
symbol on it toward you one time. When you release the
stalk, the washers will stop. The wiper will continue
wiping for about three cycles and will either stop or will
resume the speed you were using before. See
Windshield Washer Fluid on page 5-37.
{CAUTION:
In freezing weather, do not use your washer
until the windshield is warmed. Otherwise the
washer ¯uid can form ice on the windshield,
blocking your vision.
3-8