warning light CHEVROLET TRAIL BLAZER 2008 1.G Owners Manual
[x] Cancel search | Manufacturer: CHEVROLET, Model Year: 2008, Model line: TRAIL BLAZER, Model: CHEVROLET TRAIL BLAZER 2008 1.GPages: 472, PDF Size: 2.57 MB
Page 1 of 472
Seats and Restraint Systems........................... 1-1
Front Seats
............................................... 1-2
Rear Seats
..............................................1-10
Safety Belts
.............................................1-12
Child Restraints
.......................................1-30
Airbag System
.........................................1-51
Restraint System Check
............................1-66
Features and Controls..................................... 2-1
Keys
........................................................ 2-3
Doors and Locks
....................................... 2-6
Windows
.................................................2-12
Theft-Deterrent Systems
............................2-15
Starting and Operating Your Vehicle
...........2-19
Mirrors
....................................................2-37
OnStar
®System
......................................2-47
Universal Home Remote System
................2-50
Storage Areas
.........................................2-55
Sunroof
..................................................2-58
Instrument Panel............................................. 3-1
Instrument Panel Overview
.......................... 3-4
Climate Controls
......................................3-21
Warning Lights, Gages, and Indicators
........3-30
Driver Information Center (DIC)
..................3-49
Audio System(s)
.......................................3-64Driving Your Vehicle....................................... 4-1
Your Driving, the Road, and Your Vehicle
..... 4-2
Towing
...................................................4-41
Service and Appearance Care.......................... 5-1
Service
..................................................... 5-3
Fuel
......................................................... 5-5
Checking Things Under the Hood
...............5-10
All-Wheel Drive
........................................5-49
Rear Axle
...............................................5-49
Four-Wheel Drive
.....................................5-50
Front Axle
...............................................5-51
Headlamp Aiming
.....................................5-52
Bulb Replacement
....................................5-52
Windshield Wiper Blade Replacement
.........5-55
Tires
......................................................5-58
Appearance Care
...................................5-100
Vehicle Identi�cation
...............................5-109
Electrical System
....................................5-109
Capacities and Speci�cations
...................5-121
Maintenance Schedule..................................... 6-1
Maintenance Schedule
................................ 6-2
Customer Assistance Information.................... 7-1
Customer Assistance and Information
........... 7-2
Reporting Safety Defects
...........................7-14
Vehicle Data Recording and Privacy
...........7-17
Index................................................................ 1
2008 Chevrolet TrailBlazer Owner ManualM
Page 77 of 472
Remote Keyless Entry (RKE)
System Operation
The Remote Keyless Entry (RKE) transmitter functions
will work up to 30 feet (9 m) away.
There are other conditions which can affect the
performance of the transmitter. SeeRemote Keyless
Entry (RKE) System on page 2-4.
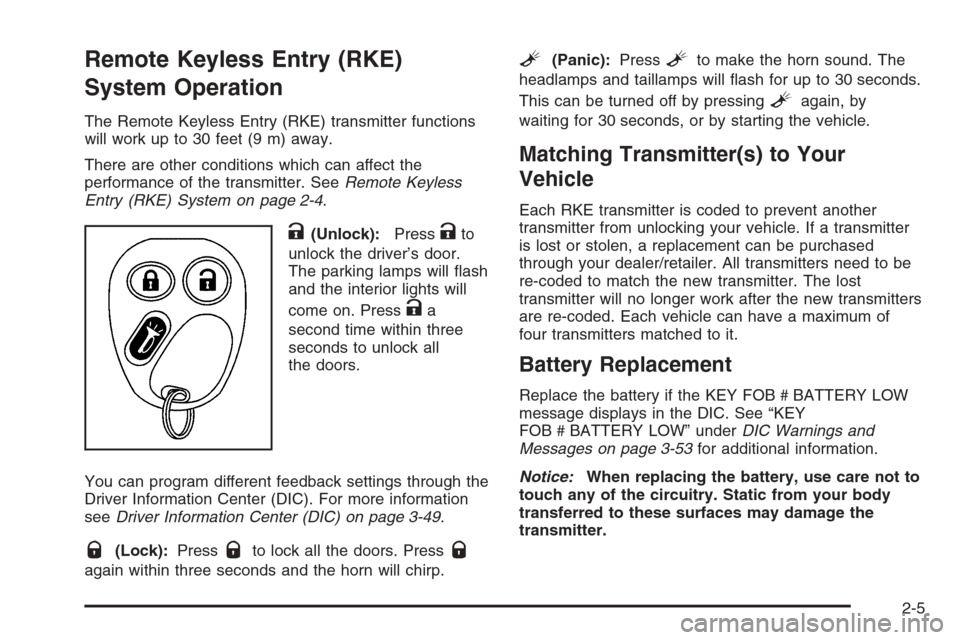
K(Unlock):PressKto
unlock the driver’s door.
The parking lamps will �ash
and the interior lights will
come on. Press
Ka
second time within three
seconds to unlock all
the doors.
You can program different feedback settings through the
Driver Information Center (DIC). For more information
seeDriver Information Center (DIC) on page 3-49.
Q(Lock):PressQto lock all the doors. PressQ
again within three seconds and the horn will chirp.
L(Panic):PressLto make the horn sound. The
headlamps and taillamps will �ash for up to 30 seconds.
This can be turned off by pressing
Lagain, by
waiting for 30 seconds, or by starting the vehicle.
Matching Transmitter(s) to Your
Vehicle
Each RKE transmitter is coded to prevent another
transmitter from unlocking your vehicle. If a transmitter
is lost or stolen, a replacement can be purchased
through your dealer/retailer. All transmitters need to be
re-coded to match the new transmitter. The lost
transmitter will no longer work after the new transmitters
are re-coded. Each vehicle can have a maximum of
four transmitters matched to it.
Battery Replacement
Replace the battery if the KEY FOB # BATTERY LOW
message displays in the DIC. See “KEY
FOB # BATTERY LOW” underDIC Warnings and
Messages on page 3-53for additional information.
Notice:When replacing the battery, use care not to
touch any of the circuitry. Static from your body
transferred to these surfaces may damage the
transmitter.
2-5
Page 101 of 472
When the vehicle senses a loss of traction, the system
will automatically engage four-wheel drive. Driving in
this mode results in slightly lower fuel economy
than Two-Wheel High.
4
m(Four-Wheel High):This setting should be used
when you need extra traction, such as on snowy or
icy roads or in most off-road situations. This setting also
engages your front axle to help drive your vehicle.
4
n(Four-Wheel Low):This setting also engages
your front axle and delivers extra torque. It sends
maximum power to all four wheels. You might choose
this setting if you are driving off-road in deep sand, deep
mud, and climbing or descending steep hills.
{CAUTION:
Shifting the transfer case to NEUTRAL can
cause your vehicle to roll even if the
transmission is in PARK (P). You or someone
else could be seriously injured. Be sure to set
the parking brake before placing the transfer
case in NEUTRAL. SeeParking Brake on
page 2-32.NEUTRAL:Shift the vehicle’s transfer case to
NEUTRAL only when towing your vehicle. See
Recreational Vehicle Towing on page 4-42for more
information.
An indicator light in the knob will show you which
position the transfer case is in. The indicator lights will
come on brie�y when you turn on the ignition and
one will stay on. If the lights do not come on, you should
take your vehicle to your dealer for service. An
indicator light will �ash while shifting the transfer case.
It will stay on when the shift is complete. If for some
reason the transfer case cannot make a requested shift,
it will return to the last chosen setting.
If the service Four-Wheel Drive Warning Light on the
instrument panel cluster stays on, you should take your
vehicle to your dealer for service. SeeService
Four-Wheel Drive Warning Light on page 3-47for
further information.Shifting Into Four-Wheel High or Automatic
Four-Wheel Drive
Turn the knob to Four-Wheel High or Automatic
Four-Wheel Drive. This can be done at any speed
unless you are shifting out of Four-Wheel Low. The
indicator light will �ash while shifting. It will remain on
when the shift is complete.
2-29
Page 104 of 472
Parking Brake
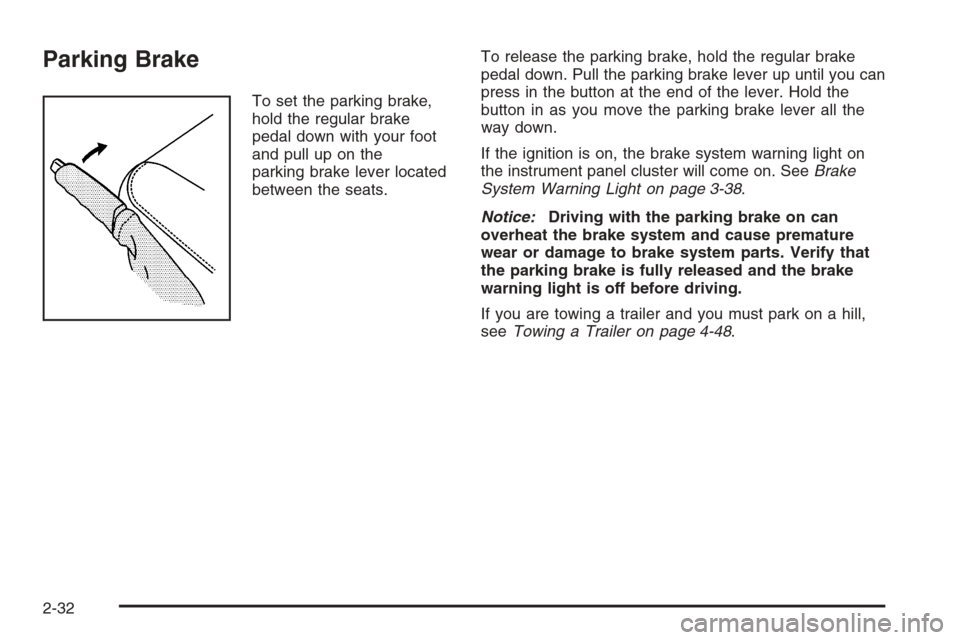
To set the parking brake,
hold the regular brake
pedal down with your foot
and pull up on the
parking brake lever located
between the seats.To release the parking brake, hold the regular brake
pedal down. Pull the parking brake lever up until you can
press in the button at the end of the lever. Hold the
button in as you move the parking brake lever all the
way down.
If the ignition is on, the brake system warning light on
the instrument panel cluster will come on. SeeBrake
System Warning Light on page 3-38.
Notice:Driving with the parking brake on can
overheat the brake system and cause premature
wear or damage to brake system parts. Verify that
the parking brake is fully released and the brake
warning light is off before driving.
If you are towing a trailer and you must park on a hill,
seeTowing a Trailer on page 4-48.
2-32
Page 131 of 472
Instrument Panel Overview...............................3-4
Hazard Warning Flashers................................3-6
Other Warning Devices...................................3-6
Horn .............................................................3-6
Tilt Wheel.....................................................3-6
Turn Signal/Multifunction Lever.........................3-7
Turn and Lane-Change Signals........................3-7
Headlamp High/Low-Beam Changer..................3-8
Flash-to-Pass.................................................3-8
Windshield Wipers..........................................3-9
Windshield Washer.........................................3-9
Rear Window Wiper/Washer...........................3-10
Cruise Control..............................................3-10
Headlamps..................................................3-14
Headlamps on Reminder................................3-14
Daytime Running Lamps (DRL).......................3-15
Automatic Headlamp System..........................3-15
Fog Lamps ..................................................3-16
Instrument Panel Brightness...........................3-17
Dome Lamps ...............................................3-17
Dome Lamp Override....................................3-17
Entry Lighting...............................................3-18
Exit Lighting.................................................3-18
Reading Lamps............................................3-18
Electric Power Management...........................3-18
Battery Run-Down Protection..........................3-19
Accessory Power Outlet(s).............................3-20Ashtray(s) and Cigarette Lighter......................3-21
Climate Controls............................................3-21
Dual Climate Control System..........................3-21
Dual Automatic Climate Control System...........3-24
Outlet Adjustment.........................................3-28
Rear Climate Control System.........................3-28
Warning Lights, Gages, and Indicators............3-30
Instrument Panel Cluster................................3-31
Speedometer and Odometer...........................3-32
Trip Odometer..............................................3-32
Tachometer.................................................3-32
Safety Belt Reminders...................................3-33
Airbag Readiness Light..................................3-34
Passenger Airbag Status Indicator...................3-35
Charging System Light..................................3-37
Voltmeter Gage............................................3-37
Brake System Warning Light..........................3-38
Anti-lock Brake System (ABS) Warning Light. . . .3-39
StabiliTrak Service Light................................3-39
StabiliTrak Indicator Light...............................3-40
Engine Coolant Temperature Gage..................3-40
Tire Pressure Light.......................................3-41
Malfunction Indicator Lamp.............................3-41
Oil Pressure Gage........................................3-44
Change Engine Oil Light................................3-45
Security Light...............................................3-46
Section 3 Instrument Panel
3-1
Page 132 of 472
Cruise Control Light......................................3-46
Reduced Engine Power Light.........................3-46
Highbeam On Light.......................................3-47
Service Four-Wheel Drive
Warning Light...........................................3-47
Check Gages Warning Light...........................3-47
Gate Ajar Light.............................................3-47
Fuel Gage...................................................3-48
Low Fuel Warning Light.................................3-48
Check Gas Cap Light....................................3-48
Driver Information Center (DIC).......................3-49
DIC Operation and Displays...........................3-50
DIC Warnings and Messages.........................3-53
DIC Vehicle Customization.............................3-58Audio System(s).............................................3-64
Setting the Clock..........................................3-66
Radio(s)......................................................3-66
Using an MP3..............................................3-83
XM Radio Messages.....................................3-87
Navigation/Radio System...............................3-89
Rear Seat Entertainment (RSE) System...........3-89
Rear Seat Audio (RSA)................................3-103
Theft-Deterrent Feature................................3-104
Audio Steering Wheel Controls......................3-105
Radio Reception.........................................3-106
Fixed Mast Antenna....................................3-106
XM™ Satellite Radio Antenna System............3-107
Chime Level Adjustment...............................3-107
Section 3 Instrument Panel
3-2
Page 160 of 472
Warning Lights, Gages, and
Indicators
This part describes the warning lights and gages that
may be on your vehicle. The pictures will help you
locate them.
Warning lights and gages can signal that something is
wrong before it becomes serious enough to cause
an expensive repair or replacement. Paying attention to
your warning lights and gages could also save you
or others from injury.
Warning lights come on when there may be or is a
problem with one of your vehicle’s functions. As you
will see in the details on the next few pages, some
warning lights come on brie�y when you start the engine
just to let you know they’re working. If you are familiar
with this section, you should not be alarmed when
this happens.Gages can indicate when there may be or is a problem
with one of your vehicle’s functions. Often gages
and warning lights work together to let you know when
there’s a problem with your vehicle.
When one of the warning lights comes on and stays on
when you are driving, or when one of the gages
shows there may be a problem, check the section
that tells you what to do about it. Please follow this
manual’s advice.
Waiting to do repairs can be costly — and even
dangerous. So please get to know your warning lights
and gages. They’re a big help.
Your vehicle may also have a Driver Information Center
(DIC) that works along with the warning lights and
gages. SeeDriver Information Center (DIC) on
page 3-49.
3-30
Page 164 of 472
Airbag Readiness Light
There is an airbag readiness light on the instrument
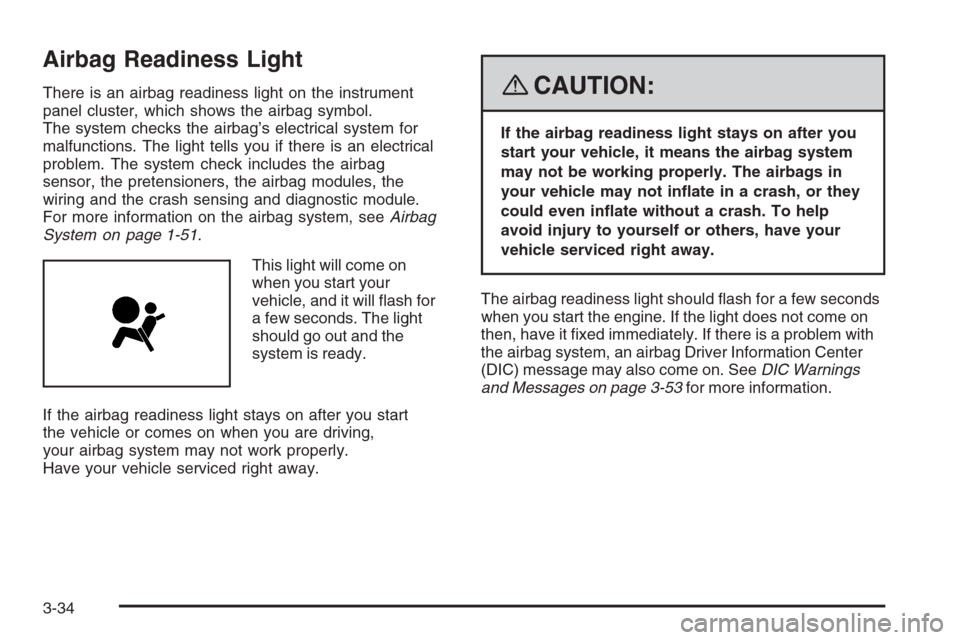
panel cluster, which shows the airbag symbol.
The system checks the airbag’s electrical system for
malfunctions. The light tells you if there is an electrical
problem. The system check includes the airbag
sensor, the pretensioners, the airbag modules, the
wiring and the crash sensing and diagnostic module.
For more information on the airbag system, seeAirbag
System on page 1-51.
This light will come on
when you start your
vehicle, and it will �ash for
a few seconds. The light
should go out and the
system is ready.
If the airbag readiness light stays on after you start
the vehicle or comes on when you are driving,
your airbag system may not work properly.
Have your vehicle serviced right away.{CAUTION:
If the airbag readiness light stays on after you
start your vehicle, it means the airbag system
may not be working properly. The airbags in
your vehicle may not in�ate in a crash, or they
could even in�ate without a crash. To help
avoid injury to yourself or others, have your
vehicle serviced right away.
The airbag readiness light should �ash for a few seconds
when you start the engine. If the light does not come on
then, have it �xed immediately. If there is a problem with
the airbag system, an airbag Driver Information Center
(DIC) message may also come on. SeeDIC Warnings
and Messages on page 3-53for more information.
3-34
Page 167 of 472
Charging System Light
This light will come on
brie�y when you turn on
the ignition key, but
the engine is not running,
as a check to show
you it is working.
It should go out once the engine is running. If it stays on,
or comes on while driving, there could be a problem
with the charging system. A charging system Driver
Information Center (DIC) message may also appear.
SeeDIC Warnings and Messages on page 3-53for more
information. This light could indicate that there are
problems with a generator drive belt, or that there is an
electrical problem. Have it checked right away. If you
must drive a short distance with the light on, be certain to
turn off all the accessories, such as the radio and air
conditioner.
Voltmeter Gage
When your engine is not
running, but the ignition is
on, this gage displays
the battery voltage in
DC volts.
When the engine is running, the gage shows the
condition of the charging system. The gage may
transition from a higher to lower or a lower to higher
reading. This is normal. Readings between the low and
high warning zones indicate the normal operating range.
The voltmeter gage may also read lower when in fuel
economy mode. This is normal.
Readings in the low warning zone may occur when a
large number of electrical accessories are operating in
the vehicle and the engine is left idling for an extended
period. This condition is normal since the charging
system is not able to provide full power at engine idle.
As engine speeds are increased, this condition should
correct itself as higher engine speeds allow the charging
system to create maximum power.
3-37
Page 168 of 472
You can only drive for a short time with the reading in
either warning zone. If you must drive, turn off all
unnecessary accessories.
Readings in either warning zone indicate a possible
problem in the electrical system. Have the vehicle
serviced as soon as possible.
Brake System Warning Light
When the ignition is on, the brake system warning
light will come on when you set your parking brake.
The light will stay on if your parking brake does not
release fully. If it stays on after your parking brake is
fully released, it means your vehicle has a brake
problem. A chime may also sound when the light
comes on.
Your vehicle’s hydraulic brake system is divided into
two parts. If one part is not working, the other part can
still work and stop you. For good braking, though,
you need both parts working well.
If the warning light comes on, there could be a brake
problem. Have your brake system inspected right away.This light should come on brie�y when you turn the
ignition key to RUN. If it does not come on then, have it
�xed so it will be ready to warn you if there is a problem.
If the light comes on while you are driving, pull off the
road and stop carefully. You may notice that the pedal is
harder to push or the pedal may go closer to the �oor.
It may take longer to stop. If the light is still on, have
the vehicle towed for service. SeeTowing Your Vehicle
on page 4-41.
{CAUTION:
Your brake system may not be working properly
if the brake system warning light is on. Driving
with the brake system warning light on can lead
CAUTION: (Continued) United States
Canada
3-38