CHEVROLET TRAIL BLAZER 2009 1.G Owners Manual
Manufacturer: CHEVROLET, Model Year: 2009, Model line: TRAIL BLAZER, Model: CHEVROLET TRAIL BLAZER 2009 1.GPages: 484, PDF Size: 2.61 MB
Page 351 of 484
{CAUTION:
Fans or other moving engine parts can injure you
badly. Keep your hands away from moving parts
once the engine is running.
5. Check that the jumper cables do not have loose
or missing insulation. If they do, you could get a
shock. The vehicles could be damaged too.
Before you connect the cables, here are some
basic things you should know. Positive (+) will go to
positive (+) or to a remote positive (+) terminal if
the vehicle has one. Negative (−) will go to a heavy,
unpainted metal engine part or to a remote
negative (−) terminal if the vehicle has one. Do not
connect positive (+) to negative (−) or you will get a
short that would damage the battery and maybe
other parts too. And do not connect the negative (−)
cable to the negative (−) terminal on the dead battery
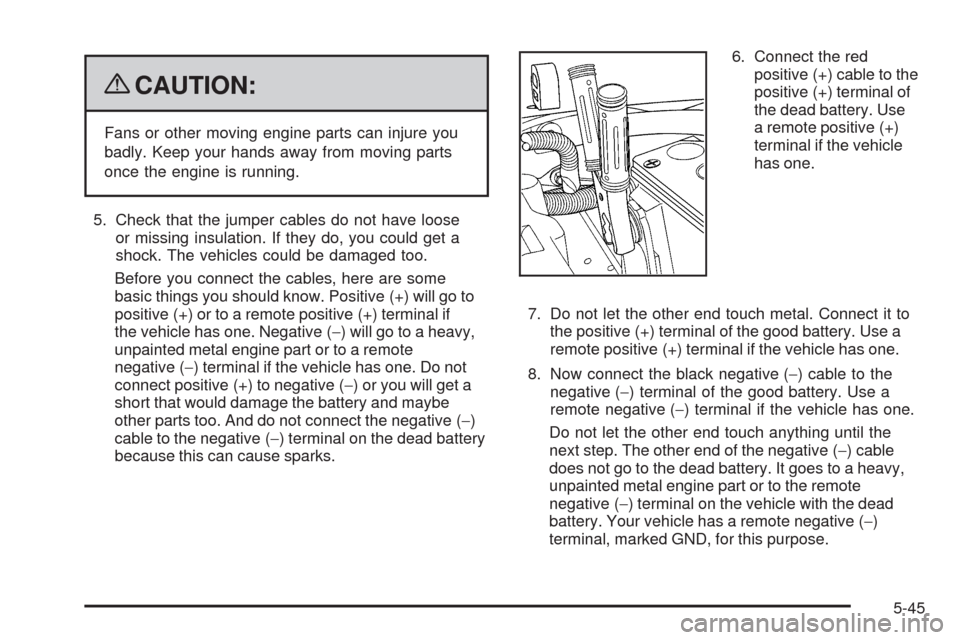
because this can cause sparks.6. Connect the red
positive (+) cable to the
positive (+) terminal of
the dead battery. Use
a remote positive (+)
terminal if the vehicle
has one.
7. Do not let the other end touch metal. Connect it to
the positive (+) terminal of the good battery. Use a
remote positive (+) terminal if the vehicle has one.
8. Now connect the black negative (−) cable to the
negative (−) terminal of the good battery. Use a
remote negative (−) terminal if the vehicle has one.
Do not let the other end touch anything until the
next step. The other end of the negative (−) cable
does not go to the dead battery. It goes to a heavy,
unpainted metal engine part or to the remote
negative (−) terminal on the vehicle with the dead
battery. Your vehicle has a remote negative (−)
terminal, marked GND, for this purpose.
5-45
Page 352 of 484
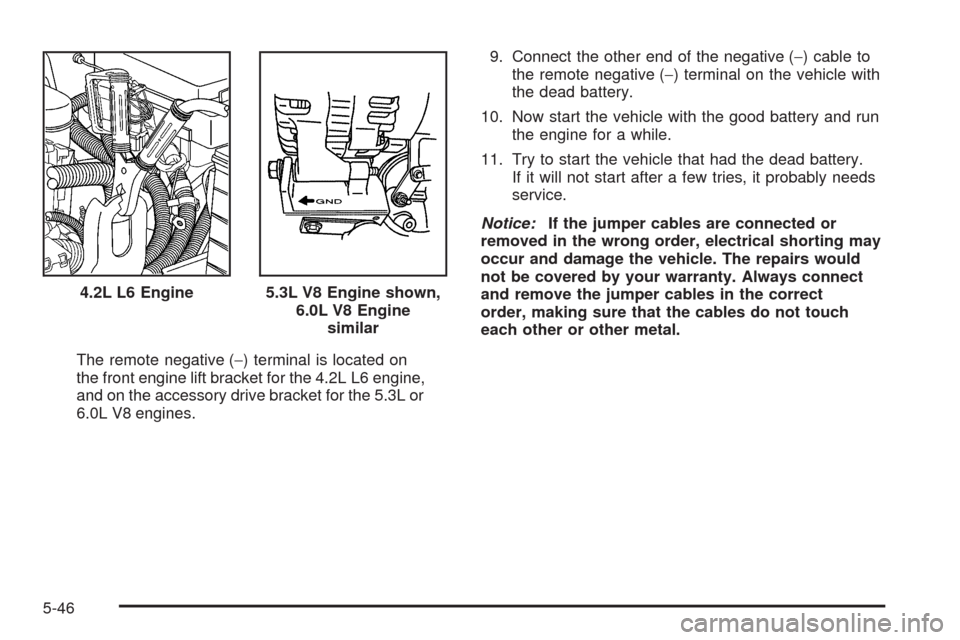
The remote negative (−) terminal is located on
the front engine lift bracket for the 4.2L L6 engine,
and on the accessory drive bracket for the 5.3L or
6.0L V8 engines.9. Connect the other end of the negative (−) cable to
the remote negative (−) terminal on the vehicle with
the dead battery.
10. Now start the vehicle with the good battery and run
the engine for a while.
11. Try to start the vehicle that had the dead battery.
If it will not start after a few tries, it probably needs
service.
Notice:If the jumper cables are connected or
removed in the wrong order, electrical shorting may
occur and damage the vehicle. The repairs would
not be covered by your warranty. Always connect
and remove the jumper cables in the correct
order, making sure that the cables do not touch
each other or other metal. 4.2L L6 Engine
5.3L V8 Engine shown,
6.0L V8 Engine
similar
5-46
Page 353 of 484
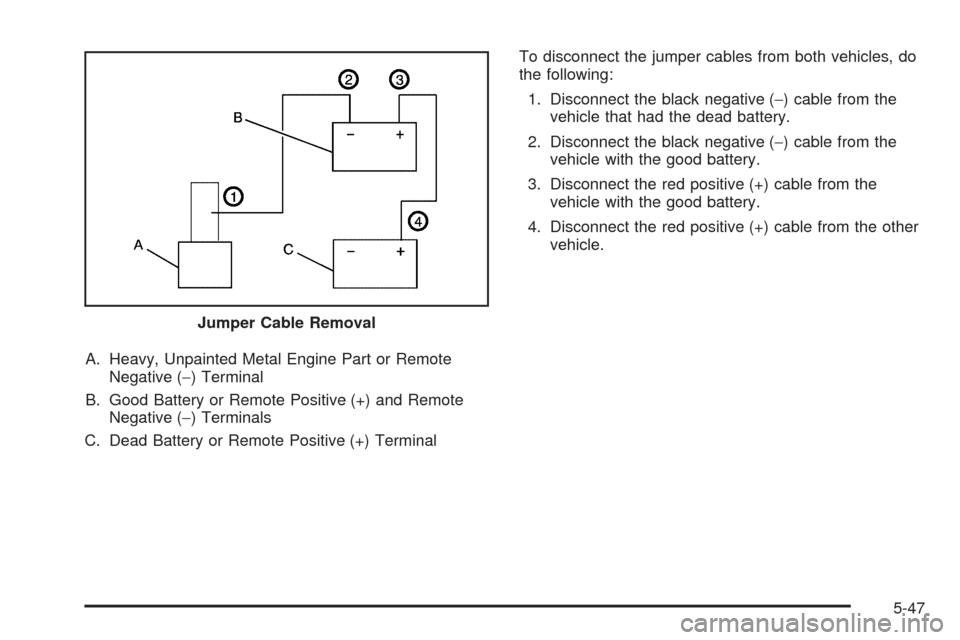
A. Heavy, Unpainted Metal Engine Part or Remote
Negative (−) Terminal
B. Good Battery or Remote Positive (+) and Remote
Negative (−) Terminals
C. Dead Battery or Remote Positive (+) TerminalTo disconnect the jumper cables from both vehicles, do
the following:
1. Disconnect the black negative (−) cable from the
vehicle that had the dead battery.
2. Disconnect the black negative (−) cable from the
vehicle with the good battery.
3. Disconnect the red positive (+) cable from the
vehicle with the good battery.
4. Disconnect the red positive (+) cable from the other
vehicle.
Jumper Cable Removal
5-47
Page 354 of 484
All-Wheel Drive
When to Check Lubricant
It is not necessary to regularly check �uid unless you
suspect there is a leak or you hear an unusual noise.
A �uid loss could indicate a problem. Have it inspected
and repaired.
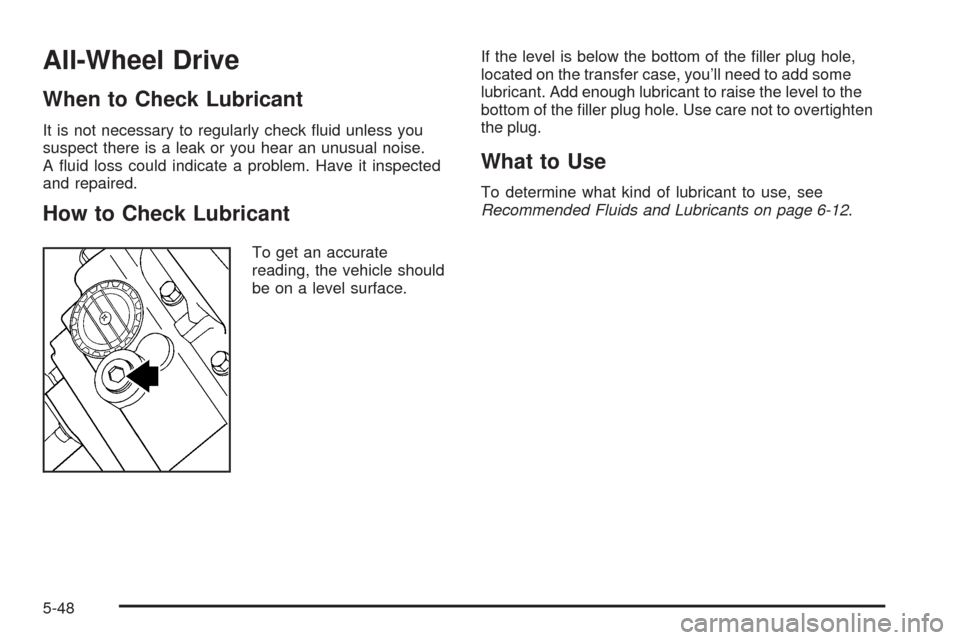
How to Check Lubricant
To get an accurate
reading, the vehicle should
be on a level surface.If the level is below the bottom of the �ller plug hole,
located on the transfer case, you’ll need to add some
lubricant. Add enough lubricant to raise the level to the
bottom of the �ller plug hole. Use care not to overtighten
the plug.
What to Use
To determine what kind of lubricant to use, see
Recommended Fluids and Lubricants on page 6-12.
5-48
Page 355 of 484
Rear Axle
When to Check Lubricant
It is not necessary to regularly check rear axle �uid
unless you suspect there is a leak or you hear an
unusual noise. A �uid loss could indicate a problem.
Have it inspected and repaired.
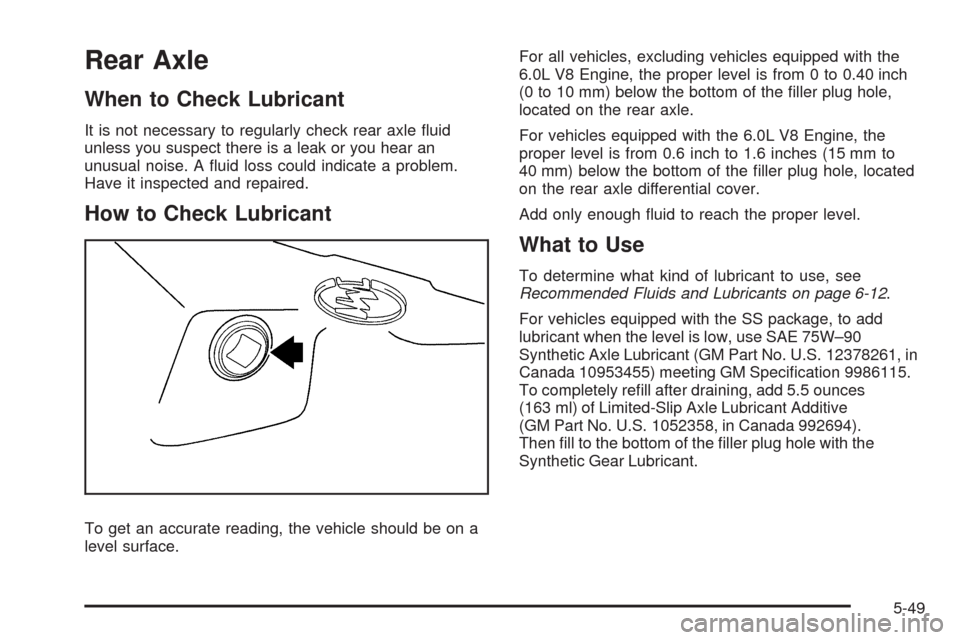
How to Check Lubricant
To get an accurate reading, the vehicle should be on a
level surface.For all vehicles, excluding vehicles equipped with the
6.0L V8 Engine, the proper level is from 0 to 0.40 inch
(0 to 10 mm) below the bottom of the �ller plug hole,
located on the rear axle.
For vehicles equipped with the 6.0L V8 Engine, the
proper level is from 0.6 inch to 1.6 inches (15 mm to
40 mm) below the bottom of the �ller plug hole, located
on the rear axle differential cover.
Add only enough �uid to reach the proper level.
What to Use
To determine what kind of lubricant to use, see
Recommended Fluids and Lubricants on page 6-12.
For vehicles equipped with the SS package, to add
lubricant when the level is low, use SAE 75W–90
Synthetic Axle Lubricant (GM Part No. U.S. 12378261, in
Canada 10953455) meeting GM Speci�cation 9986115.
To completely re�ll after draining, add 5.5 ounces
(163 ml) of Limited-Slip Axle Lubricant Additive
(GM Part No. U.S. 1052358, in Canada 992694).
Then �ll to the bottom of the �ller plug hole with the
Synthetic Gear Lubricant.
5-49
Page 356 of 484
Four-Wheel Drive
Transfer Case
When to Check Lubricant
It is not necessary to regularly check �uid unless you
suspect there is a leak or you hear an unusual noise.
A �uid loss could indicate a problem. Have it inspected
and repaired.
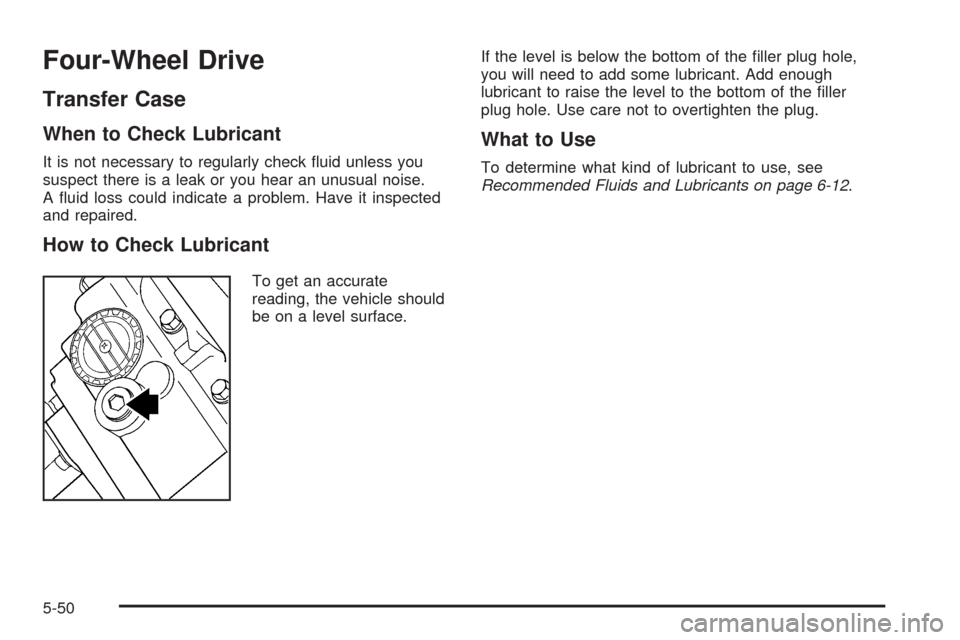
How to Check Lubricant
To get an accurate
reading, the vehicle should
be on a level surface.If the level is below the bottom of the �ller plug hole,
you will need to add some lubricant. Add enough
lubricant to raise the level to the bottom of the �ller
plug hole. Use care not to overtighten the plug.
What to Use
To determine what kind of lubricant to use, see
Recommended Fluids and Lubricants on page 6-12.
5-50
Page 357 of 484
Front Axle
When to Check Lubricant
It is not necessary to regularly check front axle �uid
unless you suspect there is a leak or you hear an
unusual noise. A �uid loss could indicate a problem.
Have it inspected and repaired.
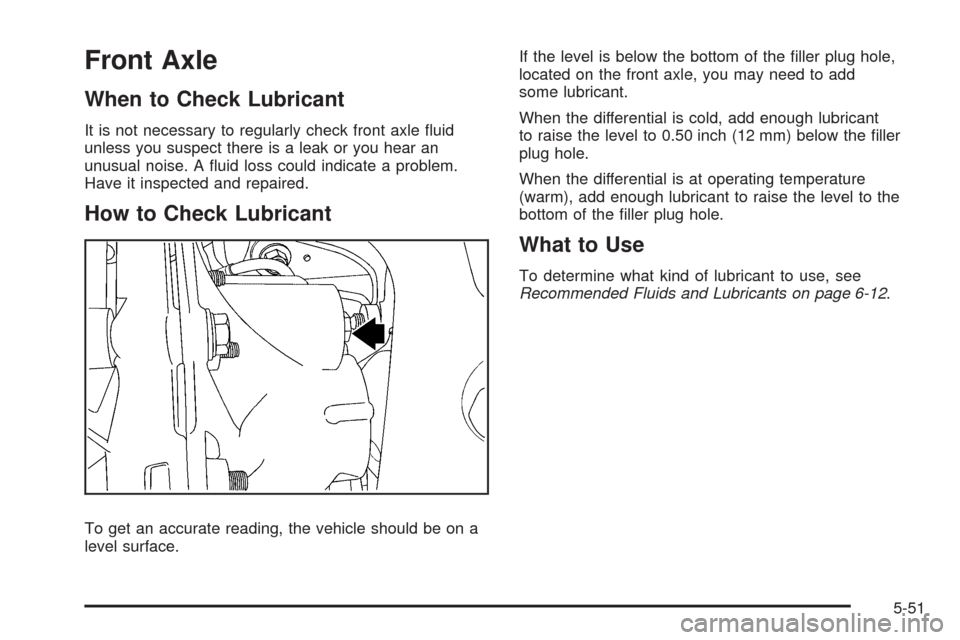
How to Check Lubricant
To get an accurate reading, the vehicle should be on a
level surface.If the level is below the bottom of the �ller plug hole,
located on the front axle, you may need to add
some lubricant.
When the differential is cold, add enough lubricant
to raise the level to 0.50 inch (12 mm) below the �ller
plug hole.
When the differential is at operating temperature
(warm), add enough lubricant to raise the level to the
bottom of the �ller plug hole.
What to Use
To determine what kind of lubricant to use, see
Recommended Fluids and Lubricants on page 6-12.
5-51
Page 358 of 484
Headlamp Aiming
Headlamp aim has been preset at the factory and
should need no further adjustment.
However, if your vehicle is damaged in a crash, the
headlamp aim may be affected. Aim adjustment to the
low-beam headlamps may be necessary if oncoming
drivers �ash their high-beam headlamps at you
(for vertical aim).
If the headlamps need to be re-aimed, it is
recommended that you take the vehicle to your
dealer/retailer for service.
Bulb Replacement
For the proper type of replacement bulbs,
seeReplacement Bulbs on page 5-54.
For any bulb changing procedure not listed in this
section, contact your dealer/retailer.
Halogen Bulbs
{CAUTION:
Halogen bulbs have pressurized gas inside and
can burst if you drop or scratch the bulb. You or
others could be injured. Be sure to read and follow
the instructions on the bulb package.
5-52
Page 359 of 484
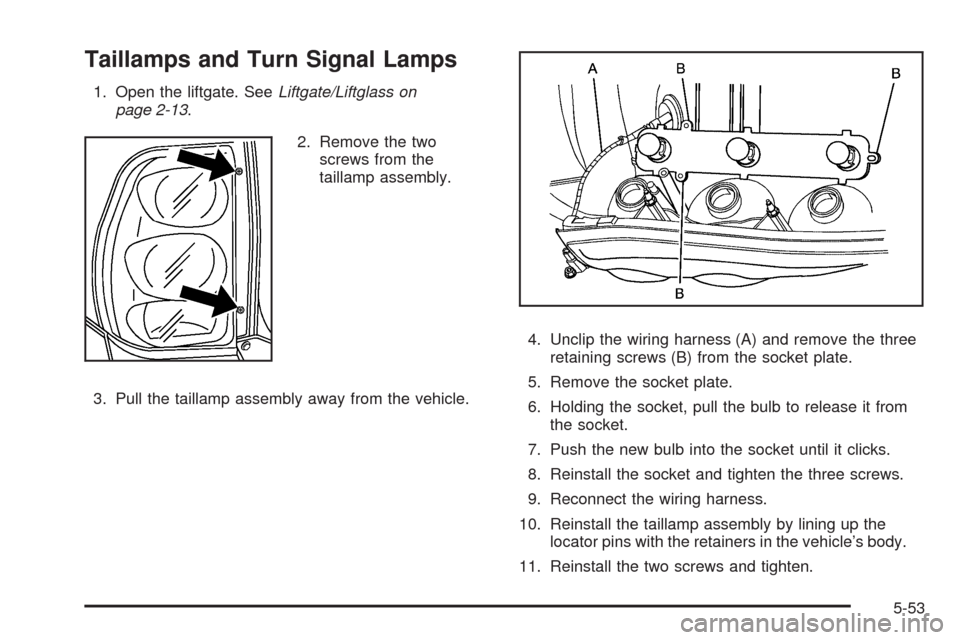
Taillamps and Turn Signal Lamps
1. Open the liftgate. SeeLiftgate/Liftglass on
page 2-13.
2. Remove the two
screws from the
taillamp assembly.
3. Pull the taillamp assembly away from the vehicle.4. Unclip the wiring harness (A) and remove the three
retaining screws (B) from the socket plate.
5. Remove the socket plate.
6. Holding the socket, pull the bulb to release it from
the socket.
7. Push the new bulb into the socket until it clicks.
8. Reinstall the socket and tighten the three screws.
9. Reconnect the wiring harness.
10. Reinstall the taillamp assembly by lining up the
locator pins with the retainers in the vehicle’s body.
11. Reinstall the two screws and tighten.
5-53
Page 360 of 484
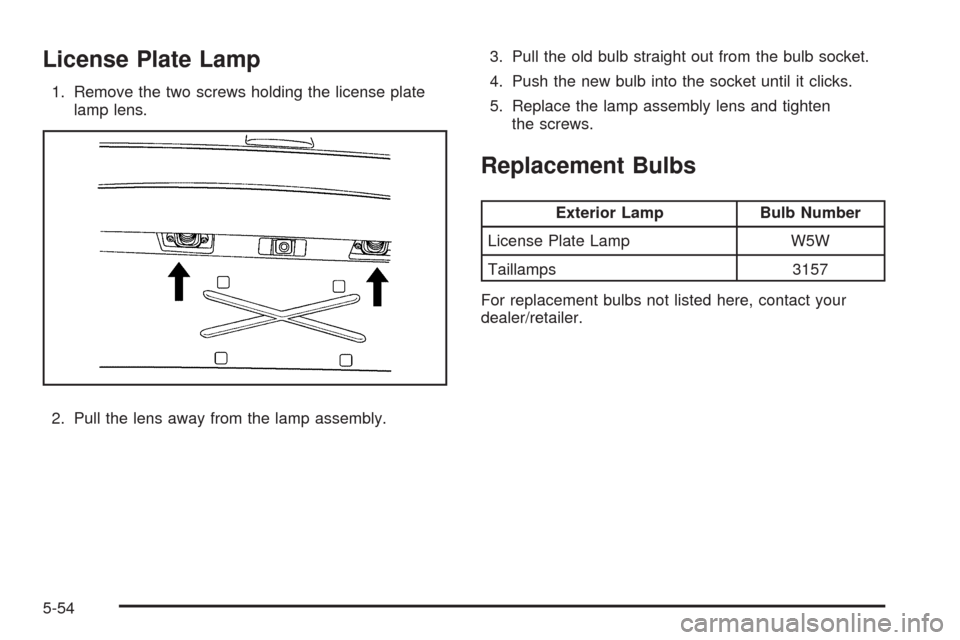
License Plate Lamp
1. Remove the two screws holding the license plate
lamp lens.
2. Pull the lens away from the lamp assembly.3. Pull the old bulb straight out from the bulb socket.
4. Push the new bulb into the socket until it clicks.
5. Replace the lamp assembly lens and tighten
the screws.
Replacement Bulbs
Exterior Lamp Bulb Number
License Plate Lamp W5W
Taillamps 3157
For replacement bulbs not listed here, contact your
dealer/retailer.
5-54