park assist CHEVROLET TRAIL BLAZER 2009 1.G Owners Manual
[x] Cancel search | Manufacturer: CHEVROLET, Model Year: 2009, Model line: TRAIL BLAZER, Model: CHEVROLET TRAIL BLAZER 2009 1.GPages: 484, PDF Size: 2.61 MB
Page 99 of 484
Retained Accessory Power (RAP)
These vehicle accessories can be used for up to
20 minutes after the engine is turned off:
Audio System
Power Windows
Overhead Console
Sunroof (if equipped)
These features will work when the key is in ON/RUN
or ACC/ACCESSORY. Once the key is turned from
ON/RUN to LOCK/OFF, these features continue to
work for up to 20 minutes, or until a door is opened.
Starting the Engine
Move the shift lever to P (Park) or N (Neutral). The
engine will not start in any other position. To restart
the engine when the vehicle is already moving,
use N (Neutral) only.
Notice:Do not try to shift to P (Park) if the
vehicle is moving. If you do, you could damage
the transmission. Shift to P (Park) only when
the vehicle is stopped.
Starting Procedure
1. With your foot off the accelerator pedal, turn the
ignition to START. When the engine starts, let go of
the key. The idle speed will slow down as the engine
warms. Do not race the engine immediately after
starting it. Operate the engine and transmission
gently to allow the oil to warm up and lubricate all
moving parts.
The vehicle has a Computer-Controlled Cranking
System. This feature assists in starting the engine
and protects components. If the ignition key is turned
to the START position, and then released when the
engine begins cranking, the engine will continue
cranking for a few seconds or until the vehicle starts.
If the engine does not start and the key is held in
START, cranking will be stopped after 15 seconds to
prevent cranking motor damage. To prevent gear
damage, this system also prevents cranking if the
engine is already running. Engine cranking can be
stopped by turning the ignition switch to the ACC/
ACCESSORY or LOCK/OFF position.
Notice:Cranking the engine for long periods of
time, by returning the key to the START position
immediately after cranking has ended, can overheat
and damage the cranking motor, and drain the
battery. Wait at least 15 seconds between each try,
to let the cranking motor cool down.
2-23
Page 125 of 484
Universal Home Remote System
Operation (With One Triangular LED)
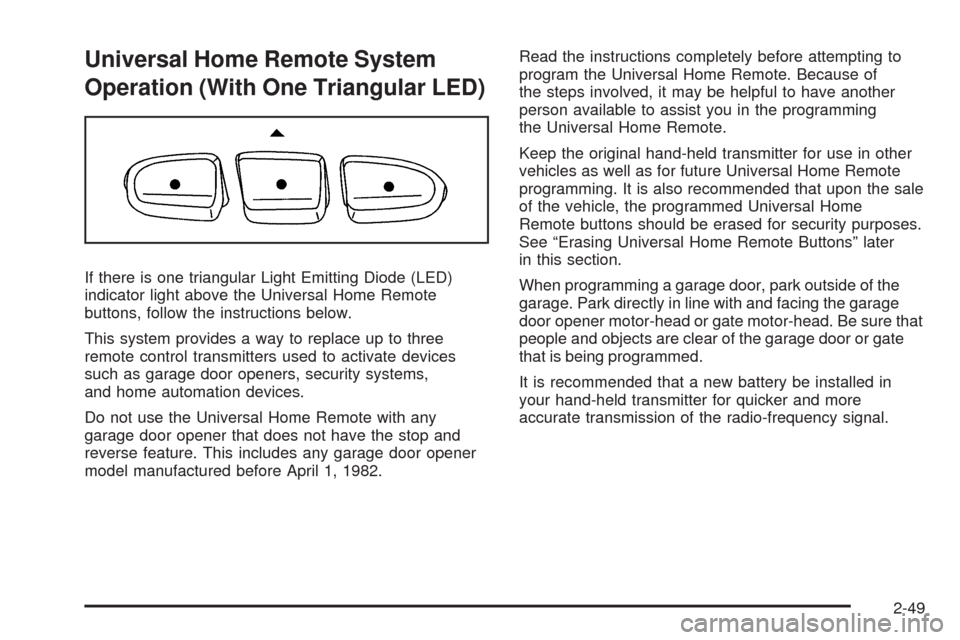
If there is one triangular Light Emitting Diode (LED)
indicator light above the Universal Home Remote
buttons, follow the instructions below.
This system provides a way to replace up to three
remote control transmitters used to activate devices
such as garage door openers, security systems,
and home automation devices.
Do not use the Universal Home Remote with any
garage door opener that does not have the stop and
reverse feature. This includes any garage door opener
model manufactured before April 1, 1982.Read the instructions completely before attempting to
program the Universal Home Remote. Because of
the steps involved, it may be helpful to have another
person available to assist you in the programming
the Universal Home Remote.
Keep the original hand-held transmitter for use in other
vehicles as well as for future Universal Home Remote
programming. It is also recommended that upon the sale
of the vehicle, the programmed Universal Home
Remote buttons should be erased for security purposes.
See “Erasing Universal Home Remote Buttons” later
in this section.
When programming a garage door, park outside of the
garage. Park directly in line with and facing the garage
door opener motor-head or gate motor-head. Be sure that
people and objects are clear of the garage door or gate
that is being programmed.
It is recommended that a new battery be installed in
your hand-held transmitter for quicker and more
accurate transmission of the radio-frequency signal.
2-49
Page 174 of 484
If the check engine light comes on and stays on, while
the engine is running, this indicates that there is an
OBD II problem and service is required.
Malfunctions often are indicated by the system before
any problem is apparent. Being aware of the light
can prevent more serious damage to the vehicle.
This system assists the service technician in correctly
diagnosing any malfunction.
Notice:If the vehicle is continually driven with
this light on, after a while, the emission controls
might not work as well, the vehicle’s fuel economy
might not be as good, and the engine might not
run as smoothly. This could lead to costly repairs
that might not be covered by the vehicle warranty.
Notice:Modi�cations made to the engine,
transmission, exhaust, intake, or fuel system
of the vehicle or the replacement of the original
tires with other than those of the same Tire
Performance Criteria (TPC) can affect the vehicle’s
emission controls and can cause this light to come
on. Modi�cations to these systems could lead to
costly repairs not covered by the vehicle warranty.
This could also result in a failure to pass a required
Emission Inspection/Maintenance test. See
Accessories and Modifications on page 5-3.This light comes on during a malfunction in one of
two ways:
Light Flashing:A mis�re condition has been detected.
A mis�re increases vehicle emissions and could damage
the emission control system on the vehicle. Diagnosis
and service might be required.
To prevent more serious damage to the vehicle:
Reduce vehicle speed.
Avoid hard accelerations.
Avoid steep uphill grades.
If towing a trailer, reduce the amount of cargo being
hauled as soon as it is possible.
If the light continues to �ash, when it is safe to do so,
stop the vehicle. Find a safe place to park the vehicle.
Turn the key off, wait at least 10 seconds, and restart
the engine. If the light is still �ashing, follow the previous
steps and see your dealer/retailer for service as soon
as possible.
3-40
Page 341 of 484
Engine Overheating
The vehicle has several indicators to warn of engine
overheating.
You will �nd a coolant temperature gage on the vehicle’s
instrument panel. SeeEngine Coolant Temperature
Gage on page 3-38for more information.
If the vehicle has a Driver Information Center (DIC),
the display will show an Engine Coolant Hot/Engine
Overheated message. SeeDIC Warnings and Messages
on page 3-51for more information.
You may decide not to lift the hood when this warning
appears, but instead get service help right away.
SeeRoadside Assistance Program on page 7-7.
If you do decide to lift the hood, make sure the vehicle
is parked on a level surface.
Then check to see if the engine cooling fans are
running. If the engine is overheating, both fans should
be running. If they are not, do not continue to run
the engine and have the vehicle serviced.
Notice:Engine damage from running the engine
without coolant is not covered by the warranty.
Notice:If the engine catches �re because of being
driven with no coolant, your vehicle can be badly
damaged. The costly repairs would not be covered
by the vehicle warranty.
If Steam Is Coming From The Engine
Compartment
{CAUTION:
Steam from an overheated engine can burn you
badly, even if you just open the hood. Stay away
from the engine if you see or hear steam coming
from it. Just turn it off and get everyone away from
the vehicle until it cools down. Wait until there is no
sign of steam or coolant before you open the hood.
If you keep driving when your engine is overheated,
the liquids in it can catch �re. You or others could
be badly burned. Stop your engine if it overheats,
and get out of the vehicle until the engine is cool.
5-35
Page 399 of 484
Changing a Flat Tire
If a tire goes �at, avoid further tire and wheel damage
by driving slowly to a level place. Turn on the hazard
warning �ashers. SeeHazard Warning Flashers
on page 3-6.
{CAUTION:
Changing a tire can be dangerous. The vehicle
can slip off the jack and roll over or fall on you or
other people. You and they could be badly injured
or even killed. Find a level place to change your
tire. To help prevent the vehicle from moving:
1. Set the parking brake �rmly.
2. Put the shift lever in P (Park).
3. If you have a four-wheel-drive vehicle,
be sure the transfer case is in a drive
gear — not in Neutral.
4. Turn off the engine and do not restart while
the vehicle is raised.
CAUTION: (Continued)
CAUTION: (Continued)
5. Do not allow passengers to remain in the
vehicle.
6. Put the wheel blocks at the front and rear of
the tire farthest away from the one being
changed. That would be the tire on the other
side, at the opposite end of the vehicle.
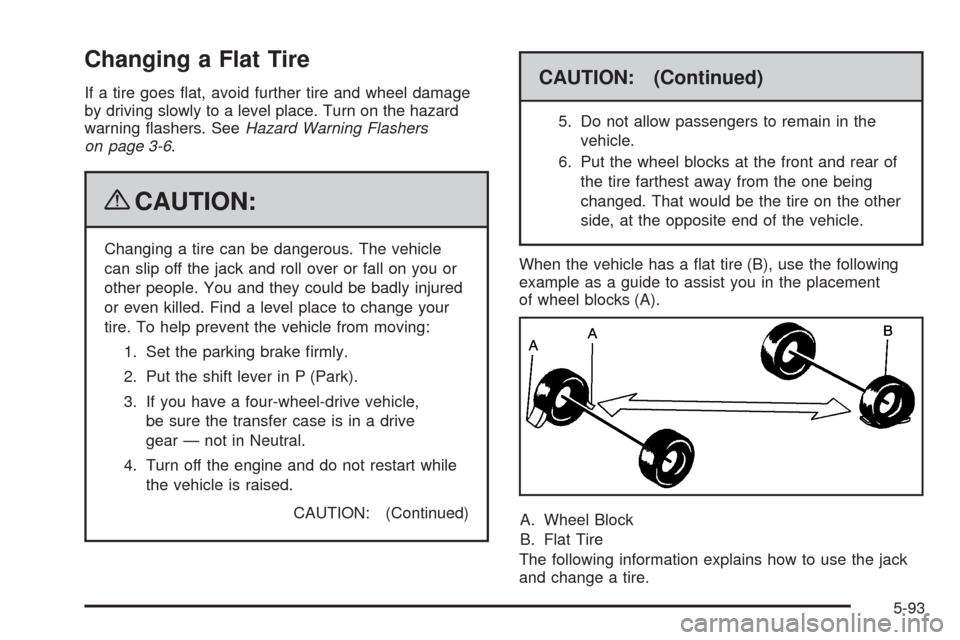
When the vehicle has a �at tire (B), use the following
example as a guide to assist you in the placement
of wheel blocks (A).
A. Wheel Block
B. Flat Tire
The following information explains how to use the jack
and change a tire.
5-93
Page 481 of 484
Rear Windshield Washer/Wiper.........................3-10
Rearview Mirror, Automatic Dimming..................2-40
Rearview Mirrors.............................................2-40
Reclining Seatbacks.......................................... 1-7
Recommended Fluids and Lubricants.................6-12
Recovery Hooks.............................................4-32
Recreational Vehicle Towing.............................4-40
Reduced Engine Power Light............................3-44
Remote Keyless Entry (RKE) System.................. 2-4
Remote Keyless Entry (RKE) System, Operation . . . 2-5
Removing the Flat Tire and Installing the
Spare Tire..................................................5-97
Removing the Spare Tire and Tools...................5-94
Replacement Bulbs.........................................5-54
Replacement Parts, Maintenance......................6-14
Reporting Safety Defects
Canadian Government..................................7-16
General Motors...........................................7-16
United States Government............................7-15
Restraint System Check
Checking the Restraint Systems....................1-70
Replacing Restraint System Parts
After a Crash..........................................1-71
Retained Accessory Power...............................2-23
Roadside
Assistance Program....................................... 7-7
Rocking Your Vehicle to Get it Out....................4-32
Routing, Engine Drive Belt...............................6-15
Running the Vehicle While Parked.....................2-39S
Safety Belt Reminders.....................................3-31
Safety Belts
Care of ....................................................5-112
How to Wear Safety Belts Properly................1-18
Lap-Shoulder Belt........................................1-27
Safety Belt Extender....................................1-32
Safety Belt Use During Pregnancy.................1-31
Safety Belts Are for Everyone.......................1-13
Safety Warnings and Symbols.............................. iii
Scheduled Maintenance..................................... 6-4
Seats
Head Restraints..........................................1-10
Heated Seats............................................... 1-4
Manual Lumbar............................................. 1-3
Memory ....................................................... 1-5
Power Lumbar .............................................. 1-4
Power Seats................................................. 1-3
Rear Seat Operation....................................1-11
Reclining Seatbacks...................................... 1-7
Secondary Latch System................................5-103
Securing a Child Restraint
Center Rear Seat Position............................1-51
Rear Outside Seat Position...........................1-49
Right Front Seat Position..............................1-52
Security Light.................................................3-44
11