brake CHEVROLET TRAILBLAZER 2022 Workshop Manual
[x] Cancel search | Manufacturer: CHEVROLET, Model Year: 2022, Model line: TRAILBLAZER, Model: CHEVROLET TRAILBLAZER 2022Pages: 363, PDF Size: 6.76 MB
Page 236 of 363
Chevrolet Trailblazer Owner Manual (GMNA-Localizing-U.S./Canada-
14400528) - 2021 - CRC - 11/7/19
Driving and Operating 235
.Vehicles can tow in D (Drive). If the
transmission downshifts too often, a
lower gear may be selected using Manual
Mode SeeManual Mode 0203.
If equipped, the following driver assistance
features should be turned off when towing
a trailer:
.Adaptive Cruise Control (ACC)
.Super Cruise Control
.Lane Keep Assist (LKA)
.Park Assist
If equipped, the following driver assistance
features should be turned to alert or off
when towing a trailer:
.Automatic Emergency Braking (AEB)
.Intelligent Brake Assist (IBA)
.Front Pedestrian Braking (FPB)
If equipped with Lane Change Alert (LCA),
the LCA detection zones that extend back
from the side of the vehicle do not move
further back when a trailer is towed. Use
caution while changing lanes when towing a
trailer.
If equipped with Rear Cross Traffic Alert
(RCTA), use caution while backing up when
towing a trailer, as the RCTA detection zones that extend out from the back of the vehicle
do not move further back when a trailer is
towed.
{Warning
To prevent serious injury or death from
carbon monoxide (CO), when towing a
trailer:
.Do not drive with the liftgate, trunk/
hatch, or rear-most window open.
.Fully open the air outlets on or under
the instrument panel.
.Adjust the climate control system to a
setting that brings in only outside air.
See
“Climate Control Systems” in the
Index.
For more information about carbon
monoxide, see Engine Exhaust 0200.
Towing a trailer requires experience. The
combination of the vehicle and trailer is
longer and not as responsive as the vehicle
itself. Get used to the handling and braking
of the combination by driving on a level
road surface before driving on public roads.
The trailer structure, the tires, and the
brakes must be all be rated to carry the
intended cargo. Inadequate trailer equipment can cause the combination to
operate in an unexpected or unsafe manner.
Before driving, inspect all trailer hitch parts
and attachments, safety chains, electrical
connectors, lamps, tires, and mirrors. See
Towing Equipment
0240. If the trailer has
electric brakes, start the combination
moving and then manually apply the trailer
brake controller to check the trailer brakes
work. During the trip, occasionally check
that the cargo and trailer are secure and
that the lamps and any trailer brakes are
working.Towing with a Stability Control System
When towing, the stability control system
might be heard. The system reacts to
vehicle movement caused by the trailer,
which mainly occurs during cornering. This is
normal when towing heavier trailers.
Following Distance
Stay at least twice as far behind the vehicle
ahead as you would when driving without a
trailer. This can help to avoid heavy braking
and sudden turns.
Page 237 of 363
Chevrolet Trailblazer Owner Manual (GMNA-Localizing-U.S./Canada-
14400528) - 2021 - CRC - 11/7/19
236 Driving and Operating
Passing
More passing distance is needed when
towing a trailer. The combination will not
accelerate as quickly and is much longer so
it is necessary to go much farther beyond
the passed vehicle before returning to the
lane. Pass on level roadways. Avoid passing
on hills if possible.
Backing Up
Hold the bottom of the steering wheel with
one hand. To move the trailer to the left,
move that hand to the left. To move the
trailer to the right, move that hand to the
right.
Always back up slowly and, if possible, have
someone guide you.
Making TurnsCaution
Turn more slowly and make wider arcs
when towing a trailer to prevent damage
to your vehicle. Making very sharp turns
could cause the trailer to contact the
vehicle. Make wider turns than normal when towing,
so trailer will not go over soft shoulders,
over curbs, or strike road signs, trees,
or other objects. Always signal turns well in
advance. Do not steer or brake suddenly.
Driving on Grades
Reduce speed and shift to a lower gear
before starting down a long or steep
downhill grade. If the transmission is not
shifted down, the brakes may overheat and
result in reduced braking efficiency.
The vehicle can tow in D (Drive). Shift the
transmission to a lower gear if the
transmission shifts too often under heavy
loads and/or hilly conditions.
When towing at higher altitudes, engine
coolant will boil at a lower temperature
than at lower altitudes. If the engine is
turned off immediately after towing at high
altitude on steep uphill grades, the vehicle
could show signs similar to engine
overheating. To avoid this, let the engine
run, preferably on level ground, with the
transmission in P (Park) for a few minutes
before turning the engine off. If the
overheat warning comes on, see
Engine
Overheating 0258.
Parking on Hills
{Warning
To prevent serious injury or death,
always park your vehicle and trailer on a
level surface when possible.
When parking your vehicle and your trailer
on a hill: 1. Press the brake pedal, but do not shift into P (Park) yet. Turn the wheels into
the curb if facing downhill or into traffic
if facing uphill.
2. Have someone place chocks under the trailer wheels.
3. When the wheel chocks are in place, gradually release the brake pedal to
allow the chocks to absorb the load of
the trailer.
4. Reapply the brake pedal. Then apply the parking brake and shift into P (Park).
5. Release the brake pedal.
Leaving After Parking on a Hill
1. Apply and hold the brake pedal.
.Start the engine.
.Shift into a gear.
.Release the parking brake.
Page 238 of 363
Chevrolet Trailblazer Owner Manual (GMNA-Localizing-U.S./Canada-
14400528) - 2021 - CRC - 11/7/19
Driving and Operating 237
2. Let up on the brake pedal.
3. Drive slowly until the trailer is clear ofthe chocks.
4. Stop and have someone pick up and store the chocks.
Maintenance When Trailer Towing
The vehicle needs service more often when
used to tow trailers. See Maintenance
Schedule 0316. It is especially important to
check the automatic transmission fluid,
engine oil, axle lubricant, belts, cooling
system, and brake system before and during
each trip.
Check periodically that all nuts and bolts on
the trailer hitch are tight.
Engine Cooling When Trailer Towing
The cooling system may temporarily
overheat during severe operating conditions.
See Engine Overheating 0258.
Trailer Towing
Caution
Towing a trailer improperly can damage
the vehicle and result in costly repairs
not covered by the vehicle warranty. To
(Continued)
Caution (Continued)
tow a trailer correctly, follow the
directions in this section and see your
dealer for important information about
towing a trailer with the vehicle.
Trailer Weight
{Warning
Never exceed the towing capacity for
your vehicle.
Safe trailering requires monitoring the
weight, speed, altitude, road grades, outside
temperature, dimensions of the front of the
trailer, and how frequently the vehicle is
used to tow a trailer.
Trailer Weight Ratings
When towing a trailer, the weight of the
loaded vehicle and trailer must be within
the weight ratings for the vehicle.
.GCWR: Gross Combined Weight Rating
.GVWR: Gross Vehicle Weight Rating
.Maximum Trailer Weight Rating
.Maximum Trailer Tongue Weight See
“Weight-Distributing Hitch Adjustment”
under Towing Equipment 0240 to
determine if equalizer bars are required to
obtain the maximum trailer weight rating.
See “Trailer Brakes” underTowing
Equipment 0240 to determine if brakes are
required based on your trailer's weight.
The only way to be sure the weight is not
exceeding any of these ratings is to weigh
the tow vehicle and trailer combination,
fully loaded for the trip, getting individual
weights for each of these items.
{Warning
You and others could be seriously injured
or killed if the trailer is too heavy or the
trailer brakes are inadequate for the load.
The vehicle may be damaged, and the
repairs would not be covered by the
vehicle warranty.
Only tow a trailer if all the steps in this
section have been followed. Ask your
dealer for advice and information about
towing a trailer.
Page 242 of 363
Chevrolet Trailblazer Owner Manual (GMNA-Localizing-U.S./Canada-
14400528) - 2021 - CRC - 11/7/19
Driving and Operating 241
Cross the safety chains under the tongue of
the trailer to help prevent the tongue from
contacting the road if it becomes separated
from the hitch. Always leave just enough
slack so the combination can turn. Never
allow safety chains to drag on the ground.
Trailer Brakes
Loaded trailers over 450 kg (1,000 lb) must
be equipped with brake systems and with
brakes for each axle. Trailer braking
equipment conforming to Canadian
Standards Association (CSA) requirement
CAN3-D313, or its equivalent, is
recommended.
State or local regulations may require
trailers to have their own braking system if
the loaded weight of the trailer exceeds
certain minimums that can vary from state
to state. Read and follow the instructions for
the trailer brakes so they are installed,
adjusted, and maintained properly. Never
attempt to tap into your vehicle's hydraulic
brake system. If you do, both the vehicle
anti-lock brakes and the trailer brakes may
not function, which could result in a crash.
Trailer Lamps
Always check all trailer lamps are working at
the beginning of each trip, and periodically
on longer trips.
Turn Signals When Towing a Trailer
When properly connected, the trailer turn
signals should will illuminate to indicate the
vehicle is turning, changing lanes,
or stopping. When towing a trailer, the
arrows on the instrument cluster will
illuminate even if the trailer is not properly
connected or the bulbs are burned out.
Trailer Tires
Special Trailer (ST) tires differ from vehicle
tires. Trailer tires are designed with stiff
sidewalls to help prevent sway and to
support heavy loads. These features can
make it difficult to determine if the trailer
tire pressures are low only based on a visual
inspection.
Always check all trailer tire pressures before
each trip when the tires are cool. Low trailer
tire pressure is a leading cause of trailer tire
blow-outs.Trailer tires deteriorate over time. The trailer
tire sidewall will show the week and year
the tire was manufactured. Many trailer tire
manufacturers recommend replacing tires
more than six years old.
Overloading is another leading cause of
trailer tire blow-outs. Never load your trailer
with more weight than the tires are
designed to support. The load rating is
located on the trailer tire sidewall.
Always know the maximum speed rating for
the trailer tires before driving. This may be
significantly lower than the vehicle tire
speed rating. The speed rating may be on
the trailer tire sidewall. If the speed rating is
not shown, the default trailer tire speed
rating is 105 km/h (65 mph).
Conversions and Add-Ons
Add-On Electrical Equipment
{Warning
The Data Link Connector (DLC) is used for
vehicle service and Emission Inspection/
Maintenance testing. See
Malfunction
Indicator Lamp (Check Engine Light) 096.
(Continued)
Page 244 of 363
Chevrolet Trailblazer Owner Manual (GMNA-Localizing-U.S./Canada-
14400528) - 2021 - CRC - 11/7/19
Vehicle Care 243
Vehicle Care
General Information
General Information . . . . . . . . . . . . . . . . . . . 244
California Proposition 65 Warning . . . . . 244
California Perchlorate MaterialsRequirements . . . . . . . . . . . . . . . . . . . . . . . . 244
Accessories and Modifications . . . . . . . . . 245
Vehicle Checks
Doing Your Own Service Work . . . . . . . . 245
Hood . . . . . . . . . . . . . . . . . . . . . . . . . . . . . . . . . . 245
Engine Compartment Overview . . . . . . . . 247
Engine Oil . . . . . . . . . . . . . . . . . . . . . . . . . . . . . 250
Engine Oil Life System . . . . . . . . . . . . . . . . . 252
Automatic Transmission Fluid . . . . . . . . . . 252
Engine Air Filter Life System . . . . . . . . . . . 253
Engine Air Cleaner/Filter . . . . . . . . . . . . . . . 253
Cooling System . . . . . . . . . . . . . . . . . . . . . . . . 255
Engine Overheating . . . . . . . . . . . . . . . . . . . 258
Washer Fluid . . . . . . . . . . . . . . . . . . . . . . . . . . 259
Brakes . . . . . . . . . . . . . . . . . . . . . . . . . . . . . . . . 260
Brake Fluid . . . . . . . . . . . . . . . . . . . . . . . . . . . . 260
Battery - North America . . . . . . . . . . . . . . . 261
All-Wheel Drive . . . . . . . . . . . . . . . . . . . . . . . . 263
Starter Switch Check . . . . . . . . . . . . . . . . . . 263
Automatic Transmission Shift Lock Control Function Check . . . . . . . . . . . . . . 263
Park Brake and P (Park) Mechanism Check . . . . . . . . . . . . . . . . . . . . . . . . . . . . . . . 264 Wiper Blade Replacement . . . . . . . . . . . . . 264
Windshield Replacement . . . . . . . . . . . . . . 265
Gas Strut(s) . . . . . . . . . . . . . . . . . . . . . . . . . . . 265
Headlamp Aiming
Front Headlamp Aiming . . . . . . . . . . . . . . . 266
Bulb Replacement
Bulb Replacement . . . . . . . . . . . . . . . . . . . . . 266
Halogen Bulbs . . . . . . . . . . . . . . . . . . . . . . . . . 267
LED Lighting . . . . . . . . . . . . . . . . . . . . . . . . . . . 267
Headlamps, Front Turn Signal,
Sidemarker, and Parking Lamps (Base
Level) . . . . . . . . . . . . . . . . . . . . . . . . . . . . . . . . 267
Headlamps, Front Turn Signal, Sidemarker, and Parking Lamps
(Uplevel) . . . . . . . . . . . . . . . . . . . . . . . . . . . . 268
Fog Lamps . . . . . . . . . . . . . . . . . . . . . . . . . . . . 269
Taillamps, Turn Signal, Sidemarker, Stoplamps, and Back-Up Lamps (Base
Level) . . . . . . . . . . . . . . . . . . . . . . . . . . . . . . . 269
Taillamps, Turn Signal, Sidemarker, Stoplamps, and Back-Up Lamps
(Uplevel) . . . . . . . . . . . . . . . . . . . . . . . . . . . . . 271
Electrical System
Electrical System Overload . . . . . . . . . . . . . 273
Fuses and Circuit Breakers . . . . . . . . . . . . . 274
Engine Compartment Fuse Block . . . . . . 274
Instrument Panel Fuse Block . . . . . . . . . . . 277
Rear Compartment Fuse Block . . . . . . . . . 278
Wheels and Tires
Tires . . . . . . . . . . . . . . . . . . . . . . . . . . . . . . . . . . . 279
All-Season Tires . . . . . . . . . . . . . . . . . . . . . . . 280
Winter Tires . . . . . . . . . . . . . . . . . . . . . . . . . . . 280
Tire Sidewall Labeling . . . . . . . . . . . . . . . . . . 281
Tire Designations . . . . . . . . . . . . . . . . . . . . . . 282
Tire Terminology and Definitions . . . . . . 283
Tire Pressure . . . . . . . . . . . . . . . . . . . . . . . . . . 285
Tire Pressure Monitor System . . . . . . . . . 286
Tire Pressure Monitor Operation . . . . . . . 287
Tire Inspection . . . . . . . . . . . . . . . . . . . . . . . . 290
Tire Rotation . . . . . . . . . . . . . . . . . . . . . . . . . . 290
When It Is Time for New Tires . . . . . . . . 291
Buying New Tires . . . . . . . . . . . . . . . . . . . . . 292
Different Size Tires and Wheels . . . . . . . 293
Uniform Tire Quality Grading . . . . . . . . . 293
Wheel Alignment and Tire Balance . . . . 295
Wheel Replacement . . . . . . . . . . . . . . . . . . . 295
Tire Chains . . . . . . . . . . . . . . . . . . . . . . . . . . . . 295
If a Tire Goes Flat . . . . . . . . . . . . . . . . . . . . . 296
Tire Changing . . . . . . . . . . . . . . . . . . . . . . . . . 297
Compact Spare Tire . . . . . . . . . . . . . . . . . . . . 301
Jump Starting
Jump Starting - North America . . . . . . . . 302
Towing the Vehicle
Towing the Vehicle . . . . . . . . . . . . . . . . . . . 304
Recreational Vehicle Towing . . . . . . . . . . . 305
Page 246 of 363
Chevrolet Trailblazer Owner Manual (GMNA-Localizing-U.S./Canada-
14400528) - 2021 - CRC - 11/7/19
Vehicle Care 245
Accessories and Modifications
Adding non-dealer accessories or making
modifications to the vehicle can affect
vehicle performance and safety, including
such things as airbags, braking, stability,
ride and handling, emissions systems,
aerodynamics, durability, and electronic
systems like antilock brakes, traction control,
and stability control. These accessories or
modifications could even cause malfunction
or damage not covered by the vehicle
warranty.
Damage to suspension components caused
by modifying vehicle height outside of
factory settings will not be covered by the
vehicle warranty.
Damage to vehicle components resulting
from modifications or the installation or use
of non-GM certified parts, including control
module or software modifications, is not
covered under the terms of the vehicle
warranty and may affect remaining
warranty coverage for affected parts.
GM Accessories are designed to complement
and function with other systems on the
vehicle. See your dealer to accessorize the
vehicle using genuine GM Accessories
installed by a dealer technician.Also, see
Adding Equipment to the
Airbag-Equipped Vehicle 060.
Vehicle Checks
Doing Your Own Service Work
{Warning
It can be dangerous to work on your
vehicle if you do not have the proper
knowledge, service manual, tools,
or parts. Always follow owner’s manual
procedures and consult the service
manual for your vehicle before doing any
service work.
If doing some of your own service work, use
the proper service manual. It tells you much
more about how to service the vehicle than
this manual can. To order the proper service
manual, see Publication Ordering
Information 0339.
This vehicle has an airbag system. Before
attempting to do your own service work,
see Servicing the Airbag-Equipped Vehicle
0 59. If equipped with remote vehicle start, open
the hood before performing any service
work to prevent remote starting the vehicle
accidentally. See
Remote Vehicle Start 017.
Keep a record with all parts receipts and list
the mileage and the date of any service
work performed. See Maintenance Records
0 327.Caution
Even small amounts of contamination can
cause damage to vehicle systems. Do not
allow contaminants to contact the fluids,
reservoir caps, or dipsticks.
Hood
{Warning
For vehicles with auto engine stop/start,
turn the vehicle off before opening the
hood. If the vehicle is on, the engine will
start when the hood is opened. You or
others could be injured.
Page 249 of 363

Chevrolet Trailblazer Owner Manual (GMNA-Localizing-U.S./Canada-
14400528) - 2021 - CRC - 11/7/19
248 Vehicle Care
1. Windshield Washer Fluid Reservoir. SeeWasher Fluid 0259.
2. Engine Coolant Surge Tank and Pressure Cap. See Cooling System 0255.
3. Engine Oil Dipstick. See Engine Oil0250.
4. Engine Cooling Fan (Out of View). See Cooling System 0255.
5. Engine Oil Fill Cap. See Engine Oil0250.
6. Engine Air Cleaner/Filter 0253.
7. Brake Fluid Reservoir. See Brakes0260.
8. Positive (+) Battery Terminal. See Jump
Starting - North America 0302.
9. Battery - North America 0261.
10. Engine Compartment Fuse Block 0274.
11. Remote Negative (-) Battery Terminal. SeeJump Starting - North America 0302
Page 250 of 363

Chevrolet Trailblazer Owner Manual (GMNA-Localizing-U.S./Canada-
14400528) - 2021 - CRC - 11/7/19
Vehicle Care 249
1.3L L3 Engine (L3T)
1. Windshield Washer Fluid Reservoir. See Washer Fluid 0259.
2. Engine Coolant Surge Tank and Pressure Cap. See Cooling System 0255. 3. Engine Oil Fill Cap. See
Engine Oil0250.
4. Engine Oil Dipstick. See Engine Oil0250.
5. Engine Cooling Fan (Out of View). See Cooling System 0255. 6.
Engine Air Cleaner/Filter 0253.
7. Brake Fluid Reservoir. See Brakes0260.
8. Positive (+) Battery Terminal. See Jump
Starting - North America 0302.
Page 259 of 363
Chevrolet Trailblazer Owner Manual (GMNA-Localizing-U.S./Canada-
14400528) - 2021 - CRC - 11/7/19
258 Vehicle Care
6. Verify coolant level after the engine isshut off and the coolant is cold.
If necessary, repeat coolant fill procedure
Steps 1–6.
If the coolant still is not at the proper
level when the system cools down again,
see your dealer.
Caution
If the pressure cap is not tightly installed,
coolant loss and engine damage may
occur. Be sure the cap is properly and
tightly secured.
Automatic Coolant Service Fill Instruction
If equipped, this feature assists in filling and
removing air from the cooling system after
service of components or when coolant is
added after being too low.
To activate the fill and air removal process:
1. With a cold system, open the surge tank cap and add coolant to the indicated
mark on the surge tank.
2. Connect the vehicle to a battery charger.
3. Turn the ignition to Service Mode. See Ignition Positions (Key Access) 0191 or
Ignition Positions (Keyless Access) 0192.
4. Turn off the air conditioning. 5. Set the parking brake.
6. At the same time, press the accelerator
and the brake for two seconds, then
release.
At the end of the cycle, check the coolant
level in the surge tank and add coolant if it
is low. Turn off the vehicle, allow the Engine
Control Module (ECM) to go to sleep, about
two minutes, and repeat Steps 3-7.
Listen for pump activation and movement of
the control valves while watching the level
of the coolant in the surge tank. If the tank
empties, turn the ignition off, carefully
remove the surge tank cap, refill to the
indicated mark, and repeat Steps 4-7. The fill
and air removal process will run for
approximately 10 minutes.
Engine Overheating
The vehicle has an engine coolant
temperature gauge to warn of the engine
overheating. See Engine Coolant
Temperature Gauge 094.
If the decision is made not to lift the hood
when this warning appears, get service help
right away. See Roadside Assistance Program
0 335. If the decision is made to lift the hood,
make sure the vehicle is parked on a level
surface.
Then check to see if the engine cooling fan
is running. If the engine is overheating, the
fan should be running. If it is not, do not
continue to run the engine. Have the vehicle
serviced.
Caution
Do not run the engine if there is a leak
in the engine cooling system. This can
cause a loss of all coolant and can
damage the system and vehicle. Have
any leaks fixed right away.
If Steam Is Coming from the Engine
Compartment
{Warning
Steam and scalding liquids from a hot
cooling system are under pressure.
Turning the pressure cap, even a little,
can cause them to come out at high
speed and you could be burned. Never
turn the cap when the cooling system,
(Continued)
Page 261 of 363
Chevrolet Trailblazer Owner Manual (GMNA-Localizing-U.S./Canada-
14400528) - 2021 - CRC - 11/7/19
260 Vehicle Care
Caution (Continued)
.When using concentrated washer fluid,
follow the manufacturer instructions
for adding water.
.Fill the washer fluid tank only
three-quarters full when it is very cold.
This allows for fluid expansion if
freezing occurs, which could damage
the tank if it is completely full.
Brakes
Disc brake pads have built-in wear indicators
that make a high-pitched warning sound
when the brake pads are worn and new
pads are needed. The sound can come and
go or can be heard all the time when the
vehicle is moving, except when applying the
brake pedal firmly.
{Warning
The brake wear warning sound means
that soon the brakes will not work well.
That could lead to a crash. When the
brake wear warning sound is heard, have
the vehicle serviced.
Caution
Continuing to drive with worn-out brake
pads could result in costly brake repair.
Some driving conditions or climates can
cause a brake squeal when the brakes are
first applied or lightly applied. This does not
mean something is wrong with the brakes.
Properly torqued wheel nuts are necessary
to help prevent brake pulsation. When tires
are rotated, inspect brake pads for wear and
evenly tighten wheel nuts in the proper
sequence to torque specifications. See
Capacities and Specifications 0329.
Brake pads should be replaced as
complete sets.
Brake Pedal Travel
See your dealer if the brake pedal does not
return to normal height, or if there is a
rapid increase in pedal travel. This could be
a sign that brake service may be required.
Replacing Brake System Parts
Always replace brake system parts with
new, approved replacement parts. If this is
not done, the brakes may not work
properly. The braking performance expected can change in many other ways if the
wrong replacement brake parts are installed
or if parts are improperly installed.
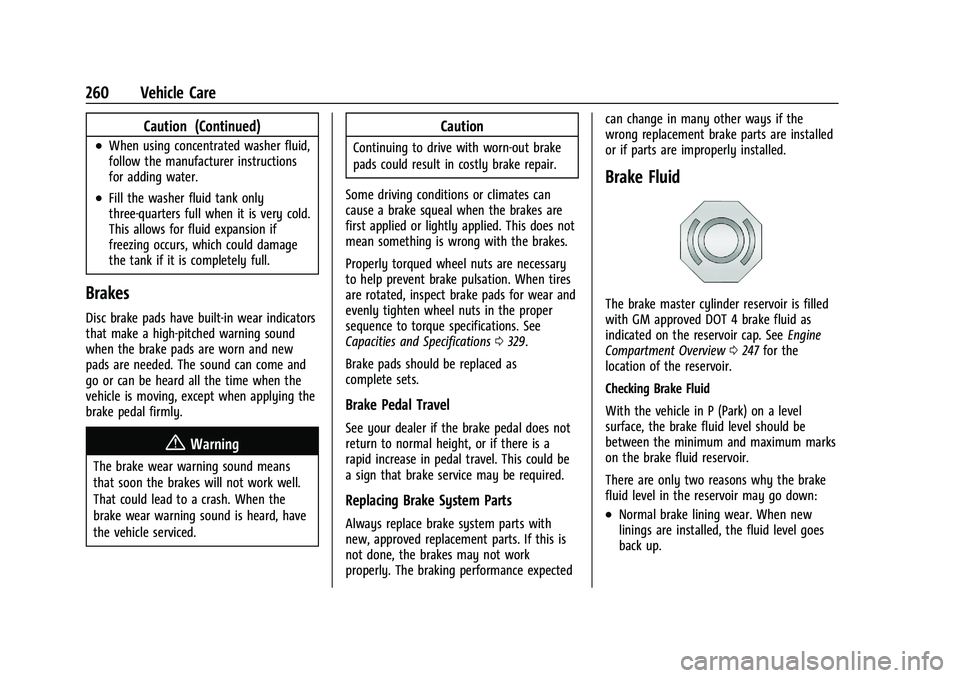
Brake Fluid
The brake master cylinder reservoir is filled
with GM approved DOT 4 brake fluid as
indicated on the reservoir cap. See
Engine
Compartment Overview 0247 for the
location of the reservoir.
Checking Brake Fluid
With the vehicle in P (Park) on a level
surface, the brake fluid level should be
between the minimum and maximum marks
on the brake fluid reservoir.
There are only two reasons why the brake
fluid level in the reservoir may go down:
.Normal brake lining wear. When new
linings are installed, the fluid level goes
back up.