clock CHEVROLET TRAVERSE 2010 1.G User Guide
[x] Cancel search | Manufacturer: CHEVROLET, Model Year: 2010, Model line: TRAVERSE, Model: CHEVROLET TRAVERSE 2010 1.GPages: 448, PDF Size: 6.96 MB
Page 220 of 448
7-34 Infotainment System
To use an auxiliary input device,
connect a 3.5 mm (1/8 in) cable to
the radio's front auxiliary input jack.
O(Power/Volume):Turn
clockwise or counterclockwise to
increase or decrease the volume of
the portable player. Additional
volume adjustments might have to
be made from the portable device if
the volume is not loud or soft
enough.
BAND: Press to listen to the radio
when a portable audio device is
playing. The portable audio device
continues playing, so you might
want to stop it or turn it off.
CD/AUX (CD/Auxiliary): Press to
select between CD, or Auxiliary.
.When a CD is in the player the
CD icon and a message
showing the disc and/or track
number displays.
.If an auxiliary input device is not
connected, “No Input Device
Found” displays. DVD/CD AUX (Auxiliary):
Press to
select between DVD, CD,
or Auxiliary.
.If an auxiliary input device is not
connected, “No Aux Input
Device” displays.
.When a disc is in either slot, the
DVD/CD text tab and a message
showing the track or chapter
number displays.
.If an auxiliary input device is not
connected, and a disc is in both
the DVD slot and the CD slot the
DVD/CD AUX button only cycles
between the two sources and
does not indicate “No Aux Input
Device”.
.If a front auxiliary input device is
connected, the DVD/CD AUX
button cycles through all
available options.
If a disc is inserted into top DVD
slot, the rear seat operator can turn
on the video screen and use the remote control to only navigate the
CD tracks through the remote
control.
See
“Using the Auxiliary Input
Jack(s)” later in this section,
or “Audio/Video (A/V) Jacks” under,
Rear Seat Entertainment (RSE)
System
on page 7‑35for more
information.
Using the USB Port
For vehicles with a USB port, the
connector is located in the center
console.
Radios with a USB port can control
a USB storage device or an iPod
®
using the radio buttons and knobs.
See MP3 (Radio with CD and Radio
with CD/USB)
on page 7‑21or
MP3 (Radio with CD/DVD)on
page 7‑27for information about
how to connect and control a USB
storage device or an iPod.
Page 241 of 448
Climate Controls 8-1
Climate Controls
Climate Control Systems
Climate Control Systems . . . . . . 8-1
Dual Automatic Climate ControlSystem . . . . . . . . . . . . . . . . . . . . . . 8-4
Rear Climate Control System (Rear Climate
Control Only) . . . . . . . . . . . . . . . 8-10
Rear Climate Control System (Rear Climate with Rear Seat
Audio) . . . . . . . . . . . . . . . . . . . . . . 8-11
Air Vents
Air Vents . . . . . . . . . . . . . . . . . . . . . 8-12
Climate Control Systems
The heating, cooling, and ventilation in the vehicle can be controlled with
this system.
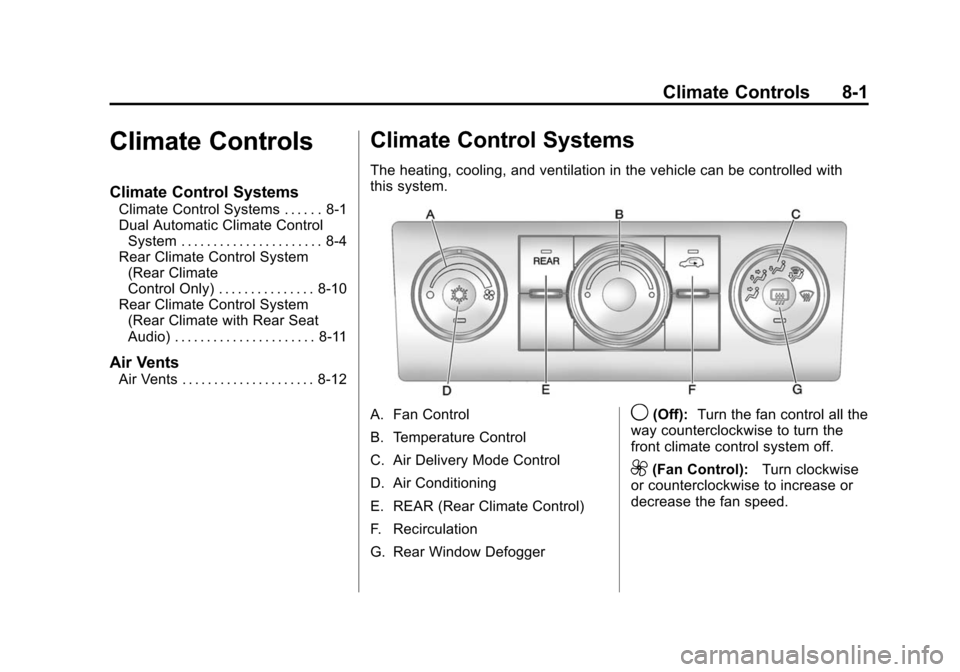
A. Fan Control
B. Temperature Control
C. Air Delivery Mode Control
D. Air Conditioning
E. REAR (Rear Climate Control)
F. Recirculation
G. Rear Window Defogger9(Off): Turn the fan control all the
way counterclockwise to turn the
front climate control system off.
9(Fan Control): Turn clockwise
or counterclockwise to increase or
decrease the fan speed.
Page 242 of 448
8-2 Climate Controls
Temperature Control:Turn
clockwise or counterclockwise to
increase or decrease the
temperature of the air flowing from
the system.
Air Delivery Mode Control: Turn
clockwise or counterclockwise to
change the current airflow mode.
By positioning the right knob
between two modes, a combination
of those two modes is selected.
H(Vent): Air is directed to the
instrument panel outlets.
)(Bi-Level): Air is divided
between the instrument panel and
floor outlets. Some air is directed
towards the windshield and side
window outlets. Cooler air is
directed to the upper outlets and
warmer air to the floor outlets.
6(Floor): Air is directed to the
floor outlets, with some of the air
directed to the windshield, side
window, and second row floor
outlets. In this mode, the system automatically selects outside air.
Recirculation cannot be selected
while in floor mode.
-(Defog):
This clears the
windows of fog or moisture. Air is
directed to the windshield, floor
outlets, and side window vents.
When this mode is selected, the
system turns off recirculation and
runs the air conditioning unless the
outside temperature is less than 4°C
(40°F). Recirculation cannot be
selected while in the defog mode.
Do not drive the vehicle until all the
windows are clear.
0(Defrost): This clears the
windshield of fog or frost, more
quickly. Air is directed to the
windshield and side window vents,
with some to the floor vents. In this
mode, outside air is pulled inside
the vehicle. Recirculation cannot be
selected while in the defrost mode.
The air conditioning system runs
automatically in this setting, unless
the outside temperature is less than
4°C (40°F). Do not drive the vehicle
until all the windows are clear.
#(Air Conditioning): Press to
turn the air conditioning system on
or off. An indicator light comes on
when A/C is on. The air conditioning
system does not operate when the
outside temperature is below 4°C
(40°F). The indicator light flashes
three times and turns off when
outside conditions affect air
conditioning operation. This is
normal.
For quicker cool down on hot days:
1. Open the windows to let hot air escape.
2. Select
Hmode.
3. Select
#.
4. Select the coolest temperature.
5. Select the highest fan speed.
6. Close the windows after the hot air has escaped.
7. Once the vehicle's interior temperature is below the outside
temperature, select
@mode
for faster cooling.
Page 250 of 448
8-10 Climate Controls
Rear Climate Control System (Rear Climate
Control Only)
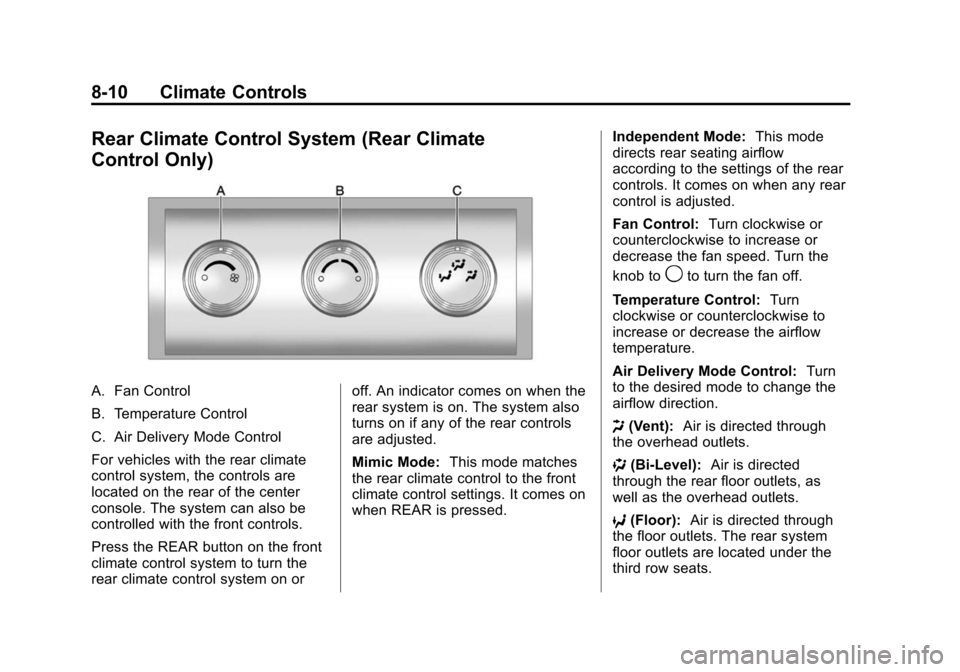
A. Fan Control
B. Temperature Control
C. Air Delivery Mode Control
For vehicles with the rear climate
control system, the controls are
located on the rear of the center
console. The system can also be
controlled with the front controls.
Press the REAR button on the front
climate control system to turn the
rear climate control system on oroff. An indicator comes on when the
rear system is on. The system also
turns on if any of the rear controls
are adjusted.
Mimic Mode:
This mode matches
the rear climate control to the front
climate control settings. It comes on
when REAR is pressed. Independent Mode:
This mode
directs rear seating airflow
according to the settings of the rear
controls. It comes on when any rear
control is adjusted.
Fan Control: Turn clockwise or
counterclockwise to increase or
decrease the fan speed. Turn the
knob to
9to turn the fan off.
Temperature Control: Turn
clockwise or counterclockwise to
increase or decrease the airflow
temperature.
Air Delivery Mode Control: Turn
to the desired mode to change the
airflow direction.
H (Vent): Air is directed through
the overhead outlets.
) (Bi-Level): Air is directed
through the rear floor outlets, as
well as the overhead outlets.
6 (Floor): Air is directed through
the floor outlets. The rear system
floor outlets are located under the
third row seats.
Page 257 of 448
Driving and Operating 9-5
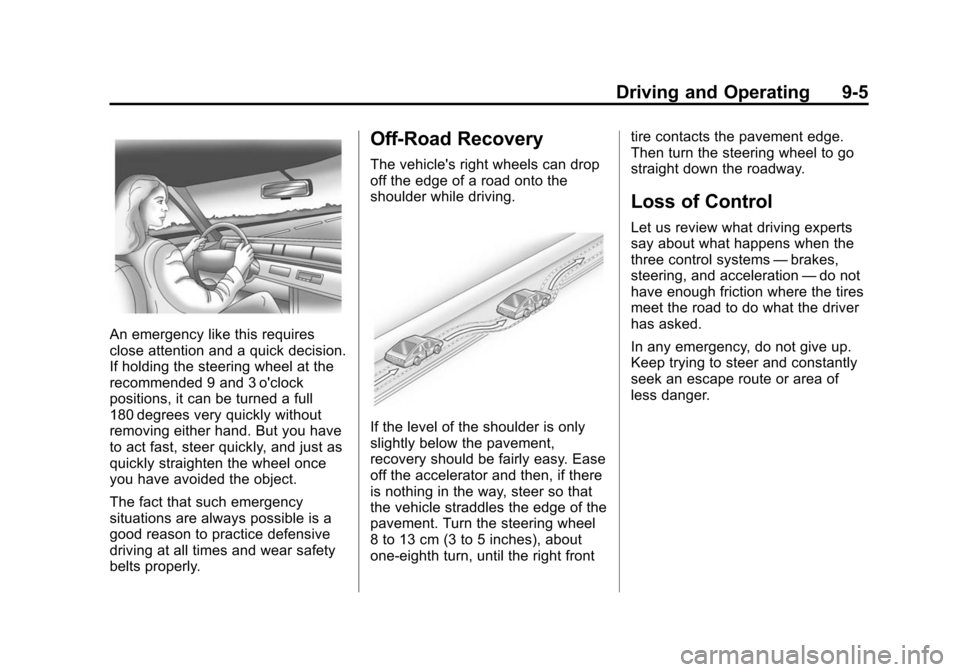
An emergency like this requires
close attention and a quick decision.
If holding the steering wheel at the
recommended 9 and 3 o'clock
positions, it can be turned a full
180 degrees very quickly without
removing either hand. But you have
to act fast, steer quickly, and just as
quickly straighten the wheel once
you have avoided the object.
The fact that such emergency
situations are always possible is a
good reason to practice defensive
driving at all times and wear safety
belts properly.
Off-Road Recovery
The vehicle's right wheels can drop
off the edge of a road onto the
shoulder while driving.
If the level of the shoulder is only
slightly below the pavement,
recovery should be fairly easy. Ease
off the accelerator and then, if there
is nothing in the way, steer so that
the vehicle straddles the edge of the
pavement. Turn the steering wheel
8 to 13 cm (3 to 5 inches), about
one-eighth turn, until the right fronttire contacts the pavement edge.
Then turn the steering wheel to go
straight down the roadway.
Loss of Control
Let us review what driving experts
say about what happens when the
three control systems
—brakes,
steering, and acceleration —do not
have enough friction where the tires
meet the road to do what the driver
has asked.
In any emergency, do not give up.
Keep trying to steer and constantly
seek an escape route or area of
less danger.
Page 295 of 448
Driving and Operating 9-43
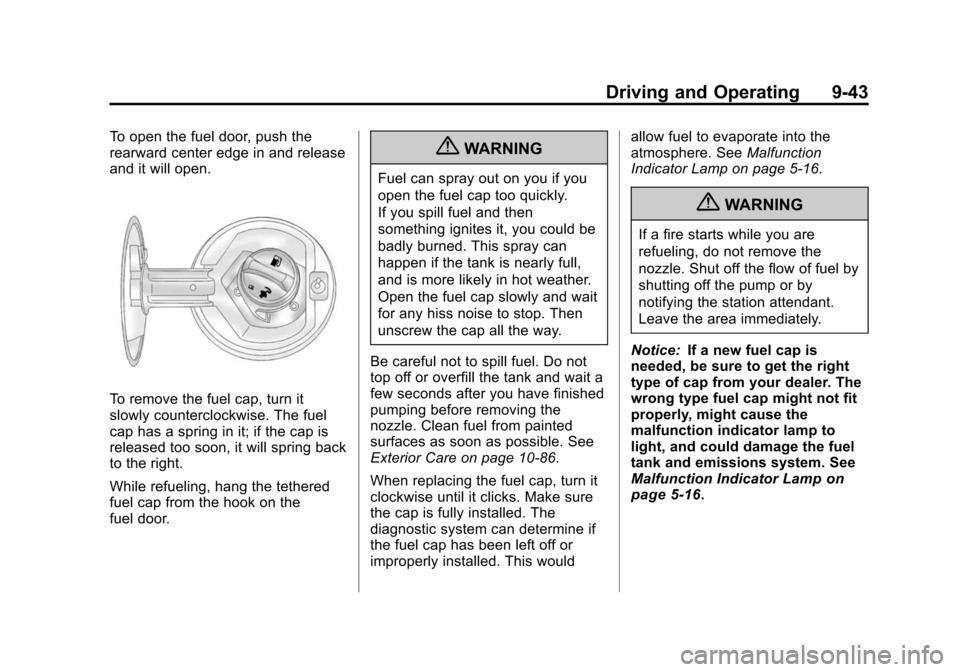
To open the fuel door, push the
rearward center edge in and release
and it will open.
To remove the fuel cap, turn it
slowly counterclockwise. The fuel
cap has a spring in it; if the cap is
released too soon, it will spring back
to the right.
While refueling, hang the tethered
fuel cap from the hook on the
fuel door.
{WARNING
Fuel can spray out on you if you
open the fuel cap too quickly.
If you spill fuel and then
something ignites it, you could be
badly burned. This spray can
happen if the tank is nearly full,
and is more likely in hot weather.
Open the fuel cap slowly and wait
for any hiss noise to stop. Then
unscrew the cap all the way.
Be careful not to spill fuel. Do not
top off or overfill the tank and wait a
few seconds after you have finished
pumping before removing the
nozzle. Clean fuel from painted
surfaces as soon as possible. See
Exterior Care on page 10‑86.
When replacing the fuel cap, turn it
clockwise until it clicks. Make sure
the cap is fully installed. The
diagnostic system can determine if
the fuel cap has been left off or
improperly installed. This would allow fuel to evaporate into the
atmosphere. See
Malfunction
Indicator Lamp on page 5‑16.
{WARNING
If a fire starts while you are
refueling, do not remove the
nozzle. Shut off the flow of fuel by
shutting off the pump or by
notifying the station attendant.
Leave the area immediately.
Notice: If a new fuel cap is
needed, be sure to get the right
type of cap from your dealer. The
wrong type fuel cap might not fit
properly, might cause the
malfunction indicator lamp to
light, and could damage the fuel
tank and emissions system. See
Malfunction Indicator Lamp
on
page 5‑16.
Page 325 of 448
Vehicle Care 10-17
WARNING (Continued)
cooling system and surge tank
pressure cap to cool if you ever
have to turn the pressure cap.
If coolant is needed, add the proper
mixture directly to the radiator, but
be sure the cooling system is cool
before this is done.
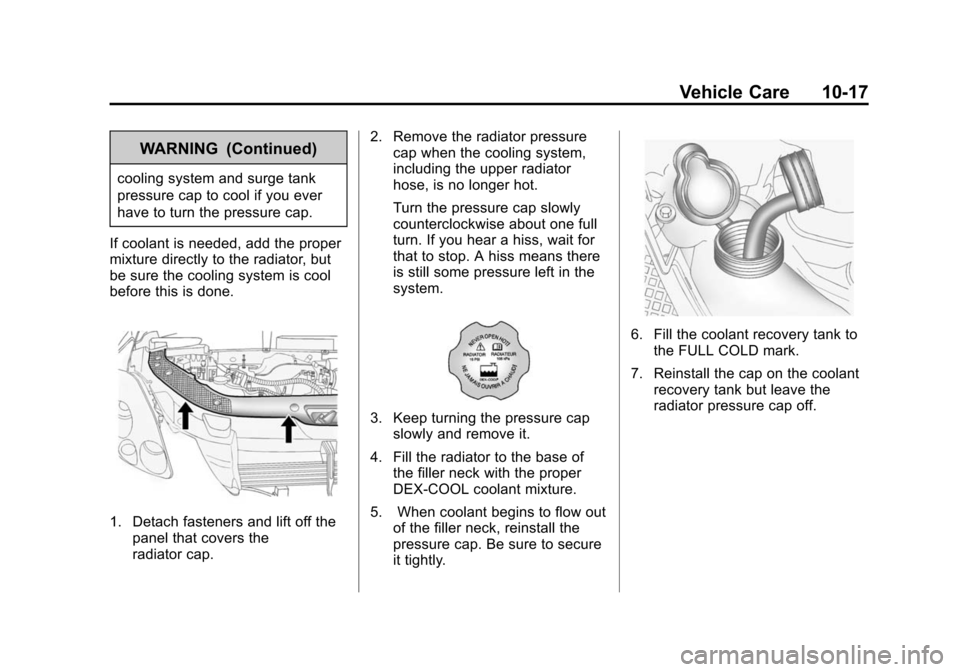
1. Detach fasteners and lift off the panel that covers the
radiator cap. 2. Remove the radiator pressure
cap when the cooling system,
including the upper radiator
hose, is no longer hot.
Turn the pressure cap slowly
counterclockwise about one full
turn. If you hear a hiss, wait for
that to stop. A hiss means there
is still some pressure left in the
system.
3. Keep turning the pressure capslowly and remove it.
4. Fill the radiator to the base of the filler neck with the proper
DEX-COOL coolant mixture.
5. When coolant begins to flow out of the filler neck, reinstall the
pressure cap. Be sure to secure
it tightly.
6. Fill the coolant recovery tank tothe FULL COLD mark.
7. Reinstall the cap on the coolant recovery tank but leave the
radiator pressure cap off.
Page 336 of 448
10-28 Vehicle Care
Taillamps, Turn Signal,
Sidemarker, and
Stoplamps
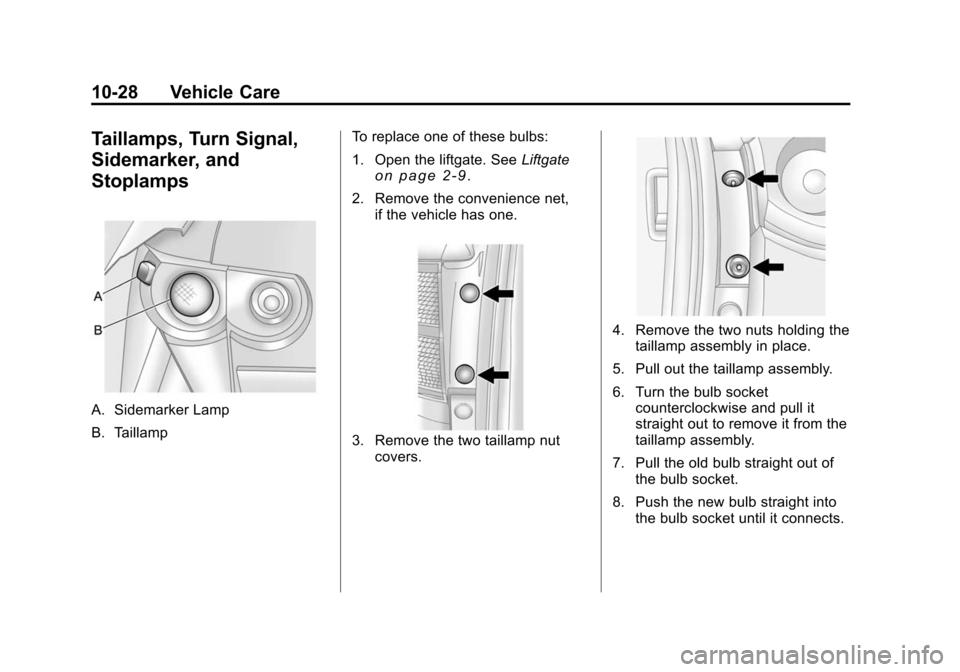
A. Sidemarker Lamp
B. TaillampTo replace one of these bulbs:
1. Open the liftgate. See
Liftgate
on page 2‑9.
2. Remove the convenience net, if the vehicle has one.
3. Remove the two taillamp nutcovers.
4. Remove the two nuts holding thetaillamp assembly in place.
5. Pull out the taillamp assembly.
6. Turn the bulb socket counterclockwise and pull it
straight out to remove it from the
taillamp assembly.
7. Pull the old bulb straight out of the bulb socket.
8. Push the new bulb straight into the bulb socket until it connects.
Page 369 of 448
Vehicle Care 10-61
2. Unwrap the sealant/air hose (F)and the power plug (H).
3. Place the kit on the ground. Make sure the tire valve stem is
positioned close to the ground
so the hose will reach it.
4. Remove the valve stem cap from the flat tire by turning it
counterclockwise.
5. Attach the sealant/air hose (F) onto the tire valve stem. Turn it
clockwise until it is tight.
6. Plug the power plug (H) into the accessory power outlet in the
vehicle. Unplug all items from
other accessory power outlets.
See Power Outlets
on
page 5‑9.
If the vehicle has an accessory
power outlet, do not use the
cigarette lighter.
If the vehicle only has a cigarette
lighter, use the cigarette lighter.
Do not pinch the power plug
cord in the door or window. 7. Start the vehicle. The vehicle
must be running while using the
air compressor.
8. Turn the selector switch (A) counterclockwise to the
Sealant + Air position.
9. Press the on/off (B) button to turn the tire sealant and
compressor kit on.
The compressor will inject
sealant and air into the tire.
The pressure gauge (C) will
initially show a high pressure
while the compressor pushes the
sealant into the tire. Once the
sealant is completely dispersed
into the tire, the pressure will
quickly drop and start to rise
again as the tire inflates with
air only.
10. Inflate the tire to the recommended inflation
pressure using the pressure
gauge (C). The recommended
inflation pressure can be found on the Tire and Loading
Information label. See
Tire
Pressure on page 10‑42.
The pressure gauge (C) may
read higher than the actual tire
pressure while the compressor
is on. Turn the compressor off
to get an accurate pressure
reading. The compressor may
be turned on/off until the
correct pressure is reached.
Notice: If the recommended
pressure cannot be reached after
approximately 25 minutes, the
vehicle should not be driven
farther. The tire is too severely
damaged and the tire sealant and
compressor kit cannot inflate the
tire. Remove the power plug from
the accessory power outlet and
unscrew the inflating hose from
the tire valve. See Roadside
Assistance Program on
page 13‑6.
Page 370 of 448
10-62 Vehicle Care
11. Press the on/off button (B) toturn the tire sealant and
compressor kit off.
The tire is not sealed and will
continue to leak air until the
vehicle is driven and the
sealant is distributed in the tire,
therefore, Steps 12 through
18 must be done immediately
after Step 11.
Be careful while handling the
tire sealant and compressor kit
as it could be warm after
usage.
12. Unplug the power plug (H) from the accessory power outlet in
the vehicle.
13. Turn the sealant/air hose (F) counterclockwise to remove it
from the tire valve stem.
14. Replace the tire valve stem cap.
15. Replace the sealant/air hose (F), and the power
plug (H) back in their original
location.
16. If the flat tire was able to inflate
to the recommended inflation
pressure, remove the
maximum speed label from the
sealant canister (E) and place
it in a highly visible location.
The label is a reminder not to
exceed 55 mph (90 km/h) until
the damaged tire is repaired or
replaced.
17. Return the equipment to its original storage location in the
vehicle.
18. Immediately drive the vehicle 5 miles (8 km) to distribute the
sealant in the tire. 19. Stop at a safe location and
check the tire pressure. Refer
to Steps 1 through 11 under
“Using the Tire Sealant and
Compressor Kit without Sealant
to Inflate a Tire (Not
Punctured).”
If the tire pressure has fallen
more than 10 psi (68 kPa)
below the recommended
inflation pressure, stop driving
the vehicle. The tire is too
severely damaged and the tire
sealant cannot seal the tire.
SeeRoadside Assistance
Program on page 13‑6.
If the tire pressure has not
dropped more than 10 psi
(68 kPa) from the
recommended inflation
pressure, inflate the tire to the
recommended inflation
pressure.
20. Wipe off any sealant from the wheel, tire, and vehicle.