mirror CHEVROLET TRAVERSE 2010 1.G User Guide
[x] Cancel search | Manufacturer: CHEVROLET, Model Year: 2010, Model line: TRAVERSE, Model: CHEVROLET TRAVERSE 2010 1.GPages: 448, PDF Size: 6.96 MB
Page 50 of 448
2-18 Keys, Doors and Windows
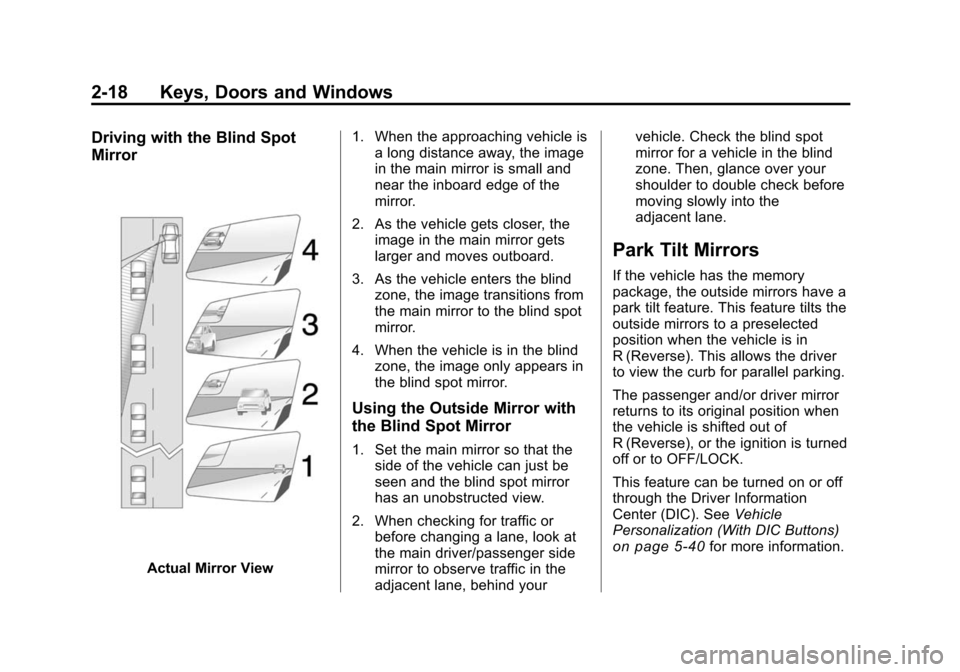
Driving with the Blind Spot
Mirror
Actual Mirror View1. When the approaching vehicle is
a long distance away, the image
in the main mirror is small and
near the inboard edge of the
mirror.
2. As the vehicle gets closer, the image in the main mirror gets
larger and moves outboard.
3. As the vehicle enters the blind zone, the image transitions from
the main mirror to the blind spot
mirror.
4. When the vehicle is in the blind zone, the image only appears in
the blind spot mirror.
Using the Outside Mirror with
the Blind Spot Mirror
1. Set the main mirror so that theside of the vehicle can just be
seen and the blind spot mirror
has an unobstructed view.
2. When checking for traffic or before changing a lane, look at
the main driver/passenger side
mirror to observe traffic in the
adjacent lane, behind your vehicle. Check the blind spot
mirror for a vehicle in the blind
zone. Then, glance over your
shoulder to double check before
moving slowly into the
adjacent lane.
Park Tilt Mirrors
If the vehicle has the memory
package, the outside mirrors have a
park tilt feature. This feature tilts the
outside mirrors to a preselected
position when the vehicle is in
R (Reverse). This allows the driver
to view the curb for parallel parking.
The passenger and/or driver mirror
returns to its original position when
the vehicle is shifted out of
R (Reverse), or the ignition is turned
off or to OFF/LOCK.
This feature can be turned on or off
through the Driver Information
Center (DIC). See
Vehicle
Personalization (With DIC Buttons)
on page 5‑40for more information.
Page 51 of 448
Keys, Doors and Windows 2-19
Interior Mirrors
Manual Rearview Mirror
Adjust the inside rearview mirror to
see clearly behind your vehicle.
Hold the mirror in the center to
move it up or down and side to side.
Use the day/night adjustment to
help prevent glare from the
headlamps behind you. Move the
lever to the right for nighttime use
and to the left for daytime use.
Vehicles with OnStar
®have three
additional control buttons located at
the bottom of the mirror. See your
dealer for more information about
OnStar and how to subscribe to it.
See the OnStar
®owner guide for
more information on the services
OnStar provides.
Automatic Dimming
Rearview Mirror
The vehicle may have an automatic
dimming inside rearview mirror.
Automatic dimming reduces the
glare from the headlamps of the
vehicle behind you. The dimming
feature comes on and the indicator
light illuminates each time the
ignition is turned to start.
Vehicles with OnStar
®have three
additional control buttons for the
OnStar
®system. See your dealer
for more information about OnStar®
and how to subscribe to it. See the
OnStar®owner guide for more
information about the services
OnStar
®provides.
O(On/Off): Press to turn the
dimming feature on or off.
The vehicle may also have a Rear
Vision Camera (RVC). See Rear
Vision Camera (RVC)
on page 9‑35for more information.
If the vehicle has RVC,
the
Obutton for turning the
dimming feature on or off will not be
available.
Cleaning the Mirror
Do not spray glass cleaner directly
on the mirror. Use a soft towel
dampened with water.
Page 54 of 448
2-22 Keys, Doors and Windows
Sun Visors
Pull the sun visor down to block
glare. Detach the sun visor from the
center mount and slide it along the
rod from side-to-side to cover the
driver or passenger side of the front
window. Swing the sun visor to the
side to cover the side window. It can
be moved along the rod from
side-to-side in this position also.
Lighted Visor Vanity Mirror
The vehicle has lighted visor vanity
mirrors on both the driver and
passenger sun visors. Pull the sun
visor down and lift the mirror cover
to turn the lamps on.
Roof
Sunroof
The ignition must be in ON/RUN or
ACC/ACCESSORY to operate the
sunroof and power sunshade. See
Retained Accessory Power (RAP)
on page 9‑17
The vehicle may have a sunroof
over the front seats and a rear
sunroof over the second row seats.
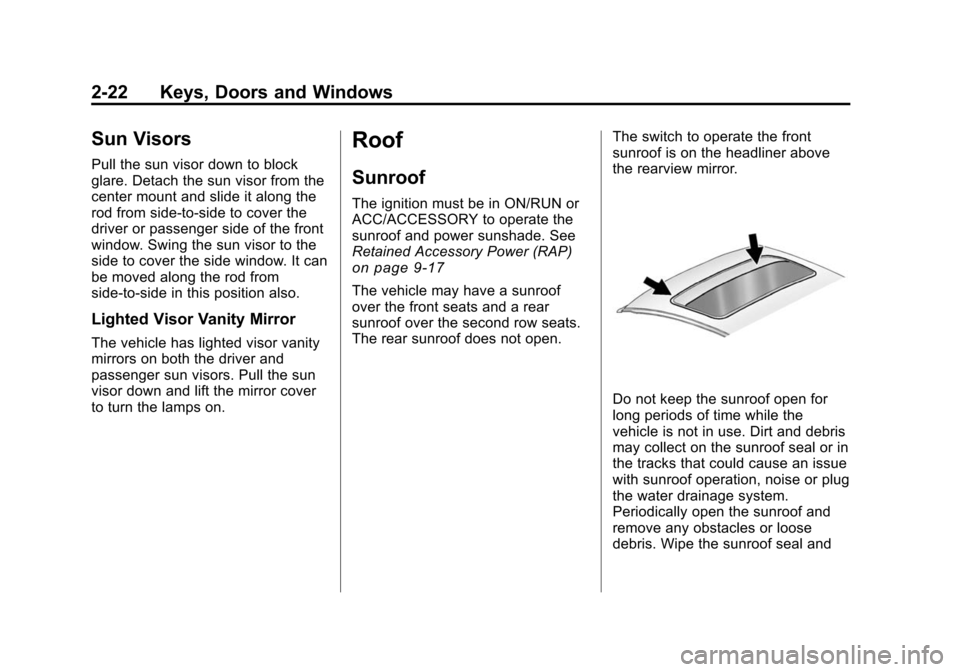
The rear sunroof does not open.The switch to operate the front
sunroof is on the headliner above
the rearview mirror.
Do not keep the sunroof open for
long periods of time while the
vehicle is not in use. Dirt and debris
may collect on the sunroof seal or in
the tracks that could cause an issue
with sunroof operation, noise or plug
the water drainage system.
Periodically open the sunroof and
remove any obstacles or loose
debris. Wipe the sunroof seal and
Page 55 of 448
Keys, Doors and Windows 2-23
roof sealing area using a clean
cloth, mild soap, and water. Do not
remove grease from sunroof.
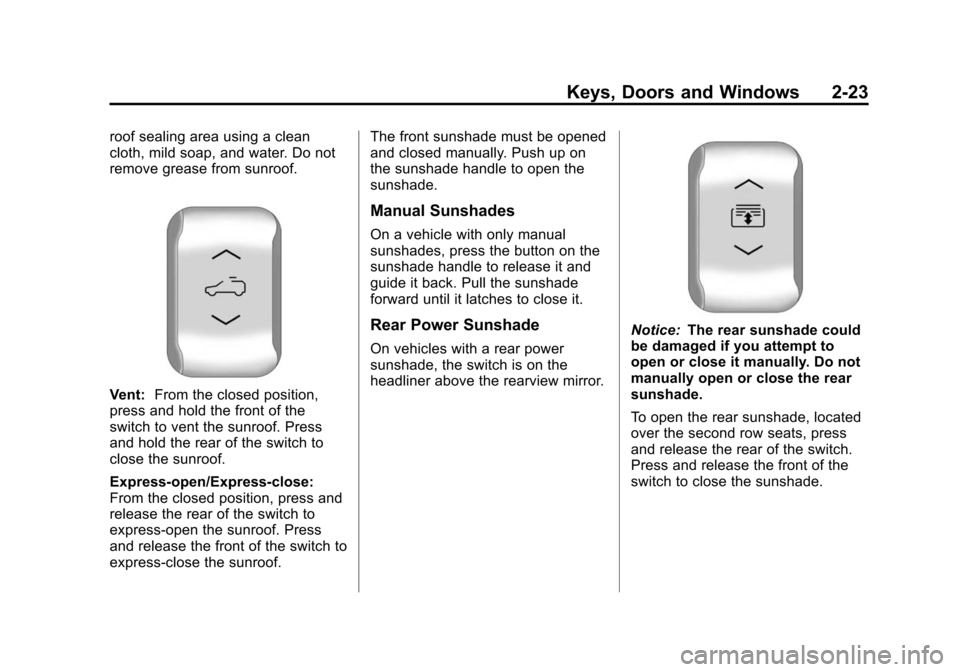
Vent:From the closed position,
press and hold the front of the
switch to vent the sunroof. Press
and hold the rear of the switch to
close the sunroof.
Express-open/Express-close:
From the closed position, press and
release the rear of the switch to
express-open the sunroof. Press
and release the front of the switch to
express-close the sunroof. The front sunshade must be opened
and closed manually. Push up on
the sunshade handle to open the
sunshade.
Manual Sunshades
On a vehicle with only manual
sunshades, press the button on the
sunshade handle to release it and
guide it back. Pull the sunshade
forward until it latches to close it.
Rear Power Sunshade
On vehicles with a rear power
sunshade, the switch is on the
headliner above the rearview mirror.
Notice:
The rear sunshade could
be damaged if you attempt to
open or close it manually. Do not
manually open or close the rear
sunshade.
To open the rear sunshade, located
over the second row seats, press
and release the rear of the switch.
Press and release the front of the
switch to close the sunshade.
Page 60 of 448
3-4 Seats and Restraints
Move the seat forward or rearward
by sliding the power seat
adjustment control (A) forward or
rearward.
The vehicle may have additional
features to adjust the power seat:
.Raise or lower the entire seat by
moving the power seat
adjustment control (A) up
or down.
.Raise or lower the front part of
the seat cushion by moving the
front of the control up or down.
.Raise or lower the rear part of
the seat cushion by moving the
rear of the control up or down.
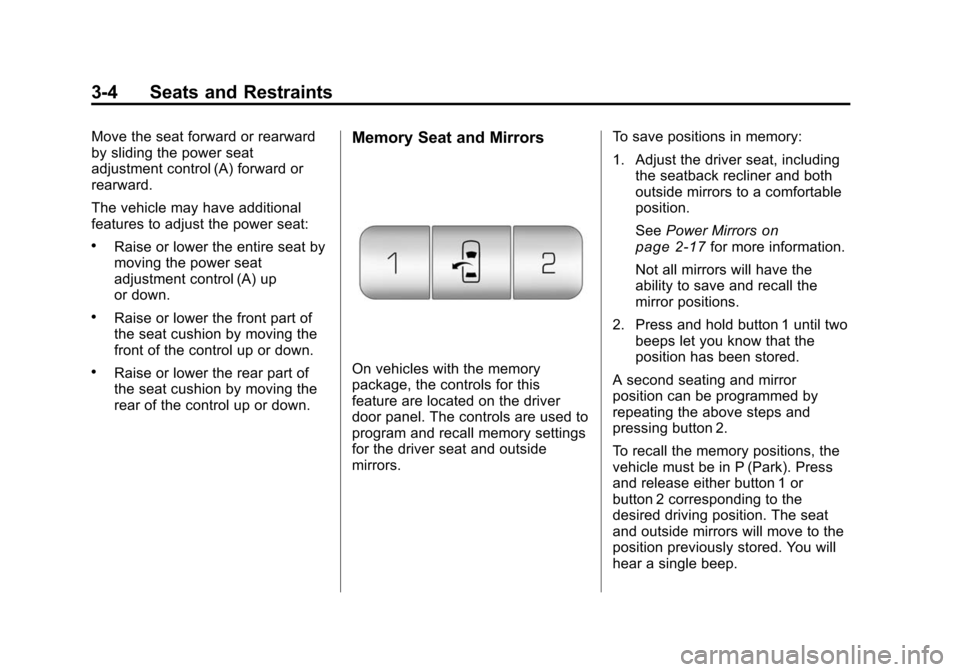
Memory Seat and Mirrors
On vehicles with the memory
package, the controls for this
feature are located on the driver
door panel. The controls are used to
program and recall memory settings
for the driver seat and outside
mirrors.To save positions in memory:
1. Adjust the driver seat, including
the seatback recliner and both
outside mirrors to a comfortable
position.
See Power Mirrors
on
page 2‑17for more information.
Not all mirrors will have the
ability to save and recall the
mirror positions.
2. Press and hold button 1 until two beeps let you know that the
position has been stored.
A second seating and mirror
position can be programmed by
repeating the above steps and
pressing button 2.
To recall the memory positions, the
vehicle must be in P (Park). Press
and release either button 1 or
button 2 corresponding to the
desired driving position. The seat
and outside mirrors will move to the
position previously stored. You will
hear a single beep.
Page 61 of 448
Seats and Restraints 3-5
Using the Remote Keyless
Entry (RKE) transmitter to enter the
vehicle, with the remote recall
memory feature on, causes
automatic seat and mirror
adjustment. There is no adjustment
when the position has not been
changed by another seating position
or the easy exit feature. See
“MEMORY SEAT RECALL”under
Vehicle Personalization (With DIC
Buttons)
on page 5‑40for more
information.
To stop recall movement of the
memory feature at any time, press
one of the power seat controls,
memory buttons, or power mirror
buttons.
If something has blocked the driver
seat while recalling a memory
position, the driver seat recall may
stop working. If this happens, press
the appropriate control for the area
that is not recalling for two seconds,
after the obstruction is removed.
Then try recalling the memory
position again by pressing the appropriate memory button. If the
memory position is still not being
recalled, see your dealer for service.
Easy Exit Seat
The control for this feature is
located on the driver door panel
between buttons 1 and 2.
With the vehicle in P (Park), the exit
position can be recalled by pressing
the exit button. You will hear a
single beep. The driver seat will
move back approximately 3 inches
(7.6 cm). To move the seat back
further, press the exit button again,
until the seat is all the way back.
If the easy exit seat feature is on in
the Driver Information Center (DIC),
automatic seat movement will occur
when the key is removed from the
ignition. See
“EASY EXIT SEAT”
under Vehicle Personalization
(With DIC Buttons)
on page 5‑40for more information. Further programming for the
memory seat feature can be done
using the DIC. You can select or
cancel the following:
.The automatic easy exit seat
feature.
.The remote memory seat recall
feature.
For programming information, see
Vehicle Personalization (With DIC
Buttons) on page 5‑40.
Page 170 of 448
5-44 Instruments and Controls
APPROACH LIGHTING
This feature allows you to select
whether or not to have the exterior
lights turn on briefly during low light
periods after unlocking the vehicle
using the Remote Keyless Entry
(RKE) transmitter.
Press the customization button until
APPROACH LIGHTING appears on
the DIC display. Press the set/reset
button once to access the settings
for this feature. Then press the
customization button to scroll
through the following settings:
OFF:The exterior lights will not
turn on when you unlock the vehicle
with the RKE transmitter.
ON (default): If it is dark enough
outside, the exterior lights will turn
on briefly when you unlock the
vehicle with the RKE transmitter.
The lights will remain on for
20 seconds or until the lock button
on the RKE transmitter is pressed,
or the vehicle is no longer off. See Remote Keyless Entry (RKE)
System Operationon page 2‑3for
more information.
NO CHANGE : No change will be
made to this feature. The current
setting will remain.
To select a setting, press the set/
reset button while the desired
setting is displayed on the DIC.
CHIME VOLUME
This feature allows you to select the
volume level of the chime.
Press the customization button until
CHIME VOLUME appears on the
DIC display. Press the set/reset
button once to access the settings
for this feature. Then press the
customization button to scroll
through the following settings:
NORMAL: The chime volume will
be set to a normal level.
LOUD: The chime volume will be
set to a loud level. NO CHANGE:
No change will be
made to this feature. The current
setting will remain.
There is no default for chime
volume. The volume will stay at the
last known setting.
To select a setting, press the set/
reset button while the desired
setting is displayed on the DIC.
PARK TILT MIRRORS
If your vehicle has this feature, it
allows you to select whether or not
the outside mirror(s) will
automatically tilt down when the
vehicle is shifted into R (Reverse).
See Park Tilt Mirrors
on page 2‑18for more information.
Page 171 of 448
Instruments and Controls 5-45
Press the customization button until
PARK TILT MIRRORS appears on
the DIC display. Press the set/reset
button once to access the settings
for this feature. Then press the
customization button to scroll
through the following settings:
OFF (default):Neither outside
mirror will be tilted down when the
vehicle is shifted into R (Reverse).
DRIVER MIRROR: The driver's
outside mirror will be tilted down
when the vehicle is shifted into
R (Reverse).
PASSENGER MIRROR: The
passenger's outside mirror will be
tilted down when the vehicle is
shifted into R (Reverse).
BOTH MIRRORS: The driver's and
passenger's outside mirrors will be
tilted down when the vehicle is
shifted into R (Reverse).
NO CHANGE: No change will be
made to this feature. The current
setting will remain. To select a setting, press the set/
reset button while the desired
setting is displayed on the DIC.
EASY EXIT SEAT
If your vehicle has this feature, it
allows you to select your preference
for the automatic easy exit seat
feature. See
Delayed Locking
on
page 2‑8for more information.
Press the customization button until
EASY EXIT SEAT appears on the
DIC display. Press the set/reset
button once to access the settings
for this feature. Then press the
customization button to scroll
through the following settings:
OFF (default): No automatic seat
exit recall will occur.
ON: The driver's seat will move
back when the key is removed from
the ignition.
The automatic easy exit seat
movement will only occur one time
after the key is removed from the
ignition. If the automatic movement
has already occurred, and you put the key back in the ignition and
remove it again, the seat and
steering column will stay in the
original exit position, unless a
memory recall took place prior to
removing the key again.
NO CHANGE:
No change will be
made to this feature. The current
setting will remain.
To select a setting, press the set/
reset button while the desired
setting is displayed on the DIC.
MEMORY SEAT RECALL
If your vehicle has this feature, it
allows you to select your preference
for the remote memory seat recall
feature. See Delayed Locking
on
page 2‑8for more information.
Page 172 of 448
5-46 Instruments and Controls
Press the customization button until
MEMORY SEAT RECALL appears
on the DIC display. Press the set/
reset button once to access the
settings for this feature. Then press
the customization button to scroll
through the following settings:
OFF (default):No remote memory
seat recall will occur.
ON: The driver's seat and outside
mirrors will automatically move to
the stored driving position when the
unlock button on the Remote
Keyless Entry (RKE) transmitter is
pressed. See “Relearn Remote Key”
under Driver Information Center
(DIC) (With DIC Buttons)
on
page 5‑22or Driver Information
Center (DIC) (Without DIC Buttons)
on page 5‑28for more information
on matching transmitters to driver ID
numbers.
NO CHANGE: No change will be
made to this feature. The current
setting will remain. To select a setting, press the set/
reset button while the desired
setting is displayed on the DIC.
REMOTE START
If your vehicle has this feature, it
allows you to turn the remote start
off or on. The remote start feature
allows you to start the engine from
outside of the vehicle using the
Remote Keyless Entry (RKE)
transmitter. See
Remote Vehicle
Start
on page 2‑5for more
information.
Press the customization button until
REMOTE START appears on the
DIC display. Press the set/reset
button once to access the settings
for this feature. Then press the
customization button to scroll
through the following settings:
OFF: The remote start feature will
be disabled.
ON (default): The remote start
feature will be enabled. NO CHANGE:
No change will be
made to this feature. The current
setting will remain.
To select a setting, press the set/
reset button while the desired
setting is displayed on the DIC.
FACTORY SETTINGS
This feature allows you to set all of
the customization features back to
their factory default settings.
Press the customization button until
FACTORY SETTINGS appears on
the DIC display. Press the set/reset
button once to access the settings
for this feature. Then press the
customization button to scroll
through the following settings:
RESTORE ALL (default): The
customization features will be set to
their factory default settings.
DO NOT RESTORE: The
customization features will not be
set to their factory default settings.
Page 183 of 448
Lighting 6-5
The reading lamps, located on the
headliner above the rearview mirror,
can be turned on or off independent
of the automatic courtesy lamps,
when the doors are closed.
Dome Lamps
The dome lamps are located in the
overhead console and above the
rear seat passengers.
The dome lamps automatically
come on when a door is opened,
unless the dome lamp override
button is pressed in.
The lamps can also be turned on
and off by turning the instrument
panel brightness control clockwise
to the farthest position.Dome Lamp Override
The dome lamp override button is
next to the exterior lamps control.
E
(Dome Lamp Override): Press
the button in and the dome lamps
remain off when a door is opened.
Press the button again to return it to
the extended position so that the
dome lamps come on when a door
is opened.
Reading Lamps
Press the button near each lamp to
turn them on or off.
Lighting Features
Entry Lighting
For vehicles with courtesy lamps,
they come on and stay on for a set
time whenever the unlock symbol is
pressed on the Remote Keyless
Entry (RKE) transmitter, if the
vehicle has one.
If a door is opened, the lamps stay
on while it is open and then turn off
automatically about 20 seconds
after the door is closed. If the unlock
symbol is pressed and no door is
opened, the lamps turn off after
about 20 seconds.
Entry lighting includes a feature
called theater dimming. With theater
dimming, the lamps do not turn off
at the end of the delay time.
Instead, they slowly dim and then
go out. The delay time is canceled if
the ignition key is turned to ON/RUN
or the power door lock switch is
pressed. The lamps will dim
right away.