radio controls CHEVROLET TRAVERSE 2010 1.G Owners Manual
[x] Cancel search | Manufacturer: CHEVROLET, Model Year: 2010, Model line: TRAVERSE, Model: CHEVROLET TRAVERSE 2010 1.GPages: 448, PDF Size: 6.96 MB
Page 1 of 448

2010 Chevrolet Traverse Owner ManualM
In Brief. . . . . . . . . . . . . . . . . . . . . . . . 1-1
Instrument Panel . . . . . . . . . . . . . . 1-2
Initial Drive Information . . . . . . . . 1-4
Vehicle Features . . . . . . . . . . . . . 1-15
Performance and Maintenance . . . . . . . . . . . . . . . . 1-20
Keys, Doors and Windows . . . 2-1
Keys and Locks . . . . . . . . . . . . . . . 2-2
Doors . . . . . . . . . . . . . . . . . . . . . . . . . . 2-9
Vehicle Security . . . . . . . . . . . . . . 2-13
Exterior Mirrors . . . . . . . . . . . . . . . 2-16
Interior Mirrors . . . . . . . . . . . . . . . . 2-19
Windows . . . . . . . . . . . . . . . . . . . . . 2-20
Roof . . . . . . . . . . . . . . . . . . . . . . . . . . 2-22
Seats and Restraints . . . . . . . . . 3-1
Head Restraints . . . . . . . . . . . . . . . 3-2
Front Seats . . . . . . . . . . . . . . . . . . . . 3-3
Rear Seats . . . . . . . . . . . . . . . . . . . 3-10
Safety Belts . . . . . . . . . . . . . . . . . . 3-14
Airbag System . . . . . . . . . . . . . . . . 3-30
Child Restraints . . . . . . . . . . . . . . 3-46 Storage
. . . . . . . . . . . . . . . . . . . . . . . 4-1
Storage Compartments . . . . . . . . 4-1
Additional Storage Features . . . 4-3
Roof Rack System . . . . . . . . . . . . . 4-4
Instruments and Controls . . . . 5-1
Controls . . . . . . . . . . . . . . . . . . . . . . . 5-2
Warning Lights, Gauges, and
Indicators . . . . . . . . . . . . . . . . . . . 5-10
Information Displays . . . . . . . . . . 5-22
Vehicle Messages . . . . . . . . . . . . 5-31
Vehicle Personalization . . . . . . . 5-40
Universal Remote System . . . . 5-47
Lighting . . . . . . . . . . . . . . . . . . . . . . . 6-1
Exterior Lighting . . . . . . . . . . . . . . . 6-1
Interior Lighting . . . . . . . . . . . . . . . . 6-4
Lighting Features . . . . . . . . . . . . . . 6-5
Infotainment System . . . . . . . . . 7-1
Introduction . . . . . . . . . . . . . . . . . . . . 7-1
Radio . . . . . . . . . . . . . . . . . . . . . . . . . . 7-6
Audio Players . . . . . . . . . . . . . . . . 7-12
Rear Seat Infotainment . . . . . . . 7-35
Phone . . . . . . . . . . . . . . . . . . . . . . . . 7-45 Climate Controls
. . . . . . . . . . . . . 8-1
Climate Control Systems . . . . . . 8-1
Air Vents . . . . . . . . . . . . . . . . . . . . . 8-12
Driving and Operating . . . . . . . . 9-1
Driving Information . . . . . . . . . . . . . 9-2
Starting and Operating . . . . . . . 9-16
Engine Exhaust . . . . . . . . . . . . . . 9-22
Automatic Transmission . . . . . . 9-23
Drive Systems . . . . . . . . . . . . . . . . 9-26
Brakes . . . . . . . . . . . . . . . . . . . . . . . 9-27
Ride Control Systems . . . . . . . . 9-29
Cruise Control . . . . . . . . . . . . . . . . 9-31
Object Detection Systems . . . . 9-33
Fuel . . . . . . . . . . . . . . . . . . . . . . . . . . 9-40
Towing . . . . . . . . . . . . . . . . . . . . . . . 9-44
Conversions and Add-Ons . . . 9-55
Page 7 of 448
In Brief 1-1
In Brief
Instrument Panel
Instrument Panel . . . . . . . . . . . . . . 1-2
Initial Drive Information
Initial Drive Information . . . . . . . . 1-4
Remote Keyless Entry (RKE)System . . . . . . . . . . . . . . . . . . . . . . 1-4
Remote Vehicle Start . . . . . . . . . 1-4
Door Locks . . . . . . . . . . . . . . . . . . . 1-5
Liftgate . . . . . . . . . . . . . . . . . . . . . . . . 1-5
Windows . . . . . . . . . . . . . . . . . . . . . . 1-6
Seat Adjustment . . . . . . . . . . . . . . 1-6
Second Row Seats . . . . . . . . . . . 1-7
Third Row Seats . . . . . . . . . . . . . . 1-7
Heated Seats . . . . . . . . . . . . . . . . . 1-8
Heated and Ventilated Seats . . . . . . . . . . . . . . . . . . . . . . . . 1-8
Head Restraint Adjustment . . . . 1-8
Safety Belt . . . . . . . . . . . . . . . . . . . . 1-8
Sensing System for Passenger Airbag . . . . . . . . . . . . . . . . . . . . . . . 1-9
Mirror Adjustment . . . . . . . . . . . . . 1-9
Steering Wheel Adjustment . . . . . . . . . . . . . . . . . 1-10
Interior Lighting . . . . . . . . . . . . . . 1-11 Exterior Lighting . . . . . . . . . . . . . 1-12
Windshield Wiper/Washer . . . . 1-12
Climate Controls . . . . . . . . . . . . . 1-13
Vehicle Features
Radio(s) . . . . . . . . . . . . . . . . . . . . . 1-15
Satellite Radio . . . . . . . . . . . . . . . 1-16
Portable Audio Devices . . . . . . 1-16
Bluetooth
®. . . . . . . . . . . . . . . . . . . 1-16
Steering Wheel Controls . . . . . 1-17
Navigation System . . . . . . . . . . . 1-17
Driver Information Center (DIC) (With DIC Buttons) . . . 1-18
Cruise Control . . . . . . . . . . . . . . . 1-18
Storage Compartments . . . . . . 1-19
Power Outlets . . . . . . . . . . . . . . . 1-19
Sunroof . . . . . . . . . . . . . . . . . . . . . . 1-20
Performance and Maintenance
StabiliTrak®. . . . . . . . . . . . . . . . . . 1-20
Tire Pressure Monitor . . . . . . . . 1-21
Tire Sealant and Compressor Kit . . . . . . . . . . . . . 1-21
Engine Oil Life System . . . . . . 1-21
Driving for Better Fuel Economy . . . . . . . . . . . . . . . . . . . 1-22
Roadside Assistance Program . . . . . . . . . . . . . . . . . . . . 1-23
OnStar
®. . . . . . . . . . . . . . . . . . . . . 1-23
Page 9 of 448

In Brief 1-3
A.Windshield Wiper/Washeron
page 5‑5.
B. Instrument Cluster
on
page 5‑11.
C. Steering Wheel Controls
on
page 5‑3.
D. Instrument Panel Storage
on
page 4‑1.
E. AM-FM Radio on page 7‑6.
F. Air Vents on page 8‑12.
G. Exterior Lamp Controls
on
page 6‑1.
H. Instrument Panel Illumination
Control on page 6‑4.
I. Cruise Control on page 9‑31.
J. Steering Wheel Adjustment
on
page 5‑2.
K. Horn on page 5‑5. L. Driver Information Center (DIC)
Buttons. See Driver Information
Center (DIC) (With DIC Buttons)
on page 5‑22or Driver
Information Center (DIC)
(Without DIC Buttons)
on
page 5‑28.
M. Climate Control Systems
on
page 8‑1or Dual Automatic
Climate Control Systemon
page 8‑4.
N. Shift Lever. See Shifting Into
Park on page 9‑20.
O. Power Outlets on page 5‑9.
P. Rear Window Wiper/Washer
on
page 5‑6. Traction Control
System (TCS) Disable Button.
See StabiliTrak System
on
page 9‑29. Tow/Haul Modeon
page 9‑26(If Equipped) . Power
Liftgate. See Liftgateon
page 2‑9(If Equipped). Q.
Heated Front Seats
on
page 3‑8.
R. Hazard Warning Flashers
on
page 6‑3.
S. Passenger Airbag Status
Indicator
on page 5‑15(If Equipped).
T. Glove Box on page 4‑1.
Page 22 of 448
1-16 In Brief
Setting the Clock
To set the time and date for the
radio with CD, DVD, and USB Port:
1. Turn the ignition key toACC/ACCESSORY or ON/RUN,
then press
O, to turn the
radio on.
2. Press
Gto display HR, MIN,
MM, DD, YYYY (hour, minute,
month, day, and year).
3. Press the pushbutton located under any one of the labels to be
changed.
4. To increase or decrease the time or date, turn
fclockwise or
counter‐clockwise.
For detailed instructions on setting
the clock for the vehicles specific
audio system, see Clock
on
page 5‑8.
Satellite Radio
Vehicles with an XM™ Satellite
Radio tuner and a valid XM Satellite
Radio subscription can receive XM
programming.
XM Satellite Radio Service
XM is a satellite radio service that is
based in the 48 contiguous United
States and 10 Canadian provinces.
XM Satellite Radio has a wide
variety of programming and
commercial-free music,
coast-to-coast, and in digital-quality
sound. A fee is required to receive
the XM service.
For more information refer to:
.www.xmradio.com or call
1-800-929-2100 (U.S.).
.www.xmradio.ca or call
1-877-438-9677 (Canada).
See Satellite Radio on page 7‑8.
Portable Audio Devices
This vehicle may have an auxiliary
input located on the radio faceplate
and a USB port located in the center
console. External devices such as
iPod
®, laptop computers, MP3
players, CD changers, USB storage
device, etc. can be connected to the
auxiliary port using a 3.5 mm (1/8 in)
input jack or the USB port
depending on the audio system.
See Auxiliary Devices
on
page 7‑33.
Bluetooth®
The in-vehicle Bluetooth system
allows users with a
Bluetooth-enabled cell phone to
make and receive hands-free calls
using the vehicle’ s audio system,
microphone and controls.
Page 23 of 448
In Brief 1-17
The Bluetooth-enabled cell phone
must be paired with the in-vehicle
Bluetooth system before it can be
used in the vehicle. Not all phones
will support all functions.
SeeBluetooth on page 7‑45.
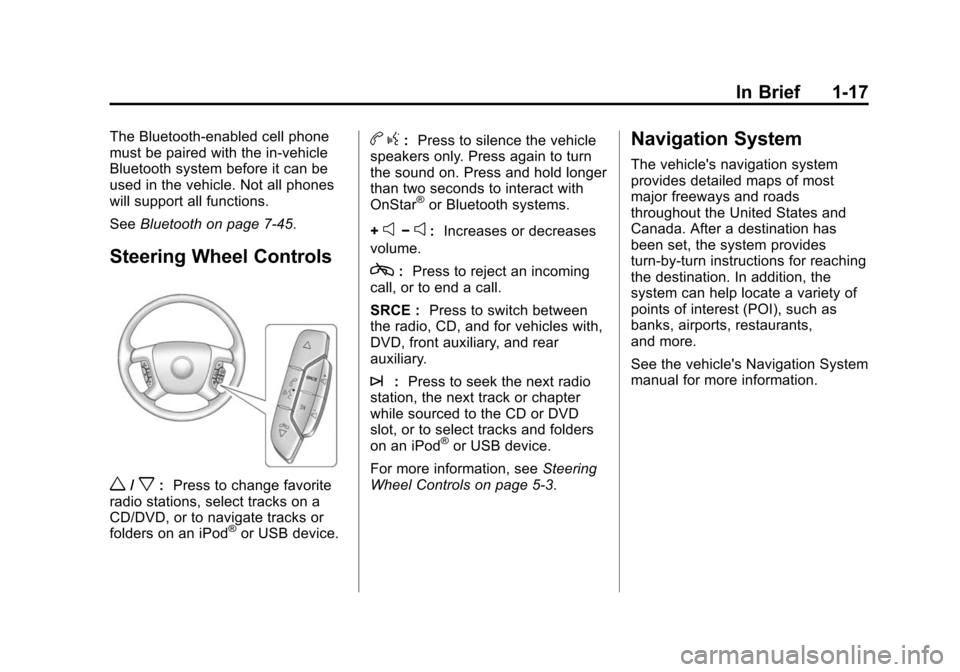
Steering Wheel Controls
w/x:Press to change favorite
radio stations, select tracks on a
CD/DVD, or to navigate tracks or
folders on an iPod
®or USB device.
b g: Press to silence the vehicle
speakers only. Press again to turn
the sound on. Press and hold longer
than two seconds to interact with
OnStar
®or Bluetooth systems.
+
e−e: Increases or decreases
volume.
c: Press to reject an incoming
call, or to end a call.
SRCE : Press to switch between
the radio, CD, and for vehicles with,
DVD, front auxiliary, and rear
auxiliary.
¨: Press to seek the next radio
station, the next track or chapter
while sourced to the CD or DVD
slot, or to select tracks and folders
on an iPod
®or USB device.
For more information, see Steering
Wheel Controls on page 5‑3.
Navigation System
The vehicle's navigation system
provides detailed maps of most
major freeways and roads
throughout the United States and
Canada. After a destination has
been set, the system provides
turn-by-turn instructions for reaching
the destination. In addition, the
system can help locate a variety of
points of interest (POI), such as
banks, airports, restaurants,
and more.
See the vehicle's Navigation System
manual for more information.
Page 31 of 448
In Brief 1-25
OnStar Steering Wheel
Controls
This vehicle may have a Talk/Mute
button that can be used to interact
with OnStar hands-free calling. See
Steering Wheel Controls
on
page 5‑3for more information.
On some vehicles, the mute button
can be used to dial numbers into
voice mail systems, or to dial phone
extensions. See the OnStar Owner's
Guide for more information.
Your Responsibility
Increase the volume of the radio if
the OnStar advisor cannot be heard.
If the light next to the OnStar
buttons is red, the system may not
be functioning properly. Press
Q
and request a vehicle diagnostic.
If the light appears clear (no light is
appearing), your OnStar
subscription has expired and all
services have been deactivated.
Press
Qto confirm that the OnStar
equipment is active.
Page 34 of 448
2-2 Keys, Doors and Windows
Keys and Locks
Keys
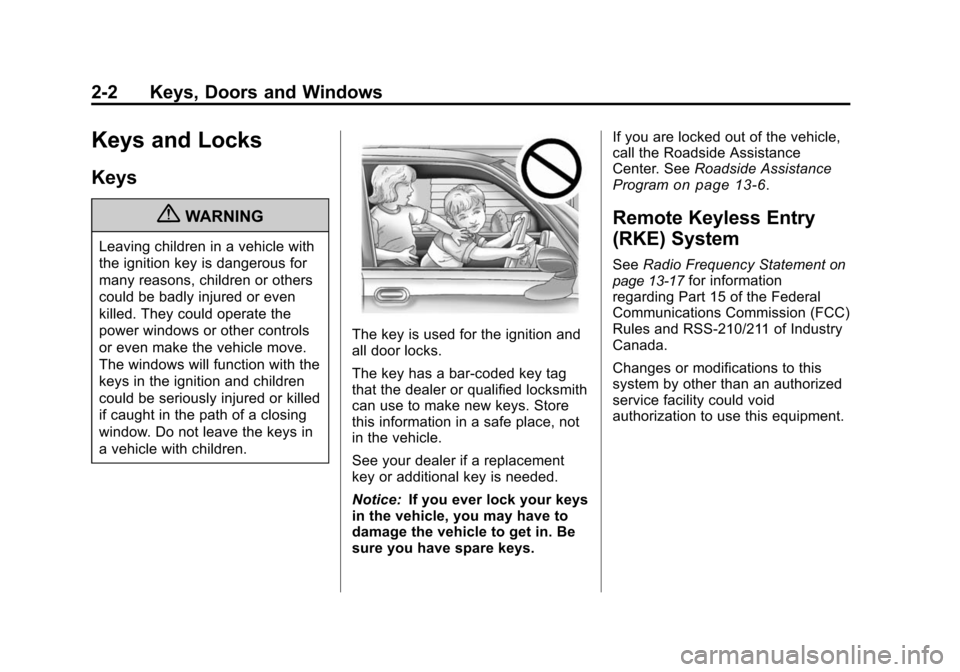
{WARNING
Leaving children in a vehicle with
the ignition key is dangerous for
many reasons, children or others
could be badly injured or even
killed. They could operate the
power windows or other controls
or even make the vehicle move.
The windows will function with the
keys in the ignition and children
could be seriously injured or killed
if caught in the path of a closing
window. Do not leave the keys in
a vehicle with children.
The key is used for the ignition and
all door locks.
The key has a bar-coded key tag
that the dealer or qualified locksmith
can use to make new keys. Store
this information in a safe place, not
in the vehicle.
See your dealer if a replacement
key or additional key is needed.
Notice:If you ever lock your keys
in the vehicle, you may have to
damage the vehicle to get in. Be
sure you have spare keys. If you are locked out of the vehicle,
call the Roadside Assistance
Center. See
Roadside Assistance
Program
on page 13‑6.
Remote Keyless Entry
(RKE) System
See Radio Frequency Statementon
page 13‑17for information
regarding Part 15 of the Federal
Communications Commission (FCC)
Rules and RSS-210/211 of Industry
Canada.
Changes or modifications to this
system by other than an authorized
service facility could void
authorization to use this equipment.
Page 129 of 448
Instruments and Controls 5-3
Push the control forward or
rearward to move the steering wheel
toward the front or rear of the
vehicle. To set the memory position,
seeVehicle Personalization (With
DIC Buttons) on page 5‑40.
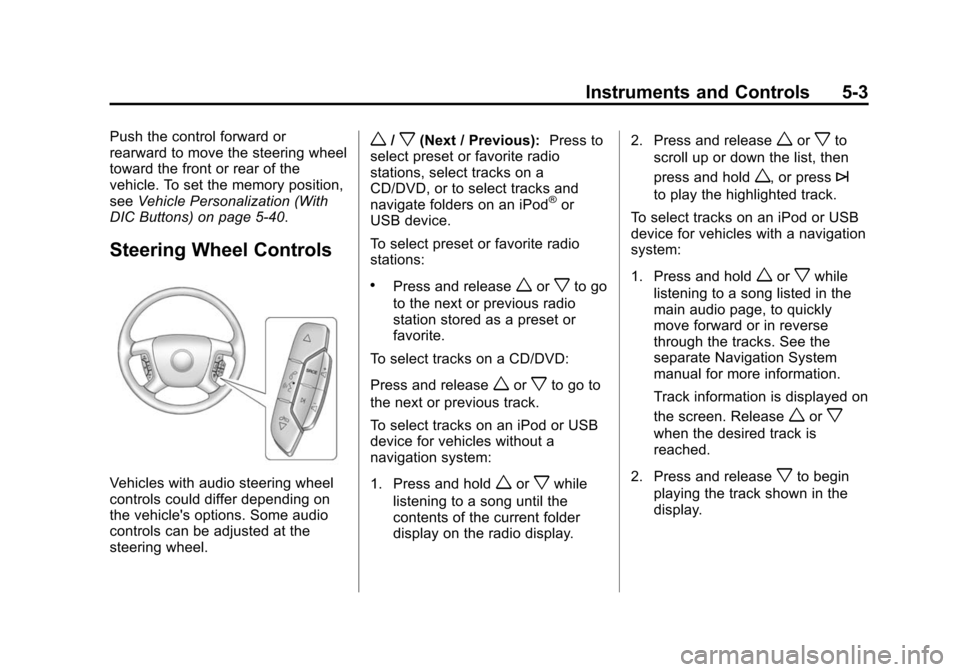
Steering Wheel Controls
Vehicles with audio steering wheel
controls could differ depending on
the vehicle's options. Some audio
controls can be adjusted at the
steering wheel.
w/x(Next / Previous): Press to
select preset or favorite radio
stations, select tracks on a
CD/DVD, or to select tracks and
navigate folders on an iPod
®or
USB device.
To select preset or favorite radio
stations:
.Press and releaseworxto go
to the next or previous radio
station stored as a preset or
favorite.
To select tracks on a CD/DVD:
Press and release
worxto go to
the next or previous track.
To select tracks on an iPod or USB
device for vehicles without a
navigation system:
1. Press and hold
worxwhile
listening to a song until the
contents of the current folder
display on the radio display. 2. Press and release
worxto
scroll up or down the list, then
press and hold
w, or press¨
to play the highlighted track.
To select tracks on an iPod or USB
device for vehicles with a navigation
system:
1. Press and hold
worxwhile
listening to a song listed in the
main audio page, to quickly
move forward or in reverse
through the tracks. See the
separate Navigation System
manual for more information.
Track information is displayed on
the screen. Release
worx
when the desired track is
reached.
2. Press and release
xto begin
playing the track shown in the
display.
Page 130 of 448
5-4 Instruments and Controls
To navigate folders on an iPod or
USB device for vehicles without a
navigation system:
1. Press and hold
worxwhile
listening to a song until the
contents of the current folder
display on the radio display.
2. Press and hold
xto go back to
the previous folder list.
3. Press and release
worxto
scroll up or down the list.
.To select a folder, press
and hold
w, or press¨
when the folder is
highlighted.
.To go back further in the
folder list, press and
hold
x. To navigate folders on an iPod or
USB device for vehicles with a
navigation system:
1. Go to the Music Navigator by
first touching the center touch
screen folder button in the main
audio page.
2. While in Music Navigator, select the folder/artist/genre/category,
etc. using the touch screen.
3. Press and release
xto scroll
through the selected music list.
Touch the track label on the
touch screen to highlight and
begin playing the track from
that list.
4. Press and hold
xto quickly
scroll through the selected
music list
b g(Mute/Push to Talk): Press to
silence the vehicle speakers only.
Press again to turn the sound on.
For vehicles with Bluetooth or
OnStar
®systems, press and hold
for longer than two seconds to interact with those systems. See
Bluetooth
on page 7‑45and the
OnStar Owner's Guide for more
information.
c(End): Press to reject an
incoming call, or end a current call.
SRCE (Source/Voice
Recognition): Press to switch
between the radio, CD, and for
vehicles with, DVD, front auxiliary,
and rear auxiliary.
For vehicles with the navigation
system, press and hold this button
for longer than one second to
initiate voice recognition. See “Voice
Recognition” in the Navigation
System manual for more
information.
¨(Seek): Press to go to the next
radio station while in AM,
FM, or XM™.
For vehicles with or without a
navigation system:
Press
¨to go to the next track or
chapter while sourced to the CD or
DVD slot.
Page 131 of 448
Instruments and Controls 5-5
Press¨to select a track or a
folder when navigating folders on an
iPod or USB device.
For vehicles with a navigation
system:
1. Press and hold
¨until a beep
is heard, to place the radio into
SCAN mode, a station will play
for five seconds before moving
to the next station.
2. To stop the SCAN function, press
¨again.
3. In CD/DVD, iPod, or AUX USB, press and hold to quickly move
forward through the tracks.
Release to stop on the desired
track.
+
e−e(Volume): Press to
increase or to decrease the volume.
Horn
Press near the horn symbols or
press on the steering wheel pad to
sound the horn.
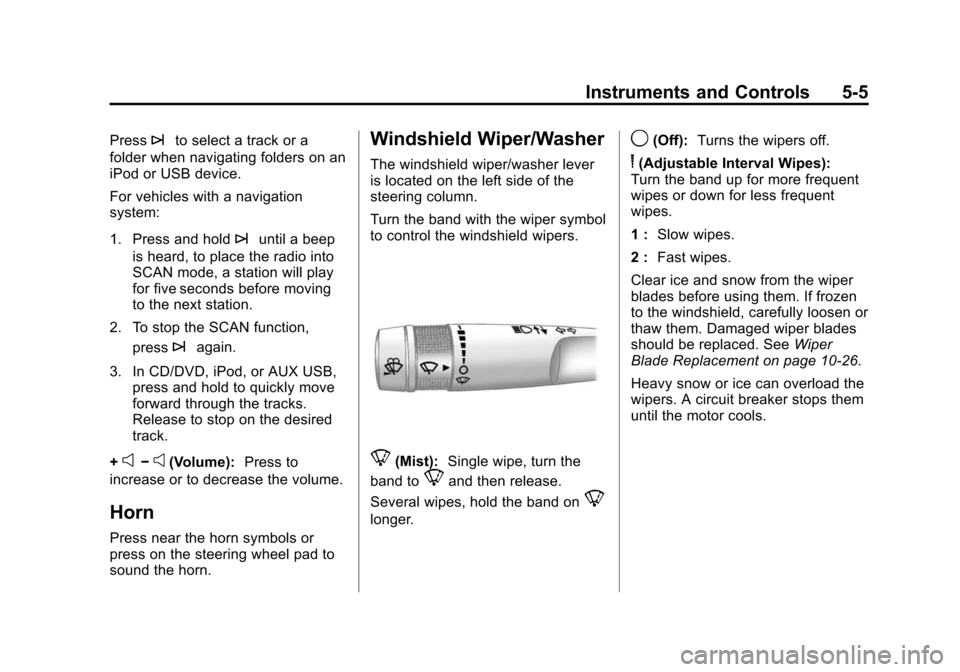
Windshield Wiper/Washer
The windshield wiper/washer lever
is located on the left side of the
steering column.
Turn the band with the wiper symbol
to control the windshield wipers.
8(Mist): Single wipe, turn the
band to
8and then release.
Several wipes, hold the band on
8
longer.
9(Off): Turns the wipers off.
6(Adjustable Interval Wipes):
Turn the band up for more frequent
wipes or down for less frequent
wipes.
1 : Slow wipes.
2 : Fast wipes.
Clear ice and snow from the wiper
blades before using them. If frozen
to the windshield, carefully loosen or
thaw them. Damaged wiper blades
should be replaced. See Wiper
Blade Replacement on page 10‑26.
Heavy snow or ice can overload the
wipers. A circuit breaker stops them
until the motor cools.