transmission fluid CHEVROLET TRAVERSE 2010 1.G Owners Manual
[x] Cancel search | Manufacturer: CHEVROLET, Model Year: 2010, Model line: TRAVERSE, Model: CHEVROLET TRAVERSE 2010 1.GPages: 448, PDF Size: 6.96 MB
Page 127 of 448
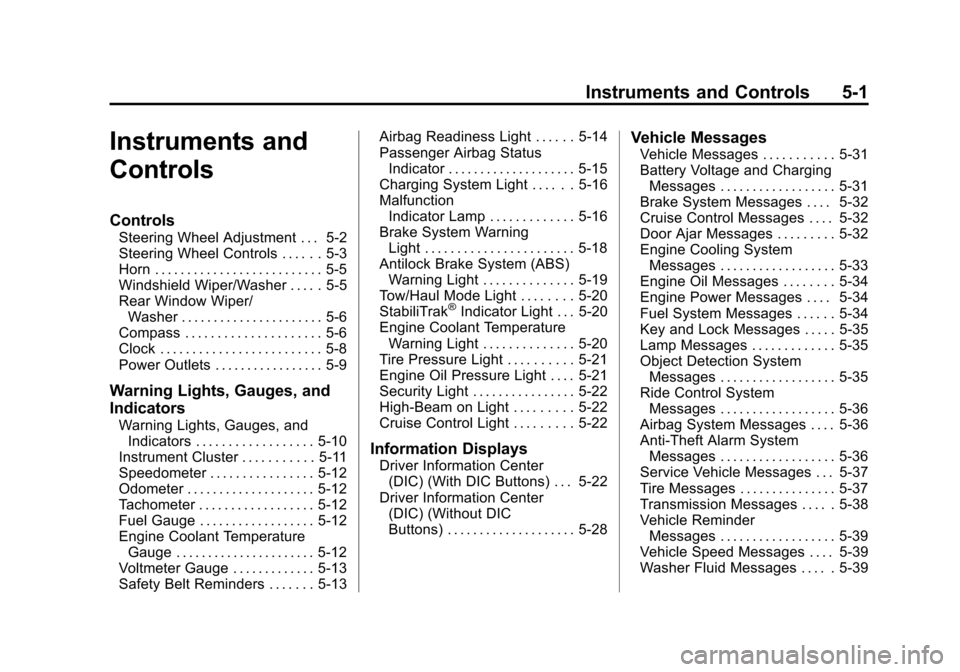
Instruments and Controls 5-1
Instruments and
Controls
Controls
Steering Wheel Adjustment . . . 5-2
Steering Wheel Controls . . . . . . 5-3
Horn . . . . . . . . . . . . . . . . . . . . . . . . . . 5-5
Windshield Wiper/Washer . . . . . 5-5
Rear Window Wiper/Washer . . . . . . . . . . . . . . . . . . . . . . 5-6
Compass . . . . . . . . . . . . . . . . . . . . . 5-6
Clock . . . . . . . . . . . . . . . . . . . . . . . . . 5-8
Power Outlets . . . . . . . . . . . . . . . . . 5-9
Warning Lights, Gauges, and
Indicators
Warning Lights, Gauges, and Indicators . . . . . . . . . . . . . . . . . . 5-10
Instrument Cluster . . . . . . . . . . . 5-11
Speedometer . . . . . . . . . . . . . . . . 5-12
Odometer . . . . . . . . . . . . . . . . . . . . 5-12
Tachometer . . . . . . . . . . . . . . . . . . 5-12
Fuel Gauge . . . . . . . . . . . . . . . . . . 5-12
Engine Coolant Temperature Gauge . . . . . . . . . . . . . . . . . . . . . . 5-12
Voltmeter Gauge . . . . . . . . . . . . . 5-13
Safety Belt Reminders . . . . . . . 5-13 Airbag Readiness Light . . . . . . 5-14
Passenger Airbag Status
Indicator . . . . . . . . . . . . . . . . . . . . 5-15
Charging System Light . . . . . . 5-16
Malfunction Indicator Lamp . . . . . . . . . . . . . 5-16
Brake System Warning Light . . . . . . . . . . . . . . . . . . . . . . . 5-18
Antilock Brake System (ABS) Warning Light . . . . . . . . . . . . . . 5-19
Tow/Haul Mode Light . . . . . . . . 5-20
StabiliTrak
®Indicator Light . . . 5-20
Engine Coolant Temperature Warning Light . . . . . . . . . . . . . . 5-20
Tire Pressure Light . . . . . . . . . . 5-21
Engine Oil Pressure Light . . . . 5-21
Security Light . . . . . . . . . . . . . . . . 5-22
High-Beam on Light . . . . . . . . . 5-22
Cruise Control Light . . . . . . . . . 5-22
Information Displays
Driver Information Center (DIC) (With DIC Buttons) . . . 5-22
Driver Information Center (DIC) (Without DIC
Buttons) . . . . . . . . . . . . . . . . . . . . 5-28
Vehicle Messages
Vehicle Messages . . . . . . . . . . . 5-31
Battery Voltage and ChargingMessages . . . . . . . . . . . . . . . . . . 5-31
Brake System Messages . . . . 5-32
Cruise Control Messages . . . . 5-32
Door Ajar Messages . . . . . . . . . 5-32
Engine Cooling System Messages . . . . . . . . . . . . . . . . . . 5-33
Engine Oil Messages . . . . . . . . 5-34
Engine Power Messages . . . . 5-34
Fuel System Messages . . . . . . 5-34
Key and Lock Messages . . . . . 5-35
Lamp Messages . . . . . . . . . . . . . 5-35
Object Detection System Messages . . . . . . . . . . . . . . . . . . 5-35
Ride Control System Messages . . . . . . . . . . . . . . . . . . 5-36
Airbag System Messages . . . . 5-36
Anti-Theft Alarm System Messages . . . . . . . . . . . . . . . . . . 5-36
Service Vehicle Messages . . . 5-37
Tire Messages . . . . . . . . . . . . . . . 5-37
Transmission Messages . . . . . 5-38
Vehicle Reminder Messages . . . . . . . . . . . . . . . . . . 5-39
Vehicle Speed Messages . . . . 5-39
Washer Fluid Messages . . . . . 5-39
Page 164 of 448

5-38 Instruments and Controls
You can receive more than one tire
pressure message at a time. To
read the other messages that may
have been sent at the same time,
press the set/reset button or the trip
odometer reset stem. The DIC also
shows the tire pressure values. See
Driver Information Center (DIC)
(With DIC Buttons)
on page 5‑22or
Driver Information Center (DIC)
(Without DIC Buttons)
on
page 5‑28.
SERVICE TIRE MONITOR
SYSTEM
On vehicles with the Tire Pressure
Monitor System (TPMS), this
message displays if a part on the
TPMS is not working properly. The
tire pressure light also flashes and
then remains on during the same
ignition cycle. See Tire Pressure
Light
on page 5‑21. Several
conditions may cause this message
to appear. See Tire Pressure
Monitor Operation
on page 10‑44for
more information. If the warning comes on and stays on, there may
be a problem with the TPMS. See
your dealer.
TIRE LEARNING ACTIVE
This message displays when the
Tire Pressure Monitor System
(TPMS) is re-learning the tire
positions on your vehicle. The tire
positions must be re-learned after
rotating the tires or after replacing a
tire or sensor. See
Tire Rotation
on
page 10‑48, Tire Pressure Monitor
Systemon page 10‑43, and Tire
Pressureon page 10‑42for more
information.
Transmission Messages
ALL WHEEL DRIVE OFF
If your vehicle has the All-Wheel
Drive (AWD) system, this message
displays when there is a compact
spare tire on the vehicle, when the
Antilock Brake System (ABS)
warning light comes on, or when the rear differential fluid is overheating.
This message turns off when the
differential fluid cools.
The AWD system is disabled until
the compact spare tire is replaced
by a full-size tire. If the warning
message is still on after putting on
the full-size tire, you need to reset
the warning message. To reset the
warning message, turn the ignition
off and then back on again after
30 seconds. If the message stays
on, see your dealer right away. See
All-Wheel Drive
on page 9‑26for
more information.
SERVICE ALL WHEEL DRIVE
If your vehicle has the All-Wheel
Drive (AWD) system, this message
displays if there is a problem with
this system. If this message
appears, stop as soon as possible
and turn off the vehicle. Restart the
vehicle after 30 seconds and check
for the message on the DIC display.
If the message is still displayed or
Page 165 of 448
Instruments and Controls 5-39
appears again when you begin
driving, the AWD system needs
service. See your dealer.
SERVICE TRANSMISSION
This message displays when there
is a problem with the transmission.
See your dealer for service.
TRANSMISSION HOT IDLE
ENGINE
Notice:If you drive your vehicle
while the transmission fluid is
overheating and the transmission
temperature warning is displayed
on the instrument panel cluster
and/or DIC, you can damage the
transmission. This could lead to
costly repairs that would not be
covered by your warranty. Do not
drive your vehicle with
overheated transmission fluid or
while the transmission
temperature warning is displayed. This message displays and a chime
sounds if the transmission fluid in
the vehicle gets hot. Driving with the
transmission fluid temperature high
can cause damage to the vehicle.
Stop the vehicle and let it idle to
allow the transmission to cool. This
message clears when the fluid
temperature reaches a safe level.
Vehicle Reminder
Messages
ICE POSSIBLE DRIVE
WITH CARE
This message displays when the
outside air temperature is cold
enough to create icy road
conditions. Adjust your driving
accordingly.
Vehicle Speed Messages
SPEED LIMITED TO
XXX MPH (KM/H)
This message displays when your
vehicle speed is limited to 80 mph
(128 km/h) because the vehicle
detects a problem in the speed
variable assist steering system.
Have your vehicle serviced by your
dealer.
Washer Fluid Messages
WASHER FLUID LOW ADD
FLUID
This message displays when the
windshield washer fluid is low. Fill
the windshield washer fluid reservoir
as soon as possible. See
Engine
Compartment Overview
on
page 10‑6for the location of the
windshield washer fluid reservoir.
Also, see Washer Fluid
on
page 10‑21for more information.
Page 260 of 448
9-8 Driving and Operating
.Keep your eyes moving—scan
the road ahead and to the sides.
.Check the rearview mirror and
vehicle instruments often.
Hill and Mountain Roads
Driving on steep hills or through
mountains is different than driving
on flat or rolling terrain. Tips for
driving in these conditions include:
.Keep the vehicle serviced and in
good shape.
.Check all fluid levels and brakes,
tires, cooling system, and
transmission.
.Going down steep or long hills,
shift to a lower gear.
{WARNING
If you do not shift down, the
brakes could get so hot that they
would not work well. You would
then have poor braking or even
none going down a hill. You could
crash. Shift down to let the engine
assist the brakes on a steep
downhill slope.
{WARNING
Coasting downhill in N (Neutral)
or with the ignition off is
dangerous. The brakes will have
to do all the work of slowing down
and they could get so hot that
they would not work well. You
would then have poor braking or
even none going down a hill. You
could crash. Always have the
engine running and the vehicle in
gear when going downhill.
.Stay in your own lane. Do not
swing wide or cut across the
center of the road. Drive at
speeds that let you stay in your
own lane.
.Top of hills: Be
alert —something could be in
your lane (stalled car, accident).
.Pay attention to special road
signs (falling rocks area, winding
roads, long grades, passing or
no-passing zones) and take
appropriate action.
Page 302 of 448
9-50 Driving and Operating
Maintenance When Trailer
Towing
The vehicle needs service more
often when pulling a trailer. See this
manual's Maintenance Schedule or
Index for more information. Things
that are especially important in
trailer operation are automatic
transmission fluid, engine oil, axle
lubricant, belts, cooling system and
brake system. Inspect these before
and during the trip.
Check periodically to see that all
hitch nuts and bolts are tight.
Engine Cooling When Trailer
Towing
The cooling system may temporarily
overheat during severe operating
conditions. SeeEngine Overheating
on page 10‑18.
Trailer Towing
Three important considerations
have to do with weight:
.The weight of the trailer
.The weight of the trailer tongue
.The total weight on the vehicle's
tires
Weight of the Trailer
How heavy can a trailer safely be?
Speed, altitude, road grades,
outside temperature, special
equipment, and the amount of
tongue weight the vehicle can carry
must be considered. See “Weight of
the Trailer Tongue” later in this
section for more information. Maximum trailer weight is calculated
assuming only the driver is in the
tow vehicle and it has all the
required trailering equipment. The
weight of additional optional
equipment, passengers and cargo in
the tow vehicle must be subtracted
from the maximum trailer weight.
Use the following chart to determine
how much the vehicle can weigh,
based upon the vehicle model and
options.
Page 309 of 448
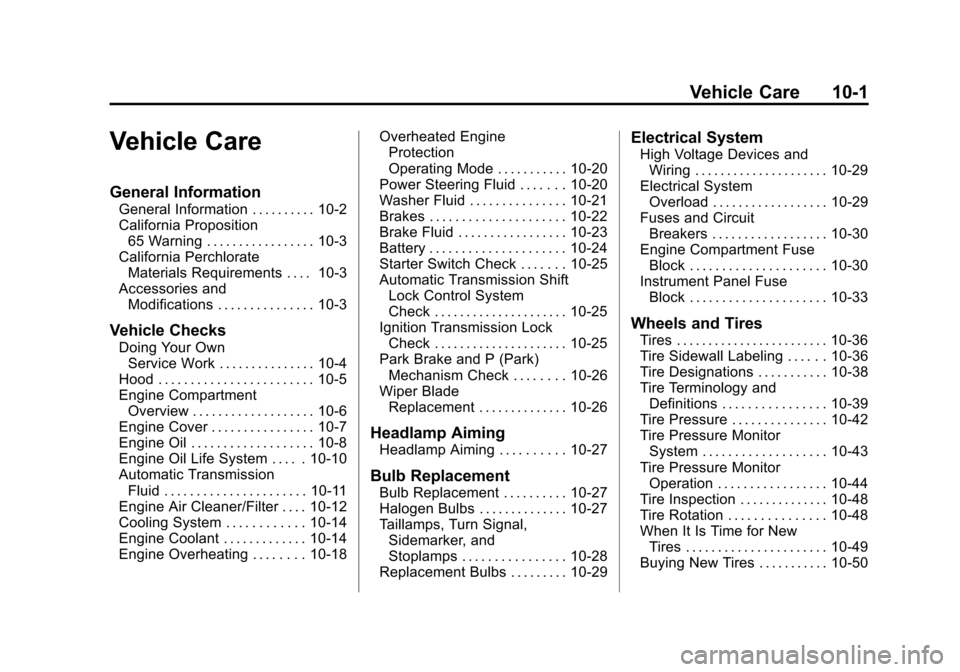
Vehicle Care 10-1
Vehicle Care
General Information
General Information . . . . . . . . . . 10-2
California Proposition65 Warning . . . . . . . . . . . . . . . . . 10-3
California Perchlorate Materials Requirements . . . . 10-3
Accessories and Modifications . . . . . . . . . . . . . . . 10-3
Vehicle Checks
Doing Your OwnService Work . . . . . . . . . . . . . . . 10-4
Hood . . . . . . . . . . . . . . . . . . . . . . . . 10-5
Engine Compartment Overview . . . . . . . . . . . . . . . . . . . 10-6
Engine Cover . . . . . . . . . . . . . . . . 10-7
Engine Oil . . . . . . . . . . . . . . . . . . . 10-8
Engine Oil Life System . . . . . 10-10
Automatic Transmission Fluid . . . . . . . . . . . . . . . . . . . . . . 10-11
Engine Air Cleaner/Filter . . . . 10-12
Cooling System . . . . . . . . . . . . 10-14
Engine Coolant . . . . . . . . . . . . . 10-14
Engine Overheating . . . . . . . . 10-18 Overheated Engine
Protection
Operating Mode . . . . . . . . . . . 10-20
Power Steering Fluid . . . . . . . 10-20
Washer Fluid . . . . . . . . . . . . . . . 10-21
Brakes . . . . . . . . . . . . . . . . . . . . . 10-22
Brake Fluid . . . . . . . . . . . . . . . . . 10-23
Battery . . . . . . . . . . . . . . . . . . . . . 10-24
Starter Switch Check . . . . . . . 10-25
Automatic Transmission Shift Lock Control System
Check . . . . . . . . . . . . . . . . . . . . . 10-25
Ignition Transmission Lock Check . . . . . . . . . . . . . . . . . . . . . 10-25
Park Brake and P (Park) Mechanism Check . . . . . . . . 10-26
Wiper Blade Replacement . . . . . . . . . . . . . . 10-26
Headlamp Aiming
Headlamp Aiming . . . . . . . . . . 10-27
Bulb Replacement
Bulb Replacement . . . . . . . . . . 10-27
Halogen Bulbs . . . . . . . . . . . . . . 10-27
Taillamps, Turn Signal,Sidemarker, and
Stoplamps . . . . . . . . . . . . . . . . 10-28
Replacement Bulbs . . . . . . . . . 10-29
Electrical System
High Voltage Devices and
Wiring . . . . . . . . . . . . . . . . . . . . . 10-29
Electrical System Overload . . . . . . . . . . . . . . . . . . 10-29
Fuses and Circuit
Breakers . . . . . . . . . . . . . . . . . . 10-30
Engine Compartment Fuse Block . . . . . . . . . . . . . . . . . . . . . 10-30
Instrument Panel Fuse Block . . . . . . . . . . . . . . . . . . . . . 10-33
Wheels and Tires
Tires . . . . . . . . . . . . . . . . . . . . . . . . 10-36
Tire Sidewall Labeling . . . . . . 10-36
Tire Designations . . . . . . . . . . . 10-38
Tire Terminology andDefinitions . . . . . . . . . . . . . . . . 10-39
Tire Pressure . . . . . . . . . . . . . . . 10-42
Tire Pressure Monitor System . . . . . . . . . . . . . . . . . . . 10-43
Tire Pressure Monitor Operation . . . . . . . . . . . . . . . . . 10-44
Tire Inspection . . . . . . . . . . . . . . 10-48
Tire Rotation . . . . . . . . . . . . . . . 10-48
When It Is Time for New Tires . . . . . . . . . . . . . . . . . . . . . . 10-49
Buying New Tires . . . . . . . . . . . 10-50
Page 315 of 448
Vehicle Care 10-7
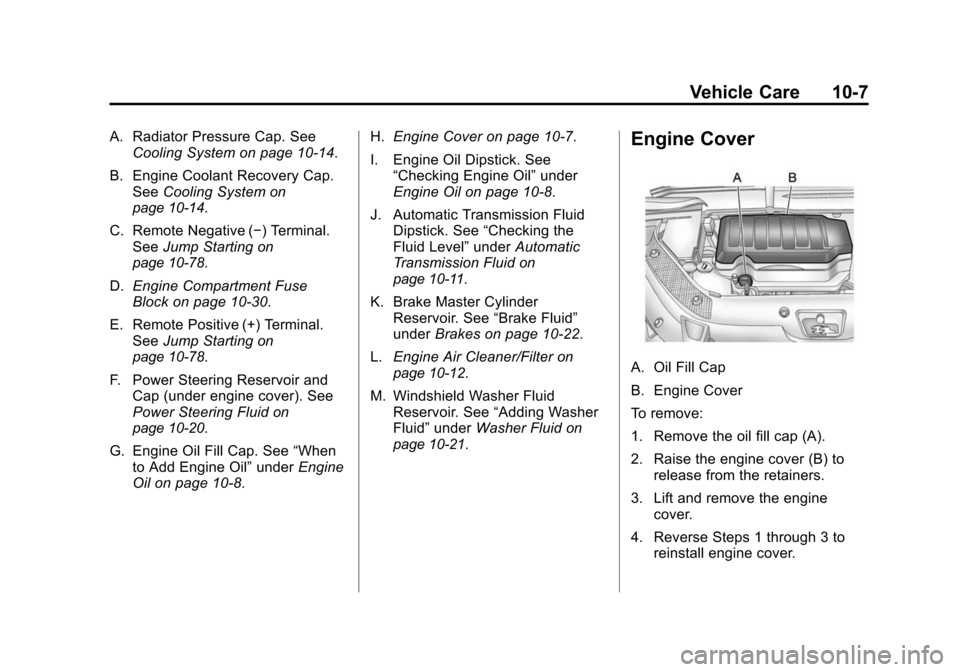
A. Radiator Pressure Cap. SeeCooling System on page 10‑14.
B. Engine Coolant Recovery Cap. See Cooling System
on
page 10‑14.
C. Remote Negative (−) Terminal. See Jump Starting
on
page 10‑78.
D. Engine Compartment Fuse
Block on page 10‑30.
E. Remote Positive (+) Terminal. See Jump Starting
on
page 10‑78.
F. Power Steering Reservoir and Cap (under engine cover). See
Power Steering Fluid
on
page 10‑20.
G. Engine Oil Fill Cap. See “When
to Add Engine Oil” underEngine
Oil on page 10‑8. H.
Engine Cover on page 10‑7.
I. Engine Oil Dipstick. See “Checking Engine Oil” under
Engine Oil on page 10‑8.
J. Automatic Transmission Fluid Dipstick. See “Checking the
Fluid Level” underAutomatic
Transmission Fluid
on
page 10‑11.
K. Brake Master Cylinder Reservoir. See “Brake Fluid”
under Brakes on page 10‑22.
L. Engine Air Cleaner/Filter
on
page 10‑12.
M. Windshield Washer Fluid Reservoir. See “Adding Washer
Fluid” under Washer Fluid
on
page 10‑21.
Engine Cover
A. Oil Fill Cap
B. Engine Cover
To remove:
1. Remove the oil fill cap (A).
2. Raise the engine cover (B) to release from the retainers.
3. Lift and remove the engine cover.
4. Reverse Steps 1 through 3 to reinstall engine cover.
Page 319 of 448
Vehicle Care 10-11
If the vehicle has Driver Information
Center (DIC) buttons:
1. Turn the ignition to ON/RUN,with the engine off.
2. Press the vehicle information button until OIL LIFE
REMAINING displays.
3. Press and hold the set/reset button until “100%”is displayed.
Three chimes sound and the
CHANGE ENGINE OIL SOON
message goes off.
4. Turn the key to LOCK/OFF.
If the CHANGE ENGINE OIL SOON
message comes back on when the
vehicle is started, the engine oil life
system has not reset. Repeat the
procedure.What to Do with Used Oil
Used engine oil contains certain
elements that can be unhealthy for
your skin and could even cause
cancer. Do not let used oil stay on
your skin for very long. Clean your
skin and nails with soap and water,
or a good hand cleaner. Wash or
properly dispose of clothing or rags
containing used engine oil. See the
manufacturer's warnings about the
use and disposal of oil products.
Used oil can be a threat to the
environment. If you change your
own oil, be sure to drain all the oil
from the filter before disposal. Never
dispose of oil by putting it in the
trash, pouring it on the ground, into
sewers, or into streams or bodies of
water. Recycle it by taking it to a
place that collects used oil.
Automatic Transmission
Fluid
It is not necessary to check the
transmission fluid level.
A transmission fluid leak is the only
reason for fluid loss. If a leak
occurs, take the vehicle to the
dealer and have it repaired as soon
as possible.
Change the fluid at the intervals
listed in Scheduled Maintenance
on
page 11‑2, and be sure to use the
transmission fluid listed in
Recommended Fluids and
Lubricants on page 11‑7.
Notice: Use of the incorrect
automatic transmission fluid may
damage the vehicle, and the
damages may not be covered by
the vehicle's warranty. Always
use the automatic transmission
fluid listed in Recommended
Fluids and Lubricants
on
page 11‑7.
Page 320 of 448
10-12 Vehicle Care
The transmission fluid will not reach
the end of the dipstick unless the
transmission is at operating
temperature. If you need to check
the transmission fluid level, please
take the vehicle to your dealer.
Engine Air Cleaner/Filter
When to Inspect the Engine Air
Cleaner/Filter
Inspect the air cleaner/filter at the
MaintenanceIIintervals and replace
it at the first oil change after each
80 000 km (50,000 mile) interval.
See Scheduled Maintenance
on
page 11‑2for more information.
If you are driving in dusty/dirty
conditions, inspect the filter at each
engine oil change. See
Engine Compartment Overview
on page 10‑6for the location of the
engine air cleaner/filter.
How to Inspect the Engine Air
Cleaner/Filter
To inspect the air cleaner/filter,
remove the filter from the vehicle
and lightly shake the filter (away
from vehicle) to release loose dust
and dirt. If the filter remains caked
with dirt, a new filter is required. To inspect or replace the engine air
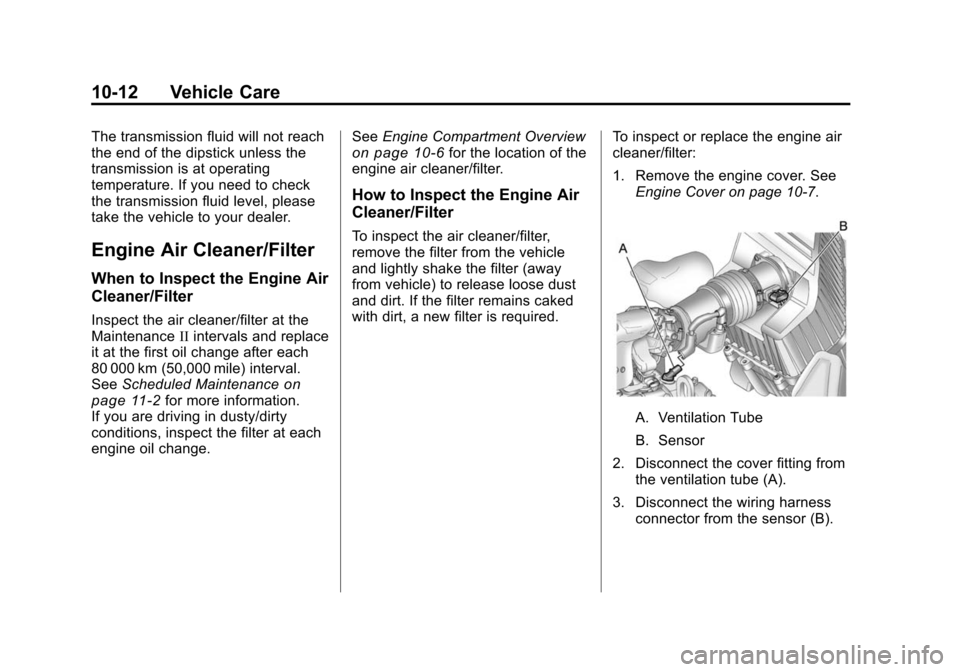
cleaner/filter:
1. Remove the engine cover. See
Engine Cover on page 10‑7.
A. Ventilation Tube
B. Sensor
2. Disconnect the cover fitting from the ventilation tube (A).
3. Disconnect the wiring harness connector from the sensor (B).
Page 387 of 448
Vehicle Care 10-79
vehicle, and the bad grounding
could damage the electrical
systems.
To avoid the possibility of the
vehicles rolling, set the parking
brake firmly on both vehicles
involved in the jump start
procedure. Put an automatic
transmission in P (Park) or a
manual transmission in Neutral
before setting the parking brake.
If one of the vehicles is a
four-wheel-drive vehicle, be sure
the transfer case is not in
Neutral.
Notice: If you leave the radio or
other accessories on during the
jump starting procedure, they
could be damaged. The repairs
would not be covered by the
warranty. Always turn off the
radio and other accessories when
jump starting the vehicle. 3. Turn off the ignition on both
vehicles. Unplug unnecessary
accessories plugged into the
cigarette lighter or the accessory
power outlets. Turn off the radio
and all lamps that are not
needed. This will avoid sparks
and help save both batteries.
And it could save the radio!
4. Open the hoods and locate the positive (+) and negative (−)
terminal locations on the other
vehicle. Your vehicle has a
remote positive (+) and a remote
negative (−) jump starting
terminal. See Engine
Compartment Overview
on
page 10‑6for more information
on the terminal locations.
{WARNING
Using a match near a battery can
cause battery gas to explode.
People have been hurt doing this,
and some have been blinded.
Use a flashlight if you need more
light.
Be sure the batteries have
enough water. You do not need to
add water to the ACDelco
®
battery (or batteries) installed in
your new vehicle. But if a battery
has filler caps, be sure the right
amount of fluid is there. If it is low,
add water to take care of that
first. If you do not, explosive gas
could be present.
Battery fluid contains acid that
can burn you. Do not get it on
you. If you accidentally get it in
your eyes or on your skin, flush
the place with water and get
medical help immediately.