trip CHEVROLET TRAVERSE 2013 1.G Owners Manual
[x] Cancel search | Manufacturer: CHEVROLET, Model Year: 2013, Model line: TRAVERSE, Model: CHEVROLET TRAVERSE 2013 1.GPages: 444
Page 29 of 444
Black plate (23,1)Chevrolet Traverse Owner Manual - 2013 - CRC 2nd Edition - 11/13/12
In Brief 1-23
on vehicles with this feature, and
compass calibration and zone
setting on vehicles with this feature.
3:Press this button to display
the odometer, trip odometers, fuel
range, average economy, timer, fuel
used, and average speed.
Some vehicles do not have the
buttons shown, however some of
the menus can be viewed by using
the trip odometer reset stem.
See Driver Information Center (DIC)
(Without DIC Buttons) on page 5‑29
or Driver Information Center (DIC)
(With DIC Buttons) on page 5‑24.
Ultrasonic Parking Assist
If available, this system uses
sensors on the rear bumper to
assist with parking and avoiding
objects while in R (Reverse).
It operates at speeds less than
8 km/h (5 mph). URPA uses audible
beeps to provide distance and
system information. Keep the sensors on the vehicle's
rear bumper clean to ensure proper
operation.
See
Ultrasonic Parking Assist on
page 9‑31.
Power Outlets
The vehicle has 12-volt accessory
power outlets which can be used to
plug in electrical equipment, such as
a cell phone or MP3 player.
The power outlets are located:
.On the instrument panel below
the climate controls.
.Inside the center floor console.
.At the rear of the center floor
console.
.In the rear cargo area.
To use the outlets, remove the
cover.
See Power Outlets on page 5‑8.
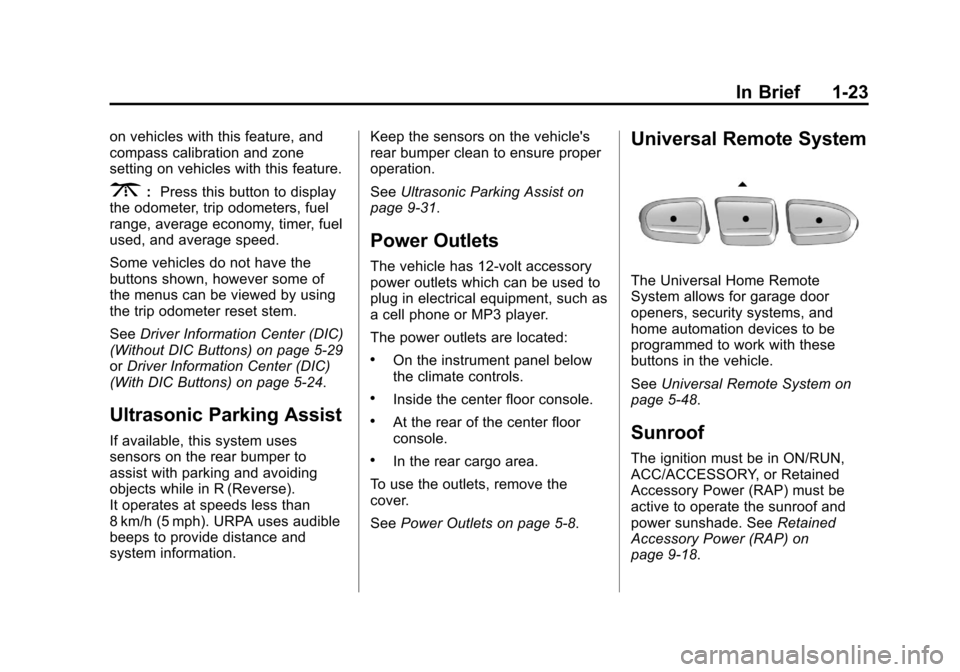
Universal Remote System
The Universal Home Remote
System allows for garage door
openers, security systems, and
home automation devices to be
programmed to work with these
buttons in the vehicle.
SeeUniversal Remote System on
page 5‑48.
Sunroof
The ignition must be in ON/RUN,
ACC/ACCESSORY, or Retained
Accessory Power (RAP) must be
active to operate the sunroof and
power sunshade. See Retained
Accessory Power (RAP) on
page 9‑18.
Page 31 of 444
Black plate (25,1)Chevrolet Traverse Owner Manual - 2013 - CRC 2nd Edition - 11/13/12
In Brief 1-25
tire pressures are getting low and
the tires need to be inflated to the
proper pressure.
The TPMS does not replace normal
monthly tire maintenance. Maintain
the correct tire pressures.
SeeTire Pressure Monitor System
on page 10‑44.
Engine Oil Life System
The engine oil life system calculates
engine oil life based on vehicle use
and displays the CHANGE ENGINE
OIL SOON message when it is time
to change the engine oil and filter.
The oil life system should be reset
to 100% only following an oil
change.
Resetting the Oil Life System
1. Turn the ignition to ON/RUN, with the engine off. 2. If the vehicle has Driver
Information Center (DIC)
buttons: Press the vehicle
information button until OIL LIFE
REMAINING displays.
If the vehicle does not have
Driver Information Center (DIC)
buttons: The vehicle must be in
P (Park) to access this display.
Press the trip odometer reset
stem until OIL LIFE REMAINING
displays.
3. If the vehicle has Driver Information Center (DIC)
buttons: Press and hold the set/
reset button until “100%”is
displayed. Three chimes sound
and the CHANGE ENGINE OIL
SOON message goes off.
If the vehicle does not have
Driver Information Center (DIC)
buttons: Press and hold the trip
odometer reset stem until OIL
LIFE REMAINING shows
“100%.” Three chimes sound
and the CHANGE ENGINE OIL
SOON message goes off. 4. Turn the key to LOCK/OFF.
See
Engine Oil Life System on
page 10‑9.
Driving for Better Fuel
Economy
Driving habits can affect fuel
mileage. Here are some driving tips
to get the best fuel economy
possible.
.Avoid fast starts and accelerate
smoothly.
.Brake gradually and avoid
abrupt stops.
.Avoid idling the engine for long
periods of time.
.When road and weather
conditions are appropriate, use
cruise control.
.Always follow posted speed
limits or drive more slowly when
conditions require.
.Keep vehicle tires properly
inflated.
Page 32 of 444
Black plate (26,1)Chevrolet Traverse Owner Manual - 2013 - CRC 2nd Edition - 11/13/12
1-26 In Brief
.Combine several trips into a
single trip.
.Replace the vehicle's tires with
the same TPC Spec number
molded into the tire's sidewall
near the size.
.Follow recommended scheduled
maintenance.
Roadside Assistance
Program
U.S.: 1-800-243-8872
TTY Users (U.S. Only):
1-888-889-2438
Canada: 1-800-268-6800
Mexico: 01-800-466-0800
New Chevrolet owners are
automatically enrolled in the
Roadside Assistance Program.
SeeRoadside Assistance Program
(Mexico) on page 13‑7 orRoadside
Assistance Program (U.S. and
Canada) on page 13‑11.
OnStar®
If equipped, this vehicle has a
comprehensive, in-vehicle system
that can connect to a live Advisor
for Emergency, Security, Navigation,
Connection, and Diagnostic
Services. See OnStar Overview on
page 14‑1.
Page 91 of 444
Black plate (37,1)Chevrolet Traverse Owner Manual - 2013 - CRC 2nd Edition - 11/13/12
Seats and Restraints 3-37
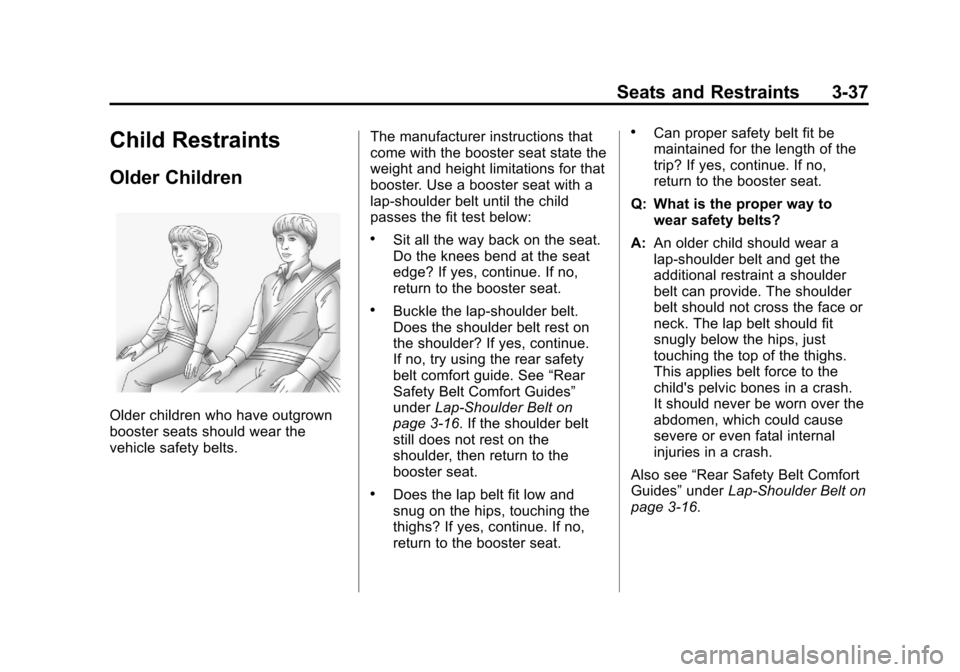
Child Restraints
Older Children
Older children who have outgrown
booster seats should wear the
vehicle safety belts.The manufacturer instructions that
come with the booster seat state the
weight and height limitations for that
booster. Use a booster seat with a
lap-shoulder belt until the child
passes the fit test below:
.Sit all the way back on the seat.
Do the knees bend at the seat
edge? If yes, continue. If no,
return to the booster seat.
.Buckle the lap-shoulder belt.
Does the shoulder belt rest on
the shoulder? If yes, continue.
If no, try using the rear safety
belt comfort guide. See
“Rear
Safety Belt Comfort Guides”
under Lap-Shoulder Belt on
page 3‑16. If the shoulder belt
still does not rest on the
shoulder, then return to the
booster seat.
.Does the lap belt fit low and
snug on the hips, touching the
thighs? If yes, continue. If no,
return to the booster seat.
.Can proper safety belt fit be
maintained for the length of the
trip? If yes, continue. If no,
return to the booster seat.
Q: What is the proper way to wear safety belts?
A: An older child should wear a
lap-shoulder belt and get the
additional restraint a shoulder
belt can provide. The shoulder
belt should not cross the face or
neck. The lap belt should fit
snugly below the hips, just
touching the top of the thighs.
This applies belt force to the
child's pelvic bones in a crash.
It should never be worn over the
abdomen, which could cause
severe or even fatal internal
injuries in a crash.
Also see “Rear Safety Belt Comfort
Guides” underLap-Shoulder Belt on
page 3‑16.
Page 123 of 444
Black plate (5,1)Chevrolet Traverse Owner Manual - 2013 - CRC 2nd Edition - 11/13/12
Instruments and Controls 5-5
{WARNING
In freezing weather, do not use
the washer until the windshield is
warmed. Otherwise the washer
fluid can form ice on the
windshield, blocking your vision.
WASHER FLUID LOW ADD FLUID
is displayed on the Driver
Information Center (DIC) when the
washer fluid is low. See Washer
Fluid Messages on page 5‑41.
Rear Window Wiper/
Washer
The rear wiper and rear wash button
is located on the instrument panel
below the climate control system.
Z(Rear Wiper): Press to turn the
rear wiper on and off. The wiper
speed cannot be changed.
Y(Wash): Press to spray washer
fluid on the rear window. The
window wiper will also come on. Release the button when enough
fluid has been sprayed on the
window. The rear wiper will run a
few more cycles after it is released.
If the rear wiper function was
already on prior to pressing the
wash button, it stays on until the
wiper button is pressed again.
The rear window washer uses the
same fluid that is in the windshield
washer reservoir. See
Washer Fluid
on page 10‑19.
Compass
Your vehicle may have a compass
in the Driver Information Center
(DIC). See Driver Information
Center (DIC) (Without DIC Buttons)
on page 5‑29 orDriver Information
Center (DIC) (With DIC Buttons) on
page 5‑24 for more information
about the DIC.
Compass Zone
The zone is set to zone eight upon
leaving the factory. Your dealer will
set the correct zone for your
location. Under certain circumstances, such
as during a long distance
cross-country trip or moving to a
new state or province, it will be
necessary to compensate for
compass variance by resetting the
zone through the DIC if the zone is
not set correctly.
Compass variance is the difference
between the earth's magnetic north
and true geographic north. If the
compass is not set to the zone
where you live, the compass may
give false readings. The compass
must be set to the variance zone in
which the vehicle is traveling.
Page 124 of 444
Black plate (6,1)Chevrolet Traverse Owner Manual - 2013 - CRC 2nd Edition - 11/13/12
5-6 Instruments and Controls
To adjust for compass variance, use
the following procedure:
Compass Variance (Zone)
Procedure
1. Do not set the compass zonewhen the vehicle is moving. Only
set it when the vehicle is in
P (Park).
Press the vehicle information
button until PRESS
VTO
CHANGE COMPASS ZONE
displays.
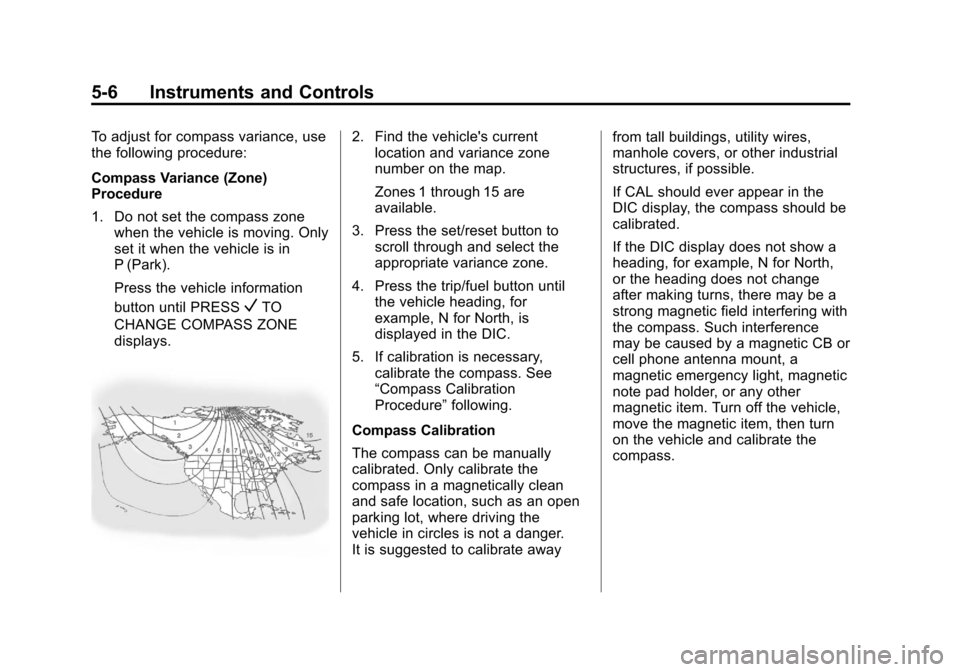
2. Find the vehicle's current location and variance zone
number on the map.
Zones 1 through 15 are
available.
3. Press the set/reset button to scroll through and select the
appropriate variance zone.
4. Press the trip/fuel button until the vehicle heading, for
example, N for North, is
displayed in the DIC.
5. If calibration is necessary, calibrate the compass. See
“Compass Calibration
Procedure” following.
Compass Calibration
The compass can be manually
calibrated. Only calibrate the
compass in a magnetically clean
and safe location, such as an open
parking lot, where driving the
vehicle in circles is not a danger.
It is suggested to calibrate away from tall buildings, utility wires,
manhole covers, or other industrial
structures, if possible.
If CAL should ever appear in the
DIC display, the compass should be
calibrated.
If the DIC display does not show a
heading, for example, N for North,
or the heading does not change
after making turns, there may be a
strong magnetic field interfering with
the compass. Such interference
may be caused by a magnetic CB or
cell phone antenna mount, a
magnetic emergency light, magnetic
note pad holder, or any other
magnetic item. Turn off the vehicle,
move the magnetic item, then turn
on the vehicle and calibrate the
compass.
Page 136 of 444
Black plate (18,1)Chevrolet Traverse Owner Manual - 2013 - CRC 2nd Edition - 11/13/12
5-18 Instruments and Controls
Modifications to these systems
could lead to costly repairs not
covered by the vehicle warranty.
This could also result in a failure
to pass a required Emission
Inspection/Maintenance test. See
Accessories and Modifications on
page 10‑2.
This light comes on during a
malfunction in one of two ways:
Light Flashing:A misfire condition
has been detected. A misfire
increases vehicle emissions and
could damage the emission control
system on the vehicle. Diagnosis
and service might be required.
To prevent more serious damage to
the vehicle:
.Reduce vehicle speed.
.Avoid hard accelerations.
.Avoid steep uphill grades.
.If towing a trailer, reduce the
amount of cargo being hauled as
soon as it is possible. If the light continues to flash, find a
safe place to stop and park the
vehicle. Turn the vehicle off, wait at
least 10 seconds, and restart the
engine. If the light is still flashing,
follow the previous steps and see
your dealer for service as soon as
possible.
Light On Steady:
An emission
control system malfunction has
been detected on the vehicle.
Diagnosis and service might be
required.
The following may correct an
emission control system
malfunction:
.Check that the fuel cap is fully
installed. See Filling the Tank on
page 9‑41. The diagnostic
system can determine if the fuel
cap has been left off or
improperly installed. A loose or
missing fuel cap allows fuel to
evaporate into the atmosphere.
A few driving trips with the cap
properly installed should turn the
light off.
.Check that good quality fuel is
used. Poor fuel quality causes
the engine not to run as
efficiently as designed and may
cause stalling after start-up,
stalling when the vehicle is
changed into gear, misfiring,
hesitation on acceleration,
or stumbling on acceleration.
These conditions might go away
once the engine is warmed up.
If one or more of these conditions
occurs, change the fuel brand used.
It may require at least one full tank
of the proper fuel to turn the light off.
See Recommended Fuel on
page 9‑38.
If none of the above have made the
light turn off, your dealer can check
the vehicle. The dealer has the
proper test equipment and
diagnostic tools to fix any
mechanical or electrical problems
that might have developed.
Page 142 of 444
Black plate (24,1)Chevrolet Traverse Owner Manual - 2013 - CRC 2nd Edition - 11/13/12
5-24 Instruments and Controls
Information Displays
Driver Information Center
(DIC) (With DIC Buttons)
If your vehicle has DIC buttons, the
information below explains the
operation of this system.
The DIC displays information about
your vehicle. It also displays
warning messages if a system
problem is detected.
All messages will appear in the DIC
display located at the top of the
instrument panel cluster.
The DIC comes on when the ignition
is on. After a short delay, the DIC
will display the information that was
last displayed before the engine
was turned off.
The DIC also displays a shift lever
position indicator on the bottom line
of the display. SeeAutomatic
Transmission on page 9‑21 for more
information. The outside air temperature and
compass, if equipped, also display
on the DIC when viewing the trip
and fuel information. The outside air
temperature automatically appears
in the top right corner of the DIC
display. If there is a problem with
the system that controls the
temperature display, the numbers
will be replaced with dashes. If this
occurs, have the vehicle serviced.
The compass will be shown in the
bottom right corner of the DIC
display. See
Compass on page 5‑5
for more information.
The DIC also allows some features
to be customized. See Vehicle
Personalization (With DIC Buttons)
on page 5‑41 for more information.
If your vehicle has DIC buttons, you
can also use the trip odometer reset
stem to view the odometer and trip
odometers. DIC Buttons
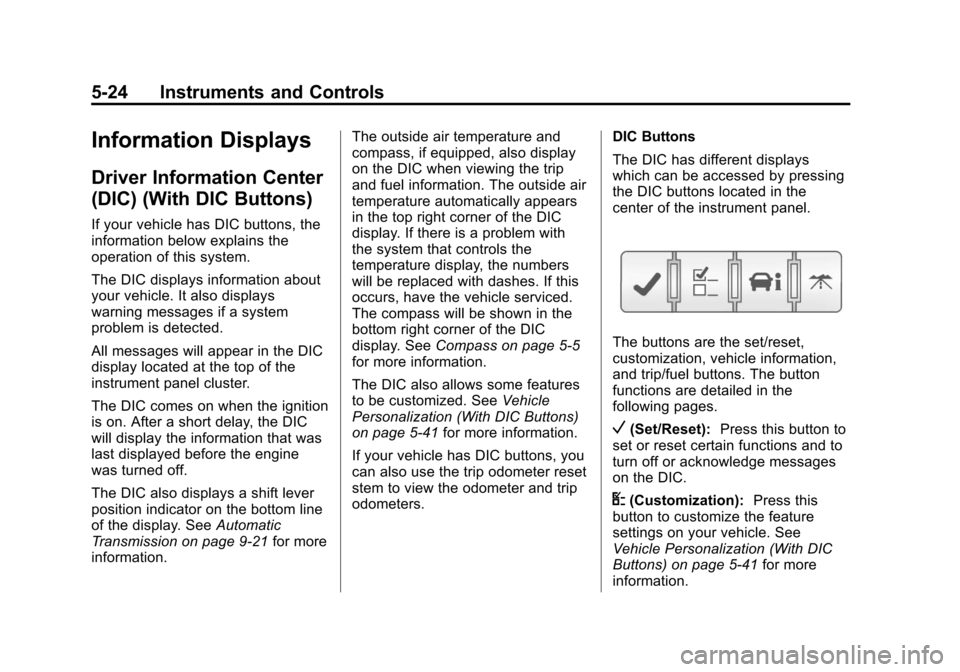
The DIC has different displays
which can be accessed by pressing
the DIC buttons located in the
center of the instrument panel.
The buttons are the set/reset,
customization, vehicle information,
and trip/fuel buttons. The button
functions are detailed in the
following pages.
V(Set/Reset):
Press this button to
set or reset certain functions and to
turn off or acknowledge messages
on the DIC.
U(Customization): Press this
button to customize the feature
settings on your vehicle. See
Vehicle Personalization (With DIC
Buttons) on page 5‑41 for more
information.
Page 143 of 444
Black plate (25,1)Chevrolet Traverse Owner Manual - 2013 - CRC 2nd Edition - 11/13/12
Instruments and Controls 5-25
T(Vehicle Information):Press
this button to display the oil life,
park assist on vehicles with this
feature, units, tire pressure readings
on vehicles with this feature, and
compass calibration and zone
setting on vehicles with this feature.
3(Trip/Fuel): Press this button
to display the odometer, trip
odometers, fuel range, average
economy, timer, fuel used, and
average speed.
Vehicle Information Menu
Items
T(Vehicle Information): Press
this button to scroll through the
following menu items:
OIL LIFE
Press the vehicle information button
until OIL LIFE REMAINING
displays. This display shows an
estimate of the oil's remaining useful
life. If you see 99% OIL LIFE
REMAINING on the display, that
means 99% of the current oil life
remains. The engine oil life system will alert you to change the oil on a
schedule consistent with your
driving conditions.
When the remaining oil life is low,
the CHANGE ENGINE OIL SOON
message will appear on the display.
See
“CHANGE ENGINE OIL SOON”
under Engine Oil Messages on
page 5‑34. You should change the
oil as soon as you can. See Engine
Oil on page 10‑7. In addition to the
engine oil life system monitoring the
oil life, additional maintenance is
recommended in the Maintenance
Schedule in this manual. See
Maintenance Schedule on
page 11‑2 for more information.
Remember, you must reset the OIL
LIFE display yourself after each oil
change. It will not reset itself. Also,
be careful not to reset the OIL LIFE
display accidentally at any time
other than when the oil has just
been changed. It cannot be reset
accurately until the next oil change.
To reset the engine oil life system,
see Engine Oil Life System on
page 10‑9. SIDE BLIND ZONE ALERT
If the vehicle has the Side Blind
Zone Alert (SBZA) system, this
display allows the system to be
turned on or off. Once in this
display, press the set/reset button to
select between ON or OFF. If you
choose ON, the system will be
turned on. If you choose OFF, the
system will be turned off. When the
SBZA system is turned off, the DIC
will display the SIDE BLIND ZONE
ALERT SYSTEM OFF message as
a reminder that the system has
been turned off. See
Object
Detection System Messages on
page 5‑36 andSide Blind Zone Alert
(SBZA) on page 9‑32 for more
information.
PARK ASSIST
If your vehicle has the Ultrasonic
Rear Parking Assist (URPA) system,
press the vehicle information button
until PARK ASSIST displays. This
display allows the system to be
turned on or off. Once in this
display, press the set/reset button to
Page 145 of 444
Black plate (27,1)Chevrolet Traverse Owner Manual - 2013 - CRC 2nd Edition - 11/13/12
Instruments and Controls 5-27
Blank Display
This display shows no information.
Trip/Fuel Menu Items
3(Trip/Fuel):Press this button
to scroll through the following menu
items:
ODOMETER
Press the trip/fuel button until
ODOMETER displays. This display
shows the distance the vehicle has
been driven in either kilometers (km)
or miles (mi). Pressing the trip
odometer reset stem will also
display the odometer.
To switch between English and
metric measurements, see “UNITS”
earlier in this section.
TRIP A and TRIP B
Press the trip/fuel button until
TRIP A or TRIP B displays. This
display shows the current distance
traveled in either kilometers (km) or
miles (mi) since the last reset for
each trip odometer. Both trip
odometers can be used at the same time. Pressing the trip odometer
reset stem will also display the trip
odometers.
Each trip odometer can be reset to
zero separately by pressing the set/
reset button or the trip odometer
reset stem while the desired trip
odometer is displayed.
The trip odometer has a feature
called retroactive reset. This can be
used to set the trip odometer to the
number of kilometers (miles) driven
since the ignition was last turned on.
This can be used if the trip
odometer is not reset at the
beginning of the trip.
To use the retroactive reset feature,
press and hold the set/reset button
for at least four seconds. The trip
odometer will display the number of
kilometers (km) or miles (mi) driven
since the ignition was last turned on
and the vehicle was moving. Once
the vehicle begins moving, the trip
odometer will accumulate mileage.
For example, if the vehicle was
driven 8 km (5 mi) before it is started
again, and then the retroactive reset
feature is activated, the display will
show 8 km (5 mi). As the vehicle
begins moving, the display will then
increase to 8.2 km (5.1 mi), 8.4 km
(5.2 mi), etc.
If the retroactive reset feature is
activated after the vehicle is started,
but before it begins moving, the
display will show the number of
kilometers (km) or miles (mi) driven
during the last ignition cycle.
RANGE
Press the trip/fuel button until
RANGE displays. This display
shows the approximate number of
remaining kilometers (km) or
miles (mi) the vehicle can be driven
without refueling. The display will
show LOW if the fuel level is low.
The fuel range estimate is based on
an average of the vehicle's fuel
economy over recent driving history
and the amount of fuel remaining in
the fuel tank. This estimate will
change if driving conditions change.
For example, if driving in traffic and