buttons CHEVROLET TRAVERSE 2015 1.G User Guide
[x] Cancel search | Manufacturer: CHEVROLET, Model Year: 2015, Model line: TRAVERSE, Model: CHEVROLET TRAVERSE 2015 1.GPages: 434, PDF Size: 5.84 MB
Page 46 of 434
Black plate (10,1)Chevrolet Traverse Owner Manual (GMNA-Localizing-U.S./Canada/Mexico-
7576032) - 2015 - CRC - 8/19/14
2-10 Keys, Doors, and Windows
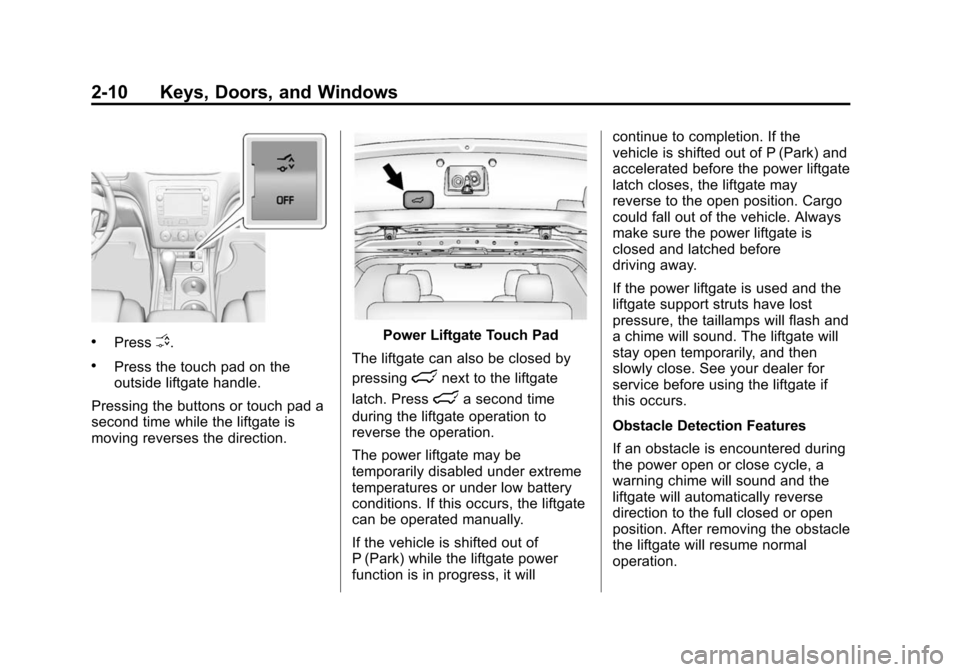
.PressO.
.Press the touch pad on the
outside liftgate handle.
Pressing the buttons or touch pad a
second time while the liftgate is
moving reverses the direction.
Power Liftgate Touch Pad
The liftgate can also be closed by
pressing
lnext to the liftgate
latch. Press
la second time
during the liftgate operation to
reverse the operation.
The power liftgate may be
temporarily disabled under extreme
temperatures or under low battery
conditions. If this occurs, the liftgate
can be operated manually.
If the vehicle is shifted out of
P (Park) while the liftgate power
function is in progress, it will continue to completion. If the
vehicle is shifted out of P (Park) and
accelerated before the power liftgate
latch closes, the liftgate may
reverse to the open position. Cargo
could fall out of the vehicle. Always
make sure the power liftgate is
closed and latched before
driving away.
If the power liftgate is used and the
liftgate support struts have lost
pressure, the taillamps will flash and
a chime will sound. The liftgate will
stay open temporarily, and then
slowly close. See your dealer for
service before using the liftgate if
this occurs.
Obstacle Detection Features
If an obstacle is encountered during
the power open or close cycle, a
warning chime will sound and the
liftgate will automatically reverse
direction to the full closed or open
position. After removing the obstacle
the liftgate will resume normal
operation.
Page 52 of 434
Black plate (16,1)Chevrolet Traverse Owner Manual (GMNA-Localizing-U.S./Canada/Mexico-
7576032) - 2015 - CRC - 8/19/14
2-16 Keys, Doors, and Windows
Resetting the Power Folding
Mirrors
Reset the power folding mirrors if:
.The mirrors are accidentally
obstructed while folding.
.They are accidentally manually
folded/unfolded.
.The mirrors vibrate at normal
driving speeds.
To reset the mirrors, fold and unfold
the mirrors one time using the
power folding mirror controls.
A popping noise may be heard
during the resetting. This sound is
normal during the reset operation.
Heated Mirrors
For vehicles with heated mirrors:
1(Rear Window Defogger):
Press to heat the mirrors.
See “Rear Window Defogger” under
Dual Automatic Climate Control
System on page 8-4.
Park Tilt Mirrors
If equipped with memory seats, the
passenger and/or driver mirror tilts
to a preselected position when the
vehicle is in R (Reverse). This
allows the curb to be seen when
parallel parking.
The mirror(s) return to the original
position when:
.The vehicle is shifted out of
R (Reverse), or remains in
R (Reverse) for about
30 seconds.
.The ignition is turned off.
.The vehicle is driven in
R (Reverse) above a set speed.
To turn this feature on or off, see
Vehicle Personalization (With DIC
Buttons) on page 5-45.
Interior Mirrors
Interior Rearview Mirrors
Adjust the rearview mirror for a clear
view of the area behind your
vehicle.
If equipped with OnStar, the vehicle
may have three control buttons at
the bottom of the mirror. See your
dealer for more information about
OnStar and how to subscribe to it.
See “Onstar,” if equipped.
Do not spray glass cleaner directly
on the mirror. Use a soft towel
dampened with water.
Page 63 of 434
Black plate (7,1)Chevrolet Traverse Owner Manual (GMNA-Localizing-U.S./Canada/Mexico-
7576032) - 2015 - CRC - 8/19/14
Seats and Restraints 3-7
2. Press and hold“1”until
two beeps sound.
3. Repeat for a second driver position using “2.”
To recall, press and release “1”or
“2.” The vehicle must be in P (Park).
A single beep will sound. The seat
and outside mirrors will move to the
position previously stored for the
identified driver.
Memory Remote Recall
The memory feature can recall the
driver seat and outside mirrors to
stored positions when entering the
vehicle.
To activate, unlock the driver door
with the Remote Keyless
Entry (RKE) transmitter. The driver
seat and outside mirrors will move
to the memory position associated
with the transmitter used to unlock
the vehicle.
This feature is turned on or off using
the vehicle personalization menu.
See Vehicle Personalization (With
DIC Buttons) on page 5-45. To stop recall movement, press one
of the power seat controls, memory
buttons, or the power mirror buttons.
If something has blocked the driver
seat while recalling a memory
position, the recall may stop.
Remove the obstruction; then press
and hold the appropriate manual
control for the memory item that is
not recalling for two seconds. Try
recalling the memory position again
by pressing the appropriate memory
button. If the memory position is still
not recalling, see your dealer for
service.
Easy Exit Driver Seat
This feature can move the seat
rearward to allow extra room to exit
the vehicle.
S(Easy Exit Driver Seat):
Press
to activate the recall. The vehicle
must be in P (Park). If this feature is programmed on in
the vehicle personalization menu,
automatic seat movement occurs
when the ignition key is removed.
A single beep sounds. The driver
seat moves back approximately
8 cm (3 in). To move the seat back
farther, press
Sagain until the seat
is all the way back.
If something has blocked the driver
seat while recalling the exit position,
the recall may stop. Remove the
obstruction; then press and hold the
power seat control rearward for
two seconds. Try recalling the exit
position again. If the exit position is
still not recalling, see your dealer for
service.
See Vehicle Personalization (With
DIC Buttons) on page 5-45.
Page 64 of 434
Black plate (8,1)Chevrolet Traverse Owner Manual (GMNA-Localizing-U.S./Canada/Mexico-
7576032) - 2015 - CRC - 8/19/14
3-8 Seats and Restraints
Heated and Cooled Front
Seats
{Warning
If you cannot feel temperature
change or pain to the skin, the
seat heater may cause burns. To
reduce the risk of burns, people
with such a condition should use
care when using the seat heater,
especially for long periods of
time. Do not place anything on
the seat that insulates against
heat, such as a blanket, cushion,
cover, or similar item. This may
cause the seat heater to
overheat. An overheated seat
heater may cause a burn or may
damage the seat.
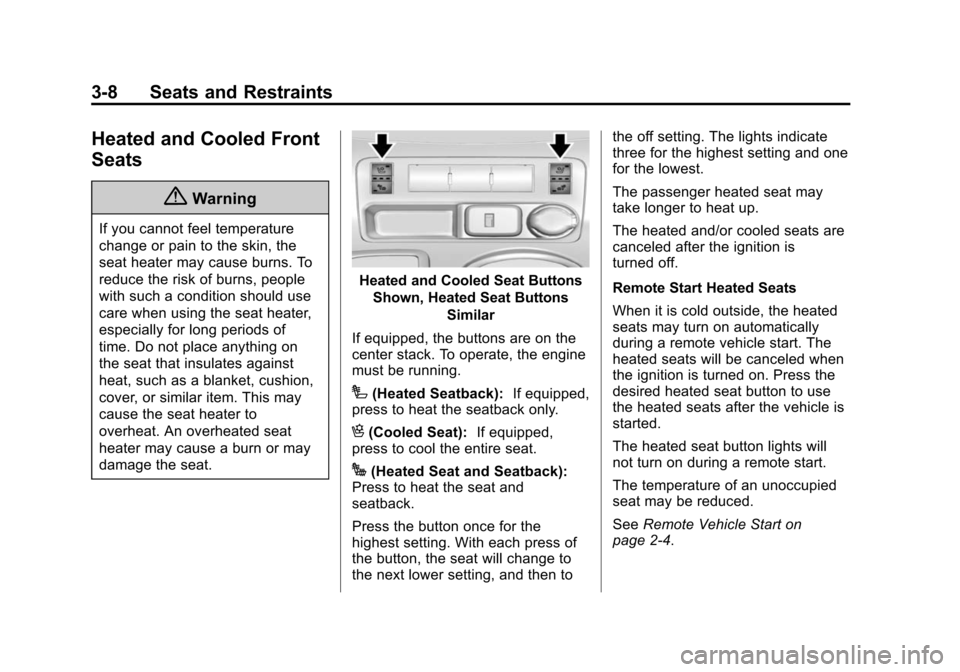
Heated and Cooled Seat ButtonsShown, Heated Seat Buttons Similar
If equipped, the buttons are on the
center stack. To operate, the engine
must be running.
I(Heated Seatback): If equipped,
press to heat the seatback only.
H(Cooled Seat): If equipped,
press to cool the entire seat.
J(Heated Seat and Seatback):
Press to heat the seat and
seatback.
Press the button once for the
highest setting. With each press of
the button, the seat will change to
the next lower setting, and then to the off setting. The lights indicate
three for the highest setting and one
for the lowest.
The passenger heated seat may
take longer to heat up.
The heated and/or cooled seats are
canceled after the ignition is
turned off.
Remote Start Heated Seats
When it is cold outside, the heated
seats may turn on automatically
during a remote vehicle start. The
heated seats will be canceled when
the ignition is turned on. Press the
desired heated seat button to use
the heated seats after the vehicle is
started.
The heated seat button lights will
not turn on during a remote start.
The temperature of an unoccupied
seat may be reduced.
See
Remote Vehicle Start on
page 2-4.
Page 119 of 434
Black plate (1,1)Chevrolet Traverse Owner Manual (GMNA-Localizing-U.S./Canada/Mexico-
7576032) - 2015 - CRC - 8/19/14
Instruments and Controls 5-1
Instruments and
Controls
Controls
Steering Wheel Adjustment . . . 5-2
Steering Wheel Controls (Radiowithout Touchscreen) . . . . . . . . 5-2
Steering Wheel Controls (Radio with Touchscreen) . . . . . . . . . . . 5-3
Heated Steering Wheel . . . . . . . 5-4
Horn . . . . . . . . . . . . . . . . . . . . . . . . . . 5-4
Windshield Wiper/Washer . . . . . 5-5
Rear Window Wiper/ Washer . . . . . . . . . . . . . . . . . . . . . . 5-5
Compass . . . . . . . . . . . . . . . . . . . . . 5-6
Clock (Radio without Touchscreen) . . . . . . . . . . . . . . . . 5-8
Clock (Radio with Touchscreen) . . . . . . . . . . . . . . . . 5-8
Power Outlets . . . . . . . . . . . . . . . . . 5-9
Warning Lights, Gauges, and
Indicators
Warning Lights, Gauges, and Indicators . . . . . . . . . . . . . . . . . . . 5-11
Instrument Cluster . . . . . . . . . . . 5-12
Speedometer . . . . . . . . . . . . . . . . 5-13 Odometer . . . . . . . . . . . . . . . . . . . . 5-13
Tachometer . . . . . . . . . . . . . . . . . . 5-13
Fuel Gauge . . . . . . . . . . . . . . . . . . 5-13
Engine Coolant Temperature
Gauge . . . . . . . . . . . . . . . . . . . . . . 5-14
Voltmeter Gauge . . . . . . . . . . . . . 5-15
Safety Belt Reminders . . . . . . . 5-15
Airbag Readiness Light . . . . . . 5-16
Passenger Airbag Status Indicator . . . . . . . . . . . . . . . . . . . . 5-16
Charging System Light . . . . . . 5-17
Malfunction Indicator Lamp . . . . . . . . . . . . . 5-18
Brake System Warning Light . . . . . . . . . . . . . . . . . . . . . . . 5-20
Antilock Brake System (ABS) Warning Light . . . . . . . . . . . . . . 5-21
Tow/Haul Mode Light . . . . . . . . 5-22
Lane Departure Warning (LDW) Light . . . . . . . . . . . . . . . . 5-22
Vehicle Ahead Indicator . . . . . . 5-22
StabiliTrak
®Indicator Light . . . 5-23
Engine Coolant Temperature Warning Light . . . . . . . . . . . . . . 5-23
Tire Pressure Light . . . . . . . . . . 5-23
Engine Oil Pressure Light . . . . 5-24
Security Light . . . . . . . . . . . . . . . . 5-24
High-Beam On Light . . . . . . . . . 5-25
Cruise Control Light . . . . . . . . . 5-25
Information Displays
Driver Information Center (DIC) (With DIC Buttons) . . . 5-25
Driver Information Center (DIC) (Without DIC
Buttons) . . . . . . . . . . . . . . . . . . . . 5-31
Vehicle Messages
Vehicle Messages . . . . . . . . . . . 5-34
Battery Voltage and ChargingMessages . . . . . . . . . . . . . . . . . . 5-34
Brake System Messages . . . . 5-35
Cruise Control Messages . . . . 5-35
Door Ajar Messages . . . . . . . . . 5-35
Engine Cooling System Messages . . . . . . . . . . . . . . . . . . 5-36
Engine Oil Messages . . . . . . . . 5-37
Engine Power Messages . . . . 5-37
Fuel System Messages . . . . . . 5-38
Key and Lock Messages . . . . . 5-38
Lamp Messages . . . . . . . . . . . . . 5-38
Object Detection System Messages . . . . . . . . . . . . . . . . . . 5-39
Ride Control System Messages . . . . . . . . . . . . . . . . . . 5-41
Airbag System Messages . . . . 5-41
Security Messages . . . . . . . . . . 5-41
Service Vehicle Messages . . . 5-42
Tire Messages . . . . . . . . . . . . . . . 5-42
Page 120 of 434
Black plate (2,1)Chevrolet Traverse Owner Manual (GMNA-Localizing-U.S./Canada/Mexico-
7576032) - 2015 - CRC - 8/19/14
5-2 Instruments and Controls
Transmission Messages . . . . . 5-43
Vehicle ReminderMessages . . . . . . . . . . . . . . . . . . 5-44
Vehicle Speed Messages . . . . 5-44
Washer Fluid Messages . . . . . 5-44
Vehicle Personalization
Vehicle Personalization (With DIC Buttons) . . . . . . . . . . . . . . . 5-45
Universal Remote System
Universal Remote System . . . 5-52
Universal Remote SystemProgramming . . . . . . . . . . . . . . . 5-52
Universal Remote System Operation . . . . . . . . . . . . . . . . . . 5-55
Controls
Steering Wheel
Adjustment
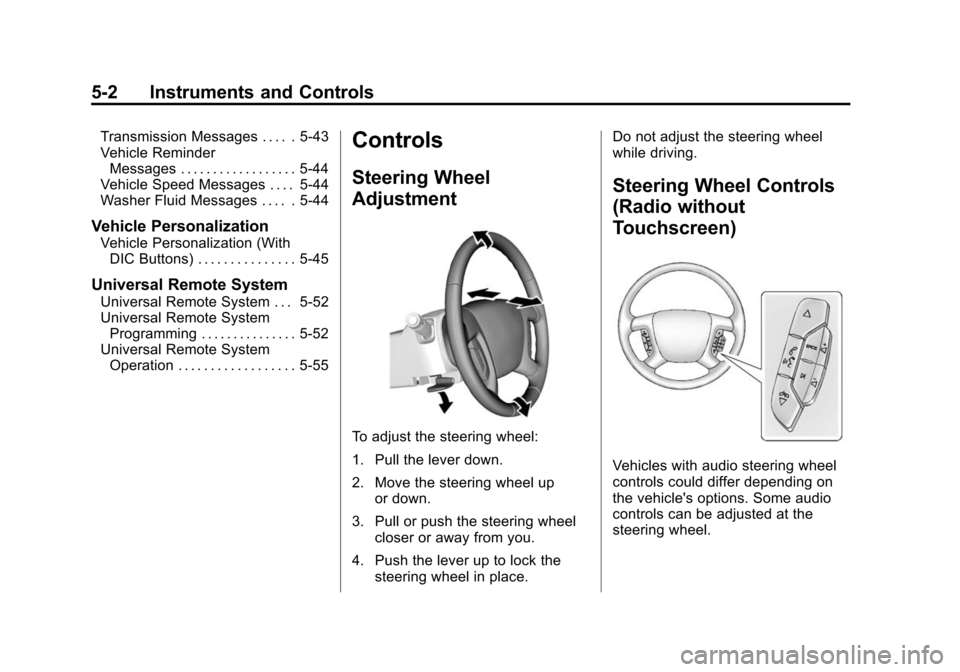
To adjust the steering wheel:
1. Pull the lever down.
2. Move the steering wheel up
or down.
3. Pull or push the steering wheel closer or away from you.
4. Push the lever up to lock the steering wheel in place. Do not adjust the steering wheel
while driving.
Steering Wheel Controls
(Radio without
Touchscreen)
Vehicles with audio steering wheel
controls could differ depending on
the vehicle's options. Some audio
controls can be adjusted at the
steering wheel.
Page 124 of 434
Black plate (6,1)Chevrolet Traverse Owner Manual (GMNA-Localizing-U.S./Canada/Mexico-
7576032) - 2015 - CRC - 8/19/14
5-6 Instruments and Controls
Release the button when enough
fluid has been sprayed on the
window. The rear wiper will run a
few more cycles after it is released.
If the rear wiper function was
already on prior to pressing the
wash button, it stays on until the
wiper button is pressed again.
The rear window washer uses the
same fluid that is in the windshield
washer reservoir. SeeWasher Fluid
on page 10-19.
Compass
Your vehicle may have a compass
in the Driver Information Center
(DIC). See Driver Information
Center (DIC) (With DIC Buttons) on
page 5-25 orDriver Information
Center (DIC) (Without DIC Buttons)
on page 5-31 for more information
about the DIC. Compass Zone
The zone is set to zone eight upon
leaving the factory. Your dealer will
set the correct zone for your
location.
Under certain circumstances, such
as during a long distance
cross-country trip or moving to a
new state or province, it will be
necessary to compensate for
compass variance by resetting the
zone through the DIC if the zone is
not set correctly.
Compass variance is the difference
between the earth's magnetic north
and true geographic north. If the
compass is not set to the zone
where you live, the compass may
give false readings. The compass
must be set to the variance zone in
which the vehicle is traveling.
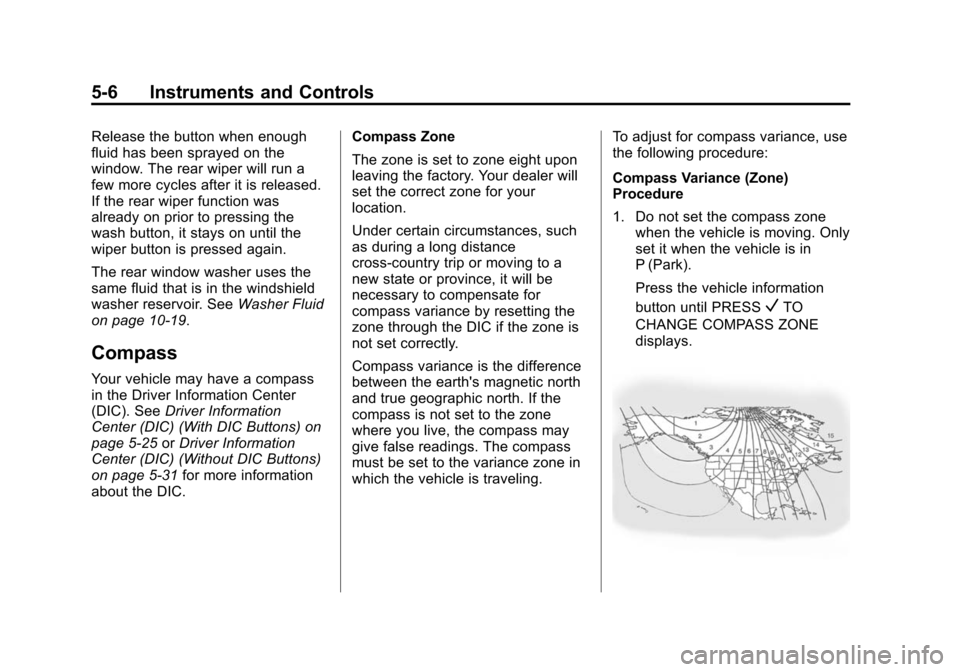
To adjust for compass variance, use
the following procedure:
Compass Variance (Zone)
Procedure
1. Do not set the compass zone
when the vehicle is moving. Only
set it when the vehicle is in
P (Park).
Press the vehicle information
button until PRESS
VTO
CHANGE COMPASS ZONE
displays.
Page 143 of 434
Black plate (25,1)Chevrolet Traverse Owner Manual (GMNA-Localizing-U.S./Canada/Mexico-
7576032) - 2015 - CRC - 8/19/14
Instruments and Controls 5-25
For information regarding this light
and the vehicle's security system,
seeVehicle Alarm System on
page 2-12.
High-Beam On Light
This light comes on when the
high-beam headlamps are in use.
See Headlamp High/Low-Beam
Changer on page 6-2 for more
information.
Cruise Control Light
This light comes on when the cruise
control is set.
This light goes out when the cruise
control is canceled. See Cruise
Control on page 9-30.
Information Displays
Driver Information Center
(DIC) (With DIC Buttons)
If your vehicle has DIC buttons, the
information below explains the
operation of this system.
The DIC displays information about
your vehicle. It also displays
warning messages if a system
problem is detected.
All messages will appear in the DIC
display at the top of the instrument
cluster.
The DIC comes on when the ignition
is on. After a short delay, the DIC
will display the information that was
last displayed before the engine
was turned off.
The DIC also displays a shift lever
position indicator on the bottom line
of the display. See Automatic
Transmission on page 9-22.
Page 144 of 434
Black plate (26,1)Chevrolet Traverse Owner Manual (GMNA-Localizing-U.S./Canada/Mexico-
7576032) - 2015 - CRC - 8/19/14
5-26 Instruments and Controls
The outside air temperature and
compass, if equipped, also display
on the DIC when viewing the trip
and fuel information. The outside air
temperature automatically appears
in the top right corner of the DIC
display. If there is a problem with
the system that controls the
temperature display, the numbers
will be replaced with dashes. If this
occurs, have the vehicle serviced.
The compass will be shown in the
bottom right corner of the DIC
display. SeeCompass on page 5-6.
The DIC also allows some features
to be customized. See Vehicle
Personalization (With DIC Buttons)
on page 5-45.
If your vehicle has DIC buttons, you
can also use the trip odometer reset
stem to view the odometer and trip
odometers.
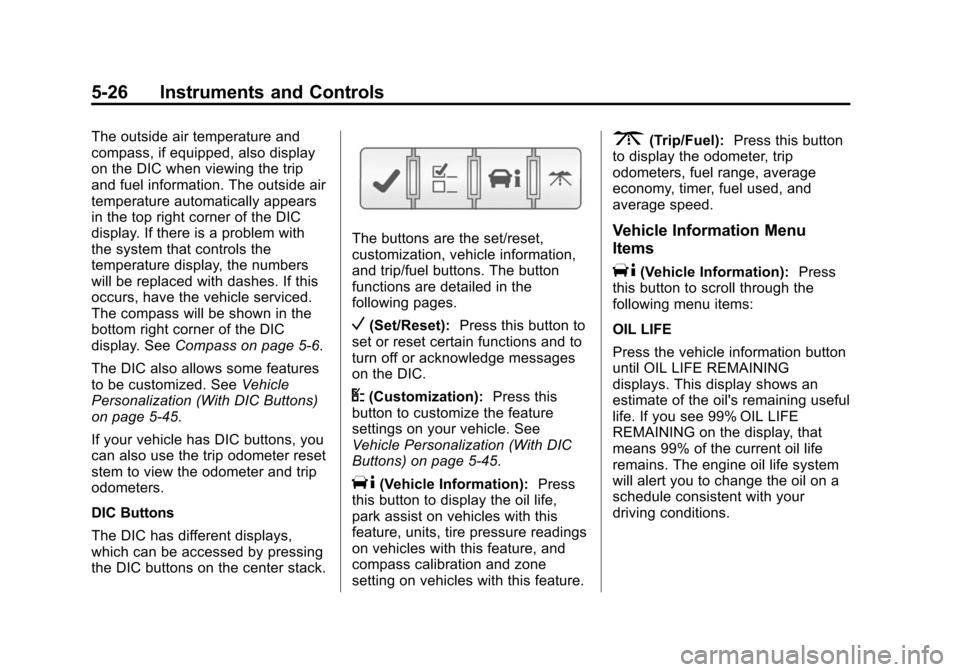
DIC Buttons
The DIC has different displays,
which can be accessed by pressing
the DIC buttons on the center stack.
The buttons are the set/reset,
customization, vehicle information,
and trip/fuel buttons. The button
functions are detailed in the
following pages.
V(Set/Reset): Press this button to
set or reset certain functions and to
turn off or acknowledge messages
on the DIC.
U(Customization): Press this
button to customize the feature
settings on your vehicle. See
Vehicle Personalization (With DIC
Buttons) on page 5-45.
T(Vehicle Information): Press
this button to display the oil life,
park assist on vehicles with this
feature, units, tire pressure readings
on vehicles with this feature, and
compass calibration and zone
setting on vehicles with this feature.
3(Trip/Fuel): Press this button
to display the odometer, trip
odometers, fuel range, average
economy, timer, fuel used, and
average speed.
Vehicle Information Menu
Items
T(Vehicle Information): Press
this button to scroll through the
following menu items:
OIL LIFE
Press the vehicle information button
until OIL LIFE REMAINING
displays. This display shows an
estimate of the oil's remaining useful
life. If you see 99% OIL LIFE
REMAINING on the display, that
means 99% of the current oil life
remains. The engine oil life system
will alert you to change the oil on a
schedule consistent with your
driving conditions.
Page 149 of 434
Black plate (31,1)Chevrolet Traverse Owner Manual (GMNA-Localizing-U.S./Canada/Mexico-
7576032) - 2015 - CRC - 8/19/14
Instruments and Controls 5-31
This average is calculated based on
the various vehicle speeds recorded
since the last reset of this value. To
reset the value to zero, press and
hold the set/reset button.
Blank Display
This display shows no information.
Driver Information Center
(DIC) (Without DIC
Buttons)
If your vehicle does not have DIC
buttons, the information below
explains the operation of this
system.
The DIC has different displays,
which can be accessed by pressing
the trip odometer reset stem on the
instrument cluster. Pressing the trip
odometer reset stem will also turn
off, or acknowledge, DIC messages.
The DIC displays trip and vehicle
system information, and warning
messages if a system problem is
detected.If your vehicle does not have DIC
buttons, you can use the trip
odometer reset stem to view the
following displays: odometer, trip
odometers, oil life, park assist menu
for vehicles with the Rear Parking
Assist (RPA) system, units, and
display language.
If your vehicle has DIC buttons, you
can use the trip odometer reset
stem to view the following displays:
odometer and trip odometers.Trip Odometer Reset Stem
Menu Items
ODOMETER
Press the trip odometer reset stem
until ODOMETER displays. This
display shows the distance the
vehicle has been driven in either
kilometers (km) or miles (mi).
To switch between English and
metric measurements, see
“UNITS”
later in this section. TRIP A or TRIP B
Press the trip odometer reset stem
until TRIP A or TRIP B displays. This
display shows the current distance
traveled in either kilometers (km) or
miles (mi) since the last reset for
each trip odometer. Both trip
odometers can be used at the
same time.
Each trip odometer can be reset to
zero separately by pressing and
holding the trip odometer reset stem
while the desired trip odometer is
displayed.
The trip odometer has a feature
called the retroactive reset. This can
be used to set the trip odometer to
the number of kilometers (miles)
driven since the ignition was last
turned on. This can be used if the
trip odometer is not reset at the
beginning of the trip.
To use the retroactive reset feature,
press and hold the trip odometer
reset stem for at least four seconds.
The trip odometer will display the
number of kilometers (km) or