instrument CHEVROLET TRAVERSE 2017 1.G Owners Manual
[x] Cancel search | Manufacturer: CHEVROLET, Model Year: 2017, Model line: TRAVERSE, Model: CHEVROLET TRAVERSE 2017 1.GPages: 394, PDF Size: 6.47 MB
Page 264 of 394
Chevrolet Traverse Owner Manual (GMNA-Localizing-U.S./Canada/Mexico-
9955676) - 2017 - crc - 4/1/16
Driving and Operating 263
Safety Chains
Always attach chains between the
vehicle and the trailer. Cross the
safety chains under the tongue of
the trailer to help prevent the tongue
from contacting the road if it
becomes separated from the hitch.
Always leave just enough slack so
the rig can turn. Never allow safety
chains to drag on the ground.
Trailer Brakes
A loaded trailer that weighs more
than 450 kg (1,000 lb) needs to have
its own brake system that is
adequate for the weight of the
trailer. Be sure to read and follow
the instructions for the trailer brakes
so they are installed, adjusted, and
maintained properly.
Because the vehicle has antilock
brakes, do not try to tap into the
vehicle's hydraulic brake system.
If you do, both brake systems will
not work well, or at all.
Trailer Wiring Harness
Basic Trailer Wiring
The trailer wiring harness, with a
seven-pin connector, is located at
the rear of the vehicle and is tied to
the vehicle's frame. The harness
connector can be plugged into a
seven-pin universal heavy-duty
trailer connector available through
your dealer.
Use only a round, seven-wire
connector with flat blade terminals
meeting SAE J2863 specifications
for proper electrical connectivity.
The seven-wire harness contains
the following trailer circuits:
.Yellow: Left Stop/Turn Signal
. Dark Green: Right Stop/Turn
Signal
. Brown: Taillamps
. Black: Ground
. Light Green: Back-up Lamps
. Red/Black: Battery Feed
. Dark Blue: Trailer Brake* *The fuse for this circuit is installed
in the underhood electrical center,
but the wires are not connected.
They should be connected by your
dealer or a qualified service center.
If the back-up lamp circuit is not
functional, contact your dealer.
To help charge a remote
(non-vehicle) battery, press the Tow/
Haul Mode button at the end of the
shift lever. If the trailer is too light for
Tow/Haul Mode, turn on the
headlamps to help charge the
battery.
Electric Trailer Brake Control
Wiring Provisions
These wiring provisions for an
electric trailer brake controller are
included with the vehicle as part of
the trailer wiring package. The
instrument panel contains blunt cut
wires above the parking brake
assembly for the electric trailer
brake controller. The harness
contains the following wires:
.
Red/Black: Power Supply
. White: Brake Switch Signal
Page 266 of 394
Chevrolet Traverse Owner Manual (GMNA-Localizing-U.S./Canada/Mexico-
9955676) - 2017 - crc - 3/29/16
Vehicle Care 265
Vehicle Care
General Information
General Information . . . . . . . . . . 266
California Proposition65 Warning . . . . . . . . . . . . . . . . . 266
California Perchlorate Materials Requirements . . . . . 266
Accessories and Modifications . . . . . . . . . . . . . . . . 266
Vehicle Checks
Doing Your OwnService Work . . . . . . . . . . . . . . . 267
Hood . . . . . . . . . . . . . . . . . . . . . . . . . 268
Engine Compartment Overview . . . . . . . . . . . . . . . . . . . . 269
Engine Cover . . . . . . . . . . . . . . . . . 270
Engine Oil . . . . . . . . . . . . . . . . . . . . 270
Engine Oil Life System . . . . . . . 273
Automatic Transmission Fluid . . . . . . . . . . . . . . . . . . . . . . . . 274
Engine Air Cleaner/Filter . . . . . . 274
Cooling System . . . . . . . . . . . . . . 275
Engine Coolant . . . . . . . . . . . . . . . 276
Engine Overheating . . . . . . . . . . 279
Overheated Engine Protection Operating Mode . . . . . . . . . . . . . 281
Power Steering Fluid . . . . . . . . . 281
Washer Fluid . . . . . . . . . . . . . . . . . 282 Brakes . . . . . . . . . . . . . . . . . . . . . . . 283
Brake Fluid . . . . . . . . . . . . . . . . . . . 283
Battery - North America . . . . . . 284
All-Wheel Drive . . . . . . . . . . . . . . . 285
Starter Switch Check . . . . . . . . . 285
Automatic Transmission Shift
Lock Control Function
Check . . . . . . . . . . . . . . . . . . . . . . . 286
Ignition Transmission Lock Check . . . . . . . . . . . . . . . . . . . . . . . 286
Park Brake and P (Park) Mechanism Check . . . . . . . . . . 286
Wiper Blade Replacement . . . . 287Headlamp Aiming
Headlamp Aiming . . . . . . . . . . . . 288
Bulb Replacement
Bulb Replacement . . . . . . . . . . . . 288
Taillamps, Turn Signal, and Stoplamps . . . . . . . . . . . . . . . . . . 288
License Plate Lamp . . . . . . . . . . 289
Replacement Bulbs . . . . . . . . . . . 289
Electrical System
High Voltage Devices and Wiring . . . . . . . . . . . . . . . . . . . . . . . 290
Electrical System Overload . . . 290
Fuses and Circuit Breakers . . . 291
Engine Compartment Fuse Block . . . . . . . . . . . . . . . . . . . . . . . . 291 Instrument Panel Fuse
Block . . . . . . . . . . . . . . . . . . . . . . . . 294
Wheels and Tires
Tires . . . . . . . . . . . . . . . . . . . . . . . . . . 297
All-Season Tires . . . . . . . . . . . . . . 297
Winter Tires . . . . . . . . . . . . . . . . . . 298
Summer Tires . . . . . . . . . . . . . . . . 298
Tire Sidewall Labeling . . . . . . . . 299
Tire Designations . . . . . . . . . . . . . 301
Tire Terminology andDefinitions . . . . . . . . . . . . . . . . . . 302
Tire Pressure . . . . . . . . . . . . . . . . . 304
Tire Pressure Monitor System . . . . . . . . . . . . . . . . . . . . . . 305
Tire Pressure Monitor Operation . . . . . . . . . . . . . . . . . . . 306
Tire Inspection . . . . . . . . . . . . . . . . 309
Tire Rotation . . . . . . . . . . . . . . . . . 310
When It Is Time for New Tires . . . . . . . . . . . . . . . . . . . . . . . . 311
Buying New Tires . . . . . . . . . . . . . 311
Different Size Tires and Wheels . . . . . . . . . . . . . . . . . . . . . . 313
Uniform Tire Quality Grading . . . . . . . . . . . . . . . . . . . . . 313
Wheel Alignment and Tire Balance . . . . . . . . . . . . . . . . . . . . . 315
Wheel Replacement . . . . . . . . . . 315
Tire Chains . . . . . . . . . . . . . . . . . . . 316
If a Tire Goes Flat . . . . . . . . . . . . 316
Page 269 of 394
Chevrolet Traverse Owner Manual (GMNA-Localizing-U.S./Canada/Mexico-
9955676) - 2017 - crc - 3/29/16
268 Vehicle Care
Keep a record with all parts receipts
and list the mileage and the date of
any service work performed. See
Maintenance Records0355.
Caution
Even small amounts of
contamination can cause damage
to vehicle systems. Do not allow
contaminants to contact the fluids,
reservoir caps, or dipsticks.
Hood
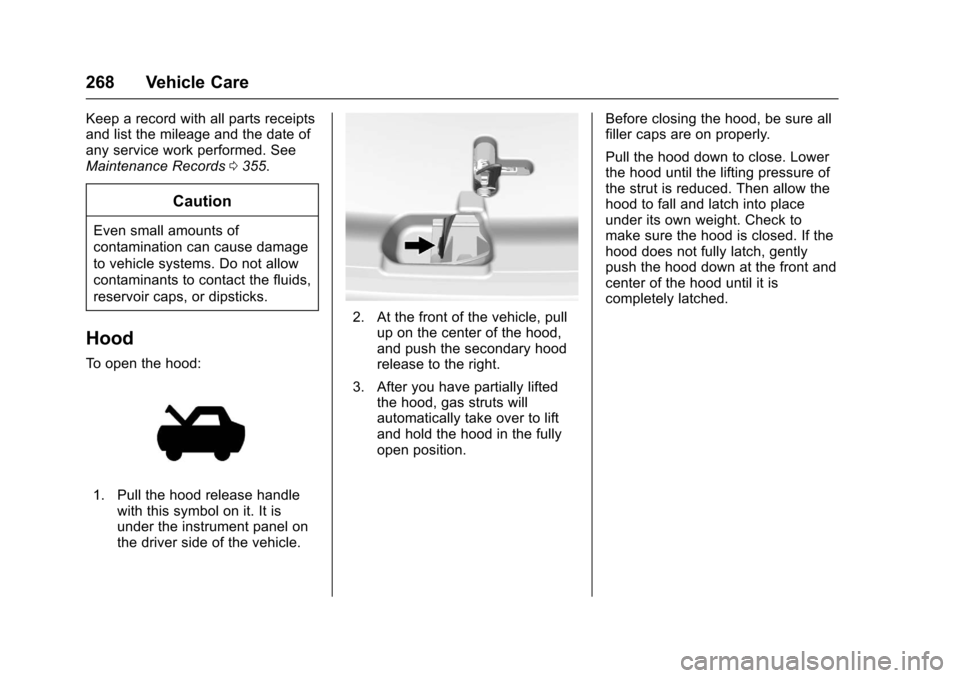
To open the hood:
1. Pull the hood release handle
with this symbol on it. It is
under the instrument panel on
the driver side of the vehicle.
2. At the front of the vehicle, pullup on the center of the hood,
and push the secondary hood
release to the right.
3. After you have partially lifted the hood, gas struts will
automatically take over to lift
and hold the hood in the fully
open position. Before closing the hood, be sure all
filler caps are on properly.
Pull the hood down to close. Lower
the hood until the lifting pressure of
the strut is reduced. Then allow the
hood to fall and latch into place
under its own weight. Check to
make sure the hood is closed. If the
hood does not fully latch, gently
push the hood down at the front and
center of the hood until it is
completely latched.
Page 280 of 394
Chevrolet Traverse Owner Manual (GMNA-Localizing-U.S./Canada/Mexico-
9955676) - 2017 - crc - 3/29/16
Vehicle Care 279
If a hiss is heard, wait for that
to stop. A hiss means there is
still some pressure left in the
system.
3. Keep turning the pressure cap slowly and remove it.
4. Fill the radiator to the base of the filler neck with the proper
DEX-COOL coolant mixture.
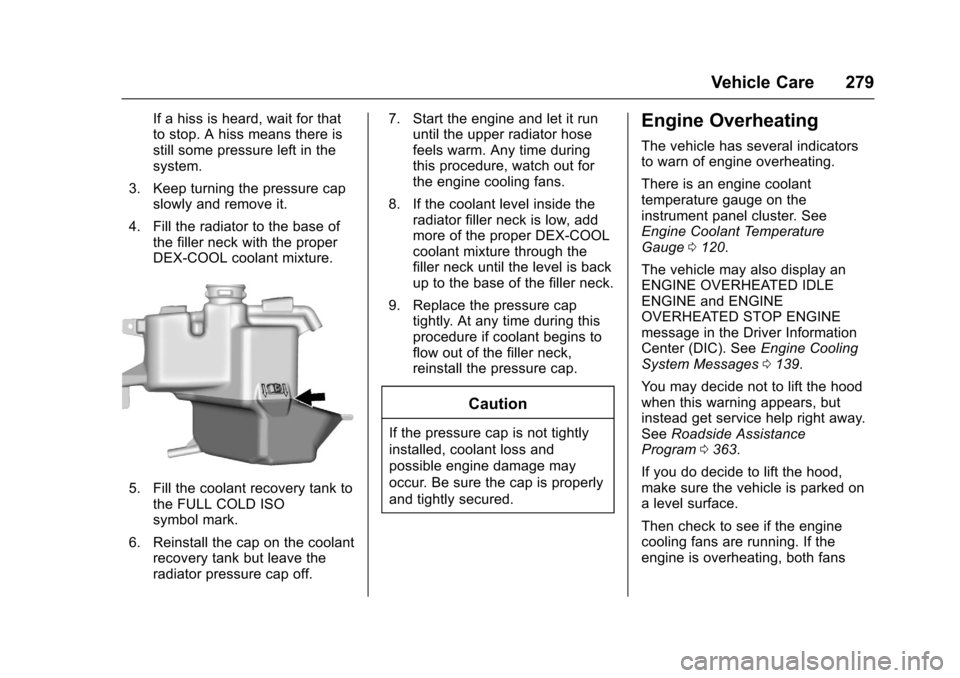
5. Fill the coolant recovery tank tothe FULL COLD ISO
symbol mark.
6. Reinstall the cap on the coolant recovery tank but leave the
radiator pressure cap off. 7. Start the engine and let it run
until the upper radiator hose
feels warm. Any time during
this procedure, watch out for
the engine cooling fans.
8. If the coolant level inside the radiator filler neck is low, add
more of the proper DEX-COOL
coolant mixture through the
filler neck until the level is back
up to the base of the filler neck.
9. Replace the pressure cap tightly. At any time during this
procedure if coolant begins to
flow out of the filler neck,
reinstall the pressure cap.
Caution
If the pressure cap is not tightly
installed, coolant loss and
possible engine damage may
occur. Be sure the cap is properly
and tightly secured.
Engine Overheating
The vehicle has several indicators
to warn of engine overheating.
There is an engine coolant
temperature gauge on the
instrument panel cluster. See
Engine Coolant Temperature
Gauge 0120.
The vehicle may also display an
ENGINE OVERHEATED IDLE
ENGINE and ENGINE
OVERHEATED STOP ENGINE
message in the Driver Information
Center (DIC). See Engine Cooling
System Messages 0139.
You may decide not to lift the hood
when this warning appears, but
instead get service help right away.
See Roadside Assistance
Program 0363.
If you do decide to lift the hood,
make sure the vehicle is parked on
a level surface.
Then check to see if the engine
cooling fans are running. If the
engine is overheating, both fans
Page 295 of 394

Chevrolet Traverse Owner Manual (GMNA-Localizing-U.S./Canada/Mexico-
9955676) - 2017 - crc - 3/29/16
294 Vehicle Care
RelaysUsage
HID/
LO BEAM Low-beam HID
headlamps
HORN Horn IGN Ignition –main
LT TRLR
STOP/TRN Left trailer
stoplamp/Turn
signal lamp
PRK LAMP Parking lamps PWR/TRN Powertrain
RR DEFOG Rear window defogger
RT LO BEAM Right low-beam headlamp
RT TRLR
STOP/TRN Right trailer
stoplamp/Turn
signal lamp
STOP LAMP Stoplamps TRLR
BCK/UP Trailer reverse
lamps
WPR Windshield wiper
WPR HI Windshield wiper –
high speedInstrument Panel Fuse
Block
The instrument panel fuse block is
under the instrument panel on the
passenger side of the vehicle. Pull
down on the cover to access the
fuse block.
Fuse Side
Page 308 of 394
Chevrolet Traverse Owner Manual (GMNA-Localizing-U.S./Canada/Mexico-
9955676) - 2017 - crc - 3/29/16
Vehicle Care 307
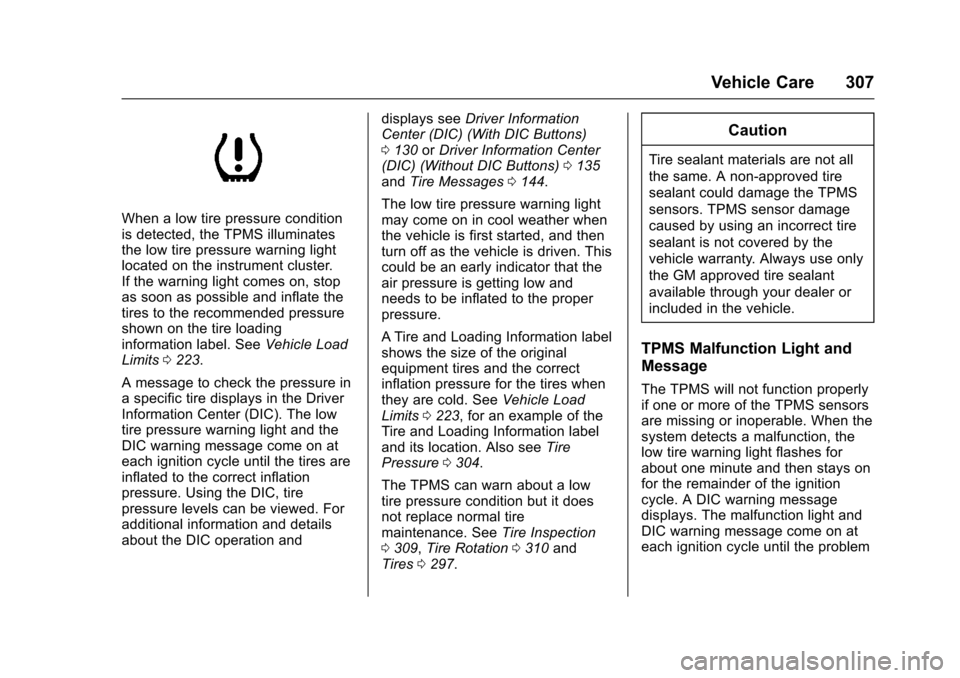
When a low tire pressure condition
is detected, the TPMS illuminates
the low tire pressure warning light
located on the instrument cluster.
If the warning light comes on, stop
as soon as possible and inflate the
tires to the recommended pressure
shown on the tire loading
information label. SeeVehicle Load
Limits 0223.
A message to check the pressure in
a specific tire displays in the Driver
Information Center (DIC). The low
tire pressure warning light and the
DIC warning message come on at
each ignition cycle until the tires are
inflated to the correct inflation
pressure. Using the DIC, tire
pressure levels can be viewed. For
additional information and details
about the DIC operation and displays see
Driver Information
Center (DIC) (With DIC Buttons)
0 130 orDriver Information Center
(DIC) (Without DIC Buttons) 0135
and Tire Messages 0144.
The low tire pressure warning light
may come on in cool weather when
the vehicle is first started, and then
turn off as the vehicle is driven. This
could be an early indicator that the
air pressure is getting low and
needs to be inflated to the proper
pressure.
A Tire and Loading Information label
shows the size of the original
equipment tires and the correct
inflation pressure for the tires when
they are cold. See Vehicle Load
Limits 0223, for an example of the
Tire and Loading Information label
and its location. Also see Tire
Pressure 0304.
The TPMS can warn about a low
tire pressure condition but it does
not replace normal tire
maintenance. See Tire Inspection
0 309, Tire Rotation 0310 and
Tires 0297.
Caution
Tire sealant materials are not all
the same. A non-approved tire
sealant could damage the TPMS
sensors. TPMS sensor damage
caused by using an incorrect tire
sealant is not covered by the
vehicle warranty. Always use only
the GM approved tire sealant
available through your dealer or
included in the vehicle.
TPMS Malfunction Light and
Message
The TPMS will not function properly
if one or more of the TPMS sensors
are missing or inoperable. When the
system detects a malfunction, the
low tire warning light flashes for
about one minute and then stays on
for the remainder of the ignition
cycle. A DIC warning message
displays. The malfunction light and
DIC warning message come on at
each ignition cycle until the problem
Page 339 of 394
Chevrolet Traverse Owner Manual (GMNA-Localizing-U.S./Canada/Mexico-
9955676) - 2017 - crc - 3/29/16
338 Vehicle Care
Interior Care
To prevent dirt particle abrasions,
regularly clean the vehicle's interior.
Immediately remove any soils.
Newspapers or dark garments can
transfer color to the vehicle’s
interior.
Use a soft bristle brush to remove
dust from knobs and crevices on the
instrument cluster. Using a mild
soap solution, immediately remove
hand lotions, sunscreen, and insect
repellent from all interior surfaces or
permanent damage may result.
Use cleaners specifically designed
for the surfaces being cleaned to
prevent permanent damage. Apply
all cleaners directly to the cleaning
cloth. Do not spray cleaners on any
switches or controls. Remove
cleaners quickly.
Before using cleaners, read and
follow all safety instructions on the
label. While cleaning the interior,
open the doors and windows to get
proper ventilation.To prevent damage, do not clean
the interior using the following
cleaners or techniques:
.
Never use a razor or any other
sharp object to remove soil from
any interior surface.
. Never use a brush with stiff
bristles.
. Never rub any surface
aggressively or with too much
pressure.
. Do not use laundry detergents or
dishwashing soaps with
degreasers. For liquid cleaners,
use approximately 20 drops per
3.8 L (1 gal) of water.
A concentrated soap solution will
create streaks and attract dirt.
Do not use solutions that contain
strong or caustic soap.
. Do not heavily saturate the
upholstery when cleaning.
. Do not use solvents or cleaners
containing solvents.
Interior Glass
To clean, use a terry cloth fabric
dampened with water. Wipe droplets
left behind with a clean dry cloth.
If necessary, use a commercial
glass cleaner after cleaning with
plain water.
Caution
To prevent scratching, never use
abrasive cleaners on automotive
glass. Abrasive cleaners or
aggressive cleaning may damage
the rear window defogger.
Cleaning the windshield with water
during the first three to six months
of ownership will reduce tendency
to fog.
Speaker Covers
Vacuum around a speaker cover
gently, so that the speaker will not
be damaged. Clean spots with water
and mild soap.
Coated Moldings
Coated moldings should be cleaned.
Page 341 of 394
Chevrolet Traverse Owner Manual (GMNA-Localizing-U.S./Canada/Mexico-
9955676) - 2017 - crc - 3/29/16
340 Vehicle Care
Instrument Panel, Leather,
Vinyl, Other Plastic Surfaces,
Low Gloss Paint Surfaces, and
Natural Open Pore Wood
Surfaces
Use a soft microfiber cloth
dampened with water to remove
dust and loose dirt. For a more
thorough cleaning, use a soft
microfiber cloth dampened with a
mild soap solution.
Caution
Soaking or saturating leather,
especially perforated leather, as
well as other interior surfaces,
may cause permanent damage.
Wipe excess moisture from these
surfaces after cleaning and allow
them to dry naturally. Never use
heat, steam, or spot removers. Do
not use cleaners that contain
silicone or wax-based products.
Cleaners containing these
solvents can permanently change(Continued)
Caution (Continued)
the appearance and feel of
leather or soft trim, and are not
recommended.
Do not use cleaners that increase
gloss, especially on the instrument
panel. Reflected glare can decrease
visibility through the windshield
under certain conditions.
Caution
Use of air fresheners may cause
permanent damage to plastics
and painted surfaces. If an air
freshener comes in contact with
any plastic or painted surface in
the vehicle, blot immediately and
clean with a soft cloth dampened
with a mild soap solution.
Damage caused by air fresheners
would not be covered by the
vehicle warranty.
Cargo Cover and
Convenience Net
Wash with warm water and mild
detergent. Do not use chlorine
bleach. Rinse with cold water, and
then dry completely.
Care of Safety Belts
Keep belts clean and dry.
{Warning
Do not bleach or dye safety belt
webbing. It may severely weaken
the webbing. In a crash, they
might not be able to provide
adequate protection. Clean and
rinse safety belt webbing only
with mild soap and lukewarm
water. Allow the webbing to dry.
Page 352 of 394
Chevrolet Traverse Owner Manual (GMNA-Localizing-U.S./Canada/Mexico-
9955676) - 2017 - crc - 3/29/16
Service and Maintenance 351
.To avoid break-down or failure to
start the vehicle, maintain a
battery with full cranking power.
. Trained dealer technicians have
the diagnostic equipment to test
the battery and ensure that the
connections and cables are
corrosion-free.
Belts
. Belts may need replacing if they
squeak or show signs of
cracking or splitting.
. Trained dealer technicians have
access to tools and equipment
to inspect the belts and
recommend adjustment or
replacement when necessary.
Brakes
Brakes stop the vehicle and are
crucial to safe driving.
. Signs of brake wear may include
chirping, grinding, or squealing
noises, or difficulty stopping. .
Trained dealer technicians have
access to tools and equipment
to inspect the brakes and
recommend quality parts
engineered for the vehicle.
Fluids
Proper fluid levels and approved
fluids protect the vehicle’s systems
and components. See
Recommended Fluids and
Lubricants 0353 for GM approved
fluids.
. Engine oil and windshield
washer fluid levels should be
checked at every fuel fill.
. Instrument cluster lights may
come on to indicate that fluids
may be low and need to be
filled.
Hoses
Hoses transport fluids and should
be regularly inspected to ensure
that there are no cracks or leaks.
With a multi-point inspection, your
dealer can inspect the hoses and
advise if replacement is needed. Lamps
Properly working headlamps,
taillamps, and brake lamps are
important to see and be seen on
the road.
.
Signs that the headlamps need
attention include dimming, failure
to light, cracking, or damage.
The brake lamps need to be
checked periodically to ensure
that they light when braking.
. With a multi-point inspection,
your dealer can check the lamps
and note any concerns.
Shocks and Struts
Shocks and struts help aid in control
for a smoother ride.
. Signs of wear may include
steering wheel vibration, bounce/
sway while braking, longer
stopping distance, or uneven
tire wear.
. As part of the multi-point
inspection, trained dealer
technicians can visually inspect
the shocks and struts for signs
Page 357 of 394
Chevrolet Traverse Owner Manual (GMNA-Localizing-U.S./Canada/Mexico-
9955676) - 2017 - crc - 3/29/16
356 Technical Data
Technical Data
Vehicle Identification
Vehicle IdentificationNumber (VIN) . . . . . . . . . . . . . . . 356
Service Parts Identification Label . . . . . . . . . . . . . . . . . . . . . . . . 356
Vehicle Data
Capacities andSpecifications . . . . . . . . . . . . . . . 357
Engine Drive Belt Routing . . . . 358
Vehicle Identification
Vehicle Identification
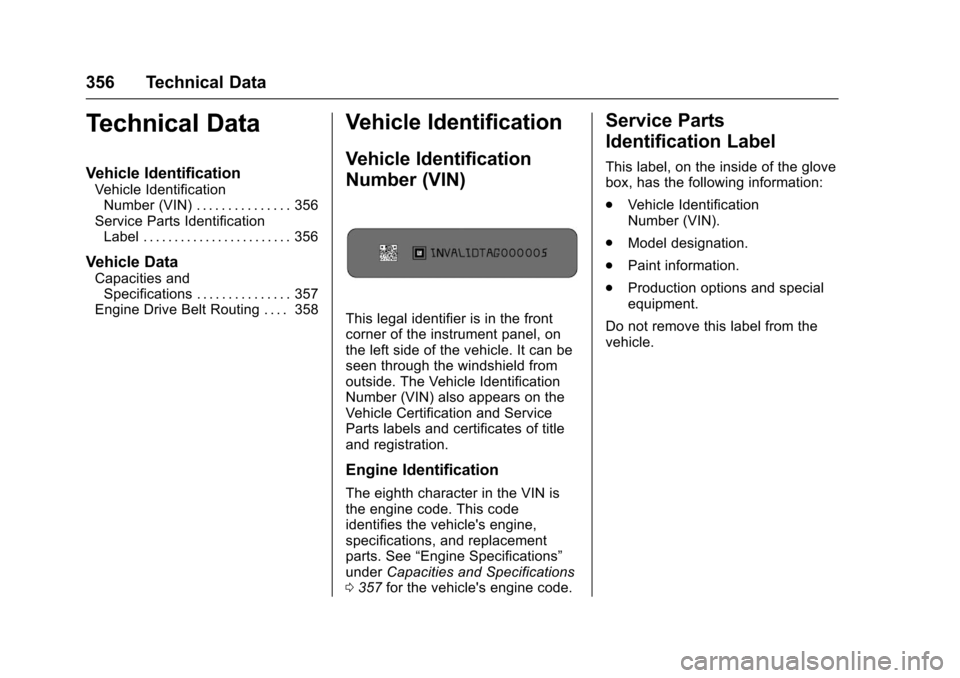
Number (VIN)
This legal identifier is in the front
corner of the instrument panel, on
the left side of the vehicle. It can be
seen through the windshield from
outside. The Vehicle Identification
Number (VIN) also appears on the
Vehicle Certification and Service
Parts labels and certificates of title
and registration.
Engine Identification
The eighth character in the VIN is
the engine code. This code
identifies the vehicle's engine,
specifications, and replacement
parts. See “Engine Specifications”
under Capacities and Specifications
0 357 for the vehicle's engine code.
Service Parts
Identification Label
This label, on the inside of the glove
box, has the following information:
.
Vehicle Identification
Number (VIN).
. Model designation.
. Paint information.
. Production options and special
equipment.
Do not remove this label from the
vehicle.