keyless entry CHEVROLET TRAVERSE 2018 Get To Know Guide
[x] Cancel search | Manufacturer: CHEVROLET, Model Year: 2018, Model line: TRAVERSE, Model: CHEVROLET TRAVERSE 2018Pages: 20, PDF Size: 3.53 MB
Page 4 of 20

4
KEYLESS ACCESS SYSTEMF
The Keyless Access System enables operation of the doors, ignition and l\
iftgate without removing the Remote Keyless Entry transmitter from a pocket or purse. Th\
e transmitter must be within 3 feet of a front door or the trunk.
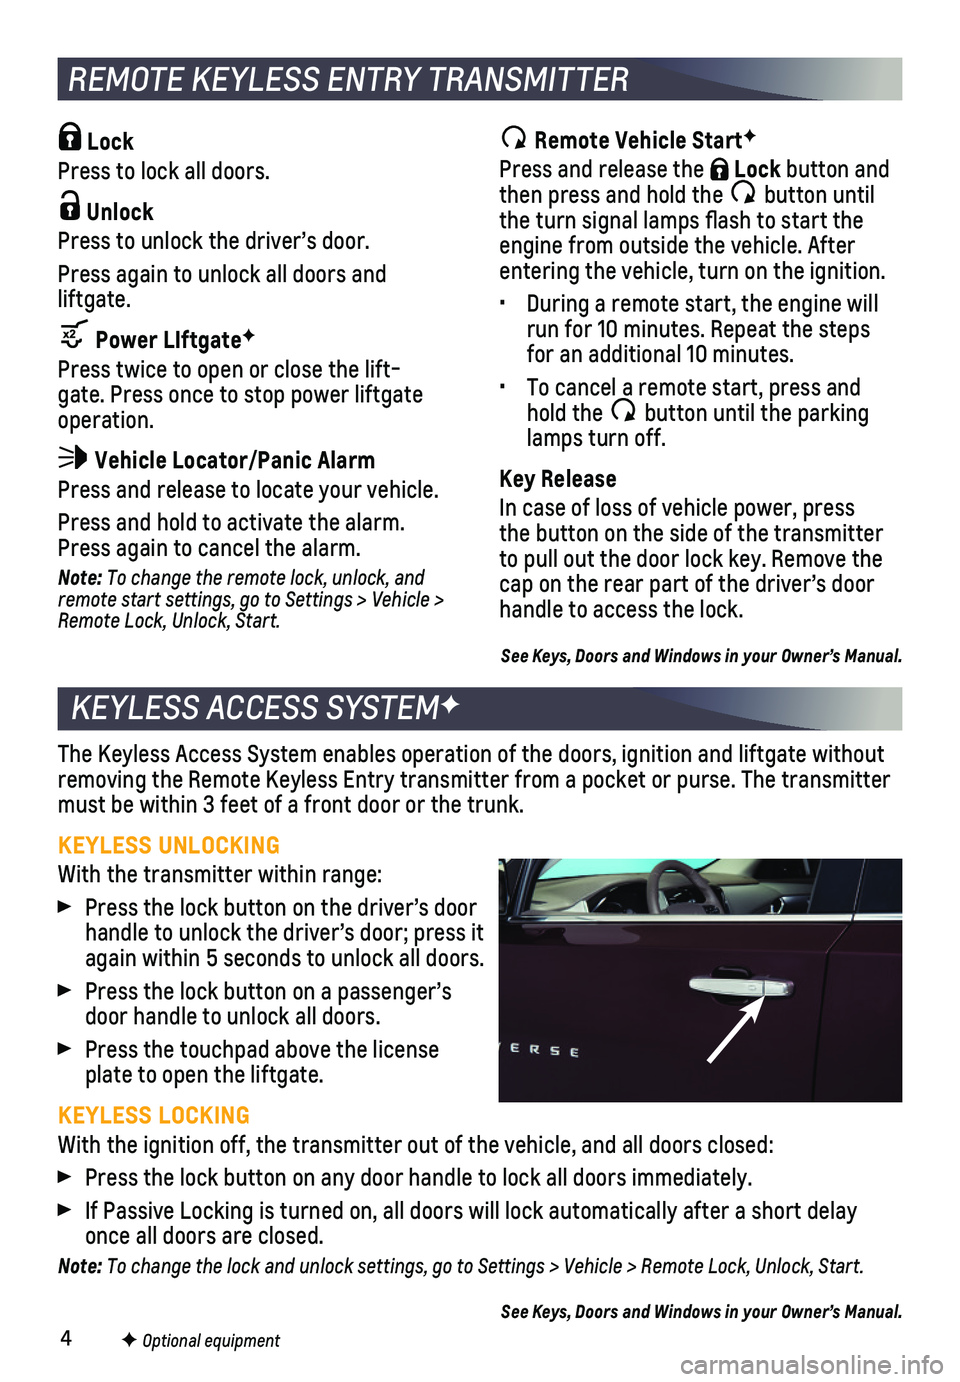
KEYLESS UNLOCKING
With the transmitter within range:
Press the lock button on the driver’s door handle to unlock the driver’s door; press it again within 5 seconds to unlock all doors.
Press the lock button on a passenger’s door handle to unlock all doors.
Press the touchpad above the license plate to open the liftgate.
KEYLESS LOCKING
With the ignition off, the transmitter out of the vehicle, and all doors\
closed:
Press the lock button on any door handle to lock all doors immediately.
If Passive Locking is turned on, all doors will lock automatically after\
a short delay once all doors are closed.
Note: To change the lock and unlock settings, go to Settings > Vehicle > Remote Lock, Unlock, Start.
See Keys, Doors and Windows in your Owner’s Manual.
REMOTE KEYLESS ENTRY TRANSMITTER
F Optional equipment
Lock
Press to lock all doors.
Unlock
Press to unlock the driver’s door.
Press again to unlock all doors and liftgate.
Power LIftgateF
Press twice to open or close the lift-gate. Press once to stop power liftgate operation.
Vehicle Locator/Panic Alarm
Press and release to locate your vehicle.
Press and hold to activate the alarm. Press again to cancel the alarm.
Note: To change the remote lock, unlock, and remote start settings, go to Settings > Vehicle > Remote Lock, Unlock, Start.
Remote Vehicle StartF
Press and release the Lock button and then press and hold the button until the turn signal lamps flash to start the engine from outside the vehicle. After entering the vehicle, turn on the ignition.
• During a remote start, the engine will run for 10 minutes. Repeat the steps for an additional 10 minutes.
• To cancel a remote start, press and hold the button until the parking lamps turn off.
Key Release
In case of loss of vehicle power, press the button on the side of the transmitter to pull out the door lock key. Remove the cap on the rear part of the driver’s door handle to access the lock.
See Keys, Doors and Windows in your Owner’s Manual.
Page 5 of 20

5
KEYLESS (PUSHBUTTON) START
AUTO ENGINE STOP/START OPERATION
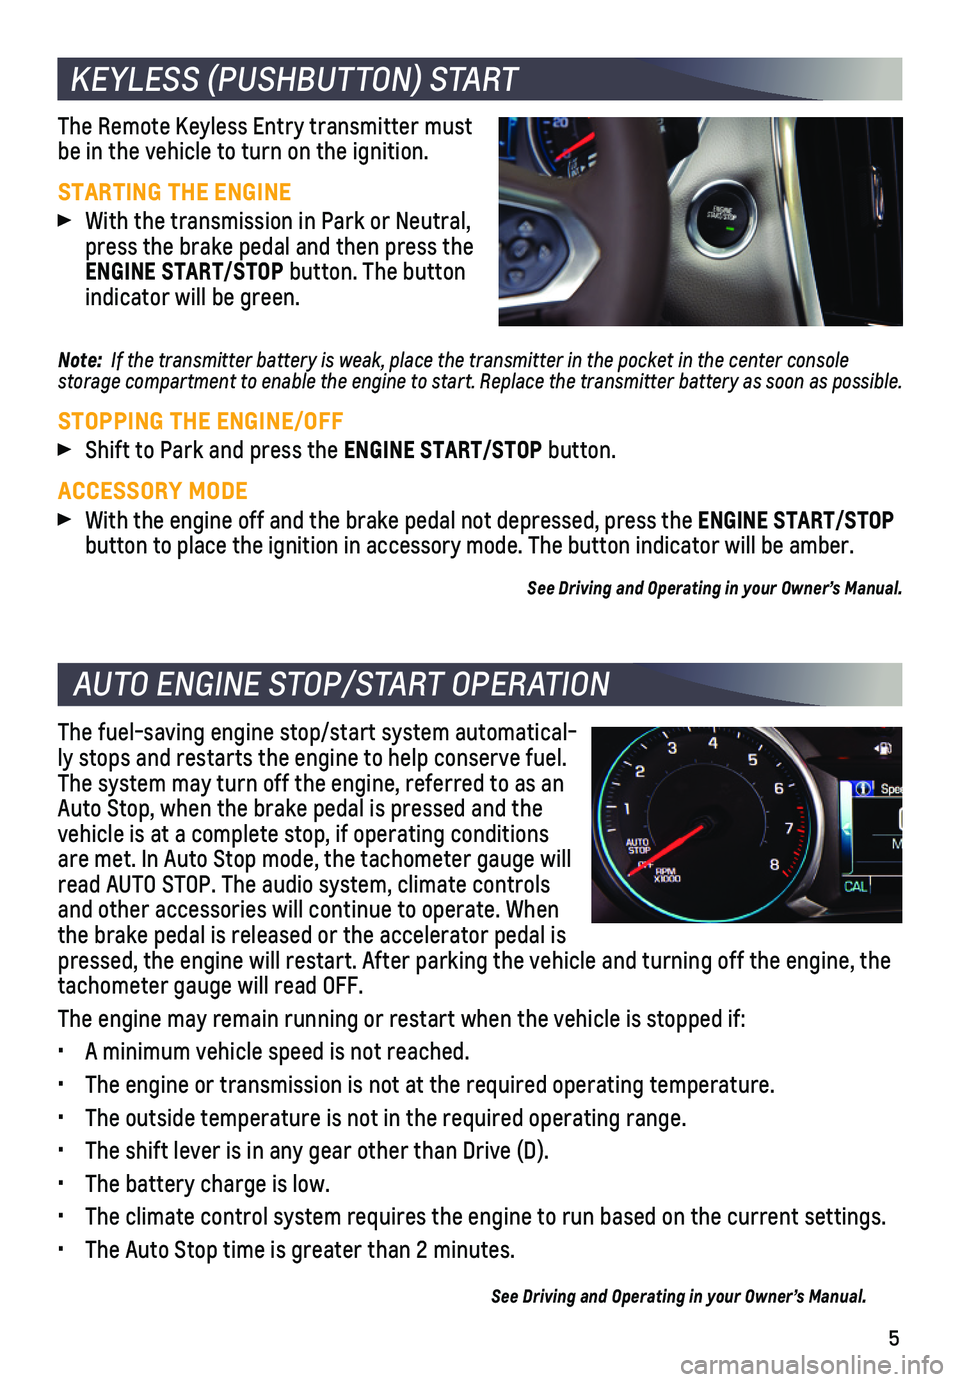
The Remote Keyless Entry transmitter must be in the vehicle to turn on the ignition.
STARTING THE ENGINE
With the transmission in Park or Neutral, press the brake pedal and then press the ENGINE START/STOP button. The button indicator will be green.
Note: If the transmitter battery is weak, place the transmitter in the pocket in the center console storage compartment to enable the engine to start. Replace the transmitter battery as soon a\
s possible.
STOPPING THE ENGINE/OFF
Shift to Park and press the ENGINE START/STOP button.
ACCESSORY MODE
With the engine off and the brake pedal not depressed, press the ENGINE START/STOP button to place the ignition in accessory mode. The button indicator wil\
l be amber.
See Driving and Operating in your Owner’s Manual.
The fuel-saving engine stop/start system automatical-ly stops and restarts the engine to help conserve fuel. The system may turn off the engine, referred to as an Auto Stop, when the brake pedal is pressed and the vehicle is at a complete stop, if operating conditions are met. In Auto Stop mode, the tachometer gauge will read AUTO STOP. The audio system, climate controls and other accessories will continue to operate. When the brake pedal is released or the accelerator pedal is pressed, the engine will restart. After parking the vehicle and turning \
off the engine, the tachometer gauge will read OFF.
The engine may remain running or restart when the vehicle is stopped if:\
• A minimum vehicle speed is not reached.
• The engine or transmission is not at the required operating temperature.\
• The outside temperature is not in the required operating range.
• The shift lever is in any gear other than Drive (D).
• The battery charge is low.
• The climate control system requires the engine to run based on the curre\
nt settings.
• The Auto Stop time is greater than 2 minutes.
See Driving and Operating in your Owner’s Manual.
Page 7 of 20

7F Optional equipment
REAR SEATS
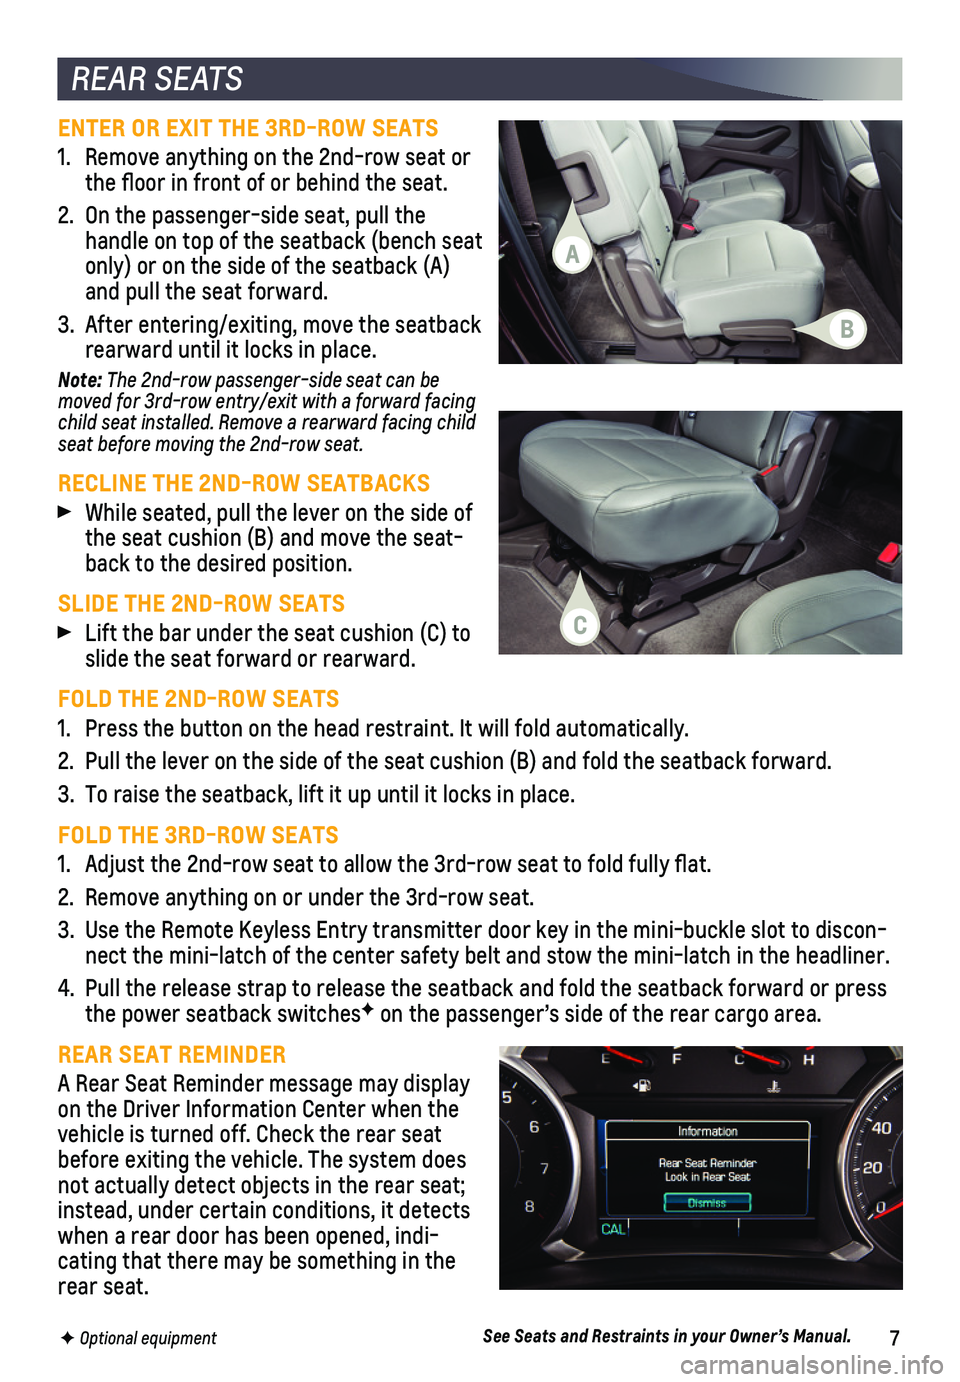
ENTER OR EXIT THE 3RD-ROW SEATS
1. Remove anything on the 2nd-row seat or the floor in front of or behind the seat.
2. On the passenger-side seat, pull the handle on top of the seatback (bench seat only) or on the side of the seatback (A) and pull the seat forward.
3. After entering/exiting, move the seatback rearward until it locks in place.
Note: The 2nd-row passenger-side seat can be moved for 3rd-row entry/exit with a forward facing child seat installed. Remove a rearward facing child seat before moving the 2nd-row seat.
RECLINE THE 2ND-ROW SEATBACKS
While seated, pull the lever on the side of the seat cushion (B) and move the seat-back to the desired position.
SLIDE THE 2ND-ROW SEATS
Lift the bar under the seat cushion (C) to slide the seat forward or rearward.
FOLD THE 2ND-ROW SEATS
1. Press the button on the head restraint. It will fold automatically.
2. Pull the lever on the side of the seat cushion (B) and fold the seatba\
ck forward.
3. To raise the seatback, lift it up until it locks in place.
FOLD THE 3RD-ROW SEATS
1. Adjust the 2nd-row seat to allow the 3rd-row seat to fold fully flat.
2. Remove anything on or under the 3rd-row seat.
3. Use the Remote Keyless Entry transmitter door key in the mini-buckle slo\
t to discon-nect the mini-latch of the center safety belt and stow the mini-latch in\
the headliner.
4. Pull the release strap to release the seatback and fold the seatback for\
ward or press the power seatback switchesF on the passenger’s side of the rear cargo area.
REAR SEAT REMINDER
A Rear Seat Reminder message may display on the Driver Information Center when the vehicle is turned off. Check the rear seat before exiting the vehicle. The system does not actually detect objects in the rear seat; instead, under certain conditions, it detects when a rear door has been opened, indi-cating that there may be something in the rear seat.
See Seats and Restraints in your Owner’s Manual.
A
B
C
Page 8 of 20

8
UNIVERSAL REMOTE SYSTEMF
The Universal Remote System on the overhead console enables your vehicle\
to control 3 different devices, ranging from garage doors and gates to home lightin\
g. Go to www.homelink.com for detailed videos and instructions on how to program the Universal Remote System. For additional assistance, call 1-800-355-3515.\
See Instruments and Controls in your Owner’s Manual.
POWER LIFTGATEF
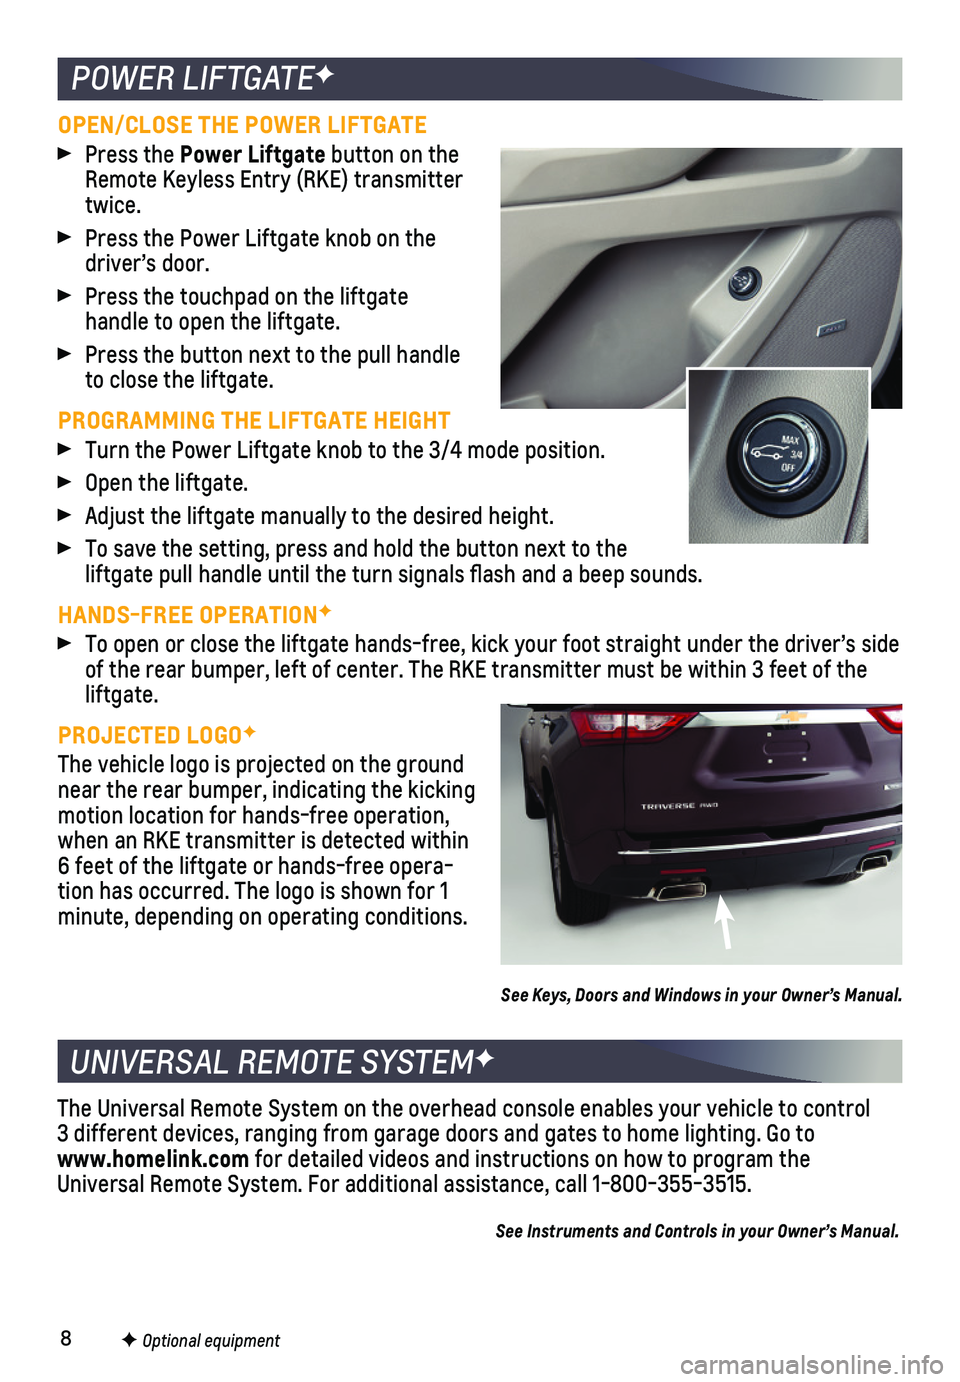
OPEN/CLOSE THE POWER LIFTGATE
Press the Power Liftgate button on the Remote Keyless Entry (RKE) transmitter twice.
Press the Power Liftgate knob on the driver’s door.
Press the touchpad on the liftgate
handle to open the liftgate.
Press the button next to the pull handle to close the liftgate.
PROGRAMMING THE LIFTGATE HEIGHT
Turn the Power Liftgate knob to the 3/4 mode position.
Open the liftgate.
Adjust the liftgate manually to the desired height.
To save the setting, press and hold the button next to the liftgate pull handle until the turn signals flash and a beep sounds.
HANDS-FREE OPERATIONF
To open or close the liftgate hands-free, kick your foot straight under \
the driver’s side of the rear bumper, left of center. The RKE transmitter must be within 3\
feet of the liftgate.
PROJECTED LOGOF
The vehicle logo is projected on the ground near the rear bumper, indicating the kicking motion location for hands-free operation, when an RKE transmitter is detected within 6 feet of the liftgate or hands-free opera-tion has occurred. The logo is shown for 1 minute, depending on operating conditions.
See Keys, Doors and Windows in your Owner’s Manual.
F Optional equipment