CHEVROLET TRAVERSE 2019 Owner's Manual
Manufacturer: CHEVROLET, Model Year: 2019, Model line: TRAVERSE, Model: CHEVROLET TRAVERSE 2019Pages: 428, PDF Size: 6.28 MB
Page 161 of 428

Chevrolet Traverse Owner Manual (GMNA-Localizing-U.S./Canada/Mexico-
12146157) - 2019 - CRC - 10/31/18
160 Instruments and Controls
Unlocked Door Anti-Lockout
When on, this feature will keep the
driver door from locking when the
door is open. If Off is selected, the
Delayed Door Lock menu will be
available.
Select Off or On.
Auto Door Unlock
This allows selection of which of the
doors will automatically unlock when
the vehicle is shifted into P (Park).
Select Off, All Doors, or Driver Door.
Delayed Door Lock
When on, this feature will delay the
locking of the doors. To override the
delay, press the power door lock
switch on the door.
Select Off or On.
Remote Lock, Unlock, Start
Select and the following may
display:
.Remote Unlock Light Feedback
. Remote Lock Feedback
. Remote Door Unlock .
Remote Start Auto Cool Seats
. Remote Start Auto Heat Seats
. Remote Window Operation
. Passive Door Unlock
. Passive Door Lock
. Remote Left in Vehicle Alert
Remote Unlock Light Feedback
When on, the exterior lamps will
flash when unlocking the vehicle
with the RKE transmitter.
Select Off or Flash Lights.
Remote Lock Feedback
This allows selection of what type of
feedback is given when locking the
vehicle with the RKE transmitter.
Select Off, Lights and Horn, Lights
Only, or Horn Only.
Remote Door Unlock
This allows selection of which doors
will unlock when pressing
Kon the
RKE transmitter.
Select All Doors or Driver Door. Remote Start Auto Cool Seats
This setting automatically turns on
the ventilated seats when using the
remote start function on warm days.
Select Off or On.
Remote Start Auto Heat Seats
This setting automatically turns on
the heated seats when using the
remote start function on cold days.
If equipped with Remote Start
Heated Steering Wheel, this feature
will turn on when the Remote Start
Auto Heated Seats turn on.
Select Off or On.
Remote Window Operation
If equipped, this feature enables the
remote operation of all windows
from the RKE transmitter. See
“Remote Window Operation”
in
Power Windows 056.
Select Off or On.
Page 162 of 428
Chevrolet Traverse Owner Manual (GMNA-Localizing-U.S./Canada/Mexico-
12146157) - 2019 - CRC - 10/31/18
Instruments and Controls 161
Passive Door Unlock
This allows the selection of what
doors will unlock when using the
button on the driver door to unlock
the vehicle.
Select All Doors or Driver Door.
Passive Door Lock
This allows passive locking to be
turned on or off and selects
feedback. SeeRemote Keyless
Entry (RKE) System Operation 030.
Select Off, On with Horn
Chirp, or On.
Remote Left in Vehicle Alert
This feature sounds an alert when
the RKE transmitter is left in the
vehicle. This menu also enables
Remote No Longer In Vehicle Alert.
Select Off or On.
Bluetooth
Select and the following may
display:
. Device Information
. Pair New Device .
Device Management
. Change Pairing PIN
. Ringtones
. Sort Order
. Voice Mail Numbers
. Text Message Alerts
Device Information
See information about the device
name, address, and PIN code.
Pair New Device
Select to pair a new device. See
“Pairing” in“Infotainment Controls”
under “Bluetooth” in the infotainment
manual.
Device Management
Select to connect to a different
phone source, disconnect a phone,
or delete a phone.
Change Pairing PIN
Select to change the PIN of a
device. Ringtones
Touch to change the ring tone for
the specific phone. The phone does
not need to be connected to change
the ring tone.
Sort Order
Select to change the order of the
contacts list.
Select First/Last or Last/First.
Voice Mail Numbers
This feature displays the voice mail
number for all connected phones.
To change the voice mail number,
select EDIT. Type a new number,
then select Save.
Text Message Alerts
This allows the feature to be turned
on or off.
Select Off or On.Apple CarPlay
Select and the following may
display:
.
Apple CarPlay
. Manage Apple CarPlay Devices
Page 163 of 428
Chevrolet Traverse Owner Manual (GMNA-Localizing-U.S./Canada/Mexico-
12146157) - 2019 - CRC - 10/31/18
162 Instruments and Controls
Apple CarPlay
This feature allows Apple devices to
be connected to the infotainment
system through a USB port.
Select Off or On.
Manage Apple CarPlay Devices
Select to manage Apple devices.
Apple CarPlay must be on for this
feature to be accessed.
Android Auto
Select and the following may
display:
.Android Auto
. Manage Android Auto Devices
Android Auto
This feature allows Android devices
to be connected to the infotainment
system through a USB port.
Select Off or On.
Manage Android Auto Devices
Select to manage Android devices.
Android Auto must be on for this
feature to be accessed.
USB Auto Launch
This allows Android and Apple
CarPlay devices to automatically
connect when plugged into the
USB port.
Select Off or On.
Voice
Select and the following may
display:
. Confidence Threshold
. Prompt Length
. Audio Feedback Speed
. Display “What Can I Say?” Tips
Confidence Threshold
This feature allows the adjustment
of the sensitivity of the speech
recognition system.
Select Confirm More or
Confirm Less.
Prompt Length
This feature adjusts the voice
prompt length.
Select Short or Long. Audio Feedback Speed
This feature adjusts the audio
feedback speed.
Select Slow, Medium, or Fast.
Display
“What Can I Say?” Tips
This feature gives voice
command tips.
Select Off or On.
Display
Select and the following may
display:
. Mode
. Calibrate Touchscreen
. Turn Display Off
Mode
Select to change the display screen
for day or night driving.
Select Auto, Day, or Night.
Calibrate Touchscreen
Select to calibrate the touchscreen,
then follow the prompts.
Page 164 of 428
Chevrolet Traverse Owner Manual (GMNA-Localizing-U.S./Canada/Mexico-
12146157) - 2019 - CRC - 10/31/18
Instruments and Controls 163
Turn Display Off
Select to turn the display off. Touch
anywhere on the infotainment
display area or press any controls
on the radio center stack to turn the
display on.
Rear Camera
This allows for Rear Park Assist
Symbols and Guidance Lines to be
turned off or on.
Select Off or On for the desired
feature.
SeeAssistance Systems for Parking
or Backing 0258.
Return to Factory Settings
Select and the following may
display:
.
Restore Vehicle Settings
. Clear All Private Data
. Restore Radio Settings Restore Vehicle Settings
This allows selection of restoring
vehicle settings.
Select Restore or Cancel.
Clear All Private Data
This allows selection to clear all
private information from the vehicle.
Select Delete or Cancel.
Restore Radio Settings
This allows selection to restore
radio settings.
Select Restore or Cancel.
Software Information
Touch to view or update the version
of the infotainment system software.
Wi-Fi
Select and the following may
display:
.
Wi-Fi
. Manage Wi-Fi Networks
Wi-Fi
This feature allows Wi-Fi networks
to be turned of or on.
Select Off or On.
Manage Wi-Fi Networks
Select to manage Wi-Fi networks.
Wi-Fi must be on for this feature to
be accessed.
Page 165 of 428
Chevrolet Traverse Owner Manual (GMNA-Localizing-U.S./Canada/Mexico-
12146157) - 2019 - CRC - 10/31/18
164 Instruments and Controls
Universal Remote
System
SeeRadio Frequency Statement
0 399.
Universal Remote System
Programming
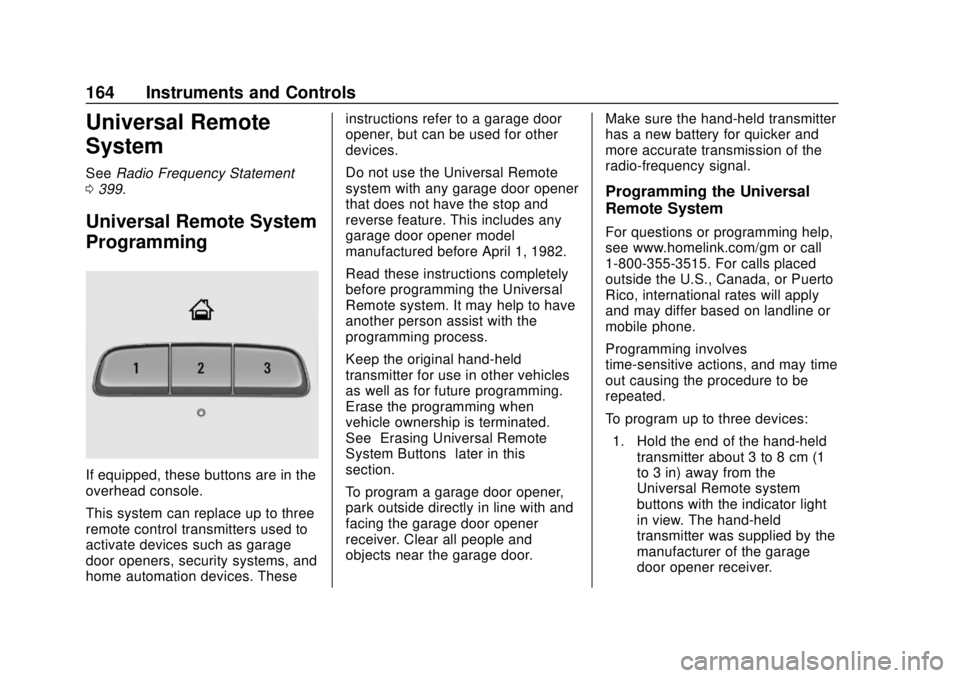
If equipped, these buttons are in the
overhead console.
This system can replace up to three
remote control transmitters used to
activate devices such as garage
door openers, security systems, and
home automation devices. These instructions refer to a garage door
opener, but can be used for other
devices.
Do not use the Universal Remote
system with any garage door opener
that does not have the stop and
reverse feature. This includes any
garage door opener model
manufactured before April 1, 1982.
Read these instructions completely
before programming the Universal
Remote system. It may help to have
another person assist with the
programming process.
Keep the original hand-held
transmitter for use in other vehicles
as well as for future programming.
Erase the programming when
vehicle ownership is terminated.
See
“Erasing Universal Remote
System Buttons” later in this
section.
To program a garage door opener,
park outside directly in line with and
facing the garage door opener
receiver. Clear all people and
objects near the garage door. Make sure the hand-held transmitter
has a new battery for quicker and
more accurate transmission of the
radio-frequency signal.
Programming the Universal
Remote System
For questions or programming help,
see www.homelink.com/gm or call
1-800-355-3515. For calls placed
outside the U.S., Canada, or Puerto
Rico, international rates will apply
and may differ based on landline or
mobile phone.
Programming involves
time-sensitive actions, and may time
out causing the procedure to be
repeated.
To program up to three devices:
1. Hold the end of the hand-held transmitter about 3 to 8 cm (1
to 3 in) away from the
Universal Remote system
buttons with the indicator light
in view. The hand-held
transmitter was supplied by the
manufacturer of the garage
door opener receiver.
Page 166 of 428
Chevrolet Traverse Owner Manual (GMNA-Localizing-U.S./Canada/Mexico-
12146157) - 2019 - CRC - 10/31/18
Instruments and Controls 165
2. At the same time, press andhold both the hand-held
transmitter button and one of
the three Universal Remote
system buttons to be used to
operate the garage door. Do
not release either button until
the indicator light changes from
a slow to a rapid flash. Then
release both buttons.
Some garage door openers
may require substitution of
Step 2 with the procedure
under “Radio Signals for Some
Gate Operators” later in this
section.
3. Press and hold the newly programmed Universal Remote
system button for five seconds
while watching the indicator
light and garage door
activation.
.If the indicator light stays on
continuously or the garage
door moves when the
button is pressed, then
programming is complete.
There is no need to
complete Steps 4–6. .
If the indicator light does
not come on or the garage
door does not move, a
second button press may
be required. For a second
time, press and hold the
newly programmed button
for five seconds. If the light
stays on or the garage door
moves, programming is
complete.
. If the indicator light blinks
rapidly for two seconds,
then changes to a solid light
and the garage door does
not move, continue with
programming Steps 4–6.
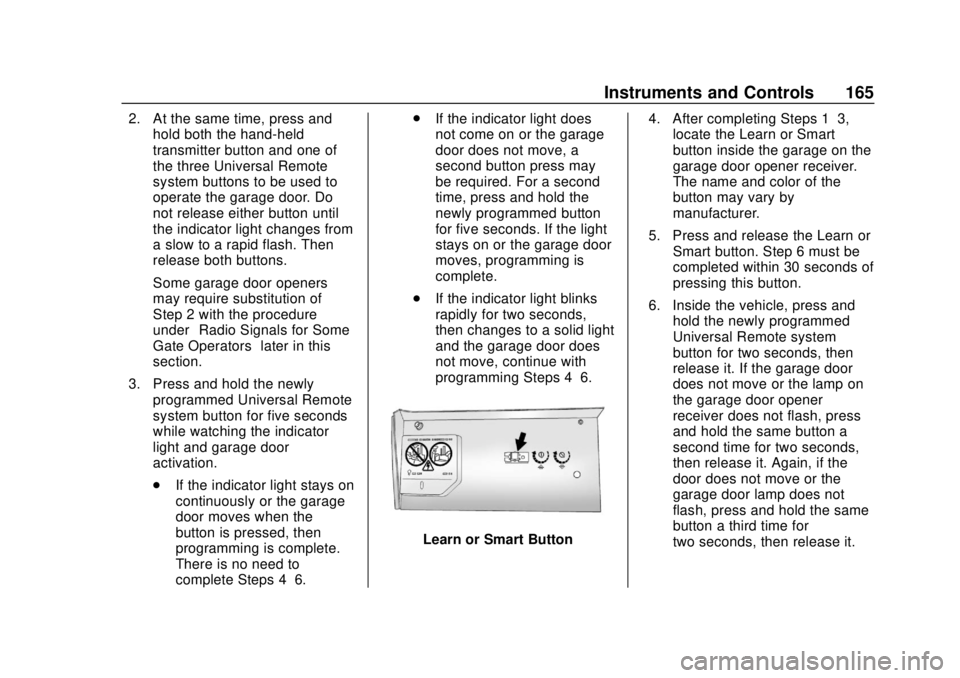
Learn or Smart Button 4. After completing Steps 1–3,
locate the Learn or Smart
button inside the garage on the
garage door opener receiver.
The name and color of the
button may vary by
manufacturer.
5. Press and release the Learn or Smart button. Step 6 must be
completed within 30 seconds of
pressing this button.
6. Inside the vehicle, press and hold the newly programmed
Universal Remote system
button for two seconds, then
release it. If the garage door
does not move or the lamp on
the garage door opener
receiver does not flash, press
and hold the same button a
second time for two seconds,
then release it. Again, if the
door does not move or the
garage door lamp does not
flash, press and hold the same
button a third time for
two seconds, then release it.
Page 167 of 428
Chevrolet Traverse Owner Manual (GMNA-Localizing-U.S./Canada/Mexico-
12146157) - 2019 - CRC - 10/31/18
166 Instruments and Controls
The Universal Remote system
should now activate the
garage door.
Repeat the process for
programming the two remaining
buttons.
Radio Signals for Some Gate
Operators
For questions or programming help,
see www.homelink.com/gm or call
1-800-355-3515. For calls placed
outside the U.S., Canada, or Puerto
Rico, international rates will apply
and may differ based on landline or
mobile phone.
Some radio-frequency laws and
gate operators require transmitter
signals to time out or quit after
several seconds of transmission.
This may not be long enough for the
Universal Remote system to pick up
the signal during programming.
If the programming did not work,
replace Step 2 under“Programming
the Universal Remote System” with
the following: Press and hold the Universal
Remote system button while
pressing and releasing the
hand-held transmitter button every
two seconds until the signal has
been successfully accepted by the
Universal Remote system. The
Universal Remote system indicator
light will flash slowly at first and then
rapidly. Proceed with Step 3 under
“Programming the Universal Remote
System”
to complete.
Universal Remote System
Operation
Using the Universal Remote
System
Press and hold the appropriate
Universal Remote system button for
at least one-half second. The
indicator light will come on while the
signal is being transmitted.
Erasing Universal Remote
System Buttons
Erase all programmed buttons when
vehicle ownership is terminated. To erase:
1. Press and hold the two outside buttons until the indicator light
begins to flash. This should
take about 10 seconds.
2. Release both buttons.
Reprogramming a Single
Universal Remote System
Button
To reprogram any of the system
buttons: 1. Press and hold any one of the buttons. Do not release the
button.
2. The indicator light will begin to flash after 20 seconds. Without
releasing the button, proceed
with Step 1 under
“Programming the Universal
Remote System.”
Page 168 of 428
Chevrolet Traverse Owner Manual (GMNA-Localizing-U.S./Canada/Mexico-
12146157) - 2019 - CRC - 10/31/18
Lighting 167
Lighting
Exterior Lighting
Exterior Lamp Controls . . . . . . . 167
Headlamp High/Low-BeamChanger . . . . . . . . . . . . . . . . . . . . 169
Flash-to-Pass . . . . . . . . . . . . . . . . 169
Daytime Running Lamps (DRL) . . . . . . . . . . . . . . . 169
Automatic Headlamp System . . . . . . . . . . . . . . . . . . . . . . 170
Hazard Warning Flashers . . . . . 171
Turn and Lane-Change Signals . . . . . . . . . . . . . . . . . . . . . . 171
Fog Lamps . . . . . . . . . . . . . . . . . . . 172
Interior Lighting
Instrument Panel Illumination Control . . . . . . . . . . . . . . . . . . . . . . 172
Courtesy Lamps . . . . . . . . . . . . . . 172
Dome Lamps . . . . . . . . . . . . . . . . . 172
Reading Lamps . . . . . . . . . . . . . . 173
Lighting Features
Entry Lighting . . . . . . . . . . . . . . . . 174
Exit Lighting . . . . . . . . . . . . . . . . . . 174
Battery Load Management . . . 174
Battery Power Protection . . . . . 175
Exterior Lighting Battery Saver . . . . . . . . . . . . . . . . . . . . . . . 175Exterior Lighting
Exterior Lamp Controls
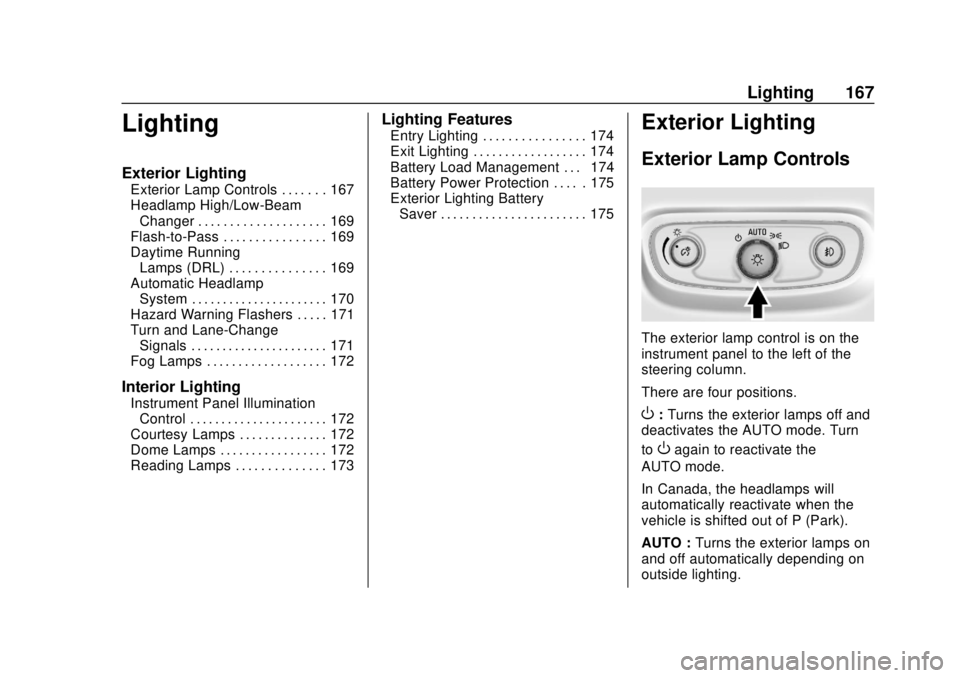
The exterior lamp control is on the
instrument panel to the left of the
steering column.
There are four positions.
O: Turns the exterior lamps off and
deactivates the AUTO mode. Turn
to
Oagain to reactivate the
AUTO mode.
In Canada, the headlamps will
automatically reactivate when the
vehicle is shifted out of P (Park).
AUTO : Turns the exterior lamps on
and off automatically depending on
outside lighting.
Page 169 of 428
Chevrolet Traverse Owner Manual (GMNA-Localizing-U.S./Canada/Mexico-
12146157) - 2019 - CRC - 10/31/18
168 Lighting
;:Turns on the parking lamps
including all lamps, except the
headlamps.
5: Turns on the headlamps
together with the parking lamps and
instrument panel lights.
IntelliBeam®System
If equipped, this system turns the
vehicle's high-beam headlamps on
and off according to surrounding
traffic conditions.
The system turns the high-beam
headlamps on when it is dark
enough and there is no other traffic
present.
This light comes on in the
instrument cluster when the
IntelliBeam system is enabled. Turning On and Enabling
IntelliBeam
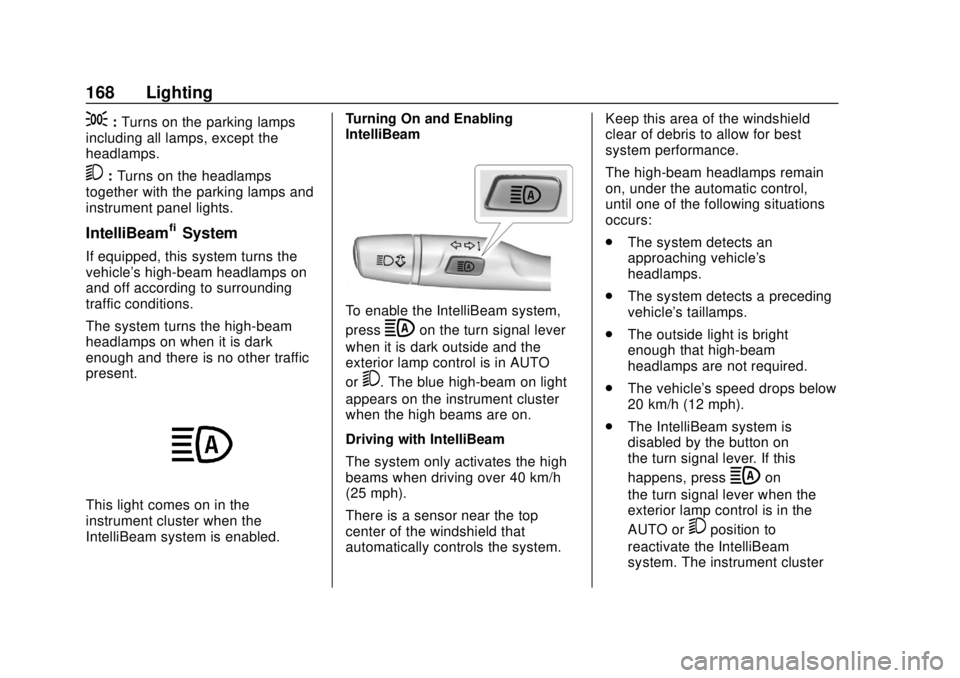
To enable the IntelliBeam system,
press
bon the turn signal lever
when it is dark outside and the
exterior lamp control is in AUTO
or
5. The blue high-beam on light
appears on the instrument cluster
when the high beams are on.
Driving with IntelliBeam
The system only activates the high
beams when driving over 40 km/h
(25 mph).
There is a sensor near the top
center of the windshield that
automatically controls the system. Keep this area of the windshield
clear of debris to allow for best
system performance.
The high-beam headlamps remain
on, under the automatic control,
until one of the following situations
occurs:
.
The system detects an
approaching vehicle's
headlamps.
. The system detects a preceding
vehicle's taillamps.
. The outside light is bright
enough that high-beam
headlamps are not required.
. The vehicle's speed drops below
20 km/h (12 mph).
. The IntelliBeam system is
disabled by the button on
the turn signal lever. If this
happens, press
bon
the turn signal lever when the
exterior lamp control is in the
AUTO or
5position to
reactivate the IntelliBeam
system. The instrument cluster
Page 170 of 428
Chevrolet Traverse Owner Manual (GMNA-Localizing-U.S./Canada/Mexico-
12146157) - 2019 - CRC - 10/31/18
Lighting 169
light will come on to indicate the
IntelliBeam system is
reactivated.
. The IntelliBeam system will turn
off if the fog lamps are
turned on.
The high beams may not turn off
automatically if the system cannot
detect another vehicle's lamps
because of any of the following:
. The other vehicle's lamps are
missing, damaged, obstructed
from view, or otherwise
undetected.
. The other vehicle's lamps are
covered with dirt, snow, and/or
road spray.
. The other vehicle's lamps cannot
be detected due to dense
exhaust, smoke, fog, snow, road
spray, mist, or other airborne
obstructions.
. The vehicle's windshield is dirty,
cracked, or obstructed by
something that blocks the view
of the light sensor. .
The vehicle is loaded such that
the front end points upward,
causing the light sensor to aim
high and not detect headlamps
and taillamps.
. The vehicle is being driven on
winding or hilly roads.
The IntelliBeam system may need to
be disabled if any of the above
conditions exist.
Headlamp High/
Low-Beam Changer
Push the turn signal lever away
from you and release, to turn the
high beams on. To return to low
beams, push the lever again or pull
it toward you and release.
This indicator light turns on in the
instrument cluster when the
high-beam headlamps are on.
Flash-to-Pass
This feature is used to signal to the
vehicle ahead that you want
to pass.
If the headlamps are off or in the
low-beam position, pull the turn
signal lever toward you to
momentarily switch to high beams.
Release the lever to turn the
high-beam headlamps off.
Daytime Running
Lamps (DRL)
DRL can make it easier for others to
see the front of your vehicle during
the day. Fully functional DRL are
required on all vehicles first sold in
Canada.
The dedicated DRL will come on
when all of the following conditions
are met:
. The ignition is on.
. The exterior lamp control is
in AUTO.
. The light sensor determines it is
daytime.