remove seats CHEVROLET TRAVERSE 2020 Owners Manual
[x] Cancel search | Manufacturer: CHEVROLET, Model Year: 2020, Model line: TRAVERSE, Model: CHEVROLET TRAVERSE 2020Pages: 382, PDF Size: 5.87 MB
Page 13 of 382
Chevrolet Traverse Owner Manual (GMNA-Localizing-U.S./Canada/Mexico-
13527526) - 2020 - CRC - 9/5/19
12 Keys, Doors, and Windows
programmed through your dealer.
The vehicle can be reprogrammed
so that lost or stolen transmitters no
longer work. Each vehicle can have
up to eight transmitters matched
to it.
Programming with Recognized
Transmitters
A new transmitter can be
programmed to the vehicle when
there are two recognized
transmitters.
To program, the vehicle must be off
and all of the transmitters, both
currently recognized and new, must
be with you.1. Remove the key by pressing the button on the side of the
RKE transmitter near the
bottom and pull the key out.
Never pull the key out without
pressing the button.
2. Remove the key lock cylinder cap on the driver door handle.
See Door Locks 017. Place
the two recognized transmitters
in the transmitter pocket. 3. Insert the vehicle key of the
transmitter into the key lock
cylinder on the driver door
handle and turn the key,
counterclockwise, to the unlock
position five times within
10 seconds.
The DIC displays READY FOR
REMOTE #3, 4, 5, ETC.
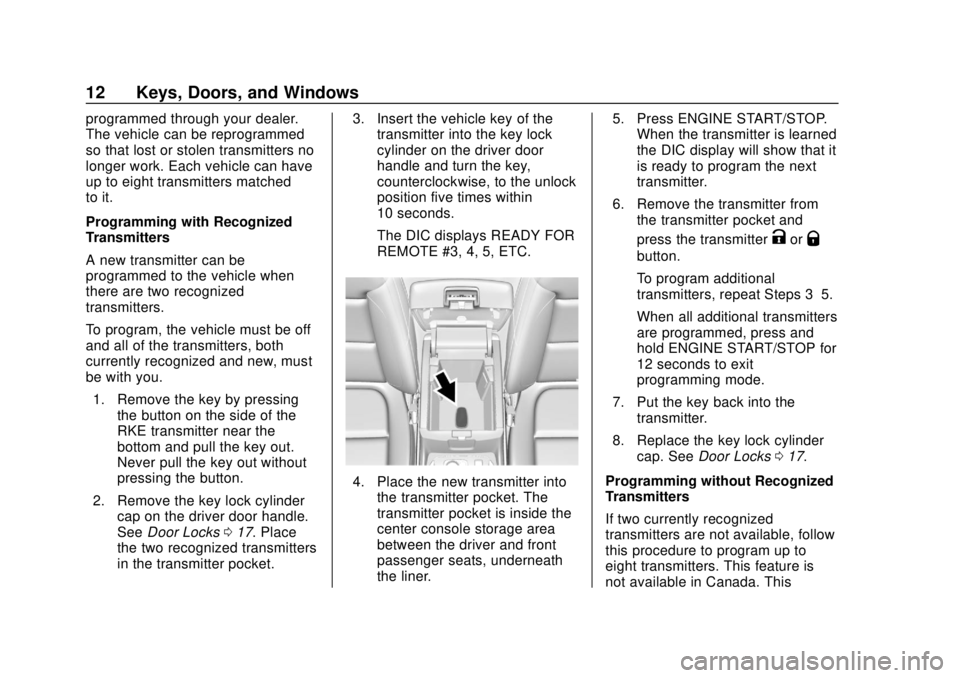
4. Place the new transmitter into
the transmitter pocket. The
transmitter pocket is inside the
center console storage area
between the driver and front
passenger seats, underneath
the liner. 5. Press ENGINE START/STOP.
When the transmitter is learned
the DIC display will show that it
is ready to program the next
transmitter.
6. Remove the transmitter from the transmitter pocket and
press the transmitter
KorQ
button.
To program additional
transmitters, repeat Steps 3–5.
When all additional transmitters
are programmed, press and
hold ENGINE START/STOP for
12 seconds to exit
programming mode.
7. Put the key back into the transmitter.
8. Replace the key lock cylinder cap. See Door Locks 017.
Programming without Recognized
Transmitters
If two currently recognized
transmitters are not available, follow
this procedure to program up to
eight transmitters. This feature is
not available in Canada. This
Page 14 of 382
Chevrolet Traverse Owner Manual (GMNA-Localizing-U.S./Canada/Mexico-
13527526) - 2020 - CRC - 9/5/19
Keys, Doors, and Windows 13
procedure will take approximately
30 minutes to complete. The vehicle
must be off and all of the
transmitters you wish to program
must be with you.1. Remove the key by pressing the button on the side of the
RKE transmitter near the
bottom and pull the key out.
Never pull the key out without
pressing the button.
2. Remove the key lock cylinder cap on the driver door handle.
See Door Locks 017. Insert
the vehicle key of the
transmitter into the key lock
cylinder on the driver door
handle and turn the key,
counterclockwise, to the unlock
position five times within
10 seconds.
The DIC displays REMOTE
LEARN PENDING,
PLEASE WAIT. 3. Wait for 10 minutes until the
DIC displays PRESS ENGINE
START BUTTON TO LEARN
and then press ENGINE
START/STOP.
The DIC will again display
REMOTE LEARN PENDING,
PLEASE WAIT.
4. Repeat Step 2 two additional times. After the third time all
previously known transmitters
will no longer work with the
vehicle. Remaining transmitters
can be relearned during the
next steps.
The DIC display should now
show READY FOR REMOTE
# 1.
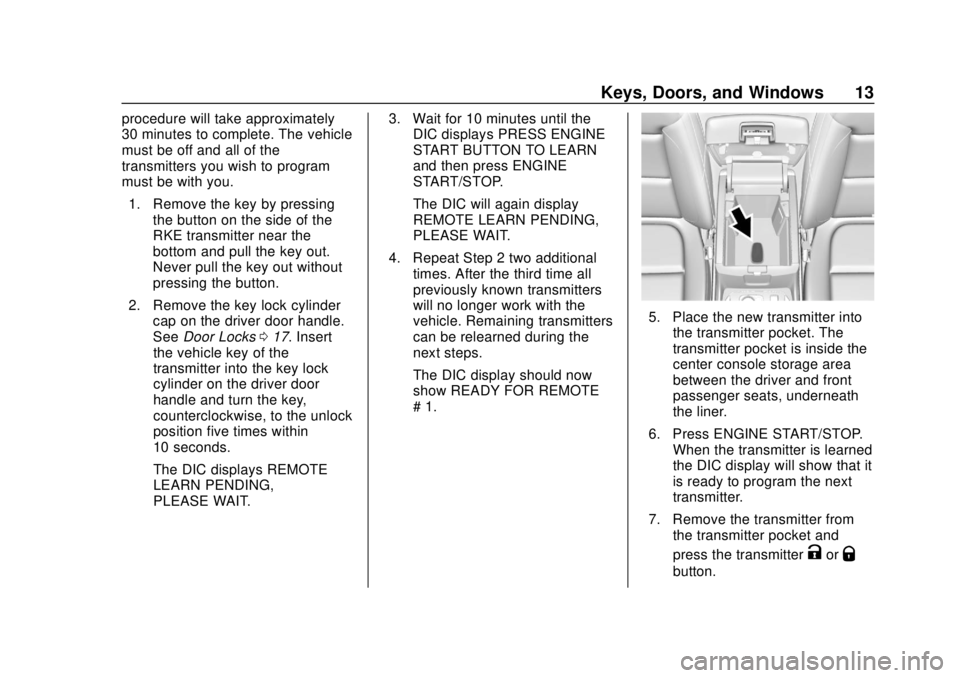
5. Place the new transmitter intothe transmitter pocket. The
transmitter pocket is inside the
center console storage area
between the driver and front
passenger seats, underneath
the liner.
6. Press ENGINE START/STOP. When the transmitter is learned
the DIC display will show that it
is ready to program the next
transmitter.
7. Remove the transmitter from the transmitter pocket and
press the transmitter
KorQ
button.
Page 47 of 382
Chevrolet Traverse Owner Manual (GMNA-Localizing-U.S./Canada/Mexico-
13527526) - 2020 - CRC - 9/5/19
46 Seats and Restraints
2. Start the vehicle with anotherkey or RKE transmitter. The
DIC should display the driver
number for the other RKE
transmitter. Turn the vehicle off
and remove the key or RKE
transmitter from the vehicle.
3. Start the vehicle with the initial key or RKE transmitter. The
DIC should display the driver
number of your RKE
transmitter.
Saving Memory Positions
Read these instructions completely
before saving memory positions.
To save preferred driving positions
1 and 2: 1. Turn the vehicle on or to ACC/ ACCESSORY.
A DIC welcome message may
indicate driver number 1 or 2.
2. Adjust all available memory features to the desired driving
position.
3. Press and release SET; a beep will sound. 4. Immediately press and hold the
1 or 2 memory button matching
the above DIC welcome
message until two beeps
sound.
If too much time passes
between releasing SET and
pressing 1, the memory
position will not be saved and
two beeps will not sound.
Repeat Steps 3 and 4.
1 or 2 corresponds to the driver
number. See “Identifying Driver
Number” previously in this
section.
5. Repeat Steps 1–4 for a second driver using 1 or 2.
To save the position for
Band
Seat Exit Memory features, repeat
Steps 1–4 using
B. This saves the
position for getting out of the
vehicle.
Save preferred memory feature
positions to both 1 and 2 if you are
the only driver. Manually Recalling Memory
Positions
Press and hold 1, 2, or
Bto recall
the previously saved memory
positions if you are driver 1 or 2
identified in the DIC welcome
message. RKE transmitters 3–8 will
not recall memory positions.
To stop Manual Memory recall
movement, release 1, 2, or
Bor
press any of the following controls:
. Power seat
. Memory SET
. Power mirror, with the driver or
passenger side mirror selected
. Power steering wheel,
if equipped
Seat Entry Memory
The vehicle identifies the number of
the current driver ’s RKE transmitter
(1–8). See Remote Keyless Entry
(RKE) System Operation 08. If the
RKE transmitter is 1 or 2, and Seat
Entry Memory is enabled in vehicle
personalization, the positions saved
to the same memory button number
Page 48 of 382
Chevrolet Traverse Owner Manual (GMNA-Localizing-U.S./Canada/Mexico-
13527526) - 2020 - CRC - 9/5/19
Seats and Restraints 47
1 or 2 are automatically recalled
when the vehicle is turned on,
or turned from off to ACC/
ACCESSORY. RKE transmitters 3–8
will not provide automatic memory
recalls.
To turn Seat Entry Memory on or off,
see“Vehicle Personalization
Settings” previously in this section
and Vehicle Personalization 0138.
The shift lever must be in P (Park)
to start Seat Entry Memory. Seat
Entry Memory recall will complete if
the vehicle is shifted out of P (Park)
prior to reaching the saved memory
position.
To stop Seat Entry Memory recall
movement, turn the vehicle off or
press any of the following controls:
. Power seat
. Memory SET, 1, 2, or
B
.Power mirror, with the driver or
passenger side mirror selected
. Power steering wheel,
if equipped If the saved memory seat position
does not automatically recall or
recalls to the wrong positions, the
driver
’s RKE transmitter number (1
or 2) may not match the memory
button number that positions were
saved to. Try storing the position to
the other memory button or try the
other RKE transmitter.
Seat Exit Memory
Seat Exit Memory is not linked to an
RKE transmitter. The position saved
to
Bis used for all drivers. To turn
Seat Exit Memory on or off, see
"Vehicle Personalization Settings"
previously in this section and
Vehicle Personalization 0138.
If turned on, the position saved to
Bis automatically recalled when
one of the following occurs:
. The vehicle is turned off and the
driver door is opened within a
short time.
. The vehicle is turned off with the
driver door open. To stop Seat Exit Memory
movement, press any of the
following memory controls:
.
Power seat
. Memory SET, 1, 2, or
B
.Power mirror, with the driver or
passenger side mirror selected
. Power steering wheel,
if equipped
Obstructions
If something has blocked the driver
seat and/or power steering wheel
while recalling a memory position,
the recall may stop. Remove the
obstruction and try the recall again.
If the memory position still does not
recall, see your dealer.
Page 51 of 382
Chevrolet Traverse Owner Manual (GMNA-Localizing-U.S./Canada/Mexico-
13527526) - 2020 - CRC - 9/5/19
50 Seats and Restraints
the vehicle through the rear door
and left the vehicle without the
vehicle being shut off.
The feature can be turned on or off.
SeeVehicle Personalization 0138.
Rear Seat Adjustment
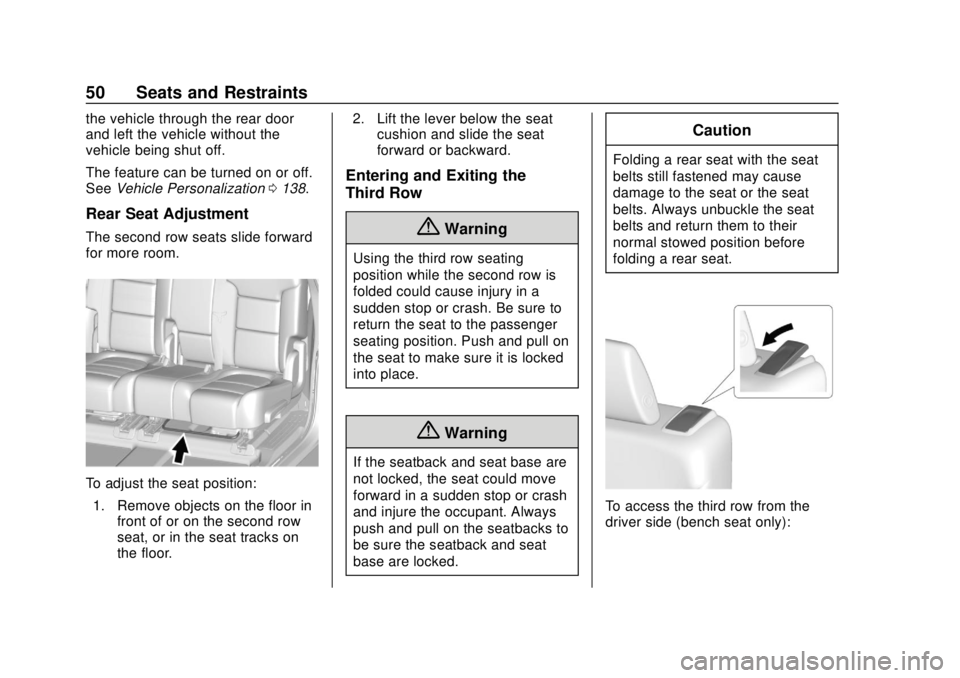
The second row seats slide forward
for more room.
To adjust the seat position:
1. Remove objects on the floor in front of or on the second row
seat, or in the seat tracks on
the floor. 2. Lift the lever below the seat
cushion and slide the seat
forward or backward.
Entering and Exiting the
Third Row
{Warning
Using the third row seating
position while the second row is
folded could cause injury in a
sudden stop or crash. Be sure to
return the seat to the passenger
seating position. Push and pull on
the seat to make sure it is locked
into place.
{Warning
If the seatback and seat base are
not locked, the seat could move
forward in a sudden stop or crash
and injure the occupant. Always
push and pull on the seatbacks to
be sure the seatback and seat
base are locked.
Caution
Folding a rear seat with the seat
belts still fastened may cause
damage to the seat or the seat
belts. Always unbuckle the seat
belts and return them to their
normal stowed position before
folding a rear seat.
To access the third row from the
driver side (bench seat only):
Page 52 of 382
Chevrolet Traverse Owner Manual (GMNA-Localizing-U.S./Canada/Mexico-
13527526) - 2020 - CRC - 9/5/19
Seats and Restraints 51
1. Remove objects on the floor infront of or on the second row
seat, or in the seat tracks on
the floor.
2. Make sure that the seat belt is unfastened and in the stowed
position.
3. Pull the handle on top of the seat forward and pull the seat
forward.
To access the third row from the
passenger side:
The second row passenger side
seat can be easily moved for third
row entry or exit with a
forward-facing child restraint
installed using the LATCH system.
Remove a rear-facing child restraint
before moving the seat for third row
entry or exit.{Warning
Remove the child from the child
restraint before moving the seat
forward for third row entry or exit.
Failure to do so may result in
injury to the child.
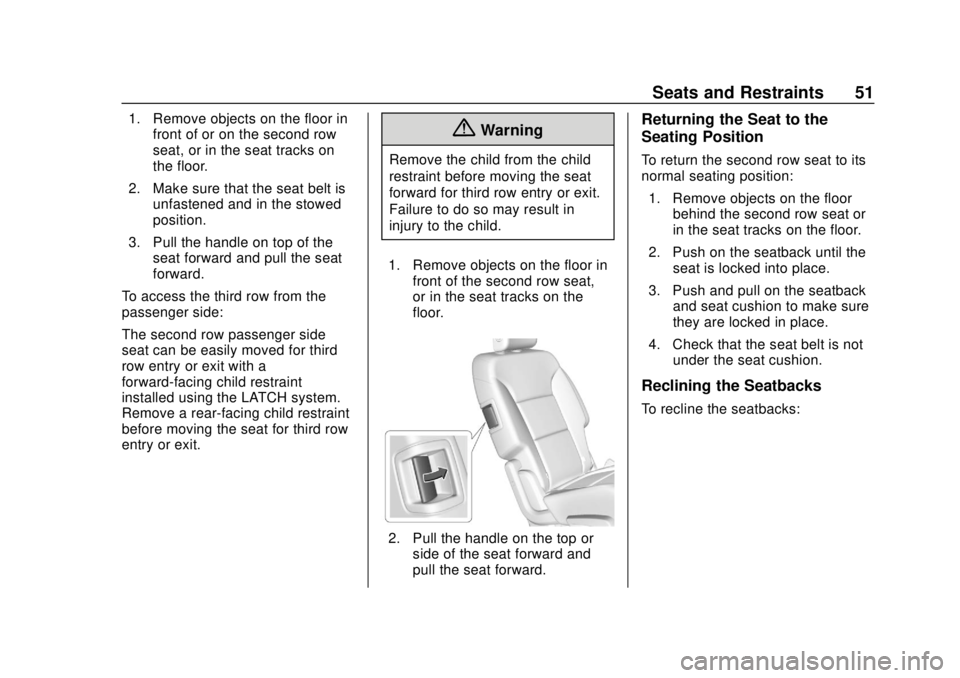
1. Remove objects on the floor in front of the second row seat,
or in the seat tracks on the
floor.
2. Pull the handle on the top or
side of the seat forward and
pull the seat forward.
Returning the Seat to the
Seating Position
To return the second row seat to its
normal seating position:
1. Remove objects on the floor behind the second row seat or
in the seat tracks on the floor.
2. Push on the seatback until the seat is locked into place.
3. Push and pull on the seatback and seat cushion to make sure
they are locked in place.
4. Check that the seat belt is not under the seat cushion.
Reclining the Seatbacks
To recline the seatbacks:
Page 53 of 382
Chevrolet Traverse Owner Manual (GMNA-Localizing-U.S./Canada/Mexico-
13527526) - 2020 - CRC - 9/5/19
52 Seats and Restraints
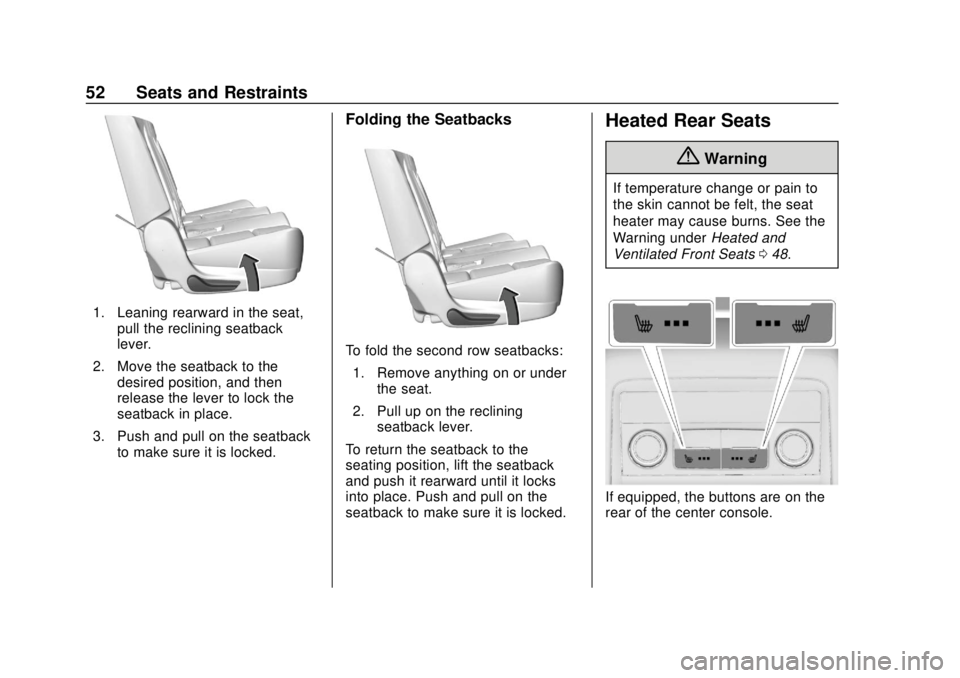
1. Leaning rearward in the seat,pull the reclining seatback
lever.
2. Move the seatback to the desired position, and then
release the lever to lock the
seatback in place.
3. Push and pull on the seatback to make sure it is locked.
Folding the Seatbacks
To fold the second row seatbacks:
1. Remove anything on or under the seat.
2. Pull up on the reclining seatback lever.
To return the seatback to the
seating position, lift the seatback
and push it rearward until it locks
into place. Push and pull on the
seatback to make sure it is locked.
Heated Rear Seats
{Warning
If temperature change or pain to
the skin cannot be felt, the seat
heater may cause burns. See the
Warning under Heated and
Ventilated Front Seats 048.
If equipped, the buttons are on the
rear of the center console.
Page 54 of 382
Chevrolet Traverse Owner Manual (GMNA-Localizing-U.S./Canada/Mexico-
13527526) - 2020 - CRC - 9/5/19
Seats and Restraints 53
With the engine running, pressMor
Lto heat the left or right outboard
seat cushion. An indicator on the
climate control display appears
when this feature is on.
This feature turns on at the highest
setting. With each press of the
button, the heated seat changes to
the next lower setting, and then the
off setting. Three lights indicate the
highest setting, and one light
indicates the lowest. If the heated
seats are on high, the level may
automatically be lowered after
approximately 30 minutes.
Third Row Seats
{Warning
Using the third row seating
position while the second row is
folded, or pushed forward in the
entry position, could cause injury
in a sudden stop or crash. Be
sure to return the seat to the
(Continued)
Warning (Continued)
passenger seating position. Push
and pull on the seat to make sure
it is locked into place.
Folding the Seatback
Caution
Folding a rear seat with the seat
belts still fastened may cause
damage to the seat or the seat
belts. Always unbuckle the seat
belts and return them to their
normal stowed position before
folding a rear seat.
To fold the third row seatback: 1. Remove objects on the floor in front of or on the second row
seat, or in the seat tracks on
the floor.
2. If the second row seat is in the full rear position, adjust it
forward to allow the third row
seat to fold fully flat. 3. Remove anything on or under
the seat.
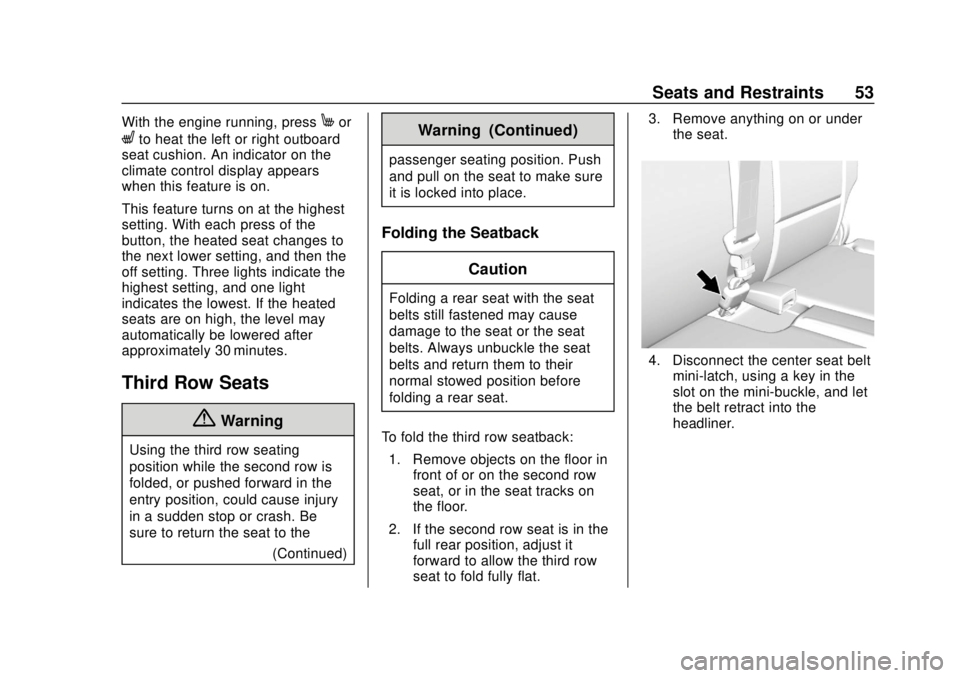
4. Disconnect the center seat beltmini-latch, using a key in the
slot on the mini-buckle, and let
the belt retract into the
headliner.
Page 57 of 382
Chevrolet Traverse Owner Manual (GMNA-Localizing-U.S./Canada/Mexico-
13527526) - 2020 - CRC - 9/5/19
56 Seats and Restraints
cycle. For fleet vehicles, shifting
from P (Park) will be prevented each
time these conditions exist.
On some models, Buckle to Drive
may also prevent shifting out of
P (Park) if a front passenger is
unbuckled under similar conditions.
A message displays in the DIC.
Buckle the front passenger seat belt
to shift out of P (Park). This feature
may not allow the vehicle to shift out
of P (Park) if an object, such as a
briefcase, handbag, grocery bag,
laptop, or other electronic device, is
on the front passenger seat. If this
happens, remove the object from
the seat or buckle the seat belt to
shift out of P (Park).
If the driver or present front
passenger remains unbuckled, the
DIC message will turn off after
several seconds and the vehicle can
be shifted out of P (Park). See“Seat
Belts” and“Child Restraints” in the
Index for information about the
importance of proper restraint use.
If the driver seat belt, and/or the
front passenger seat belt on some
vehicles, is unbuckled when driving, the seat belt reminder chime and
light(s) will come on. See
Seat Belt
Reminders 0122.
This feature may not function
properly if the airbag readiness light
is on. See Airbag Readiness Light
0 123.
Why Seat Belts Work
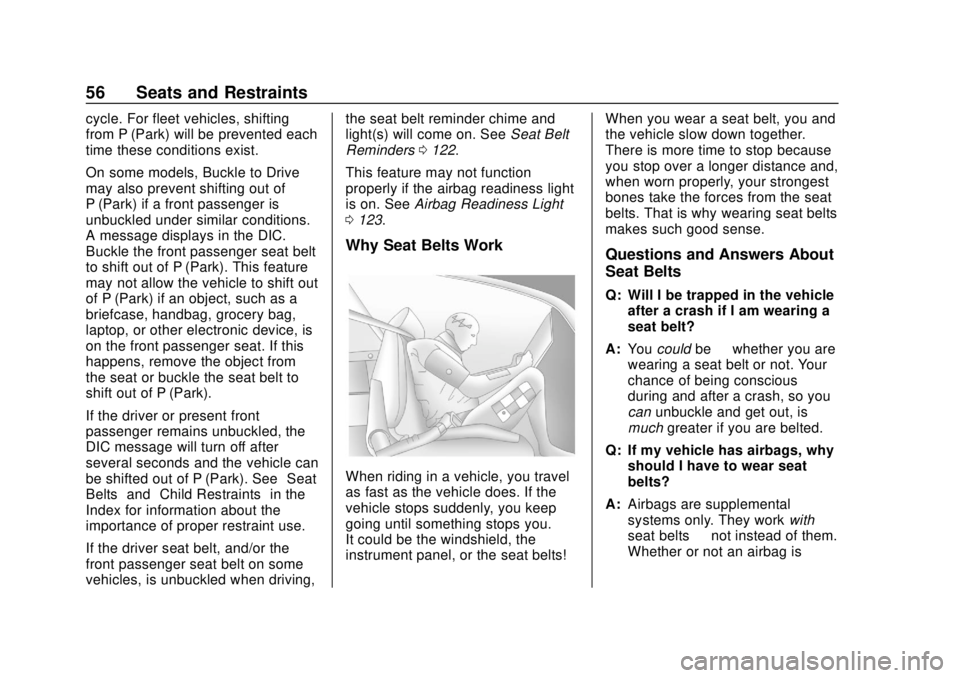
When riding in a vehicle, you travel
as fast as the vehicle does. If the
vehicle stops suddenly, you keep
going until something stops you.
It could be the windshield, the
instrument panel, or the seat belts! When you wear a seat belt, you and
the vehicle slow down together.
There is more time to stop because
you stop over a longer distance and,
when worn properly, your strongest
bones take the forces from the seat
belts. That is why wearing seat belts
makes such good sense.
Questions and Answers About
Seat Belts
Q: Will I be trapped in the vehicle
after a crash if I am wearing a
seat belt?
A: You could be—whether you are
wearing a seat belt or not. Your
chance of being conscious
during and after a crash, so you
can unbuckle and get out, is
much greater if you are belted.
Q: If my vehicle has airbags, why should I have to wear seat
belts?
A: Airbags are supplemental
systems only. They work with
seat belts —not instead of them.
Whether or not an airbag is
Page 62 of 382
Chevrolet Traverse Owner Manual (GMNA-Localizing-U.S./Canada/Mexico-
13527526) - 2020 - CRC - 9/5/19
Seats and Restraints 61
activation are met. Seat belt
pretensioners can also help tighten
the seat belts in a side crash or a
rollover event.
Pretensioners work only once. If the
pretensioners activate in a crash,
the pretensioners and probably
other parts of the vehicle’s seat belt
system will need to be replaced.
SeeReplacing Seat Belt System
Parts after a Crash 064.
Do not sit on the outboard seat belt
while entering or exiting the vehicle
or at any time while sitting in the
seat. Sitting on the seat belt can
damage the webbing and hardware.
Rear Seat Belt Comfort Guides
{Warning
A seat belt that is not properly
worn may not provide the
protection needed in a crash. The
person wearing the belt could be
seriously injured. The shoulder
belt should go over the shoulder (Continued)
Warning (Continued)
and across the chest. These parts
of the body are best able to take
belt restraining forces.
Rear seat belt comfort guides may
provide added seat belt comfort for
older children who have outgrown
booster seats and for some adults.
When installed on a shoulder belt,
the comfort guide positions the
shoulder belt away from the neck
and head.
Second Row Outboard Seating
Positions
The vehicle has comfort guides for
the second row outboard seating
positions. The comfort guides are
stored in a pocket on the side of the
seatback.
To install:
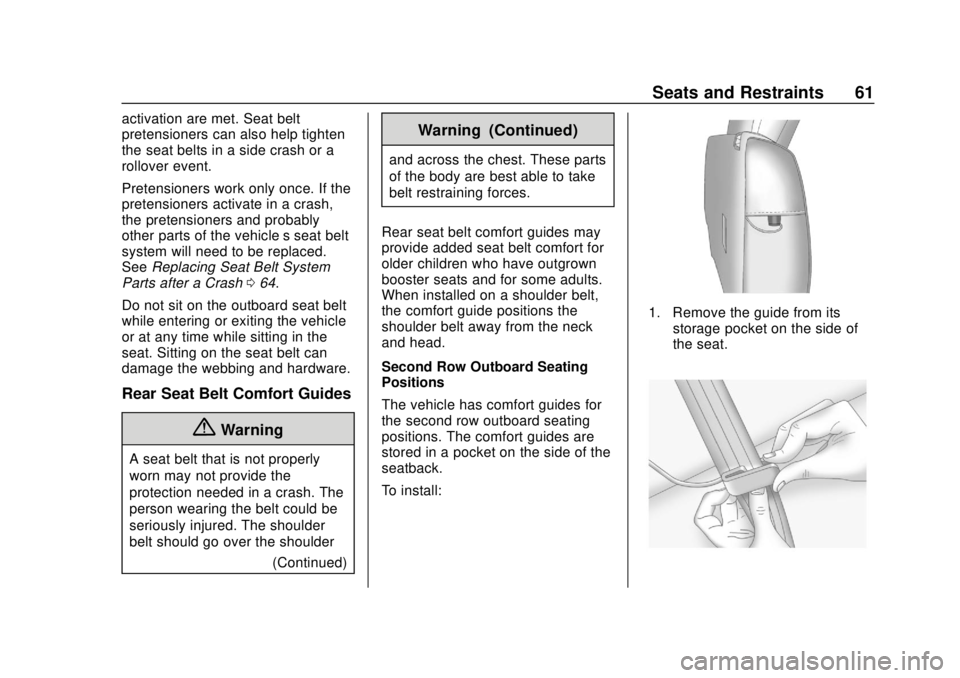
1. Remove the guide from its storage pocket on the side of
the seat.